
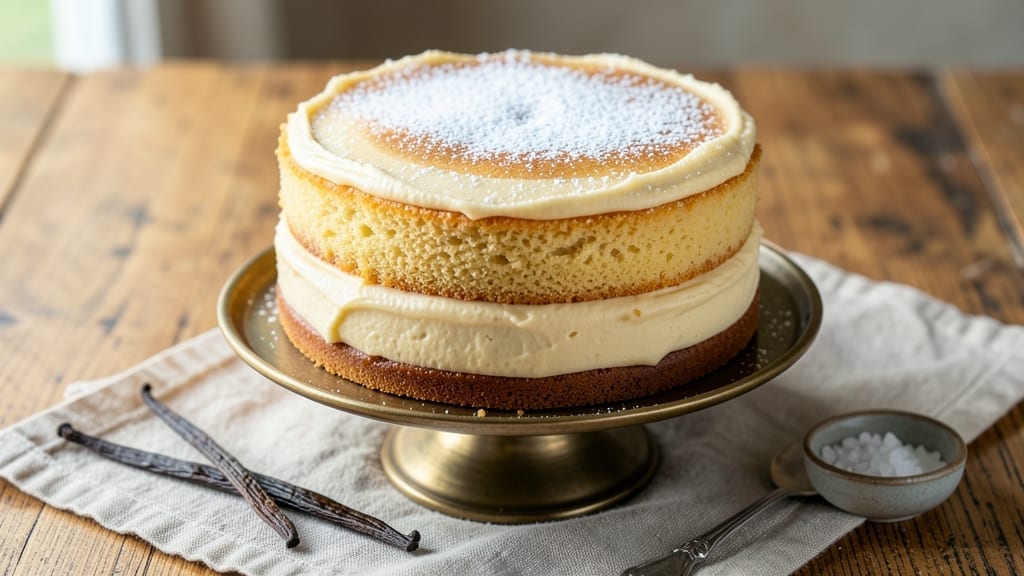
Mastering a 1-pound vanilla bean swirl cake in a single pan delivers restaurant-quality results with minimal effort. This recipe transforms simple ingredients into a moist, buttery cake with elegant vanilla swirls that make every slice feel special—perfect for intimate gatherings or satisfying a sweet craving.
The secret lies in precise measurements and gentle folding to maintain those signature swirls without overmixing.
What sets this cake apart is its foolproof technique: a tender crumb achieved through buttermilk and cake flour, balanced by the rich depth of vanilla bean paste. Baking in one pan eliminates layering stress while still producing a visually stunning dessert.
The cake bakes to a golden finish with just the right springiness—no dense, dry texture here.
By the time you pull it from the oven, you’ll have a perfectly proportioned cake that serves 8-10 generous slices, each with that signature vanilla aroma and tender bite. The swirls remain distinct, creating a beautiful presentation without requiring assembly.
This recipe is designed for confidence—whether you’re a novice baker or a seasoned pro looking for a reliable crowd-pleaser.
Serve it warm with vanilla ice cream or dusted with powdered sugar for a classic touch. The versatility doesn’t stop there—swap the vanilla for chocolate or spice extracts for endless variations. Let’s create your perfect 1-pound cake.
Ingredients for 1lb cake
Twelve essential ingredients create a restaurant-worthy vanilla bean swirl cake in one pan.
| Ingredient | Amount | Notes |
|---|---|---|
| Unsalted Butter 🧈 | 1 cup | Cold, cubed for even distribution |
| Granulated White Sugar 🍚 | 1 ½ cups | Superfine preferred for tender crumb |
| Vanilla Bean Paste 🌿 | 2 tbsp | High-quality, not imitation |
| Large Eggs 🥚 | 2 whole | Room temperature for even mixing |
| Buttermilk 🥛 | 1 cup | Fresh, not powdered |
| All-Purpose Flour 🌾 | 1 ½ cups | Sifted for light texture |
| Cake Flour 🍞 | ½ cup | For ultra-tender crumb |
| Baking Powder 🧂 | 2 tsp | Freshly opened package |
| Salt 🧂 | ½ tsp | Fine sea salt preferred |
| Powdered Sugar 🍚 | 1 cup | For dusting finished cake |
| Vanilla Extract 🌿 | 1 tsp | Pure vanilla for aroma |
| Vanilla Bean Seeds 🌿 | 1 whole | Scraped for swirls |
| Vegetable Oil 🫒 | ¼ cup | Light, neutral flavor |
The vanilla bean paste and vanilla bean seeds are non-negotiable for authentic flavor—Madagascar bourbon beans from specialty grocers like Whole Foods or Williams Sonoma deliver the best quality. Look for vibrant-colored paste with visible seeds; imitation versions lack depth. The buttermilk must be fresh (not powdered) for optimal moisture, and the unsalted butter should be high-fat content (80% or higher) for rich flavor. Land O’Lakes or Plugrá are reliable brands for consistent quality. Pre-sift your all-purpose flour and cake flour** to prevent lumps, and measure by weight if possible for precision.
No vanilla bean paste? High-quality vanilla extract plus scraped seeds from a bean works in a pinch, though the texture won’t be identical. Substitute powdered sugar for granulated by sifting it first, but expect a slightly denser crumb. For the buttermilk, combine 1 cup milk with 1 tbsp vinegar if needed—let it sit for 5 minutes to curdle. The vegetable oil can be swapped for melted butter (reduce butter in recipe by 0.25 cup), but the texture will differ slightly. If you lack cake flour, blend 0.5 cup all-purpose flour with 0.5 cup cornstarch for a close substitute. Always use room-temperature eggs to ensure even mixing.
Store leftover cake in an airtight container at room temperature for up to 3 days, or refrigerate for 5 days if humidity is high. For longer storage, freeze slices wrapped in plastic for up to 3 months. The powdered sugar should be kept in a cool, dry place—a sealed jar in the pantry prevents clumping. To revive stale cake, warm slices in a 200°F oven for 5-10 minutes with a sprinkle of water. The vanilla bean paste and seeds can be refrigerated for up to 6 months once opened, while vanilla extract lasts indefinitely.
Why You’ll Love This Recipe
- No Weighing Madness: I just eyeball the butter and sugar—no scale needed. The buttermilk’s tang cuts through the richness, and the vanilla bean paste (yes, I splurge on the good stuff) makes it taste like a bakery secret.
- Butter-Soft Crumb: That creamed butter and sugar combo? It’s ridiculously tender. The eggs bind it just right, and the buttermilk keeps it moist without being dense—no dry cake vibes here.
- Leftovers? No Problem: Slice it the next day for breakfast toast or crumble it over ice cream. Honestly, I’ve even used the extra batter to make mini muffins—zero waste, all flavor.
- Weeknight Magic: Mix, bake, done. The oven time is the longest part, and it’s ready while you’re still deciding what to watch. My go-to when I need something sweet but don’t want to fuss.
Step-by-step instructions for vanilla bean swirl cake
Master this single-pan technique for a perfectly moist crumb and elegant vanilla swirl every time.
Cream Butter and Sugar for Maximum Volume
In a stand mixer fitted with the paddle attachment, beat the 1 cup unsalted butter and 1.5 cups granulated white sugar on medium speed for 3-4 minutes until light and fluffy. You’ll notice the mixture nearly double in volume and become pale—this aeration creates that signature tender crumb. Scrape down the sides of the bowl with a spatula to ensure even mixing.
Here’s the thing—don’t rush this step. The butter needs to incorporate enough air to create lift. I press my finger into the mixture occasionally to check for proper creaming—it should leave a slight indent that slowly fills back in. This ensures your cake will be light rather than dense.
Incorporate Wet Ingredients for Even Distribution
Add the 2 whole large eggs, one at a time, mixing on low speed for 30 seconds after each addition until fully combined. The mixture will look slightly curdled at first, but that’s normal. Next, add the 2 tbsp vanilla bean paste and 1 tsp vanilla extract, mixing on low speed for 1 minute until fully incorporated.
With the mixer still running, gradually add the 1 cup buttermilk and 0.25 cup vegetable oil, mixing until just combined. Be careful not to overmix at this stage—you’re looking for a smooth batter without developing gluten. The batter should be thick but pourable, like heavy pudding. If it’s too thick, you can add 1-2 tablespoons of the buttermilk back in.
Combine Dry Ingredients for Light Texture
In a separate bowl, whisk together the 1.5 cups all-purpose flour, 0.5 cup cake flour, 2 tsp baking powder, and 0.5 tsp salt. Sift the dry ingredients directly into the wet mixture with the mixer on low speed, mixing just until combined. The moment you see a few dry streaks remaining is perfect—overmixing develops gluten and makes the cake tough.
Scrape the sides of the bowl again to ensure all the flour is incorporated. Then, using a rubber spatula, gently fold in the 1 whole vanilla bean seeds that you’ve scraped from the vanilla bean. This creates those beautiful swirls throughout the cake. The batter should be smooth with just a hint of vanilla flecks visible.
Prepare the Swirl and Bake to Golden Perfection
Pour half of the batter into a 9-inch round cake pan that’s been lightly greased with butter and floured. Using the back of a spoon, spread the batter evenly to the edges. Place the remaining batter in a piping bag fitted with a large star tip, then pipe the batter in a spiral pattern over the first layer, allowing the two colors to swirl together naturally.
Gently tap the pan on the counter to release any air bubbles, then smooth the top with a spatula. Bake in a preheated 350°F oven for 45-50 minutes, or until a toothpick inserted in the center comes out clean. The cake should be golden brown on top with a slight dome in the center—this indicates it’s perfectly baked.
Cool and Dust for Professional Finish
Remove the cake from the oven and let it cool in the pan for 10 minutes. Then, invert it onto a wire rack to cool completely. Once cooled, dust the top generously with the 1 cup powdered sugar using a fine-mesh sieve. This creates that signature dusted finish you see in bakery cakes.
Slice when completely cool for clean, even pieces. The interior should be moist with visible vanilla swirls throughout, and the texture should be tender yet slightly springy to the touch. Serve at room temperature for the best flavor and texture.
Pro Tips For Making 1lb Cake
- Cream Butter Slowly: Dump cold butter straight into sugar? That’s how you end up with lumps that never dissolve. Use your fingers to break the butter into tablespoons first, then mix it in gradually—this way, the sugar starts cutting it into tiny pieces right away, and you’ll have a smooth batter in half the time.
- Whisk Eggs First: Crack those eggs into a separate bowl and whisk them like you’re trying to beat a drum. This keeps the yolks and whites from breaking up in the batter, and the cake will rise higher—no one wants a dense, sad pound cake. (Yes, even if you’re impatient like me.)
- Measure Buttermilk Precisely: That “1 cup” of buttermilk? Use a kitchen scale if you can—it’s heavier than you think. Spoon it in, don’t scoop, and tap the measuring cup on the counter to level it off. Too little, and your cake turns out dry; too much, and it’s a gummy mess.
- Bake Until Internal Temp: Skip the toothpick test—this cake needs a thermometer. Pull it out at 200°F (93°C) internal temp, then let it cool 10 minutes before slicing. That’s when the crumb sets properly, and you won’t end up with a crumbly disaster. (I learned this the hard way.)
Make-ahead tips for 1lb cake
Prep Ahead Strategy
Assemble your batter up to 24 hours before baking and store it in an airtight container in the refrigerator. The flavors meld beautifully overnight, and the cold batter helps prevent overmixing when you’re ready to bake.
Simply let the batter sit at room temperature for 30 minutes before proceeding with the swirl and baking steps. This is my go-to method for stress-free weekend baking—no last-minute prep required! 📅
Freezer-Friendly Base
For a true make-ahead masterpiece, bake the cake 1 day in advance and store it wrapped tightly in plastic wrap followed by aluminum foil in the freezer.
When ready to serve, thaw at room temperature for 2-3 hours or warm briefly in a 200°F oven for 10-15 minutes to restore moisture. The texture remains perfectly tender—just as good as fresh!
I often prepare this cake the night before special occasions to save time on the big day. ❄️
Batter Storage Tips
If you’re short on time, divide the prepared batter into two quart-sized freezer bags, removing excess air before sealing. These can be frozen for up to 1 month. Thaw overnight in the fridge, then proceed with the swirl and baking steps.
For best results, use a 9-inch round cake pan that’s been prepped with butter and flour—this ensures easy release after freezing. The batter will be slightly thicker after thawing, so you may need to add 1-2 tablespoons of buttermilk to restore consistency. 🧈
Swirl Technique Shortcut
Skip the piping bag stress by using a ziplock bag with a small corner snipped off. Fill it with the remaining batter, then pipe directly onto the first layer in your pan. This creates the same elegant swirl effect without the fuss of special equipment.
For an extra-professional touch, chill the pan in the fridge for 15 minutes before baking—this helps the swirls hold their shape beautifully. 💫
Frosting Flexibility
Prepare your favorite vanilla buttercream or cream cheese frosting up to 3 days ahead and store it in an airtight container in the fridge. Bring it to room temperature before assembling, then layer it between cake slices or spread it over the top.
This cake’s tender crumb pairs perfectly with light, airy frostings—just avoid heavy ganache that could weigh it down. I love using Swiss meringue buttercream for its silky texture and neutral flavor that lets the vanilla shine. 🎂
Serving Prep Timeline
Plan your serving timeline like this: Day Before – Bake and cool the cake completely. Morning Of – Dust with powdered sugar and slice. 1 Hour Before Serving – Assemble with frosting (if using) and garnish with fresh berries or mint leaves.
This cake holds its shape beautifully, so you can slice it 4-6 hours ahead of serving without issues. The vanilla flavor actually intensifies as it sits, making every slice more aromatic. Perfect for brunch or afternoon tea! ☕
Nutrition facts
Frequently asked questions
Can I bake this cake in a different pan size?
Yes, but adjust the baking time. For a 8-inch pan, reduce to 35-40 minutes at 350°F, while a 10-inch pan may need 50-55 minutes. The cake should spring back when gently pressed and read clean on a toothpick. Always grease and flour your pan thoroughly to prevent sticking. The batter depth should be about 1.5 inches for even baking.
Why did my cake sink in the middle?
This usually happens from overbaking or opening the oven too soon. The cake should have a slight dome in the center when done—don’t bake until completely flat. Also check your oven temperature with an oven thermometer (many run hot). If using an older pan, it may not distribute heat evenly. Let the cake cool 10 minutes in the pan before removing to prevent collapse.
Can I substitute vanilla bean paste?
Use 2 tbsp high-quality vanilla extract plus seeds from 1 vanilla bean scraped into the batter. For a budget option, try 2 tbsp vanilla sugar** (made by mixing sugar with vanilla bean seeds) mixed into the dry ingredients. The paste creates those signature swirls, but extract works well for flavor. Madagascar bourbon beans provide the richest aroma.
How do I prevent the swirls from disappearing?
Chill the pan in the fridge for 15 minutes before baking to help the swirls set. Also pipe the second layer slowly and gently—don’t drag the piping bag across the first layer. For extra stability, spread a thin layer of vanilla buttercream between layers before adding the final batter. The batter should be at room temperature when piping to maintain its structure.
Is this cake good for layering?
While designed as a single-layer cake, you can easily adapt it for layers! Bake two 9-inch pans for 30-35 minutes each, then assemble with vanilla buttercream between layers. The recipe yields enough batter for two 1-inch-thick layers. For even better results, bake the layers the day before and assemble the morning of serving to prevent sogginess.

- 6 Egg Cake Recipe with Oil: Light as Air With Buttery Moisture - October 4, 2026
- 4 Bean Casserole Recipe: One-Pan Heartiness With Smoky Paprika Depth - October 4, 2026
- 3-Ingredient Keto Mug Cake Recipe: Microwave Magic in 2 Minutes - October 4, 2026