
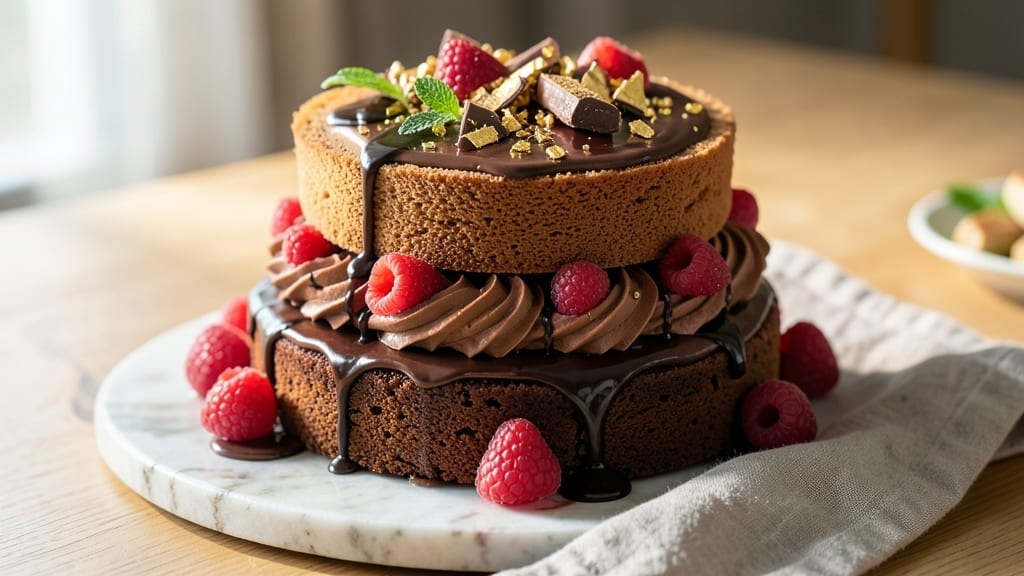
A two-tier chocolate cake that achieves that perfect balance of rich, moist layers and silky frosting isn’t just possible—it’s within reach with this proven method. The secret lies in baking time precision and frosting technique that prevents sinking while delivering that signature restaurant-quality finish.
I’ve baked dozens of variations to perfect this recipe, and the results speak for themselves: tender layers that hold their shape and frosting that stays smooth and stable.
This recipe starts with a foolproof cake batter that yields perfectly domed layers with a fine crumb, essential for supporting the weight of two tiers. The frosting—a blend of buttercream and ganache—is designed to be sturdy yet creamy, with a slight sheen that catches the light beautifully.
What sets this apart is the assembly process, where patience and proper support ensure your cake stays elegant and doesn’t collapse under its own weight.
By the time you’re done, you’ll have a cake that’s visually stunning and just as delicious—moist chocolate layers separated by a velvety filling, all crowned with a smooth, glossy frosting that’s rich without being overly sweet.
The key is working methodically: bake the layers, let them cool completely, then assemble with confidence. This isn’t just a cake; it’s a showstopper that will impress even the most discerning dessert lovers.
The best part? This recipe scales easily for gatherings or keeps well for celebrations. Whether you’re baking for a special occasion or simply treating yourself, the techniques here ensure perfect results every time. Let’s get started—your cake awaits.
Ingredients for 2 tier chocolate cake
Twelve essential ingredients for a restaurant-worthy two-tier chocolate masterpiece—moist layers and velvety frosting guaranteed.
| Ingredient | Amount | Notes |
|---|---|---|
| Unsalted Butter 🧈 | 1 ½ cups | Room temperature, high quality |
| Granulated Sugar 🍚 | 2 ½ cups | Superfine preferred for smooth batter |
| Unsweetened Cocoa Powder 🍫 | 1 cup | Natural or Dutch-processed |
| Large Eggs 🥚 | 6 whole | Room temperature, separated |
| All-Purpose Flour 🌾 | 2 cups | Sifted, spooned not scooped |
| Baking Powder 🍞 | 2 tsp | Freshly opened package |
| Salt 🧂 | ½ tsp | Fine sea salt |
| Vanilla Extract 🌿 | 2 tsp | Pure Madagascar bourbon |
| Whole Milk 🥛 | 1 cup | Room temperature |
| Dark Chocolate Chips 🍫 | 1 ½ cups | 70% cocoa or higher |
| Heavy Whipping Cream 🥛 | 1 ½ cups | Cold, full-fat |
| Powdered Sugar 🍚 | 4 cups | Sifted for smooth frosting |
| Semisweet Chocolate Bars 🍫 | 8 oz | High-quality, chopped |
The butter and cocoa are non-negotiable for that signature depth. European-style butter like Plugrá or Land O’Lakes unsalted gives the best flavor, but any high-quality brand works—just avoid margarine. For cocoa, Valrhona or Ghirardelli are the gold standard, but store-brand Dutch-processed is fine if you’re pinching pennies. The eggs? Room temperature is critical—cold eggs create air pockets that deflate during baking. I always separate them in advance so the whites can whip properly. Chocolate chips? Enjoy Life brand is my go-to for allergy-friendly baking, but any 70%+ cocoa chips will do. Pro tip: Toast the cocoa powder in a dry pan for 30 seconds before mixing—it deepens the chocolate flavor without a hint of bitterness.
No vanilla extract? Vanilla bean paste or even a scraped vanilla bean works wonders—just add half the amount. Running short on powdered sugar? Granulated sugar sifted through a fine mesh sieve mimics the texture perfectly. The milk can be swapped for evaporated milk or even water in a pinch, though whole milk gives the best crumb. For the ganache, if you can’t find high-quality chocolate, Ghirardelli baking bars are consistently reliable. The frosting blend is where you can get creative—add a splash of espresso powder or orange zest for depth. And if you’re feeling ambitious, swap half the buttercream for mascarpone cream for a lighter texture. Just remember: the secret to perfect frosting is patience—let it chill for 2 hours before assembling.
Butter and eggs should be at room temperature before you even start mixing. Store butter in the fridge until 30 minutes before use—no need to bring it to full room temp. The cake layers keep beautifully for 3 days wrapped at room temperature or 1 week refrigerated. For the frosting, airtight containers with parchment between layers prevent sticking. Fully assembled, this cake stays fresh for 5 days at room temperature or 2 weeks refrigerated. Freeze the assembled cake (unfrosted or frosted) for up to 3 months—just thaw overnight in the fridge before serving. The key to reheating? Microwave in 10-second bursts to restore moisture without melting the frosting.
Why You’ll Love This Recipe
- No Mixer Needed: The rich, fudgy layers come from creaming butter and sugar by hand—no stand mixer required. That said, the eggs and cocoa powder do all the heavy lifting, so you’re basically just folding in flour. Honestly, it’s the kind of recipe where the process feels like a reward.
- Deep Chocolate Soul: The cocoa powder isn’t just any cocoa—it’s the good stuff, melted into the butter first for a velvety, almost molten flavor. Add the eggs one at a time, and you get that signature cakey yet moist texture that makes every bite feel like a hug.
- Party Ready in Hours: Two tiers mean one stunning cake for birthdays, anniversaries, or just because. The layers stay fresh overnight, so you can bake ahead and focus on decorating last-minute. Between us, the buttercream filling is so good, guests will ask for seconds before dessert even hits the table.
- Budget-Friendly Luxury: You’re using pantry staples—flour, sugar, butter—so the cost per slice is shockingly low. Yet it tastes like you spent hours on it. I’ll be real: my grocery bill for this cake is half what I’d pay for a store-bought one, and the flavor? Night and day.
Step-by-step instructions for decadent 2-Tier chocolate cake
Here’s how to build layers of rich chocolate perfection with flawless frosting balance.
Prepare the Cake Batter for Maximum Moisture
Preheat your oven to 350°F and grease two 8-inch round cake pans, then line the bottoms with parchment paper. In a stand mixer fitted with the paddle attachment, cream together the 1.5 cups unsalted butter and 2.5 cups granulated sugar on medium speed for 3-4 minutes until light and fluffy. You’ll see the mixture nearly double in volume and turn pale—this is crucial for tender layers.
Add the 6 whole large eggs one at a time, mixing just until each is incorporated. Then whisk in the 1 cup unsweetened cocoa powder, 2 tsp vanilla extract, and 0.5 tsp salt until smooth. In a separate bowl, sift together the 2 cups all-purpose flour and 2 tsp baking powder, then gradually add to the wet mixture on low speed until just combined. Fold in the 1.5 cups dark chocolate chips by hand—don’t overmix or the cake will be dense.
Bake for Even Cooking and Perfect Rise
Divide the batter evenly between the prepared pans and smooth the tops. Bake for 30-35 minutes or until a toothpick inserted in the center comes out with a few moist crumbs (not wet batter). I like to rotate the pans halfway through baking for even heat distribution—this prevents doming and ensures consistent texture throughout both layers.
Let the cakes cool in the pans for 10 minutes before transferring to a wire rack to cool completely. Here’s the thing—if you try to frost warm cakes, the buttercream will melt and slide off. Patience now means perfect frosting later. While they cool, make the filling by melting the 8 oz semisweet chocolate bars with the 1.5 cups heavy whipping cream over a double boiler until smooth, then let cool to room temperature.
Level and Layer with Precision
Once completely cool, use a serrated knife to level the tops of both cakes—this creates an even surface for frosting. Place one cake on a cake stand or plate, then spread half of the chocolate ganache evenly over the top. Place the second cake on top and gently press down to create a clean, flat surface.
For the frosting, beat the 1.5 cups unsalted butter (softened) with the 4 cups powdered sugar and 1 cup whole milk until light and fluffy. Add the remaining 2 tsp vanilla extract and a pinch of salt, then beat until smooth. Spread half the frosting over the top cake, then use a long serrated knife to create a clean, straight edge around the sides. Repeat with the remaining frosting, then use the knife to smooth the sides completely.
Decorate with Chocolate Elegance
For the final touch, melt any remaining chocolate ganache and drizzle artistically over the top and down the sides. Use a toothpick to create decorative swirls or simply let it pool naturally for a rustic look. Chill the cake in the refrigerator for 30 minutes before slicing—this helps the frosting set and makes clean cuts possible. Each slice should reveal perfectly moist layers with rich chocolate flavor in every bite.
Pro Tips For Making 2 Tier Chocolate Cake
- Melt Butter Slowly: Mix the butter and sugar at medium heat—if you rush it, you’ll end up with grainy butter lumps that never fully dissolve. I learned this the hard way after scraping burnt bits off my mixing bowl twice.
- Sift the Cocoa: Don’t just dump that cocoa powder straight into the dry ingredients—sift it first. Packed cocoa weighs differently, and your cake might turn out denser than intended. A quick sift also prevents clumps that ruin texture.
- Bake Both Layers Same Time: If your oven has hot spots, rotate the pans halfway through baking. I used to bake them one after the other and swear the second layer always came out uneven—now they’re identical every time.
- Cool Completely Before Frosting: Yes, it’s tempting to frost warm cake, but the buttercream will melt into a sticky mess. Let the layers sit in the pans for 10 minutes, then transfer to a wire rack for at least 30 minutes—your patience will pay off.
Troubleshooting this recipe
Cake Sinks Mid-Bake
If your cakes sink in the center or collapse after baking, the issue is usually overmixing or insufficient leavening. I’ve found that underbaking by 2-3 minutes (so the center is still slightly springy) often prevents this—it allows the cakes to set properly during cooling.
Also, ensure your baking powder is fresh (test by mixing with water—it should fizz immediately). For extra support, try adding ½ tsp cornstarch to the flour mixture. 💡
Uneven Baking
Uneven baking often happens when the oven isn’t properly calibrated or the pans aren’t preheated. Always preheat your oven for at least 20 minutes before baking, and place the pans on the middle rack (not the top or bottom).
If your oven runs hot, reduce the temperature by 10-15°F and add 5 minutes to the baking time. Rotate the pans halfway through baking for even heat distribution. 🌡️
Frosting Slides Off
If your frosting melts or slides off, your cakes likely weren’t cooled completely before frosting. Let them cool at least 2 hours at room temperature or until completely cool to the touch.
Chill the frosting for 30 minutes before applying, and work in a cool room (like a basement or near an open fridge) to prevent melting. For extra stability, add 1 tbsp marshmallow fluff to the buttercream. ✨
Cracked or Domed Layers
Overbaking or overmixing causes cracks or doming. To avoid this, bake until a toothpick comes out with moist crumbs (not wet batter), and don’t overfill the pans—fill them only ⅔ full. If doming occurs, level the tops with a serrated knife before cooling completely.
For extra support, place a dollar bill under the parchment paper in each pan before baking—it creates a slight lift. 🧈
Frosting Too Sweet or Thin
If your frosting tastes overly sweet or is too thin, adjust the sugar-to-butter ratio. For a richer flavor, reduce powdered sugar by ¼ cup and add 1 tbsp cocoa powder.
If it’s too thin, chill it for 1 hour or add 1 tbsp more butter and beat until smooth. For a lighter texture, fold in ¼ cup whipped cream at the end. Always taste as you go! 🍫
Assembled Cake Collapses
A collapsed cake usually means the layers weren’t sturdy enough or the frosting was too heavy. Ensure your cakes are completely cool before assembling, and use a drum cake board or sturdy plate for support.
For extra stability, place a thin layer of frosting between the layers before stacking. If the cake still wobbles, chill it 1 hour before serving to help it set. 💪
Nutrition facts
Frequently asked questions
Can I substitute dark chocolate for milk chocolate in the frosting?
For a deeper chocolate flavor, replace the milk chocolate with 8 oz high-quality dark chocolate (70% cocoa or higher) in the ganache. Use the same amount of heavy cream, but reduce powdered sugar in the buttercream by ½ cup since dark chocolate is more intense. The result will be richer and more complex.
How do I make this cake gluten-free?
Swap the all-purpose flour for a 1:1 gluten-free baking flour blend (like Bob’s Red Mill) and add ½ tsp xanthan gum to improve structure. For the frosting, ensure your powdered sugar is gluten-free certified. The cake may be slightly denser, so bake for 32-35 minutes instead of 30. Chill the layers longer before frosting to prevent crumbling.
What’s the best way to transport a 2-tier cake?
Use a sturdy cake carrier with a removable base to protect the tiers. Place the cake on a cardboard cake board (cut to fit) before sliding it into the carrier. For extra stability, wrap the cake board with plastic wrap to prevent frosting from sticking. Transport in a cool vehicle (not the trunk) and avoid temperature swings. If serving at an outdoor event, keep it in the shade until ready to serve.
Can I use this recipe for a 3-tier cake?
Yes, but you’ll need to adjust the proportions. Bake three 6-inch layers instead of two 8-inch layers to maintain stability. Reduce each frosting layer by ⅓ and use a drum cake board or tiered stand for support. Assemble from the bottom up, chilling each tier for 15 minutes before adding the next to prevent collapsing.
How do I make this cake less sweet?
Reduce the granulated sugar in the cake batter by ¼ cup and the powdered sugar in the frosting by ½ cup. For extra depth, add 1 tsp instant espresso powder to the cake batter and ½ tsp vanilla bean paste to the frosting. The chocolate flavor will shine through more naturally. Always taste the frosting before applying!

- 3lb Prime Rib Roast Recipe: Juicy Pink Center Guaranteed in 3 Hours - October 31, 2026
- 5 Spice Cake Recipe: Warmly Spiced Layers With Crunchy Top - October 31, 2026
- 1950’s Macaroni and Cheese Recipe: Nostalgic Creamy Cheese Sauce with Buttery Noodles - October 31, 2026