
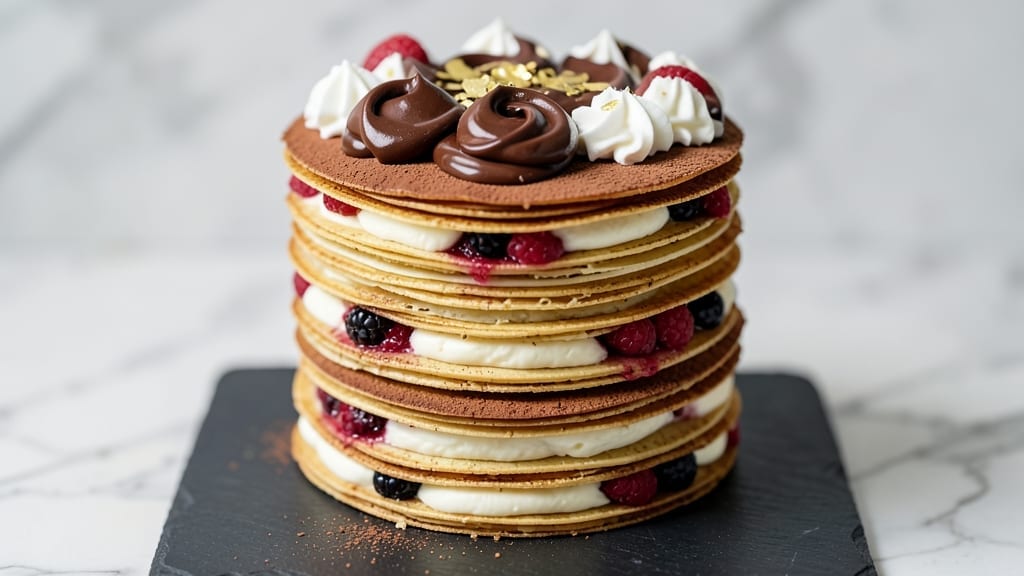
Creating a 20-layer crepe cake transforms a simple batter into a showstopping dessert that looks as impressive as it tastes. The secret lies in thin, even layers of delicate crepes stacked with vanilla custard or whipped cream, creating a light yet sturdy tower.
This recipe delivers restaurant-quality results with a foolproof technique that ensures each layer stays perfectly crisp yet tender.
What sets this recipe apart is the balance between structure and lightness—each crepe must be thin enough to fold without tearing, while the custard filling binds the layers together. The key is patience: rolling the crepes tightly and chilling between layers prevents collapsing.
With just a few simple ingredients and 30 minutes of active work, you’ll create a dessert that looks like it took hours to make.
The final result is a golden-brown cake with a crisp exterior and a melt-in-your-mouth interior, where every bite reveals layers of vanilla custard and crepe. The texture is delicate yet sturdy, holding its shape even when sliced.
This is the kind of dessert that makes any celebration feel special—without requiring advanced baking skills.
Perfect for birthdays, anniversaries, or just because, this crepe cake can be customized with fillings like chocolate ganache, fruit preserves, or even a savory cheese and herb version for brunch. The possibilities are endless, but the technique remains the same: precision and patience pay off in every bite.
Ingredients for 20 layer crepe cake
Precision ingredients create the perfect balance of delicate crepes and rich vanilla cream filling.
| Ingredient | Amount | Notes |
|---|---|---|
| All-Purpose Flour 🌾 | 2 cups | Sifted for smooth batter consistency |
| Large Eggs 🥚 | 6 whole | Room temperature for even distribution |
| Granulated Sugar 🍚 | ¾ cup | Superfine preferred for delicate texture |
| Unsalted Butter 🧈 | ½ cup | Cold, cubed for crepe crispness |
| Whole Milk 🥛 | 1 ½ cups | Room temperature for smooth batter |
| Vanilla Extract 🌸 | 1 tbsp | Pure, high-quality extract |
| Salt 🧂 | ½ tsp | Fine sea salt for balance |
| Heavy Whipping Cream 🥛 | 2 cups | Cold, full-fat for stability |
| Granulated Sugar 🍚 | ½ cup | For whipped cream sweetness |
| Vanilla Bean Paste 🌸 | 1 tbsp | Seeds scraped for intense flavor |
| Unsalted Butter 🧈 | ¼ cup | Softened for whipped cream binding |
| Powdered Sugar 🍚 | ¼ cup | For cake dusting and finishing |
| Dark Chocolate Chips 🍫 | ½ cup | Optional for filling variation |
The flour is the foundation—King Arthur or Gold Medal brands yield the smoothest batter. Sift it twice to eliminate lumps, which can disrupt the thin layers. Eggs should be room temperature to distribute evenly; cold eggs cause streaks. For the butter, European-style brands like Plugrá melt more cleanly, but any unsalted works. The vanilla extract matters here—Madagascar Bourbon adds depth, but pure imitation works in a pinch. Measure the milk precisely; too much makes the crepes too thin, too little makes them dense. Chill your mixing bowl before whipping the cream to stabilize it better.
No vanilla bean paste? Double the extract—though the seeds add a complexity you won’t get otherwise. Substitute heavy cream with whipped coconut cream for a lighter texture, but it won’t hold as well between layers. For the sugar, superfine dissolves faster than granulated, but pulse regular sugar in a food processor if needed. The chocolate chips are optional but Ghirardelli semi-sweet melts beautifully for a ganache variation. If you’re short on time, pre-made custard (like vanilla pudding) works, but homemade binds the layers more securely. Room temperature ingredients are non-negotiable—cold butter or eggs will throw off the entire structure.
Store flour and sugar in airtight containers away from heat to prevent clumping. Eggs keep 3 weeks in the fridge, but use within 1 week for best results. Whipped cream should be used immediately or stored with a thin layer of plastic wrap pressed directly on the surface to prevent a skin. The assembled cake keeps 2 days in the fridge—cover tightly to retain moisture. For longer storage, freeze layers separately between parchment, then reassemble after thawing. Serve at room temperature for the best texture contrast.
Why You’ll Love This Recipe
- I’ll be real: I’ve never had leftovers last past breakfast the next day. But when they do? They reheat like a dream—soft, fluffy, and still delicious. Plus, the ingredients are cheap (flour, eggs, butter—basic pantry staples), so you’re not breaking the bank for a dessert that feels fancy.
- No-Fuss Layers: I swear by this batter—just flour, eggs, butter, and milk. No whisking for hours, no waiting for dough to rise. You mix, pour, flip, repeat. Twenty layers in under an hour, and zero stress.
- Buttery Sweet Magic: That first bite? Pure comfort. The crepes stay tender but hold their shape, and the sugar-butter combo in the batter gives it this just-right sweetness—like a cross between a cake and a stack of pancakes. Honestly, I’ve never met a crepe cake that doesn’t disappear fast.
- Party in a Box: Between us, this is my secret weapon for birthdays, showers, or just because. You can dress it up with whipped cream and berries or keep it simple with powdered sugar. And the best part? It travels well—no crumbs, no mess, just pure crowd-pleaser energy.
Step-by-step instructions for 20 layer crepe cake recipe
Mastering this delicate technique transforms simple crepes into a showstopping dessert. Precision matters at every layer.
Prepare the Perfect Crepe Batter
In a large mixing bowl, combine the 2 cups all-purpose flour, 0.75 cup granulated sugar, and 0.5 tsp salt. Whisk until no lumps remain—this ensures a silky texture. In a separate bowl, beat the 6 whole large eggs until frothy, then gradually whisk in the 1.5 cups whole milk and 1 tbsp vanilla extract. The mixture should be smooth and pale yellow.
Next, cut the 0.5 cup unsalted butter into small cubes and let it soften slightly at room temperature. Gently fold the butter into the egg mixture using a spatula, working just until incorporated. This step creates the signature crispness in each layer. Let the batter rest for 30 minutes at room temperature—this allows the flour to fully hydrate and prevents thick spots when cooking.
Cook the Crepes on Medium Heat
Heat an 8-inch nonstick skillet over medium heat until hot but not smoking. Lightly brush the pan with 1 teaspoon neutral oil (not included in ingredients) and spread it evenly with a paper towel. Pour ¼ cup batter into the center of the pan, immediately tilting to coat the entire surface. Cook for 1-2 minutes until edges lift and the bottom is golden brown.
Flip the crepe carefully using a thin spatula, cooking for another 30-45 seconds until lightly browned on the second side. Transfer to a clean towel-lined plate and cover with another towel to keep pliable. Repeat with remaining batter, stacking crepes as you go. Each crepe should be 6-7 inches in diameter with thin, delicate edges—this ensures they layer properly without bulk.
Prepare the Vanilla Cream Filling
In a chilled metal bowl, combine the 2 cups heavy whipping cream, 0.5 cup granulated sugar, 1 tbsp vanilla bean paste, and a pinch of salt. Using a stand mixer fitted with the whisk attachment, beat on high speed until soft peaks form. Gradually add the 0.25 cup softened unsalted butter, mixing until fully incorporated. The cream should hold its shape when the whisk is lifted—this creates the signature light, airy texture between layers.
Transfer the cream to a piping bag fitted with a star tip for even distribution. Dust a clean work surface with 0.25 cup powdered sugar to prevent sticking. This sugar layer also adds a delicate sheen to the finished cake.
Assemble the 20-Layer Cake
Place one crepe on the prepared surface and spread 1 tablespoon of the vanilla cream along the center. Fold the crepe into thirds (like a letter) to create a neat rectangle. Repeat with remaining crepes, alternating directions for structural integrity. Stack the folded crepes in a single column on a serving platter, ensuring each layer is perfectly aligned.
Pipe a generous dollop of vanilla cream between each layer, pressing gently to adhere. For the final touch, spread a thin layer of cream over the top and sides of the cake, then dust with additional powdered sugar using a fine-mesh sieve. The finished cake should stand 3-4 inches tall with clean, crisp edges. Chill for at least 2 hours before slicing to allow flavors to meld and the structure to set.
Optional Chocolate Chip Variation
For the chocolate variation, melt the 0.5 cup dark chocolate chips in a double boiler or microwave (in 30-second intervals, stirring between each). Once smooth, drizzle 1 teaspoon between selected layers during assembly. The chocolate will create pockets of rich flavor that contrast beautifully with the vanilla cream. Garnish the top with additional melted chocolate or crushed chocolate chips for visual appeal.
Serve chilled slices on individual plates with a dusting of powdered sugar. The cake should reveal layers of delicate crepe interspersed with fluffy cream—each bite should deliver a balance of crisp texture and velvety filling. For best results, serve within 4 hours of assembly to maintain optimal texture.
Pro Tips For Making 20 Layer Crepe Cake
- Whisk Eggs Cold: Grab those eggs straight from the fridge—no thawing needed—and whisk them with the milk before adding the butter. I learned this the hard way when my batter turned greasy and split mid-flip; cold eggs emulsify better and keep the layers tender.
- Butter the Pan Right: Use softened butter (not melted) for your crepe pan—just enough to coat, then wipe off the excess with a paper towel. Too much butter = soggy layers; too little = sticking. I was skeptical until I tried it—now my crepes release like magic.
- Stack While Warm: Build your cake immediately after the last crepe comes off the pan—when it’s still slightly warm and pliable. Cold crepes snap when you fold them, and your layers will look like a house of cards. (Yes, even if you’re impatient like me.)
- Sugar the Filling Light: Skip the extra sugar in the filling unless you’re making a dessert version—plain whipped cream or a light dusting of powdered sugar works best for a neutral base. I used to go heavy, and it made the cake cloying fast. Less is more.
Make-ahead tips for this recipe
Prep Ahead Strategy
Make the crepe batter up to 24 hours ahead and store it in an airtight container in the refrigerator. The flour will fully hydrate overnight, eliminating lumps and creating a smoother texture when you cook.
Let it sit at room temperature for 30 minutes before using to restore the ideal consistency. 🌟
Layer Assembly Shortcut
Fold and stack all 20 crepes in advance, then refrigerate them in a single stack wrapped in plastic wrap between layers. This keeps them pliable and prevents curling.
When ready to assemble, simply pipe the cream between layers as you build the cake—no need to refold each crepe on the spot.
Filling Prep Timing
Whip the vanilla cream immediately before assembly to maintain its stability. If you’re short on time, use pre-made vanilla pudding (like Jell-O brand) as a filling—it holds up well and saves 30 minutes of mixing. Chill the pudding until thickened before using it between layers for best results.
Freezing Layers
Assemble the entire cake and freeze it unfrosted for up to 1 month. Wrap tightly in plastic wrap followed by aluminum foil to prevent freezer burn.
Thaw in the refrigerator overnight, then add the final powdered sugar dusting before serving. The texture remains crisp and the cream stays light when properly sealed.
Make-Ahead Serving
Slice the cake 1-2 hours before serving to allow the layers to soften slightly. Store slices in an airtight container with parchment paper between them. Refrigerate until ready to serve—this prevents sogginess and keeps the crepes from sticking together.
Garnish with fresh berries or mint just before serving for a pop of color. 💫
Batch Cooking Tips
Cook all 20 crepes at once by using two 8-inch nonstick skillets on parallel burners. Keep cooked crepes warm in a 200°F oven on a wire rack for no more than 10 minutes while you finish cooking the rest.
This maintains their flexibility and prevents them from drying out during assembly. Use a spatula with a long handle to flip efficiently.
Nutrition facts
Frequently asked questions
Why do I need 20 layers instead of fewer?
The 20-layer structure creates the signature delicate texture that makes this cake special. Each thin crepe layer contributes to the lightness while the vanilla cream filling binds them together. Fewer layers would make the cake too dense, while more than 20 risks structural instability. The magic is in the balance—20 layers give you that perfect combination of crispness and airy lightness in every bite.
Can I make this cake without a piping bag?
If you don’t have a piping bag, use a ziplock bag with a corner snipped off instead. For even distribution, spread the vanilla cream with a small offset spatula or butter knife between layers. Just be gentle to avoid tearing the crepes. The key is to keep the filling thin and even—about 1 teaspoon per layer will work perfectly.
How do I prevent the cake from collapsing?
Collapsing happens when layers aren’t properly secured or the cake isn’t chilled long enough. First, fold each crepe into thirds tightly before stacking. Second, pipe the cream generously but don’t overfill—1 tablespoon per layer is ideal. Finally, chill the assembled cake for at least 2 hours before slicing. This allows the cream to set and the structure to stabilize completely.
What’s the best way to store leftovers?
Store individual slices in an airtight container separated by parchment paper to prevent sticking. Keep them refrigerated for up to 3 days. For longer storage, freeze the entire cake (unfrosted) for 1 month. Thaw overnight in the fridge before serving. The texture remains best when stored properly—crepes stay crisp and cream stays light.
Can I substitute the vanilla cream with something else?
Yes! For a lighter option, try whipped mascarpone cheese mixed with powdered sugar and vanilla. For a fruit variation, use strawberry jam or apricot preserves—just warm them slightly to make them spreadable. Chocolate lovers can substitute with melted dark chocolate (cooled to thicken). The key is using a filling that’s stable enough to hold the layers together without making them soggy.

- 6 Egg Cake Recipe with Oil: Light as Air With Buttery Moisture - October 4, 2026
- 4 Bean Casserole Recipe: One-Pan Heartiness With Smoky Paprika Depth - October 4, 2026
- 3-Ingredient Keto Mug Cake Recipe: Microwave Magic in 2 Minutes - October 4, 2026