
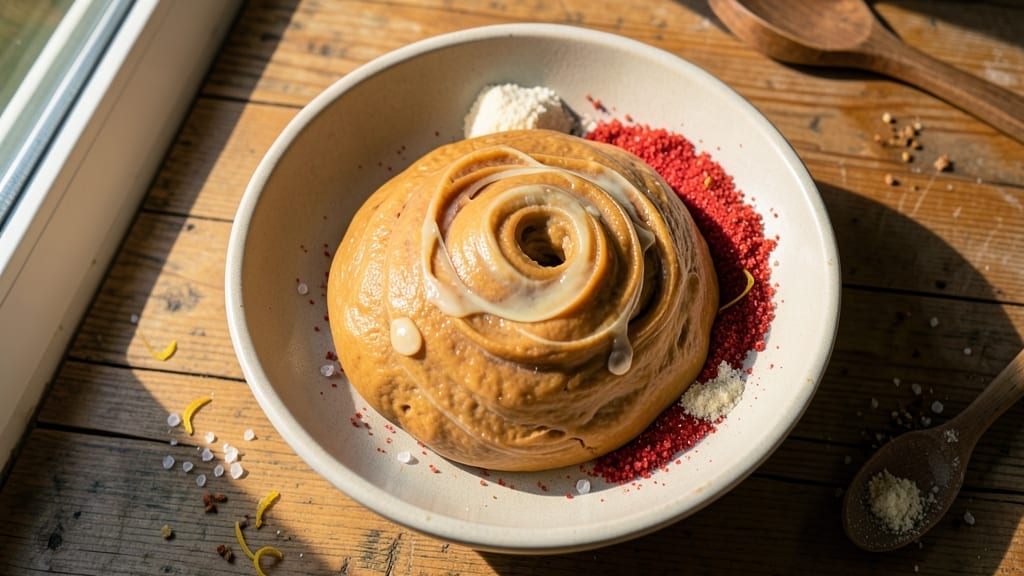
A 24-hour bread dough recipe transforms your kitchen into a bakery—no kneading required. This slow-fermented loaf develops deep flavor and an irresistible crust through cold proofing, a technique that simplifies the process while elevating the result.
The key lies in patience: letting the dough rest overnight in the fridge unlocks a texture that’s both crisp and airy, with a chewy interior that’s impossible to resist.
What sets this method apart is its foolproof simplicity—just mix, shape, and refrigerate. The dough’s long fermentation breaks down gluten and develops complex flavors, while the cold proofing creates that signature open crumb structure.
No experience needed; even beginners achieve bakery-quality bread with this approach. The only tools you’ll need are a mixing bowl, a scale, and a little time.
By morning, your dough will be ready to shape and bake, yielding a loaf with a golden, crackling crust and a tender crumb that’s perfect for sandwiches or toast. The aroma alone will wake up your household, promising a meal that’s as satisfying as it is impressive.
This recipe proves that great bread doesn’t require complicated techniques—just time and intention.
Whether you’re baking for a family gathering or treating yourself to homemade bread, this method delivers restaurant-quality results with minimal effort. The slow rise makes it ideal for busy schedules, and the dough can be prepped ahead, so you’re never without fresh bread. Let’s get started on your first loaf!
Ingredients for 24 hour bread dough
Nine simple ingredients transform your kitchen into a bakery overnight—just mix, rest, and bake.
| Ingredient | Amount | Notes |
|---|---|---|
| All-Purpose Flour 🌾 | 5 cups | High-protein preferred for structure |
| Active Dry Yeast 🍞 | ¼ oz | Or 2 1/4 tsp (1 packet) |
| Granulated Sugar 🍚 | 1 tbsp | Feeds yeast for activation |
| Unsalted Butter 🧈 | ½ cup | Cold, cubed for easy mixing |
| Warm Water 💧 | 1 ¼ cups | 110°F (43°C) for yeast activation |
| Kosher Salt 🧂 | 1 ½ tsp | Diamond Crystal preferred |
| Olive Oil 🫒 | 1 tbsp | Extra-virgin for richness |
| Instant Potato Flakes 🥔 | ½ tsp | For dough elasticity |
| Honey 🍯 | 1 tsp | Optional for subtle sweetness |
| Cornmeal 🌽 | ¼ cup | For dusting dough |
| Ice Water ❄️ | ½ cup | For final dough adjustment |
Flour is the foundation here—King Arthur or Caputo Tipo 00 give the best results, but Bob’s Red Mill all-purpose works in a pinch. The yeast should be fresh (check the date—it loses potency fast), and if your pantry yeast is past its prime, Trader Joe’s or Whole Foods sell reliable packets. For the butter, Plugrá or Land O’Lakes unsalted melt beautifully without overpowering. The warm water temp is critical: too hot kills the yeast, too cold makes it sluggish. Use a thermometer if you’re unsure—110°F is perfect. Honey adds subtle sweetness but isn’t mandatory; if you skip it, the dough will still rise beautifully.
No instant potato flakes? 1/4 tsp vital wheat gluten works as a substitute, though it’s pricier. Running short on cornmeal? Semolina or rice flour dusts just as well. The ice water is your secret weapon for shaping—it strengthens the gluten without overworking the dough. For a tangier crust, add 1 tsp apple cider vinegar to the dough. And if you’re baking in a dry climate, spray the loaf with water before baking for that signature crackly crust. The dough’s long fermentation means you can’t rush it—patience here makes all the difference.
This dough keeps up to 3 days in the fridge, wrapped tightly in plastic, and freezes beautifully for 3 months. For freezing, shape the dough into a loaf, wrap in plastic, then foil—thaw overnight in the fridge before baking. The cold proofing means you can prep the dough in the evening and bake first thing in the morning, waking up to the most incredible aroma. Leftovers? Toast them—crusty, golden perfection every time. And if you make a double batch, freeze half for lazy mornings when you crave fresh bread but don’t have time to bake.
Why You’ll Love This Recipe
- Cold Start, Warm Payoff: I mix the dough in 10 minutes—just flour, yeast, sugar, butter, and water—then let it rise overnight while I sleep. By morning, it’s transformed: that butter-infused dough stretches effortlessly, and the sugar caramelizes just enough to give every bite a subtle sweetness without tasting like dessert.
- Butter-Kissed Crust: Honestly, the butter makes this dough feel like a luxury. It crisps up beautifully in the oven (or pan), and that golden, buttery edge? It’s the kind of texture that makes you pause mid-bite. The yeast does its magic overnight, so you’re not left with dense, heavy bread—just tender, flavorful layers that taste like they took all day to make.
- Weeknight Superhero: Between us, this is my go-to for sandwiches, garlic bread, or even homemade pizza crusts. The dough keeps perfectly in the fridge for up to 3 days, so I can prep it on Sunday and pull it out for quick meals all week. No last-minute scrambling—just stretch, shape, and bake.
- Budget-Friendly Stretch: Five ingredients, minimal waste. That’s it. The sugar and butter feel indulgent, but they’re used sparingly, and the dough stretches to feed a family of four (or two very hungry people). I’ve made it for potlucks, game days, and lazy Sundays—it’s always a hit, and the cost per serving is laughably low. Plus, leftovers? Toss them in a freezer bag for up to a month.
Step-by-step instructions for 24 hour bread dough
Here’s how to create a no-knead dough that develops incredible flavor overnight.
Activate the Yeast and Mix the Base Dough
In a large bowl, combine the 1.25 cups warm water (about 110°F), 1 tbsp granulated sugar, and 0.25 oz active dry yeast. Let this sit for 5-10 minutes until the mixture becomes foamy—this confirms the yeast is alive and active. If it doesn’t foam, your yeast might be dead, and you’ll need to start over.
Once the yeast is active, add the 5 cups all-purpose flour, 1.5 tsp kosher salt, 0.5 tsp instant potato flakes, and 1 tbsp olive oil to the bowl. Using a wooden spoon or dough whisk, mix just until the ingredients come together into a shaggy mass. The dough will be sticky, but that’s normal at this stage. Avoid overmixing—you’re not developing gluten here, just combining ingredients.
Incorporate the Butter and Honey
Cut the 0.5 cup unsalted butter into small cubes and add them to the dough. Using your hands or a dough scraper, gently work the butter into the dough until it’s mostly incorporated. The butter should be cold enough to resist melting completely—this creates pockets of fat that will give your bread a tender crumb. Add the 1 tsp honey now and mix it in with a few strokes of the spoon.
Here’s the thing—this dough is intentionally underdeveloped. The long cold fermentation will do most of the gluten development work for you. The butter should remain in visible chunks, which will melt during baking to create a moist interior. If the dough feels too sticky to handle, sprinkle a little extra flour, but don’t go overboard—too much flour will make the bread dense.
Shape and Cold Proof Overnight
Lightly dust a clean surface with 0.25 cup cornmeal and turn out the dough. Gently shape it into a loose round or oval by folding the edges toward the center. Don’t worry about a perfect shape—the dough will relax during cold proofing. Place the shaped dough in a lightly oiled bowl, cover it tightly with plastic wrap, and refrigerate for 24 hours.
This overnight cold proof is where the magic happens. The slow fermentation allows the gluten to relax and develop naturally, while the cold temperature prevents the yeast from working too aggressively. The dough will rise noticeably during this time—you’ll see it expand and develop a slight domed shape. The cold also helps preserve the butter’s fat, which would otherwise melt and weaken the dough structure.
Shape and Final Proof Before Baking
After the 24-hour cold proof, remove the dough from the refrigerator and let it sit at room temperature for 1 hour. This allows the dough to relax slightly and makes it easier to handle. On a lightly floured surface, gently reshape the dough into a round loaf or divide it into individual portions if making smaller loaves. Place the shaped dough seam-side up in a lightly greased pullman pan or directly on a baking sheet.
Cover the dough loosely with a clean kitchen towel and let it proof at room temperature for 1-2 hours, or until it has risen about 50-75% of its original size. You’ll know it’s ready when the dough springs back slowly when gently pressed with a finger. The surface should look slightly domed and feel slightly puffy to the touch. This final proof develops the air pockets that will create your bread’s texture.
Bake to Golden Perfection
Preheat your oven to 375°F. If using a pullman pan, place it in the oven while it preheats to ensure even heat distribution. Bake the bread for 35-40 minutes until the internal temperature reaches 190-200°F and the crust is deep golden brown. You’ll know it’s done when you tap the bottom of the loaf—it should sound hollow like a drum.
For extra crust development, you can broil the bread for 1-2 minutes at the very end, keeping a close eye to prevent burning. The bread will continue to cook slightly after removal from the oven, so pull it out when it’s just at the desired doneness. Let it cool on a wire rack for at least 30 minutes before slicing—this prevents a gummy crumb. The bread will be best enjoyed the same day, with its crust still crisp and interior warm and tender.
Pro Tips For Making 24 Hour Bread Dough
- Use Room-Temp Butter: Cold butter slows fermentation—take the block out of the fridge 30 minutes before mixing. I learned this the hard way when my dough took three times longer to rise because the yeast got stuck waiting for that butter to soften.
- Measure Yeast by Weight: That “1 packet” of yeast is not always 2¼ teaspoons—weigh it instead. A kitchen scale ensures consistency, especially if humidity messes with your flour’s absorption. (Yes, even if you’re impatient like me.)
- Skip the Sugar Shortcut: Granulated sugar isn’t interchangeable with honey or brown sugar here—it feeds the yeast fast. Substituting slows fermentation, and your dough might never fully rise. Save the upgrades for shaping, not the bulk ferment.
- Cover Loosely, Not Tightly: Plastic wrap stuck to dough traps moisture and heat, killing yeast. Use a damp towel or bowl cover instead—let air circulate, or your dough will turn gummy and underproof. (Your future self will thank you.)
Serving suggestions for leftovers
Classic Sandwich Perfection
This crusty loaf is a sandwich game-changer—its thick, chewy interior holds up perfectly to hearty fillings like roasted turkey, sharp cheddar, and avocado slices.
Toast a slice lightly to enhance the crust, then slather with garlic-herb butter (mix softened butter with 1 tsp lemon zest and 1 tbsp chopped parsley). For a French dip twist, warm the bread slightly and serve with au jus on the side. 🥪
Toasted Bread Pudding
Transform leftover slices into a decadent bread pudding by cubing the bread and layering it with vanilla custard, whipped egg whites, and dark chocolate chips. Bake at 350°F for 30 minutes until golden and set.
Top with caramelized bananas or a dusting of cinnamon sugar. The crusty texture contrasts beautifully with the custard’s creaminess.
Garlic Breadsticks
Cut the loaf into 1-inch thick slices and brush with a mix of melted butter, minced garlic, and grated Parmesan. Bake at 400°F for 8-10 minutes until crispy.
Sprinkle with fresh parsley and serve with marinara sauce for dipping. This is my go-to appetizer for game nights—it disappears fast! 🍽️
French Toast Upgrade
For extra-crispy French toast, soak thick slices in a batter of 2 eggs, ½ cup milk, 1 tsp vanilla, and 1 tbsp cinnamon. Cook in a buttered pan over medium heat until golden brown.
Drizzle with maple syrup and top with whipped cream and berries. The dense crumb soaks up the custard beautifully.
Crostini Toppings
Toast slices until crisp, then top with whipped goat cheese, sliced figs, and honey drizzle for a sweet-savory combo. Or try smoked salmon, cream cheese, and dill for a brunch favorite. The open crumb structure makes it perfect for holding toppings without falling apart.
Bread Bowl Masterpiece
Hollow out the center of a loaf to create a soup or salad bowl. Toast the edges lightly to crisp them up, then fill with tomato basil soup or a winter squash salad.
The sturdy crust holds up to soups, while the soft interior soaks up flavors beautifully. A great way to use up a whole loaf! 🍲
Nutrition facts
Frequently asked questions
Why does this dough need 24 hours in the fridge?
The overnight cold proofing slows yeast activity, allowing gluten to relax and develop naturally for a better texture. This also enhances flavor complexity and creates that signature open crumb structure. The cold temperature prevents overproofing while preserving the butter’s fat for a tender crumb. Think of it as a flavor infusion period for your bread!
Can I make this dough without a stand mixer?
This recipe was designed for minimal effort—just mix the ingredients with a wooden spoon until combined. The dough doesn’t need kneading because the long fermentation handles gluten development. A dough whisk works great for combining everything, and your hands can gently incorporate the butter. The sticky dough is normal at this stage!
What if my dough doesn’t rise after 24 hours?
First check your yeast—it should foam when mixed with warm water. If not, try fresh yeast. Cold fridges can slow fermentation, so move the dough to room temp for 1-2 hours before final proofing. If it still doesn’t rise, your dough might be too cold—try a slightly warmer kitchen (70-75°F) for the final proof. Patience is key with this method!
How do I store leftover bread?
Wrap cooled bread tightly in plastic wrap or foil to maintain freshness. It stays good at room temperature for 3 days or in the freezer for 3 months. For reheating, wrap slices in foil and warm at 350°F for 5-7 minutes. The crust will crisp up beautifully! Perfect for toast or sandwiches.
Can I add seeds or nuts to this dough?
Yes! Fold in ½ cup seeds (sesame, flax) or chopped nuts (walnuts, pecans) during the final shaping. Just be gentle—they can tear the dough. For extra flavor, toast the seeds/nuts first. The dough’s long fermentation will soften them slightly during baking. Great for adding texture to sandwiches!

- 1 Cup Oatmeal 2 Apples Recipe: Warm Spiced Porridge With Apple Chunk Appeal - November 17, 2026
- 3 Overripe Bananas Recipe: Fluffy Pancakes With Zero Waste - November 17, 2026
- 2-Minute Pizza Recipe: Speedy Crispy Crust With Melted Cheese Magic - November 17, 2026