
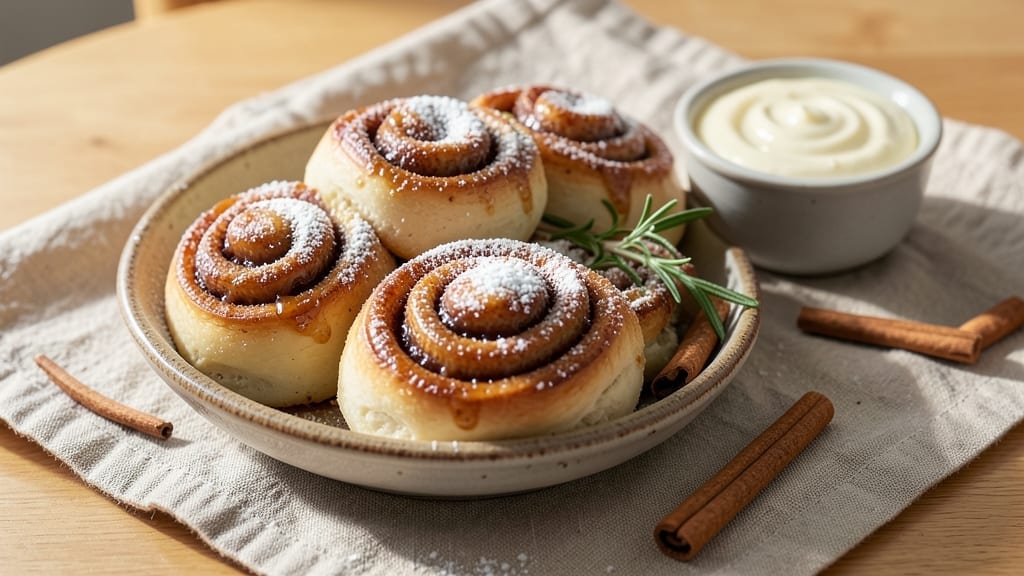
The secret to flaky cinnamon rolls lies in this 24-hour recipe that transforms simple ingredients into bakery-worthy pastries. 💛 Unlike rushed morning bakes, the overnight rise develops deep flavor and tender layers—no experience required.
This method ensures perfect texture every time, with a soft, pillowy center and crisp edges that stay fresh for hours.
What sets this apart is the slow fermentation process, which breaks down gluten for a lighter dough while allowing flavors to meld. The cinnamon-sugar filling gets sealed between layers, ensuring every bite delivers that signature warm, spiced aroma. No yeast headaches here—the dough handles beautifully, even in cooler kitchens.
By morning, you’ll have golden, swirled rolls ready for the oven, where they bake into tender perfection. The flaky layers separate cleanly, revealing that signature cinnamon-sugar goodness in every forkful.
Whether you glaze them with cream cheese frosting or keep it simple with powdered sugar, these rolls will disappear faster than you can say “second cup of coffee.”
Perfect for lazy mornings or holiday breakfasts, this recipe scales easily—doubling or tripling the dough without sacrificing texture. The key is patience; letting the dough work its magic overnight makes all the difference. Let’s get started on creating your most impressive cinnamon rolls yet.
Ingredients for 24 hour cinnamon roll
Twelve simple ingredients transform into bakery-style cinnamon rolls with overnight magic.
| Ingredient | Amount | Notes |
|---|---|---|
| All-Purpose Flour 🌾 | 5 cups | Spooned and leveled for accuracy |
| Granulated Sugar 🍚 | ¼ cup | For dough sweetness |
| Instant Yeast 🍞 | 1 tbsp | Single-use packet preferred |
| Unsalted Butter 🧈 | ½ cup | Cold, cubed for dough |
| Whole Milk 🥛 | ¾ cup | Warmed to 110°F |
| Large Eggs 🥚 | 1 whole | Room temperature |
| Salt 🧂 | ½ tsp | Diamond Crystal preferred |
| Cinnamon 🌶️ | ½ cup | Pure ground cinnamon |
| Light Brown Sugar 🍚 | ½ cup | Packed firmly |
| Unsalted Butter 🧈 | ¼ cup | Melted for filling |
| Vanilla Extract 🌸 | 1 tsp | Pure vanilla preferred |
| Powdered Sugar 🍚 | 1 cup | For glaze |
| Heavy Cream 🥛 | ¼ cup | For glaze |
| Vanilla Extract 🌸 | ½ tsp | For glaze |
The flour is non-negotiable here—King Arthur or Gold Medal for best results. Look for bleached all-purpose in the baking aisle, not the pantry section. The butter? European-style if you can find it—higher fat content means richer flavor. Instant yeast is a game-changer for this recipe; Saf-Instant or Fleischmann’s work perfectly. For the milk, warm it to 110°F—too hot kills the yeast, too cold slows fermentation. I always grab extra cinnamon since it’s used twice—Penzeys or McCormick are my go-tos for consistent quality.
No instant yeast? Active dry yeast at double the amount works, but you’ll need to dissolve it in warm milk first. Substituting butter? Vegetable shortening keeps layers flaky, but expect less flavor. For the filling, brown sugar can be swapped for white sugar if needed—just add 1/4 tsp cinnamon extra to compensate. The glaze is optional but makes all the difference; powdered sugar from the canister clumps less than the boxed kind. Want extra richness? Add 1 tbsp melted butter to the glaze. The dough can handle substitutions, but the overnight rise is where the magic happens—don’t rush it.
Dough keeps 2 days wrapped in plastic in the fridge—perfect for lazy mornings. The filling can be prepped ahead and stored 1 week in the freezer. Once baked, rolls stay fresh 3 days at room temperature or 1 week refrigerated. For make-ahead magic, bake the rolls the night before and reheat at 350°F for 10 minutes. The glaze sets quickly, so assemble it right before serving—no one will notice if you skip it, but you’ll regret it.
Why You’ll Love This Recipe
- Make a double batch on Sunday: serve half for brunch with a drizzle of cream cheese frosting, then reheat the rest for after-dinner treats. It’s the same dough, but the vibe changes completely—no rules, just flexibility.
- Buttery Swirl Magic: That warm, gooey cinnamon-sugar filling hugged by flaky layers? It’s the butter doing all the heavy lifting—softened just enough to create those melt-in-your-mouth pockets. Honestly, the smell alone is worth the 24 hours.
- Weekend Breakfast or Dessert: Make a double batch on Sunday: serve half for brunch with a drizzle of cream cheese frosting, then reheat the rest for after-dinner treats. It’s the same dough, but the vibe changes completely—no rules, just flexibility.
- Budget-Friendly Luxury: Flour, sugar, butter, milk—these are pantry staples that stretch far. A single batch feeds four, and leftovers reheat like a dream (toast them for extra crispiness). Fancy enough for company, cheap enough for Tuesday night.
Step-by-step instructions for 24 hour cinnamon rolls
Here’s the method that guarantees flaky layers and perfect texture every time.
👨🍳 Step 1: Mix the Dough for Maximum Flakiness
In a large mixing bowl, combine the 5 cups all-purpose flour, 0.25 cup granulated sugar, 1 tbsp instant yeast, and 0.5 tsp salt. Whisk gently to distribute the yeast evenly through the dry ingredients—this ensures even rising later.
Create a well in the center and add the 0.5 cup cold cubed unsalted butter, 0.75 cup warm whole milk (110°F), 1 room temperature large egg, and 1 tsp vanilla extract. Using a wooden spoon, gradually incorporate the wet ingredients into the dry, mixing just until a shaggy dough forms. Real talk: don’t overmix here—you want to preserve those gluten strands that create the flaky layers.
🍳 Step 2: Knead and Rest for Optimal Texture
Turn the dough onto a lightly floured surface and knead for 8-10 minutes until smooth and elastic. You’ll know it’s ready when it springs back slowly when poked. The dough should be slightly tacky but not sticky—if it’s too dry, add 1 tsp milk at a time until it reaches the perfect consistency.
Place the dough in a lightly greased bowl, cover with plastic wrap, and let rise at room temperature for 1 hour. Then transfer to the refrigerator and let it rise overnight (18-24 hours). This slow fermentation develops deep flavor and creates those signature flaky layers. Here’s the thing—don’t skip this step. The overnight rise is what makes these cinnamon rolls exceptional.
🥘 Step 3: Prepare the Filling and Roll the Dough
In a small bowl, mix together the 0.5 cup light brown sugar, 0.5 cup cinnamon, and 0.25 cup melted unsalted butter until well combined. This filling should be thick but spreadable—if it’s too runny, add a pinch more cinnamon to help absorb the moisture.
Roll the chilled dough on a lightly floured surface to a ¼-inch thick rectangle about 12×18 inches. Spread the filling evenly over the surface, leaving a ½-inch border around the edges. This prevents the filling from oozing out during baking and ensures each bite has that perfect cinnamon-sugar balance.
🔥 Step 4: Roll, Cut, and Proof for Perfect Shape
Starting from the long side, tightly roll the dough into a log. Use a sharp knife to cut the log into 12 equal pieces. Place each roll cut-side down in a greased 9×13-inch baking dish, leaving about ½ inch between each roll. Cover with a clean kitchen towel and let proof at room temperature for 1-2 hours until puffy and nearly doubled in size.
Here’s where it gets fun—the rolls should look like they’re about to burst at the seams. If they’re not puffy enough, give them another 30 minutes of proofing. The goal is to maximize that rise for maximum flakiness when they bake. Don’t rush this step—patience pays off with perfect texture.
🔥 Step 5: Bake and Glaze for Restaurant-Quality Results
Preheat your oven to 350°F. Bake the rolls for 25-30 minutes until the tops are deep golden brown and a toothpick inserted comes out clean. The edges should be crisp while the centers remain soft and gooey—this is the hallmark of perfect cinnamon rolls.
While the rolls bake, prepare the glaze by whisking together the 1 cup powdered sugar, 0.25 cup heavy cream, and 0.5 tsp vanilla extract until smooth. Once baked, immediately drizzle the warm glaze over the rolls. The heat from the rolls will make the glaze melt and create that glossy finish everyone loves. Serve warm with a dusting of extra cinnamon for that final touch.
Pro Tips For Making 24 Hour Cinnamon Roll
- Chill the Dough Hard: After the first rise, slap that dough in the fridge for a full 24 hours—not just overnight. I learned this the hard way when my rolls rose too fast and turned dense; the slow fermentation develops deeper flavor and a lighter texture. Cover it loosely with plastic wrap if you’re paranoid about drying out, but don’t skip this step.
- Cut Butter Cold: Use unsalted butter straight from the fridge, cut into 1-inch cubes. Warm hands make soft butter, and soft butter = uneven distribution in the dough. I was skeptical until I tried it—now my filling stays thick and gooey instead of melting into a sad puddle during rolling.
- Roll Thin, Not Perfect: Spread the dough to ¼-inch thickness, even if the edges look ragged. Thin layers mean even baking and a consistent cinnamon-sugar crust. Yes, it’ll look messy, but that’s how you get tender, flaky rolls—not some Pinterest-perfect spiral that bakes unevenly.
- Proof in a Warm Spot: Place the shaped rolls in a bowl over a pot of simmering water (not boiling) for the final rise. The steam keeps the air humid, so they puff up without drying out. I used to proof them on the counter, and they’d always crack or stay flat—this method fixes that every time.
Essential equipment for 24 hour cinnamon roll
Dough Mixer Essentials
For perfect cinnamon rolls, I recommend a stand mixer with a dough hook attachment—it saves time and ensures even kneading. My go-to is the KitchenAid Artisan Series with the 5-quart bowl, which handles the 5 cups of flour beautifully.
If you prefer hand mixing, use a wooden spoon for the initial combination and a lightly floured surface for kneading. Avoid electric beaters—they overwork the dough and destroy those flaky layers. 💛
Proofing Tools
A large, airtight container is crucial for the overnight rise. I use a glass Pyrex baking dish (about 9×13 inches) with a tight-fitting lid to create a humid environment. For smaller batches, a loaf pan with a lid works perfectly.
Line the container with parchment paper to prevent sticking, and lightly grease the surface for easy removal in the morning. The container should hold the dough comfortably without crowding.
Rolling and Cutting
For rolling the dough to ¼-inch thickness, a 12-inch rolling pin with a silicone handle is ideal—it glides smoothly and prevents sticking. I love the OXO Good Grips version because it’s lightweight yet durable.
To cut the log into 12 equal pieces, use a sharp chef’s knife (I prefer a Wüsthof Classic) and a ruler for precise measurements. A dough scraper helps transfer pieces to the baking dish without tearing the edges.
Baking Dish
The 9×13-inch baking dish is non-negotiable for this recipe. I recommend a heavy-duty stainless steel pan like All-Clad for even heat distribution, but a dark metal or glass dish works too. Grease it thoroughly with butter or baking spray to prevent sticking.
For extra insurance, sprinkle a little flour in the pan before arranging the rolls. Avoid nonstick pans—they can cause uneven baking and affect the texture.
Glazing Tools
A small whisk and measuring spoons are all you need for the glaze, but a fine-mesh sieve helps sift the 1 cup powdered sugar for a smoother finish. For drizzling, I use a small offset spatula or a pastry brush to create those perfect swirls.
A piping bag with a small round tip works too if you want decorative patterns. Keep the glaze ingredients at room temperature for easier mixing—cold heavy cream can make the glaze grainy.
Oven Thermometer
Your oven’s temperature display isn’t always accurate. I keep a Thermoworks Thermapen nearby to verify the 350°F setting—even a 25°F difference can affect baking time. If your oven runs hot, reduce the temperature to 325°F and add 5-10 minutes to the baking time.
For even browning, place a baking sheet on the lower rack during the final 5 minutes of baking to reflect heat upward. 🔥
Nutrition facts
Frequently asked questions
Can I make this recipe without a stand mixer?
This dough works perfectly by hand. Mix the ingredients with a wooden spoon until shaggy, then knead on a lightly floured surface for 8-10 minutes until smooth and elastic. The key is patience—don’t rush the kneading, as it develops the gluten needed for those signature flaky layers. A dough scraper helps keep things tidy while you work.
What if my dough doesn’t rise overnight?
First, check your yeast is fresh (test it by mixing with 1 tsp sugar and ¼ cup warm water—it should bubble within 5-10 minutes). If the dough is still flat, try moving it to a warmer spot (like near the oven with the light on) for 1-2 hours before returning to the fridge. Cold kitchens can slow fermentation, so aim for a room temperature between 68-72°F during the initial rise.
How do I store leftover cinnamon rolls?
Cool completely, then store in an airtight container at room temperature for 2 days or refrigerate for 1 week. For longer storage, freeze baked rolls (unglazed) for up to 3 months. Reheat at 350°F for 10-15 minutes until warm through. The glaze will need reapplying after reheating—just whisk fresh glaze and drizzle over warm rolls.
Can I make these rolls without the glaze?
Yes! While the glaze adds sweetness and visual appeal, the rolls are delicious plain. Dust with extra cinnamon or a sprinkle of powdered sugar for flavor. For a different twist, try brushing with melted butter mixed with a pinch of salt while warm—it adds a savory contrast that pairs surprisingly well with the cinnamon filling.
Why did my rolls turn out dense instead of flaky?
Dense rolls usually happen from overmixing the dough (breaking down gluten) or skipping the overnight rise. Make sure to knead just until smooth (8-10 minutes max) and let the dough rest fully. Also, avoid using too much flour when rolling—stick to ¼-inch thickness and keep the filling ½-inch from edges to prevent overfilling that can weigh down the layers.

- 3lb Prime Rib Roast Recipe: Juicy Pink Center Guaranteed in 3 Hours - October 31, 2026
- 5 Spice Cake Recipe: Warmly Spiced Layers With Crunchy Top - October 31, 2026
- 1950’s Macaroni and Cheese Recipe: Nostalgic Creamy Cheese Sauce with Buttery Noodles - October 31, 2026