
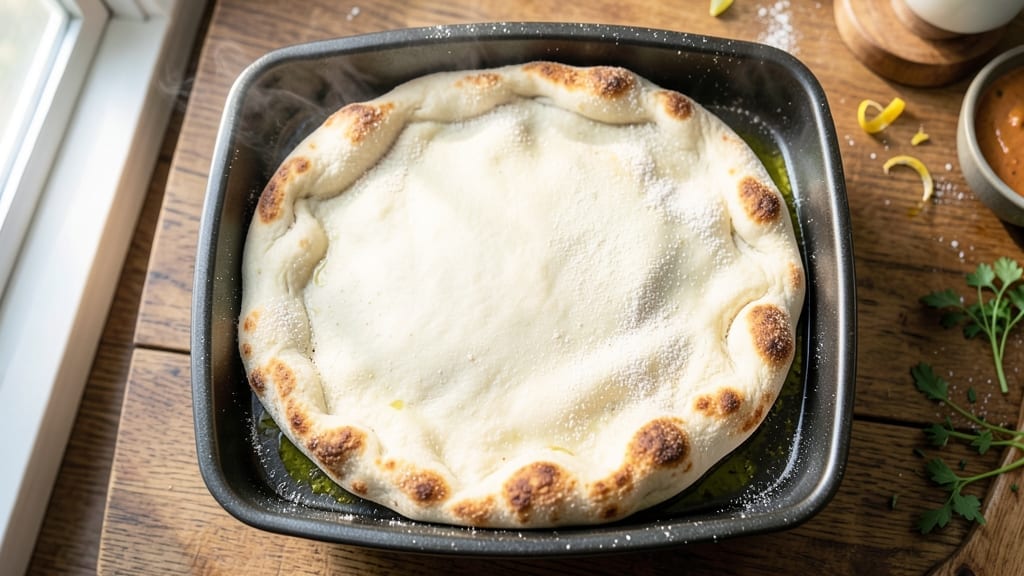
Creating crispy crust pizza dough in your bread machine with 00 flour is a game-changer for home cooks who crave restaurant-quality results without the effort. This recipe transforms simple ingredients into dough with the perfect chewy center and airy, crispy edges—all with minimal hands-on time.
The bread machine handles the kneading and proofing, while the 00 flour delivers that signature Italian texture.
The secret lies in the bread machine’s dough cycle, which develops gluten perfectly for pizza dough, and the precise ratio of 00 flour to water for that signature lightness.
No need for a stand mixer or hours of kneading—just add the ingredients, select the dough setting, and let the machine do the work. This method ensures consistent results every time, even for beginners.
What you’ll end up with is dough that’s easy to shape, bakes up with a crispy yet tender crust, and holds toppings beautifully. The bread machine’s even kneading prevents overworking, which can make dough tough, while the proofing cycle creates the ideal air pockets for that chewy interior.
Perfect for classic Margherita or loaded with your favorite toppings.
Once the dough is ready, simply shape it, add your toppings, and bake at high heat for that signature crisp. The bread machine does most of the heavy lifting, so you can focus on the fun part—customizing your pizza. Let’s get started on dough that’s foolproof and delicious.
Ingredients for 00 flour pizza dough recipe bread machine
Eight simple ingredients transform your bread machine into Italian pizza dough magic.
| Ingredient | Amount | Notes |
|---|---|---|
| 00 Flour 🌾 | 3 ½ cups | High-protein, Italian type for best texture |
| Warm Water 💧 | 1 ¼ cups | 110°F for optimal yeast activation |
| Active Dry Yeast 🍞 | ¼ tsp | Or 1 packet rapid-rise yeast |
| Granulated Sugar 🍚 | ½ tsp | Feeds yeast for faster rise |
| Salt 🧂 | 1 tsp | Kosher or sea salt preferred |
| Extra-Virgin Olive Oil 🫒 | 1 tbsp | Plus 1 tsp for greasing bowl |
| Semolina Flour 🌾 | ½ cup | For dusting and crispy crust |
| Cornmeal 🌽 | 2 tbsp | For pizza peel preparation |
The 00 flour is non-negotiable here—Caputo or Molino Grassi are the gold standards, but any high-protein Italian 00 works. I grab mine from Whole Foods or Amazon when the local stores run out. The yeast is key: use active dry and let it bloom in the warm water first, or grab rapid-rise yeast for faster results. Water temp matters—too hot kills the yeast, too cold makes it sluggish. 110°F is perfect (think warm bath water). Semolina is optional but adds that signature crispy texture—Trader Joe’s sells it cheap in bulk bins.
No 00 flour? King Arthur Bread Flour is the closest substitute, but expect slightly denser dough. Running short on semolina? All-purpose flour works in a pinch, though it won’t be as crisp. The olive oil can be swapped for avocado oil if you prefer neutral flavor. For yeast issues, instant yeast at half the amount works too. Pro tip: if your dough feels sticky, add 1 tbsp more flour—this is pizza dough, not cake batter. And yes, you can use whole wheat flour at 20% replacement if you’re feeling adventurous (though texture will change).
This dough keeps for 3 days in the fridge wrapped tightly in plastic—just let it sit at room temp 30 minutes before shaping. For longer storage, freeze shaped dough balls for up to 3 months. Thaw in the fridge overnight before baking. The bread machine does all the hard work, but don’t skip the 10-minute rest after kneading—this relaxes the gluten for easier shaping. And trust me, cornmeal on your peel makes transferring pizza a breeze.
Why You’ll Love This Recipe
- Bread Machine Magic: I’ll admit, I was skeptical about letting my bread machine handle pizza dough—but the first time I pulled out that golden, stretchy disk? No rolling pin needed. The yeast and sugar work together to create a dough so light and airy, even my picky kids don’t ask for store-bought.
- Crispy-Chewy Promise: That 00 flour is the secret weapon here. It’s got the perfect balance of protein and gluten, so your crust turns out crisp on the edges with a pillowy center—no sad, gummy dough in sight. Honestly, it’s the kind of texture that makes you slow down and take that first bite like it’s a Sunday treat.
- Weeknight Workhorse: This dough is my go-to for everything from a quick Margherita for dinner to a crowd-pleasing pizza night with friends. (Yes, even on a Tuesday.) The beauty? It keeps well in the fridge for up to 48 hours, so you can prep ahead and still have fresh dough when the craving hits.
- Pocketbook Perk: Five ingredients, zero specialty items—this is cooking on a budget. The sugar and yeast stretch a little way, and 00 flour is cheaper than you’d think if you buy it in bulk. Between us, I’ve made enough dough for four pizzas for the price of one frozen one. That’s a win.
Step-by-step instructions for bread machine 00 flour pizza dough
Here’s how to transform simple ingredients into restaurant-quality pizza dough with a perfect crispy crust.
Prepare Your Bread Machine
First, grease the inside of your bread machine pan with 1 teaspoon of the extra-virgin olive oil (the extra amount listed in the ingredients). This prevents sticking and makes cleanup easier. I like to use a paper towel to spread it evenly along the sides and bottom.
Next, add all the wet ingredients in this order: the 1.25 cups warm water (it should feel like bathwater, around 110°F), the 0.5 teaspoon granulated sugar, and the 0.25 teaspoon active dry yeast. Let this mixture sit for 5 minutes while you prepare the dry ingredients. You’ll see it start to foam slightly—this is a good sign the yeast is activating.
Combine Dry Ingredients
In a medium bowl, whisk together the 3.5 cups 00 flour and 1 teaspoon salt until completely combined. The 00 flour is key here—its high protein content gives you that perfect chewy texture we’re after. Don’t skip this step, as the salt needs to be evenly distributed throughout the flour.
Add the remaining 1 tablespoon extra-virgin olive oil to the flour mixture and stir well. The oil will help create a tender dough and give that authentic Italian flavor. If you notice any lumps, use your fingers to break them up—this ensures even hydration when the dough comes together.
Add to Bread Machine and Set Program
Pour the flour mixture into the bread machine pan, making sure it’s evenly distributed. Give it a quick stir with a wooden spoon to combine everything. Then, select the “Dough” setting on your bread machine. This setting is specifically designed for creating pizza dough and will handle the kneading process perfectly.
Let the machine do its work for the full cycle time, which is typically 2-3 hours depending on your specific model. You’ll know it’s done when the dough is smooth, elastic, and springs back slowly when poked. If you’re unsure, do the windowpane test—try to stretch a small piece of dough between your fingers. It should be thin enough to see light through without tearing.
Shape and Rest the Dough
Once the cycle is complete, remove the dough from the machine and place it on a lightly floured surface. Gently shape it into a ball, rotating it as you go to create surface tension. I like to use the “fold and turn” method—fold one side over, then rotate and fold again. This helps develop gluten and gives you that professional-looking round shape.
Lightly dust a clean bowl with 0.5 cup semolina flour and place the shaped dough inside. Cover with a damp towel and let it rest at room temperature for 30 minutes. This resting period allows the gluten to relax, making it easier to roll out later. The semolina flour also helps create that beautiful crispy crust we’re aiming for.
Prepare for Baking
After resting, turn your dough out onto a surface dusted with 2 tablespoons cornmeal. This final dusting prevents sticking and ensures your pizza will have that perfect crispy bottom. Preheat your oven to 500°F with a pizza stone or baking sheet inside for at least 30 minutes. The high heat is crucial for achieving that crispy crust while keeping the center chewy.
Now you’re ready to add your favorite toppings and bake. The dough should be pliable but still hold its shape when rolled out. If it feels too sticky, let it rest another 10 minutes. Remember, the secret to great pizza is in the dough—so don’t rush this final preparation step.
Pro Tips For Making 00 Flour Pizza Dough Recipe Bread Machine
- WEIGH YOUR FLOUR: The bread machine’s measuring cup is a lie—00 flour is lighter than all-purpose, and packing it in will make your dough dense and chewy. Use a kitchen scale and aim for 500 grams (about 4 cups loosely spooned). I learned this the hard way when my first attempt turned out like a brick.
- SALT THE WATER: Toss the salt directly into the warm water before adding yeast—not after. Dissolving it first guarantees even distribution, so every bite gets that perfect balance. I used to sprinkle it on top, and half the dough ended up bland.
- DON’T OVERMIX: Once the bread machine starts kneading, resist the urge to peek or stop it. Overmixing develops too much gluten, and 00 flour’s delicate protein structure will turn your dough tough. Let it run the full cycle—it knows what it’s doing.
- USE A LITTLE OIL: Add 1 tablespoon of neutral oil (like vegetable or canola) to the dough during mixing. It won’t make your pizza greasy, but it’ll keep the crust tender and prevent sticking to the machine’s sides. I skipped this once, and the dough stuck like glue.
Troubleshooting your 00 flour pizza dough recipe bread machine
Dough Too Sticky
If your dough feels overly sticky after kneading, it’s likely due to too much hydration or underdeveloped gluten. First, check your flour-to-water ratio—00 flour absorbs moisture differently than all-purpose. If needed, add 1-2 tablespoons more flour while kneading in the bread machine.
For extra insurance, chill the dough for 20 minutes before shaping—this firms it up. I’ve found that King Arthur Bread Flour works well if you’re substituting, but expect slightly less stickiness. 💫
Dough Not Rising
Yeast issues are usually the culprit here. First, verify your water temperature—too hot (>120°F) kills yeast, while too cold (<90°F) slows activation.
If your dough isn’t rising after 2 hours, try these fixes: use instant yeast at half the amount (no proofing needed), or replace 1 tsp sugar with 1 tsp honey to feed the yeast.
If your kitchen is cold, place the bread machine in a warm spot (like near the oven with light on). 🔥
Dough Too Dense
A dense dough often means over-kneading or insufficient gluten development. Bread machines can sometimes overwork dough, so check your machine’s cycle time—2-3 hours max is ideal. If the dough feels tough, let it rest longer (up to 1 hour) before shaping to relax the gluten.
For extra tenderness, add 1 extra tablespoon olive oil to the dough. If using a substitute like King Arthur Bread Flour, expect slightly denser results—00 flour is non-negotiable for authentic texture.
Bread Machine Errors
Modern bread machines are forgiving, but errors can happen. If your machine displays “Dough too wet” or “Dough too dry,” adjust accordingly: add 1 tbsp flour for wet dough or 1 tsp water for dry.
If the dough isn’t forming properly, stop the cycle, remove it, and manually shape it into a ball before returning it to the machine for the remaining time. Some machines (like KitchenAid) have a “Dough” setting—stick to this for pizza dough.
Avoid the “Basic” or “White Bread” settings, as they knead too aggressively. ⚡
Dough Sticks to Pan
Greasing the pan isn’t enough—semolina flour is your secret weapon. Before adding ingredients, lightly dust the pan with 2 tbsp semolina flour (use a fine-mesh sieve for even coverage).
If dough still sticks, your machine’s pan might need seasoning: coat it with 1 tbsp olive oil, bake empty at 350°F for 10 minutes, then let cool. For stubborn cases, line the pan with parchment paper (cut to fit snugly).
Pro tip: KitchenAid’s non-stick pans work well, but older models may need extra care. 💡
Dough Overproofed
Overproofed dough happens when the yeast ferments too long, making it collapse when baked. If your dough rises too high in the machine (beyond the pan’s edge), it’s overproofed. To fix it, shape immediately and bake right away—skip the final rest.
For future batches, reduce the cycle time by 30 minutes or chill the dough for 1 hour before the final rise. If your kitchen is warm (>80°F), proofing will happen faster—adjust accordingly. 🌡️
Nutrition facts
Frequently asked questions
Can I make this dough without a bread machine?
Yes! If you don’t have a bread machine, mix the ingredients by hand, then knead for 8-10 minutes until smooth and elastic. Let it rise in a greased bowl for 1-2 hours until doubled. The bread machine just automates the kneading and proofing—your hands work fine with extra time. For best texture, use the same 00 flour and hydration ratio.
How do I know when the dough is ready in the bread machine?
The dough is done when it’s smooth, elastic, and springs back slowly when poked (the “windowpane test” works too—stretch a small piece between your fingers until it’s thin enough to see light through). Most bread machines take 2-3 hours on the dough setting. If it rises above the pan’s edge, it’s overproofed—shape and bake immediately.
Can I use all-purpose flour instead of 00 flour?
You can substitute, but expect a denser texture. For best results, use King Arthur Bread Flour (high-protein) and add 1 extra tablespoon olive oil for tenderness. The 00 flour creates that signature Italian lightness—it’s worth tracking down for authentic pizza. If substituting, reduce water by 1 tablespoon to prevent stickiness.
How long can I keep the dough before baking?
Fresh dough stays good for 3 days in the fridge, wrapped tightly in plastic. For longer storage, shape into balls and freeze for up to 3 months. Thaw in the fridge overnight before baking. The bread machine’s dough is most flavorful when used within 24 hours, but it keeps well for short-term fridge storage.
What’s the best way to shape this dough?
Roll the dough out on a surface dusted with semolina flour to prevent sticking. For a classic round, use the “fold and turn” method: fold one side over, then rotate and fold again. Press gently to create surface tension. For rectangular pizzas, roll to 1/4-inch thickness. Let it rest 10 minutes before adding toppings—this prevents shrinking.

- 3lb Prime Rib Roast Recipe: Juicy Pink Center Guaranteed in 3 Hours - October 31, 2026
- 5 Spice Cake Recipe: Warmly Spiced Layers With Crunchy Top - October 31, 2026
- 1950’s Macaroni and Cheese Recipe: Nostalgic Creamy Cheese Sauce with Buttery Noodles - October 31, 2026