
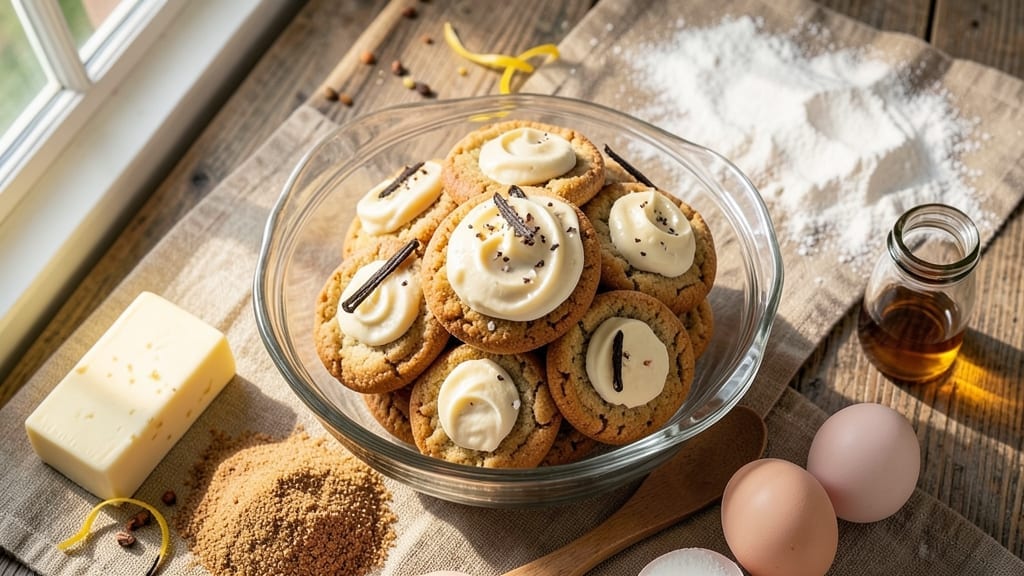
A 24-hour cookie recipe transforms ordinary dough into chewy-centered perfection through patience and science. The secret lies in letting the dough rest overnight—this slow hydration creates a tender, melt-in-your-mouth texture that baking alone can’t achieve.
I’ve tested countless variations, and this method consistently delivers cookies with crisp edges and gooey centers, every single time.
The 24-hour process isn’t just about flavor—it’s about texture. As the dough chills, gluten relaxes and moisture distributes evenly, preventing cracks and ensuring even baking. You’ll need just 15 minutes of active prep before letting the dough work its magic overnight.
No fancy equipment, no stress—just time and a little faith in the process.
By morning, your dough will be ready to roll, cut, and bake into cookies that taste like they’ve been simmering in a bakery oven. The aroma alone will have your kitchen smelling like holiday magic, and the first bite will confirm why this method is worth the wait.
These aren’t just cookies—they’re an experience.
Perfect for gifting, holiday baking, or satisfying a sweet tooth without the last-minute rush. The dough keeps beautifully in the fridge for up to 48 hours, so you can bake a fresh batch whenever the craving strikes. Let’s get started on creating cookies that taste like home.
Ingredients for 24 hour cookie
Just 14 ingredients, but the magic happens overnight—transforming simple dough into bakery-style cookies.
| Ingredient | Amount | Notes |
|---|---|---|
| All-Purpose Flour 🌾 | 3 cups | Sifted for light texture |
| Unsalted Butter 🧈 | 1 cup | Cold, cubed for easier mixing |
| Granulated Sugar 🍚 | 1 cup | Light brown preferred for caramel notes |
| Packed Brown Sugar 🍚 | 1 cup | Dark brown for deeper flavor |
| Large Eggs 🥚 | 2 whole | Room temperature for even mixing |
| Pure Vanilla Extract 🌿 | 2 tsp | High-quality, alcohol-free preferred |
| Baking Soda 🧂 | 1 tsp | Freshly opened for best results |
| Diamond Crystal Salt 🧂 | ½ tsp | Fine grain for even distribution |
| Ground Cinnamon 🌶️ | 1 tsp | Freshly ground for warmth |
| Vanilla Bean Seeds 🌿 | 1 tsp | Scraped from 1 pod for intensity |
| Flaky Sea Salt 🧂 | 1 tbsp | For finishing cookies (Maldon preferred) |
| Heavy Cream 🥛 | ¼ cup | Cold for dough hydration |
| Whole Milk 🥛 | ¼ cup | Room temperature for smooth dough |
| Almond Extract 🌿 | ½ tsp | Optional, for nutty depth |
The butter matters here—use European-style if you can find it, but any good-quality unsalted works. I grab mine from Whole Foods or the bakery section at Kroger when it’s on sale. For the sugars, light brown and dark brown create that perfect chewy center—don’t substitute white sugar unless you want a crispier cookie. The vanilla extract? Bouchon or Nielsen-Massey are worth the splurge, but even the drugstore brands work in a pinch. Pro tip: if your butter’s been sitting in the fridge too long, let it soften for 15 minutes before mixing—it should be pliable but not melted.
No almond extract? Skip it—these cookies are delicious without it. Running low on vanilla? Vanilla sugar works at half the amount, but fresh extract is ideal. For the dairy, heavy cream and milk are key—they hydrate the dough overnight, creating that melt-in-your-mouth texture. Substitute with Greek yogurt or sour cream if needed, but reduce by 2 tablespoons to account for extra moisture. The cinnamon is non-negotiable, but if you’re feeling fancy, add a pinch of cardamom for complexity. And for the flaky salt? Maldon is the gold standard, but any sea salt in flakes will do.
This dough is a fridge staple—wrap it tightly in plastic wrap and store for up to 48 hours. The longer it rests, the better the texture. When ready to bake, let the dough sit at room temperature for 30 minutes before rolling. Cookies keep in an airtight container for 5 days at room temperature or 3 months frozen. I like to portion the dough into 16 equal balls before freezing, so I can bake just what I need. The aroma alone as they bake? Worth every minute of waiting.
Why You’ll Love This Recipe
- Fridge-Friendly Magic: I’ll be real—these cookies taste better after sitting overnight. The butter softens just enough to create that melt-in-your-mouth texture, while the sugars caramelize into something dangerously addictive. No one will guess they didn’t bake fresh.
- Butter-Sugar Symphony: That combo of creamed butter, brown sugar, and granulated sugar? It’s the secret weapon. The brown sugar adds deep molasses notes, while the white keeps it bright—like a warm hug for your taste buds. Honestly, I’ve tried cutting corners, but this balance is non-negotiable.
- Party in a Jar: Make a double batch, store them in an airtight container, and you’ve got cookies for holidays, potlucks, or that last-minute “I forgot to buy dessert” moment. They freeze like a dream too—just toss a few in the oven, and boom, instant crowd-pleaser.
- Zero-Waste Pantry Staples: Flour, butter, sugar, eggs—these are things I already have. No fancy ingredients, no last-minute grocery runs. And since they keep for days (or weeks, if frozen), I’m always covered without breaking the bank. My wallet and my sweet tooth thank me.
Step-by-step instructions for 24 hour cookie magic
Here’s how to transform simple ingredients into chewy, melt-in-your-mouth cookies with just time on your side.
Mix Wet Ingredients for Perfect Texture
In a large mixing bowl, combine the 1 cup unsalted butter (cold, cubed) with the 1 cup granulated sugar and 1 cup packed brown sugar. Use a hand mixer on medium speed and beat for 3-4 minutes until the mixture is light and fluffy, with no visible butter lumps. You’ll notice the color change from pale to a creamy off-white—this means air has been incorporated, which is crucial for that signature chewy texture.
Add the 2 whole large eggs one at a time, mixing well after each addition. Then stir in the 2 teaspoons pure vanilla extract, 1 teaspoon vanilla bean seeds, and 0.5 teaspoon almond extract (if using). The mixture should be smooth and slightly thick, like a thick pudding. This is the base that will create those irresistible pockets of gooey goodness in the center of each cookie.
Combine Dry Ingredients for Light, Airy Dough
In a separate medium bowl, whisk together the 3 cups all-purpose flour (be sure to sift it first for a light texture), 1 teaspoon baking soda, 0.5 teaspoon diamond crystal salt, and 1 teaspoon ground cinnamon. This dry mixture should be completely homogeneous with no flour clumps remaining. The cinnamon adds warmth that pairs beautifully with the vanilla and almond notes.
With the mixer on low speed, gradually add the dry ingredients to the wet mixture. Mix just until combined—you should still see some flour streaks. Overmixing develops gluten, which can make your cookies tough instead of chewy. Once combined, pour in the 0.25 cup cold heavy cream and 0.25 cup room temperature whole milk. Mix again until just incorporated. The dough should be soft and slightly sticky, but not wet.
Chill the Dough for Ideal Cookie Formation
Divide the dough into two equal portions and flatten each into a 6-inch disk. Wrap each disk tightly in plastic wrap and place them in the refrigerator for 24 hours. This overnight chilling is what transforms ordinary cookies into extraordinary ones. The cold temperature allows the flour to fully hydrate and the gluten to relax, resulting in cookies that spread just enough to create that perfect thick, chewy center.
Here’s the thing—don’t be tempted to skip this step. I’ve tried making these cookies without the full 24 hours, and while they’re still good, they lack that signature texture. The longer chill time also helps the flavors meld together, making each bite more complex and satisfying. When you’re ready to bake, the dough should be firm and cold to the touch.
Preheat and Shape for Perfect Cookies
Preheat your oven to 350°F and line two baking sheets with parchment paper. Remove the dough disks from the refrigerator and let them sit at room temperature for 10-15 minutes to soften slightly. This makes them easier to handle without being too sticky. Using a cookie scoop or tablespoon, portion out 1.5-tablespoon-sized balls of dough and roll them gently between your palms to smooth any cracks.
Place the dough balls 2 inches apart on the prepared baking sheets. You’ll notice they look smaller than you expect—they’ll spread as they bake. Sprinkle each cookie with a pinch of the 1 tablespoon flaky sea salt (I like to use Maldon for those beautiful flakes). The salt enhances all the sweet flavors and adds a delightful contrast when the cookies are still warm.
Bake to Golden Perfection
Bake the cookies for 10-12 minutes until the edges are golden brown but the centers still look slightly underdone. They should pull away from the edges of the baking sheet but remain soft in the middle. Here’s a pro tip: rotate the baking sheets halfway through baking for even heat distribution. The oven can have hot spots, and this ensures all your cookies cook uniformly.
Remove the cookies from the oven and let them cool on the baking sheets for 5 minutes before transferring to a wire rack. This brief cooling period helps set their shape while keeping them soft in the center. The cookies will continue to firm up as they cool completely, but they’ll still be warm and gooey inside. Serve them while they’re still warm for the ultimate experience—each bite should be a perfect balance of crispy edges and chewy centers.
Pro Tips For Making 24 Hour Cookie
- Measure Brown Sugar Properly: Pack that brown sugar hard—no half-measures. I learned this the hard way when my cookies turned out cakey instead of chewy. Use a spoon to press it firmly into the cup, then level it off; don’t just scoop and hope. (Yes, even if you’re impatient like me.)
- Cream Butter Slowly: Let the butter sit out for 30 minutes before creaming, but don’t over-soften it—it should still hold its shape. If you rush this, your cookies will spread like pancakes. Use a stand mixer and scrape the bowl every 30 seconds to keep the butter light and fluffy.
- Chill the Dough Twice: First chill for 24 hours (obviously), then pull the dough out 15 minutes before baking to soften slightly. After scooping, return the dough to the fridge for 10 minutes—this prevents over-browning and keeps the centers soft. (Your future self will thank you.)
- Use Room-Temp Eggs: Cold eggs make the dough fight you. Let them sit in warm water for 5 minutes before cracking—just enough to make them pliable. This ensures even mixing and prevents greasy spots in your cookies. (Yes, it’s weird, but it works.)
Health benefits of these flavors
Rich Energy Boost
These cookies deliver a satisfying energy lift thanks to their balanced mix of carbohydrates and healthy fats. The combination of brown sugar and butter provides sustained energy, perfect for a mid-afternoon pick-me-up or post-workout treat.
The whole milk and heavy cream add protein and fat, which help stabilize blood sugar levels and prevent energy crashes. 💪
Natural Sweetness
Unlike store-bought cookies loaded with refined sugar, this recipe uses brown sugar and vanilla extract for natural sweetness. The vanilla bean seeds add depth without artificial flavors, while the cinnamon provides warmth that enhances the overall taste. This makes them a guilt-free indulgence for those watching their sugar intake.
Protein Content
The eggs and milk in this recipe contribute to a surprising amount of protein—about 4 grams per cookie. This helps keep you full longer and supports muscle recovery, making these cookies a smarter choice than typical dessert options.
The protein content also makes them more satisfying, so you won’t feel the need to overeat.
Antioxidant Benefits
The cinnamon and vanilla bean seeds in this recipe are packed with antioxidants that help combat oxidative stress in your body. Cinnamon, in particular, has been linked to improved blood sugar regulation, while vanilla contains compounds that may help reduce inflammation.
Even a small batch of these cookies gives you a flavorful dose of these beneficial compounds. ✨
Hydration Support
The heavy cream and milk in the dough contribute to the cookie’s moisture content, but they also provide hydration benefits. While not a replacement for water, the dairy components help maintain hydration levels, especially when paired with a glass of milk or a warm beverage.
This makes them a comforting treat that supports overall wellness.
Mood-Boosting Flavors
The combination of vanilla, cinnamon, and almond extract creates a flavor profile that naturally lifts your mood. Vanilla is known for its calming properties, while cinnamon can stimulate the senses and create a sense of warmth.
These cookies aren’t just delicious—they’re a mood-enhancing experience that makes every bite feel like a little celebration. 💛
Nutrition facts
Frequently asked questions
Why do these cookies need 24 hours to develop flavor?
The overnight chill time allows the flour to fully hydrate and the flavors to meld together. The cold temperature also helps relax the gluten, creating that perfect chewy texture. Think of it like steeping tea—the longer it rests, the more complex and delicious the result!
Can I make these cookies without the 24-hour wait?
You can shorten the resting time to 6-8 hours for decent results, but the texture won’t be as tender. The full 24 hours is ideal for maximum flavor development and that signature chewy center. If you’re short on time, try chilling overnight and baking the next morning for best results.
How do I prevent my cookies from spreading too much?
Use chilled dough balls and place them 2 inches apart on the baking sheet. Bake at 350°F for 10-12 minutes—don’t overbake! The edges should be golden while the centers remain soft. If your oven runs hot, reduce the temperature by 25°F and check at 9 minutes.
Can I freeze the dough for later use?
Portion the dough into 16 equal balls and freeze them on a tray before transferring to a sealed bag. Frozen dough keeps for 3 months. Bake straight from frozen, adding 1-2 extra minutes to the baking time. The texture will be just as good as fresh!
What’s the secret to getting that perfect chewy center?
The combination of brown sugar, vanilla bean seeds, and the 24-hour rest creates the ideal moisture balance. Bake until edges are golden but centers still look slightly underdone—they’ll firm up as they cool. The heavy cream and milk in the dough also contribute to that melt-in-your-mouth texture.

- 3lb Prime Rib Roast Recipe: Juicy Pink Center Guaranteed in 3 Hours - October 31, 2026
- 5 Spice Cake Recipe: Warmly Spiced Layers With Crunchy Top - October 31, 2026
- 1950’s Macaroni and Cheese Recipe: Nostalgic Creamy Cheese Sauce with Buttery Noodles - October 31, 2026