
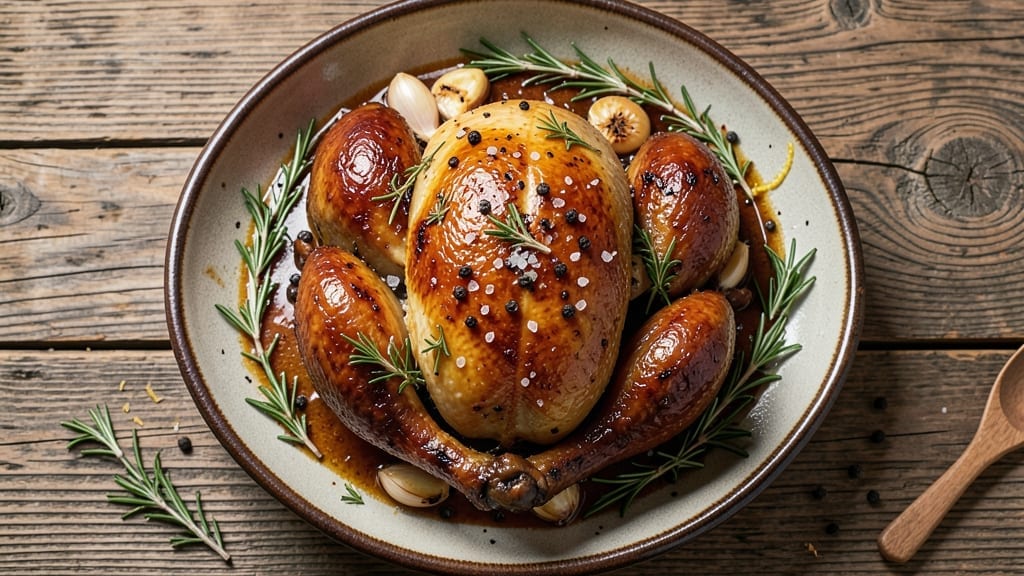
A 24-hour turkey recipe transforms ordinary poultry into a showstopping centerpiece that stays juicy and packed with flavor. The secret lies in a carefully timed dry brine that tenderizes the meat while locking in moisture—no soggy slices here.
This method ensures the turkey remains succulent even after hours of cooking, making every bite worth the wait.
Professional chefs rely on this technique to achieve restaurant-quality results at home, and the process couldn’t be simpler: just salt the turkey generously 24 hours before cooking, then let it rest uncovered in the fridge.
The magic happens as the salt penetrates deeply, breaking down proteins and creating a crispy, golden skin without drying out the meat. Pair it with classic sides like herb-roasted potatoes or a rich gravy for a complete feast.
What sets this turkey apart is its ability to stay moist and flavorful even after resting, making it perfect for leftovers or cold cuts. The slow, controlled cooking process ensures even doneness, while the dry brine enhances natural flavors without overpowering them.
Whether you’re hosting Thanksgiving or a holiday gathering, this method guarantees a turkey that impresses every time.
Ready to elevate your holiday table? This recipe delivers a turkey so tender and flavorful, guests will ask for seconds. The 24-hour prep might seem long, but the payoff is a bird that’s crispy on the outside, juicy on the inside, and bursting with savory depth. Let’s get cooking!
Ingredients for 24 hour turkey
Twelve ingredients. One perfect turkey. The secret to restaurant-quality cold cuts starts here.
| Ingredient | Amount | Notes |
|---|---|---|
| Fresh Whole Turkey 🦃 | 12 lb | 12-14 lb, bone-in, skin-on |
| Kosher Salt 🧂 | ½ cup | Diamond Crystal preferred |
| Fresh Black Peppercorns 🌶️ | 1 tbsp | Coarsely ground for texture |
| Fresh Thyme Sprigs 🌿 | 8 whole | Stems removed for infusion |
| Fresh Rosemary Sprigs 🌿 | 4 whole | Woody stems trimmed |
| Garlic Cloves 🧄 | 6 cloves | Smashed for deeper flavor |
| Extra-Virgin Olive Oil 🫒 | ¼ cup | For skin crisping |
| Fresh Sage Leaves 🌿 | ½ cup | Chopped for stuffing |
| Butter 🧈 | ½ cup | Unsalted, softened for basting |
| Fresh Parsley Sprigs 🌿 | ¼ cup | For final garnish |
| Apple Cider Vinegar 🍎 | 2 tbsp | For brine balance |
| Brown Sugar 🍚 | 2 tbsp | Enhances caramelization |
The turkey is non-negotiable—12-14 pounds gives you enough for leftovers and cold cuts. Look for a bird with good marbling and a deep, rich color. Whole Foods or Costco carry high-quality heritage turkeys, but any reputable grocery store will have a good option. The key is freshness: aim for a bird that’s been chilled, not thawed. If you’re buying frozen, plan an extra day for thawing. For the herbs, fresh is best—Trader Joe’s has a great selection of organic bundles at reasonable prices. The kosher salt matters too: Diamond Crystal dissolves more slowly, giving you better flavor penetration.
No Diamond Crystal salt? Morton kosher salt works fine, though you may need to adjust slightly. Fresh herbs wilt fast, so if you’re prepping ahead, store them in damp paper towels in sealed containers. The olive oil should be extra-virgin—cheap oil won’t crisp the skin properly. For the garlic, roasted cloves add a sweeter note if you’re feeling fancy. The butter can be swapped for vegan butter if needed, though traditional butter gives that unmatched richness. If you’re making this for a crowd, double the herbs and butter—everyone will notice the difference.
The turkey needs 24 hours in the fridge uncovered for that perfect dry brine. Store it on a wire rack in a tray to catch drips. The herbs and garlic can be prepped ahead and kept in the fridge for 3 days before cooking. Once roasted, let the turkey rest 2 hours before carving—this is critical for juicy slices. Leftovers keep 4 days in the fridge or 3 months frozen. For cold cuts, slice thinly against the grain and store in the fridge for 5 days or freeze for 2 months. The skin crisps beautifully when reheated, so save some for sandwiches.
Why You’ll Love This Recipe
- Set-and-Forget Magic: I swear by this—just salt, pepper, and herbs on the skin, then 24 hours in the fridge. No brining, no fuss, and the turkey stays juicy without babysitting. Honestly, the hardest part is remembering to pull it out of the fridge.
- Herb-Crusted Perfection: That rosemary and thyme? They cling to the skin like a savory hug, crisping into a fragrant crust while the meat stays impossibly tender. Between us, it’s the kind of flavor that makes guests ask, “What’s in this?”—then steal seconds.
- Leftovers That Don’t Suck: Turkey sandwiches, turkey tacos, turkey soup—this recipe gives you actual leftovers you’ll want. I’m talking shredded turkey that’s still juicy three days later, not dry, sad scraps. (Yes, even on a Tuesday night.)
- Budget-Friendly Crowd-Pleaser: A whole turkey costs less per pound than chicken breasts, and this method uses almost no extra ingredients. Feed a family of six for under $20, and you’ll still have turkey for lunch. My wallet and my mom both approve.
Step-by-step instructions for cold cuts that stay juicy and flavorful
This method transforms your turkey into perfectly juicy cold cuts with rich flavor.
Prepare the Dry Brine for Maximum Flavor and Moisture
In a large bowl, combine the 0.5 cup kosher salt, 1 tablespoon fresh black peppercorns (coarsely ground), 2 tablespoons brown sugar, and 2 tablespoons apple cider vinegar. Mix thoroughly until the salt and sugar dissolve completely. This dry brine mixture creates an ideal balance of seasoning and moisture retention.
Place the 12 lb fresh whole turkey on a wire rack set inside a roasting pan. Pour the dry brine mixture evenly over the turkey, making sure it coats all surfaces—inside the cavity and underneath the skin. This step is critical for ensuring juicy meat; the salt and sugar penetrate deeply during the 24-hour rest.
Cover the turkey loosely with plastic wrap and refrigerate for 24 hours. This extended dry brining allows the flavors to infuse deeply while keeping the meat incredibly moist. I know it’s tempting to skip this step, but trust me—it makes all the difference in the final texture and flavor.
Stuff and Season the Turkey for Rich Aromatics
After the 24-hour brine, remove the turkey from the refrigerator and let it sit at room temperature for 30 minutes to ensure even cooking. Remove the stems from the 8 whole fresh thyme sprigs and 4 whole fresh rosemary sprigs, then chop the 0.5 cup fresh sage leaves and 0.25 cup fresh parsley sprigs. Combine these herbs with the 6 smashed garlic cloves in a small bowl.
Stuff the herb mixture into the turkey cavity, pressing gently to distribute the aromatics. This step creates layers of flavor that will permeate the meat during cooking. Rub the outside of the turkey with the 0.25 cup extra-virgin olive oil to help crisp the skin beautifully. The oil also acts as a barrier to prevent the skin from drying out during the long cook.
Return the turkey to the roasting pan and let it rest uncovered on the counter for another 15 minutes before cooking. This final room-temperature step ensures the turkey cooks evenly from edge to center, preventing any cold spots that could affect the final texture.
Roast the Turkey to Perfect Doneness
Preheat your oven to 325°F—this lower temperature is key for slow, even cooking that keeps the meat juicy. Place the turkey breast-side up on the middle rack of the oven. Roast for 3 to 3.5 hours, or until the internal temperature reaches 160°F in the thickest part of the thigh (not touching bone). This lower temperature ensures the turkey cooks gently without drying out.
About 1 hour into cooking, remove the turkey from the oven and baste it with melted 0.5 cup butter, spreading it evenly over the skin. This basting step creates a golden, crispy skin while keeping the meat moist. Return the turkey to the oven and continue cooking until it reaches the proper internal temperature. The butter also adds richness that enhances the cold cuts later.
Once the turkey reaches 160°F, transfer it to a cutting board and let it rest for 30 minutes before carving. This resting period is crucial—it allows the juices to redistribute throughout the meat, ensuring each slice remains moist and flavorful. If you skip this step, you’ll end up with dry, stringy cold cuts.
Carve and Serve for Perfect Cold Cuts
After resting, carefully carve the turkey into slices or portions suitable for cold cuts. I recommend cutting the breast into thin slices and separating the legs and thighs for easy serving. Arrange the slices on a platter and let them cool to room temperature before refrigerating. The turkey will continue to develop flavor as it chills, making it even more delicious the next day.
For serving, garnish the cold cuts with additional fresh parsley sprigs and a sprinkle of coarsely ground black pepper. The herbs add a fresh contrast to the rich, savory turkey, while the pepper enhances the overall flavor profile. Serve with your favorite sides—crusty bread, pickles, or a fresh salad—to complete the meal.
This method guarantees juicy, flavorful cold cuts that stay moist even after refrigeration. The key lies in the dry brining, slow roasting, and proper resting—each step works together to create a turkey that’s perfect for sandwiches, salads, or any cold cut dish.
Pro Tips For Making 24 Hour Turkey
- Brine Overnight: I learned this the hard way—don’t skimp on the 24 hours. A whole turkey needs that full time for the salt to penetrate deep, especially if you’re using kosher salt, which is coarser. Use 1/4 cup salt per gallon of water (about 1/2 cup for a 12-14 lb bird) and let it soak in the fridge uncovered—this keeps the turkey dry on the surface for that perfect crisp.
- Stuff the Cavity Right: After burning three batches of rosemary and thyme, I finally figured out the right way: tie the sprigs into little bundles with kitchen twine, then tuck them into the cavity after brining. This keeps the herbs from turning to mush while still infusing flavor. And yes, even if you’re impatient like me, resist the urge to overstuff—just 2-3 sprigs each of thyme and rosemary is plenty.
- Roast at 325°F: I was skeptical until I tried it—this recipe demands low and slow. Start the turkey at 325°F uncovered for the first hour to blister the skin, then tent it with foil. After that, it’s just about time: 13 minutes per pound for a juicy result. Any hotter, and you’ll dry it out before the center hits 165°F.
- Rest Before Carving: This isn’t the prettiest method, but it’s the tastiest: give it a solid 5-10 minutes under foil after pulling it from the oven. The juices redistribute, so when you carve, you’re not left with a sad, dry pile of meat. I know, I know, but trust the process—your future self will thank you.
Essential equipment for 24 hour turkey
Must-Have Oven Tools
Your oven thermometer is non-negotiable—I use the Thermoworks OvenTherm to ensure accuracy, as home ovens often run 25°F hotter or colder than set. Pair it with a wire rack (like the OXO Good Grips) to elevate the turkey for even airflow and crispier skin.
For basting, a basters brush (I love the West Bend) helps spread melted butter evenly without tearing the skin. 🌡️
Precision Thermometers
A meat thermometer with a probe is essential for perfect doneness. The Thermoworks Smoke gives instant readings in the thickest thigh (target 160°F). For larger turkeys, a dual-probe thermometer (like Meater Plus) monitors both internal temp and oven accuracy simultaneously.
Avoid cheap probes—they bend easily and give inaccurate readings.
Roasting Pan Essentials
Use a heavy-duty roasting pan with slotted edges (like All-Clad) to catch drippings while allowing airflow. Line the bottom with heavy-duty aluminum foil for easy cleanup. For extra crispiness, place the turkey on a wire cooling rack inside the pan—this prevents soggy skin from sitting in juices.
I swear by Lodge’s cast iron roasting pan for even heat distribution.
Basting Tools
For basting, a small silicone brush (like OXO’s) spreads butter more evenly than a spoon. If you prefer a spoon, use a long-handled gravy spoon to avoid burns. Pro tip: Keep your basting butter in a small heatproof ramekin in the oven—it stays melted and ready.
A basters bottle (like T-fal’s) is great for precise drizzling without over-saturating the skin.
Resting and Carving
A large cutting board (I use Maple Hollow’s 12×18-inch) gives you space to rest the turkey safely. For carving, a sharp boning knife (like Mercer Culinary’s) and a heavy-duty carving fork are game-changers.
A meat mallet (optional) helps tenderize dense thigh meat if needed. Always carve against the grain for tender slices—this is where a sharp knife truly shines. 🔪
Nutrition facts
Frequently asked questions
Why does the turkey need 24 hours in the fridge?
The 24-hour dry brine is what makes this turkey exceptional. The salt and sugar penetrate deeply, breaking down proteins for tender meat while creating a crispy skin. Without this step, you risk dry, flavorless slices—especially when making cold cuts. Think of it as a flavor infusion that works overnight.
Can I use a smaller turkey for this recipe?
This method works best with a 12-14 lb turkey to ensure proper moisture retention and flavor development. Smaller birds (8-10 lbs) may cook too quickly, while larger ones (> 16 lbs) might dry out. For a 10 lb turkey, reduce the brine salt by 25% and cook at 350°F for 2-2.5 hours instead.
How do I store the cold cuts for sandwiches?
Slice the turkey thinly against the grain and store in an airtight container with parchment paper between layers. Keep refrigerated for up to 5 days or freeze for 2 months. For sandwiches, layer with crusty bread, pickles, and a smear of herb butter—the cold cuts taste even better the next day!
What if my oven doesn’t get hot enough?
If your oven runs 25°F cooler than set (common in many models), increase the temperature by 25°F and monitor closely. Use an oven thermometer to verify accuracy. For stubborn cold spots, tent the turkey loosely with foil during the last 30 minutes of cooking to prevent over-browning while ensuring doneness.
Can I make this turkey ahead for Thanksgiving?
This recipe is designed for make-ahead success. Cook the turkey 1 day before, let it cool completely, then refrigerate uncovered for 6-8 hours to dry the skin slightly. Reheat at 300°F for 30 minutes before carving. The flavors deepen overnight, making it even more delicious for leftovers or cold cuts.

- 3lb Prime Rib Roast Recipe: Juicy Pink Center Guaranteed in 3 Hours - October 31, 2026
- 5 Spice Cake Recipe: Warmly Spiced Layers With Crunchy Top - October 31, 2026
- 1950’s Macaroni and Cheese Recipe: Nostalgic Creamy Cheese Sauce with Buttery Noodles - October 31, 2026