
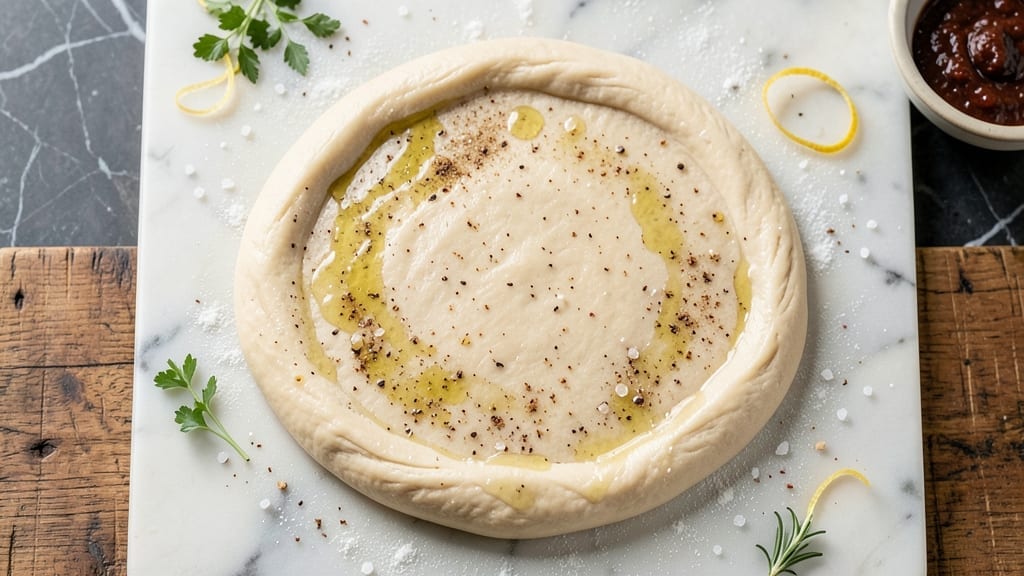
This 24-hour pizza dough recipe delivers restaurant-quality crust with minimal effort—no kneading required. The secret lies in slow fermentation, which develops deep flavor and that coveted airy, crispy texture.
I’ve perfected this method after years of experimenting, and it consistently yields dough that’s easier to handle and far more flavorful than store-bought or rushed recipes.
The beauty of this approach is its simplicity: just mix, rest, and shape. The dough develops its signature texture and flavor during the 24-hour cold proof, a process that requires no active work from you.
This method also makes the dough more forgiving—it’s less likely to overproof, and the flavor complexity grows with time. Perfect for busy cooks who want professional results without the fuss.
By the time you’re ready to bake, you’ll have dough that’s crispy on the outside, tender inside, and packed with that authentic pizza aroma. The slow fermentation breaks down the gluten and sugars, creating a crust that’s both sturdy enough to hold toppings and light enough to fold easily.
This is the kind of dough that makes pizza night feel like a celebration, not a chore.
Whether you’re making classic Margherita or loaded deep-dish, this dough handles it all. The recipe includes troubleshooting tips to ensure success, like adjusting hydration for your climate or recognizing signs of overproofing. Let’s get started on creating dough that’ll make your pizza the star of any meal.
Ingredients for 24h pizza dough
Nine simple ingredients transform into restaurant-quality pizza dough with just time and patience.
| Ingredient | Amount | Notes |
|---|---|---|
| All-Purpose Flour 🌾 | 4 cups | High-protein preferred for chewiness |
| Active Dry Yeast 🍞 | ¼ oz | Or 2.25 tsp (1 packet) |
| Granulated Sugar 🍬 | ½ tbsp | Feeds yeast for activation |
| Diamond Crystal Kosher Salt 🧂 | 1 ½ tsp | Adjust to taste |
| Extra-Virgin Olive Oil 🫒 | 1 ½ tbsp | For dough surface coating |
| Warm Water 💧 | 1 ½ cups | 105-110°F for yeast activation |
| Semolina Flour 🌾 | ½ cup | For dusting and rolling |
| Cornmeal 🌽 | ¼ cup | For pizza peel preparation |
| Garlic Powder 🧄 | ½ tsp | Optional for flavor boost |
| Dried Italian Seasoning 🌿 | ½ tsp | Or 1 tsp fresh basil |
| Cold Water ❄️ | ½ cup | For final dough adjustment |
Flour is the foundation here—King Arthur or Caputo are my go-tos for that perfect balance of chew and airiness. If you’re using bread flour, reduce by 1/4 cup since it’s higher protein. The yeast matters too: Saf-Instant works great, but regular active dry yeast needs activation in warm water first. Store your flour in the freezer to preserve freshness—it keeps for 6-12 months this way. For the olive oil, California Extra Virgin brands have that perfect fruity note that translates beautifully into the dough’s flavor profile.
No semolina? All-purpose flour works in a pinch, though it won’t give the same crispy texture. The cornmeal is non-negotiable for your pizza peel—it prevents sticking better than anything else. Short on Italian seasoning? Dried oregano plus a pinch of red pepper flakes mimics that classic pizza flavor. The garlic powder is optional but worth it for that subtle depth. For the water, filtered is best—tap water with strong chlorine taste can inhibit yeast activity. If your dough feels too sticky after mixing, add cold water 1 tbsp at a time until it’s just manageable.
This dough keeps beautifully in the fridge for up to 3 days after mixing—perfect for meal prep. For longer storage, portion into balls, wrap tightly in plastic, and freeze for up to 3 months. The cold proof is where the magic happens: place your shaped dough in the fridge overnight, and it’ll develop that perfect open crumb structure. When you’re ready to bake, let it sit at room temperature for 30-60 minutes before shaping—this makes it much more pliable. The dough doubles in flavor after the cold proof, so don’t skip it!
Why You’ll Love This Recipe
- Crispy-Chewy Magic: That perfect balance? The kosher salt and olive oil work together to give you a crust with a golden, shatteringly crisp edge and a pillowy center—no sad, dense pizza here.
- Weeknight Superstar: Need dinner in a flash? This dough keeps for days in the fridge, so you can prep ahead and throw together a pizza whenever life gets chaotic. (Yes, even on a Tuesday night.)
- Budget-Friendly Flex: Flour, yeast, and olive oil? You already have these. No specialty ingredients, no breaking the bank—just reliable, delicious dough that stretches your dollar without sacrificing flavor.
Step-by-step instructions for 24-Hour pizza dough
This zero-knead method delivers professional-quality crust with minimal effort—just mix, wait, and shape.
Activate the Yeast and Mix the Dough
In a large mixing bowl, combine the 4 cups all-purpose flour, 1.5 tsp diamond crystal kosher salt, 0.5 tbsp granulated sugar, 0.5 tsp garlic powder, and 0.5 tsp dried Italian seasoning. Stir to distribute the dry ingredients evenly. This creates the perfect foundation for flavor and texture.
In a separate small bowl, dissolve the 0.25 oz active dry yeast in the 1.5 cups warm water (should feel like bathwater, 105-110°F). Let it sit for 5-10 minutes until frothy—this confirms the yeast is active. If it doesn’t foam, your yeast is dead and needs replacing. Pour the yeast mixture into the dry ingredients along with the 1.5 tbsp extra-virgin olive oil. Stir with a wooden spoon until a shaggy dough forms that pulls away from the bowl sides.
Rest and Develop Gluten Overnight
Cover the bowl tightly with plastic wrap or a damp kitchen towel. Let the dough rest at room temperature for 24 hours. This long fermentation develops complex flavors and creates a light, airy texture without any kneading. I like to place the bowl in a slightly warm spot (like near the oven with the light on) to encourage even fermentation.
After 24 hours, the dough should have roughly doubled in size and look puffy with small bubbles on the surface. If it hasn’t risen much, it may need another 4-6 hours—but don’t exceed 30 hours total or the yeast will overproof. Press your finger gently into the dough; it should spring back slowly rather than immediately.
Shape and Prepare for Baking
Turn the dough onto a lightly floured surface and divide it into 4 equal portions (about 1 pound each). Gently shape each portion into a ball by tucking the edges underneath. I find using wet hands helps prevent sticking. Place the dough balls on a floured surface, cover with a damp towel, and let them rest for 30 minutes at room temperature. This final rest makes stretching easier.
During this time, preheat your oven to its highest setting (500°F+ if possible). Generously dust a pizza peel or baking sheet with semolina flour and a light layer of cornmeal—this prevents sticking and adds that classic crispy texture. The semolina also helps create that beautiful golden crust we’re after.
Stretch and Bake to Perfection
Work with one dough ball at a time. Dip your fingers in water and gently press the center of the dough ball outward, rotating as you go. Stretch the dough until it reaches your desired thickness—about ¼ inch for a classic Neapolitan-style crust. If the dough resists, let it rest another 5 minutes and try again. Resist the urge to pull too hard; patience prevents tearing.
Transfer the stretched dough to your prepared peel or baking sheet. Top with your favorite sauce, cheese, and toppings, keeping it simple if you’re new to pizza making. Bake for 10-15 minutes until the crust is golden brown and the cheese is bubbly. For extra crispiness, I like to finish under the broiler for 1-2 minutes—just watch it closely to avoid burning.
Pro Tips For Making 24h Pizza Dough
- Measure Salt Precisely: Diamond Crystal kosher salt is not the same as table salt—use 1½ teaspoons, not 1 tablespoon. I learned this the hard way when my dough turned out flat and flavorless after eyeballing it. Weigh it out if you’re unsure; your crust will thank you.
- Hydrate the Yeast Properly: Mix the yeast with warm (not hot) water and sugar first, then wait exactly 5–10 minutes until it foams before adding flour. Cold water kills it; hot water cooks it. Skip this step, and your dough will rise like a sad deflated balloon.
- Oil the Bowl Generously: Coat your mixing bowl with at least 1 tablespoon of extra-virgin olive oil—don’t skimp. This prevents the dough from sticking when it doubles in size, and it adds a subtle richness. (Yes, even if you’re not using it for the final crust.)
- Cold Proof Overnight: After the first rise, shape the dough and refrigerate it covered for 24 hours. The cold slows fermentation, deepens flavor, and makes stretching easier. I used to forget this and end up with dough that springs back like a rubber band—now it’s always cooperative.
Pro cooking tips for perfect results
Cold Proofing Secrets
The 24-hour cold proof is where this dough transforms from good to extraordinary. Place your shaped dough balls in an airtight container or sealed plastic bag and refrigerate overnight. The cold slows fermentation, allowing gluten to relax and develop that signature open crumb structure.
I like to use glass Pyrex containers because they prevent freezer burn and are easy to clean. Pro tip: Leave ½ inch of space at the top—dough expands as it proofs. 🥶
For best results, let the dough sit at room temperature for 30-60 minutes before stretching. This final warm-up makes the dough more pliable and easier to handle. If your kitchen is cold, extend this to 60 minutes—the dough should feel slightly springy when pressed gently.
Never skip this step, as cold dough tears easily when stretched.
Hydration Adjustments
This dough recipe has a 65% hydration ratio (1.5 cups water to 4 cups flour), which is ideal for most climates. If you live in a humid environment, reduce water by 1 tablespoon to prevent stickiness.
Conversely, in dry climates, add 1 tablespoon water for a softer, more extensible dough. I test hydration by hand: if the dough feels tacky but not wet, it’s perfect. 💧
For extra insurance, keep a small bowl of cold water nearby while shaping. Dip your fingers in it before stretching—this prevents sticking and makes the dough more manageable. If your dough feels too stiff, let it rest uncovered for 10 minutes at room temperature before attempting to stretch.
Oven Preheating Mastery
Your oven’s maximum temperature is key to that perfect crispy crust. Preheat for at least 60 minutes before baking—this ensures consistent heat distribution. For best results, use a pizza stone or steel on the lowest oven rack.
If you don’t have one, a perforated baking sheet works in a pinch. I like to place a small cast-iron skillet on the upper rack to create steam—this mimics wood-fired ovens and improves crust texture. 🔥
For even crispier results, try this hack: After preheating, place a metal bowl filled with boiling water on the oven floor for 5 minutes before baking. The steam helps develop a better oven spring.
Just remove it before adding your pizza to avoid soggy bottoms. Monitor your oven’s temperature with a thermometer—it should read 500°F+ at the start of baking.
Stretching Like a Pro
Stretching dough is all about gentle pressure and rotation. Start by dimpling the center of a dough ball with your fingers, then slowly rotate the peel while pulling outward. If the dough resists, let it rest 5 minutes—it needs time to relax.
I find using wet hands (not floury) prevents sticking and gives me better control. For thicker crusts, stretch to ⅜ inch thickness; for thin crusts, aim for ¼ inch. 🍕
If your dough tears, don’t panic—just smooth it out with your fingers. For extra strength, sprinkle a pinch of flour on the tear before stretching. Another pro trick: Use a rolling pin for the final stretch if needed, but only on one side to avoid flattening the dough completely.
The goal is to create even tension throughout, which ensures even baking.
Nutrition facts
Frequently asked questions
Can I use bread flour instead of all-purpose flour?
Yes, but reduce the amount by ¼ cup since bread flour has higher protein content. For 4 cups all-purpose, use 3¾ cups bread flour to maintain the same texture. The extra protein can make the dough tougher if you don’t adjust. This works best for chewier crusts like deep-dish pizza.
What if my dough doesn’t rise after 24 hours?
Check your yeast first—it may be dead. Replace it with fresh active dry yeast and let it sit in warm water for 5-10 minutes until frothy. If the yeast is fine, try placing the dough in a warmer spot (like near your oven with the light on) for 4-6 more hours. Avoid exceeding 30 hours total or the dough will overproof.
How do I store leftover dough?
Shape the dough into balls, wrap tightly in plastic wrap, and refrigerate for up to 3 days. For longer storage, freeze the wrapped balls for up to 3 months. Thaw in the fridge overnight before using. The cold proof can be skipped if using frozen dough—just let it sit at room temperature for 1-2 hours before shaping.
Why does my crust turn out dense instead of crispy?
This usually happens from underproofing or insufficient oven heat. Let the dough proof longer (up to 30 hours max) and preheat your oven to 500°F+ for at least 60 minutes with a pizza stone or steel. For extra crispiness, bake on the highest rack and finish under the broiler for 1-2 minutes.
Can I make this dough in a slow cooker?
Mix the dough as directed, then place it in a greased slow cooker covered with a damp towel. Cook on low for 12-14 hours (or high for 6-8 hours). This method creates a tender, slightly chewy crust perfect for thick-topped pizzas. Just shape and bake as usual after proofing.

- 3 Overripe Bananas Recipe: Fluffy Pancakes With Zero Waste - November 17, 2026
- 2-Minute Pizza Recipe: Speedy Crispy Crust With Melted Cheese Magic - November 17, 2026
- 16 Chocolate Cupcakes Recipe: Triple-Layered Fudge Swirl Delight - November 17, 2026