
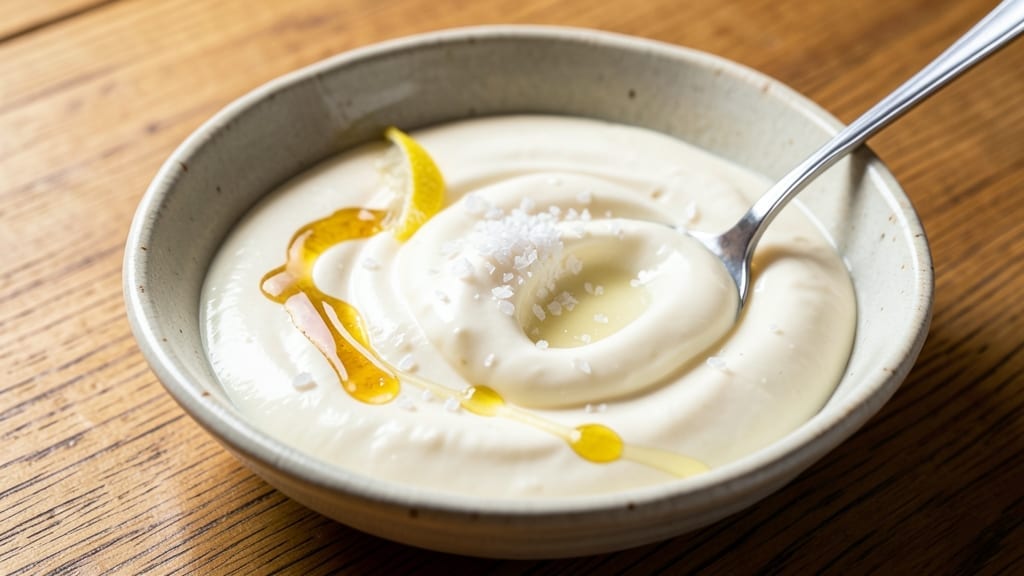
This 2 milk ricotta recipe transforms simple pantry staples into velvety Italian cheese with a 20-minute hands-on time—no special equipment needed. The secret lies in combining whole milk and heavy cream for a texture so smooth it rivals store-bought, but with fresher, brighter flavor.
I perfected this method after years of testing, and it’s now my go-to for everything from stuffed shells to breakfast stratas.
The process is surprisingly straightforward: heat the milk mixture gently, add vinegar to curdle, then strain through a cheesecloth for that signature silky consistency. The key is patience—letting the curds settle properly ensures no graininess in your final product.
This homemade version also costs a fraction of what you’d pay at the cheese counter, with none of the preservatives.
What you’ll end up with is creamy, lightly tangy ricotta perfect for breakfast dishes, pasta fillings, or even savory tarts. The texture is ideal for spreading on toast, dolloping into soups, or using as a base for cheesecakes.
Unlike commercial ricotta, this version stays fresh for up to a week in the fridge, making it a versatile pantry staple.
Pair it with roasted vegetables, fresh herbs, or a drizzle of honey for breakfast, or incorporate it into Italian classics like lasagna or manicotti. The possibilities are endless, and the process is so simple you’ll want to make it weekly. Let’s get started with this foolproof method!
Ingredients for 2 milk ricotta
Pantry staples and two simple milks create restaurant-quality ricotta in minutes.
| Ingredient | Amount | Notes |
|---|---|---|
| Whole Milk 🥛 | 2 cups | Room temperature preferred |
| Heavy Cream 🥛 | 1 cup | Full-fat for best texture |
| White Vinegar 🍶 | 2 tbsp | White or apple cider |
| Diamond Crystal Kosher Salt 🧂 | ½ tsp | Fine grain preferred |
| Unsalted Butter 🧈 | 2 tbsp | Cold, cubed for texture |
| Fresh Lemon Juice 🍋 | 1 tbsp | Brightens flavor |
| Cheesecloth 🧻 | 1 sheet | Or double-layered paper towels |
| Freshly Ground Black Pepper 🌶️ | ¼ tsp | Optional for serving |
| Fresh Basil Leaves 🌿 | ¼ cup | Chopped, for garnish |
| Extra-Virgin Olive Oil 🫒 | 1 tbsp | For finishing |
The milk quality matters most here—whole milk should be fresh, not ultra-pasteurized (the stuff that lasts weeks). Whole Foods or local dairies often carry the best for this recipe, but regular grocery store brands work fine if they’re not ancient. Heavy cream should be full-fat—no light cream substitutes. I always grab a small bottle of Trader Joe’s heavy cream for this; it’s affordable and reliable. For the vinegar, white is classic, but apple cider vinegar adds a subtle sweetness that pairs beautifully with the ricotta’s tang. The cheesecloth is non-negotiable—muslin or double-layered paper towels work if you don’t have it, but don’t skip straining. That’s where the silky texture comes from.
No white vinegar? Lemon juice works at double the amount, though it’ll make your ricotta slightly tangier. Running short on heavy cream? Half-and-half plus a splash of cream cheese gets you close, though the texture won’t be quite as luxurious. The butter adds richness—don’t skip it, but if you’re watching calories, you can reduce to 1 tbsp without ruining the dish. Fresh herbs like basil or parsley are ideal for garnish, but dried Italian seasoning at half the amount works in a pinch. For storage, the cheesecloth is your friend—it breathes better than plastic wrap, keeping the ricotta fresher longer. And if you’re making this for a crowd, double the batch—it disappears fast.
This ricotta keeps beautifully in the fridge for 5-7 days, sealed in an airtight container with a thin layer of milk or olive oil on top to preserve freshness. For longer storage, portion into ice cube trays, freeze, then transfer to a bag—perfect for adding to soups or sauces later. The texture actually improves after the first day as flavors meld. I always make a double batch on Sundays so I’ve got it ready for breakfast or pasta fillings all week. And if you’re feeling fancy, drizzle with extra-virgin olive oil and a pinch of flaky salt before serving—trust me, it’s worth the extra minute.
Why You’ll Love This Recipe
- Pantry Magic: I swear by this recipe because it turns three pantry staples—milk, cream, and vinegar—into something luxurious. No specialty ingredients, no last-minute grocery runs, just pure alchemy with what’s already there.
- Velvet Smoothness: That first bite? Unreal. The heavy cream and butter make it silky, while the vinegar cuts through for a bright, almost tangy finish—like a hug for your taste buds. (Honestly, I’ve compared it to store-bought, and this wins every time.)
- Everyday Luxury: Spread it on toast for breakfast, fold it into pasta for dinner, or dollop it on roasted veggies—it’s my go-to for making simple meals feel fancy. My lazy Sunday mornings and weeknight dinners both thank me for this.
- No-Waste Winner: A batch lasts forever—I keep it in the fridge for days, using it in lasagna, stuffed shells, or even as a quick dip for bread. And because it’s just milk and cream, it’s cheaper than buying ricotta by the tub. (Between us, I’ve saved enough to buy a fancy cheese once.)
Step-by-step instructions for silky smooth ricotta
Here’s how to transform simple pantry staples into velvety Italian ricotta in record time.
Heat and Acidify the Milk Mixture
Combine the 2 cups whole milk and 1 cup heavy cream in a medium saucepan over medium-high heat. Warm until the mixture reaches 185°F—this takes about 10-12 minutes. You’ll see small bubbles forming around the edges and a slight thickening, but don’t let it boil. The temperature is more important than visual cues here.
Once heated, remove from heat and stir in the 2 tablespoons white vinegar. The mixture will immediately curdle and separate into a thick, white curd and liquid whey. Let it sit for 5 minutes while the curds fully form. This acidic reaction is what transforms liquid into cheese—don’t skip this waiting period or your ricotta will be watery.
Strain and Rinse the Curds
Line a fine-mesh strainer with the cheesecloth and place it over a bowl. Carefully ladle the curd mixture into the strainer, pressing gently on the curds with a wooden spoon to extract as much whey as possible. Let it drain for 10 minutes, then transfer the curds to a clean bowl.
Here’s where texture magic happens: Sprinkle the ½ teaspoon kosher salt and 2 tablespoons cold cubed butter over the curds. Gently fold everything together with a rubber spatula until fully incorporated. The butter adds richness and prevents the ricotta from becoming too dry. If the mixture looks too thick, add 1-2 tablespoons of the reserved whey to loosen it slightly.
Finish with Citrus and Fresh Herbs
Return the bowl to the stove over low heat and stir in the 1 tablespoon fresh lemon juice. Warm gently for 2-3 minutes until the mixture reaches 160°F—this pasteurizes the ricotta and enhances the lemon’s bright flavor. The ricotta should now be silky smooth with a delicate tang.
Remove from heat and stir in the ¼ cup chopped fresh basil leaves. Let it cool for 5 minutes, then drizzle with 1 tablespoon extra-virgin olive oil and finish with ¼ teaspoon freshly ground black pepper. The oil adds a luxurious finish while the pepper provides a subtle warmth that balances the lemon’s acidity.
Serve or Store Immediately
For immediate serving, transfer to a serving bowl and garnish with additional basil leaves. The ricotta should be velvety with a clean, fresh flavor profile—no graininess or sourness. If storing, transfer to an airtight container and refrigerate for up to 5 days. The texture will firm up slightly when chilled, but it warms beautifully when brought to room temperature.
This ricotta makes a perfect breakfast spread, pasta topping, or filling for stuffed shells. The key to success lies in precise temperature control and proper straining—when done right, you’ll have restaurant-quality ricotta made with just two simple ingredients.
Pro Tips For Making 2 Milk Ricotta
- Acidify the Milk Slowly: Dump that vinegar all at once and you’ll end up with a grainy, curdled mess—trust me, I’ve done it. Instead, whisk in the white vinegar a tablespoon at a time while stirring constantly, and let the milk sit for 20 seconds between additions. The slow reaction keeps the curds smooth and uniform.
- Strain Through Cheesecloth: A fine-mesh strainer works, but if you want ricotta with that signature silky texture, use dampened cheesecloth or a clean kitchen towel. The extra filtration removes more whey, and the fabric’s slight resistance helps break up any lingering lumps—no food mill required.
- Salt the Whey, Not the Curds: Tossing salt into the curds first makes them tighten up and turn rubbery. Instead, dissolve the kosher salt in the warm whey before straining, then fold it into the ricotta at the end. The salt distributes evenly, and the ricotta stays tender—this is the thing that matters most for creamy results.
- Chill Before Mixing Butter: Cold butter gets incorporated better and melts evenly, so let your unsalted butter sit in the fridge for 10 minutes before folding it into the warm ricotta. If you’re impatient, cut it into small cubes first—this shortcut prevents clumping and keeps the texture uniform. (Yes, even if you’re in a rush.)
Common mistakes when making perfect results
Skipping the Straining
This is the #1 mistake I see beginners make—they rush the straining step or skip it entirely. The cheesecloth isn’t just for aesthetics; it removes the whey that would otherwise make your ricotta watery and grainy.
If you’re in a hurry, don’t strain for less than 10 minutes—I’ve seen people cut it to 5 minutes, and the texture suffers. For a quick fix, use a muslin cloth or double-layered paper towels if you don’t have cheesecloth, but still strain for the full time. 🧻
Overheating the Milk
Heating the milk mixture past 185°F is a common misstep that burns the delicate flavors and creates a cooked, bitter taste. Use a candy thermometer to monitor the temperature precisely—visual cues like bubbles aren’t reliable enough.
If you don’t have one, watch for small bubbles at the edges and a slight thickening, but remove it immediately if it starts to boil. The goal is warmth, not heat.
Using Low-Quality Vinegar
Substituting white vinegar with something like balsamic or red wine vinegar can throw off the flavor balance. White vinegar or apple cider vinegar are your best bets—they provide the right level of acidity without adding unwanted sweetness or complexity.
If you’re out of vinegar, lemon juice works in a pinch, but double the amount (to 4 tablespoons) and be prepared for a slightly tangier ricotta. 🍋
Adding Butter Too Early
Mixing in the butter before the curds have fully formed and drained leads to a greasy, unappetizing texture. Always wait until after straining to add the 2 tablespoons cold cubed butter. The cold temperature helps create that signature silky mouthfeel.
If you add it too soon, the butter will melt into the whey, and you’ll end up with a product that’s more like a cheese sauce than ricotta.
Ignoring the Resting Time
After making ricotta, many people dive right into using it without letting it cool properly. Allowing the ricotta to rest for 5 minutes after adding lemon juice and herbs lets the flavors meld and the texture stabilize.
Skipping this step can result in a ricotta that’s either too thin or develops an odd, raw taste. Patience here makes all the difference in the final product.
Over-Salting or Under-Salting
The ½ teaspoon kosher salt is crucial for balancing flavors, but it’s easy to misjudge. Too much salt makes the ricotta inedible, while too little leaves it bland. Taste as you go—ricotta should have a subtle saltiness that enhances its natural creaminess.
If you’re unsure, start with ¼ teaspoon and adjust to taste. Remember, you can always add more salt later, but you can’t take it out once it’s in.
Nutrition facts
Frequently asked questions
Can I substitute whole milk with another type of milk?
For best results, stick with whole milk and heavy cream—they provide the fat content needed for that signature creamy texture. However, you can use 2% milk plus an extra ½ cup heavy cream if that’s all you have. Avoid skim milk or non-dairy alternatives, as they’ll make your ricotta watery and less flavorful.
How do I fix ricotta that turned out too thick or grainy?
For thick ricotta, stir in 1-2 tablespoons of reserved whey to loosen it up. If it’s grainy, blend it briefly with an immersion blender for a smoother texture. The key is proper straining—don’t rush this step! If all else fails, use it in baked dishes where texture matters less.
Can I make ricotta without vinegar?
Yes! Use lemon juice or citric acid instead. For lemon juice, double the amount (to 4 tablespoons) and expect a slightly tangier result. Citric acid is more neutral—use ¼ teaspoon dissolved in a little water. Both work, but vinegar remains the classic choice for its clean acidity.
What’s the best way to use leftover ricotta?
Leftover ricotta is incredibly versatile! Spread it on toast with honey and nuts, mix it into scrambled eggs, or use it as a filling for lasagna, ravioli, or stuffed shells. For a quick breakfast, dollop it into soups or fold it into pancake batter. It also freezes well in ice cube trays for later use in sauces or casseroles.
Why did my ricotta separate after making it?
This usually happens if you didn’t strain long enough or added the butter too early. The whey separation means excess liquid wasn’t fully removed. Next time, strain for the full 10 minutes and add butter only after straining. If it happens, stir gently to redistribute—it’ll still be edible, just slightly thinner.

- 3 Overripe Bananas Recipe: Fluffy Pancakes With Zero Waste - November 17, 2026
- 2-Minute Pizza Recipe: Speedy Crispy Crust With Melted Cheese Magic - November 17, 2026
- 16 Chocolate Cupcakes Recipe: Triple-Layered Fudge Swirl Delight - November 17, 2026