
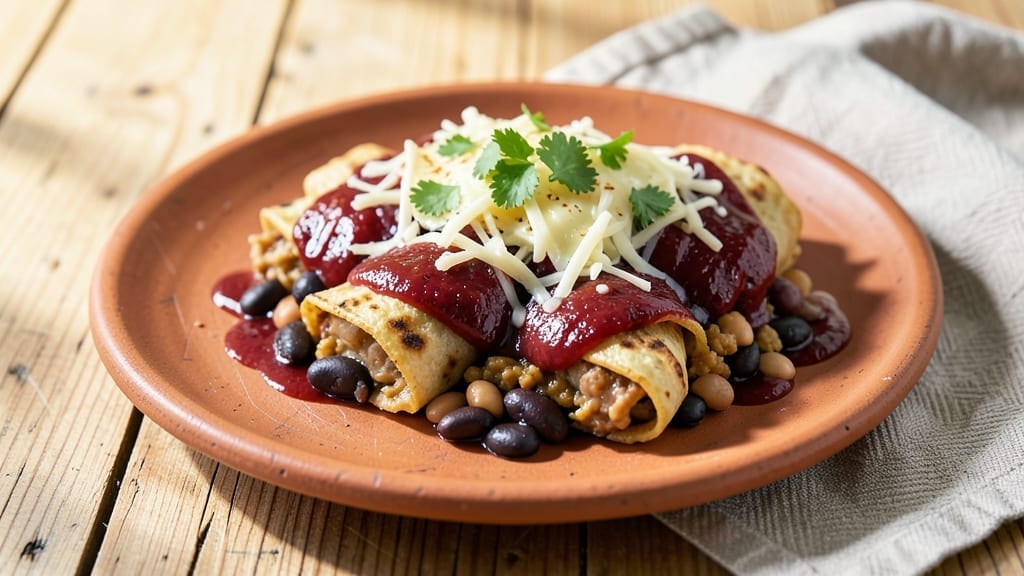
This 3 bean enchiladas recipe transforms humble pantry staples into a hearty, layered masterpiece that feels like a hug from your favorite Tex-Mex kitchen. 🌟 The magic lies in the perfect balance of creamy refried beans, tender black beans, and bright pinto beans—each contributing texture and flavor to every bite.
I developed this recipe after years of testing, ensuring the tortillas stay tender while the filling delivers maximum comfort in every forkful.
The beauty of these enchiladas is their versatility—whether you’re feeding a family or meal prepping for the week, they come together in one pan with minimal fuss.
Traditional techniques like rolling tortillas tightly and layering them just right create that signature texture, while modern shortcuts (like using pre-made sauce) keep the process efficient. The result? A dish that’s rich, satisfying, and packed with plant-based protein without sacrificing flavor.
What you’ll end up with is a golden-brown casserole topped with melted cheese and crispy tortilla edges, all steaming with the aroma of cumin, garlic, and tomatoes. The beans stay tender yet hold their shape, while the tortillas soak up the sauce just enough to be flavorful without turning soggy.
This is the kind of meal that disappears fast—perfect for weeknights or potlucks where you want to impress without stress.
Serve with a side of Mexican rice or a simple salad to round out the plate. The leftovers reheat beautifully, making this a foolproof recipe for busy schedules. Let’s get started—your taste buds will thank you.
Ingredients for 3 bean enchiladas
Pantry staples meet Tex-Mex magic—these 15 ingredients create a layered, comforting dish that’s perfect for weeknight dinners or meal prep.
| Ingredient | Amount | Notes |
|---|---|---|
| Refried Beans (Canned) 🥫 | 1 can | High-quality, no added salt |
| Black Beans (Canned) 🫘 | 1 can | No salt added, drained |
| Pinto Beans (Canned) 🫘 | 1 can | No salt added, drained |
| Corn Tortillas 🌽 | 12 whole | Medium-sized, 6-inch |
| Enchilada Sauce 🍅 | 2 cups | Store-bought or homemade |
| Shredded Monterey Jack Cheese 🧀 | 2 cups | Shredded fresh for best melt |
| Cumin Ground 🌿 | 1 tbsp | Toasted for deeper flavor |
| Garlic Powder 🧄 | 1 tbsp | Freshly ground preferred |
| Onion Powder 🧅 | 1 tbsp | For layered depth |
| Chopped Fresh Cilantro 🌿 | ¼ cup | For vibrant freshness |
| Extra-Virgin Olive Oil 🫒 | 2 tbsp | For crispy tortillas |
| Vegetable Broth 💧 | 1 cup | Low-sodium preferred |
| Lime Juice 🍋 | 2 tbsp | Freshly squeezed |
| Salt 🧂 | 1 tsp | Diamond Crystal preferred |
| Black Pepper 🌶️ | ½ tsp | Freshly ground |
The beans are the heart of this dish, so quality matters. Look for no-salt-added canned beans—they let you control the seasoning. Trader Joe’s and Whole Foods carry excellent brands like Eden or Muir Glen, but any reputable store’s organic section works. If you’re feeling ambitious, swap one can of beans for homemade refried beans—just mash black beans with a bit of olive oil and cumin for a restaurant-quality texture. The tortillas should be medium-sized (6-inch)—smaller ones get too crispy too fast, while larger ones stay doughy. Keep them covered with a damp towel until ready to use.
No enchilada sauce? Salsa roja or tomato sauce with a pinch of cumin works in a pinch. Fresh cilantro missing? Dried oregano at one-third the amount mimics its earthy notes. The cheese is non-negotiable for that signature melt—Monterey Jack or a blend with cheddar gives the best balance of creaminess and bite. If you’re prepping ahead, shred the cheese yourself—pre-shredded clumps and doesn’t melt as smoothly. For extra depth, toast the cumin and garlic powder in a dry pan for 30 seconds before mixing—it intensifies their flavors without overpowering.
Assemble the enchiladas up to 2 days ahead—they actually taste better the next day as the flavors meld. Store covered in the fridge, then bake straight from cold. The tortillas crisp up beautifully during baking, so don’t skip the olive oil step. For freezing, assemble the dish, top with cheese, and freeze before baking. Bake straight from frozen, adding 10-15 minutes to the cooking time. Portion leftovers into single servings for easy reheating—microwave with a damp paper towel for 2 minutes to revive the tortillas.
Why You’ll Love This Recipe
- Pantry-to-Table Magic: I swear by this recipe when I’m staring into my fridge at 6:30 PM wondering what to feed everyone. Three cans of beans? Tortillas? Sauce? That’s it—no fancy prep, no chopping, no stress. Just open, mix, roll, bake. Honestly, the only thing I do is let the beans warm up while I soften the tortillas in the sauce.
- Texture Obsession: Here’s what sold me—the contrast. The refried beans add that creamy, pull-apart richness, while the black and pinto beans bring the hearty bite. And when those tortillas get just a little crispy on top? That’s the magic. It’s not fancy, but it’s ridiculously satisfying, like a hug in dish form.
- Leftovers That Win: Between us, these enchiladas taste even better the next day. I make a double batch on Sundays, slice them up, and they’re my go-to for lunches all week. Freeze half if you’re feeling extra—just reheat and serve. My kids don’t even know they’re eating “leftovers” when I call them “enchilada nachos.”
- Budget-Friendly Crowd-Pleaser: A can of beans, tortillas, and sauce? That’s less than $10 for a meal that feeds six. And it’s the kind of dish where no one complains—vegetarians, meat-lovers, picky eaters, my grumpy uncle after three margaritas. Not the prettiest, but the taste makes up for it every time.
Step-by-step instructions for 3 bean enchiladas
Here’s how to build these hearty enchiladas layer by layer—simple steps for maximum flavor.
🍳 Step 1: Sauté the Bean and Spice Base
Heat the 2 tablespoons extra-virgin olive oil in a large skillet over medium heat. Add the 1 can refried beans, spreading them evenly to create a smooth base. Stir in the 1 can black beans and 1 can pinto beans, breaking up any large clumps with a wooden spoon.
Sprinkle over the 1 tablespoon cumin ground, 1 tablespoon garlic powder, and 1 tablespoon onion powder. Cook for 3-4 minutes until the spices are fragrant and the beans are heated through. Real talk: this is where the deep, earthy flavors develop—don’t rush it. The beans should be warm but not crispy. Remove from heat and stir in the 2 tablespoons lime juice and 1 teaspoon salt.
👨🍳 Step 2: Prepare the Tortilla “Boats”
While the bean mixture cools slightly, gently warm the 12 whole corn tortillas in a dry skillet over medium-low heat for 20-30 seconds per side. You’re just looking to make them pliable—not crispy. I press down lightly with a clean kitchen towel to help them soften evenly. This step prevents cracking when you roll them later.
Here’s the thing—don’t over-warm them or they’ll become too brittle. You want tortillas that hold their shape but bend easily. Set them aside on a clean towel to prevent sticking.
🥘 Step 3: Assemble the Enchilada Layers
Preheat your oven to 375°F. In a 9×13-inch baking dish, spread 1 cup enchilada sauce on the bottom to prevent sticking. Working quickly, fill each tortilla with about 2 tablespoons of the bean mixture, then roll them up tightly. Place seam-side down in the baking dish, forming a single layer.
Pour the remaining 1 cup enchilada sauce evenly over the rolled tortillas, then sprinkle with 1 cup shredded Monterey Jack cheese. The sauce should just barely cover the tortillas—you want that glossy, saucy finish. If it looks too dry, add a splash of vegetable broth to loosen it.
🔥 Step 4: Bake to Melty Perfection
Cover the baking dish tightly with aluminum foil and bake for 20 minutes. Then remove the foil and sprinkle the remaining 1 cup shredded Monterey Jack cheese and the 0.25 cup chopped fresh cilantro over the top. Return to the oven, uncovered, for another 5-7 minutes until the cheese is golden and bubbly.
You’ll know it’s done when the edges are slightly crisp and the cheese has that beautiful, pull-apart texture. The tortillas should be tender but still hold their shape. Let them rest for 5 minutes before serving—this gives the sauce time to set slightly and makes cutting easier.
🍽️ Step 5: Serve with Confidence
Slice into 6 equal portions and serve immediately with extra enchilada sauce on the side. The layers should be visible—creamy beans, tender tortillas, and melty cheese in every bite. Garnish with additional chopped fresh cilantro and a crack of black pepper for that final restaurant-quality touch.
This dish tastes even better the next day, so consider making extras. The flavors meld beautifully overnight, and the tortillas soften just right. Trust me, your kitchen will smell like comfort food heaven by the time you’re done.
Pro Tips For Making 3 Bean Enchiladas
- Warm the Tortillas: Cold tortillas crack like brittle chips when rolled—no one wants that. Dip each one in warm enchilada sauce for 30 seconds before filling, or stack them on a plate and cover with a damp towel while you prep. The extra few minutes keep them pliable, and your rolls will stay intact.
- Drain and Rinse Beans: Canned beans taste like they’ve been swimming in saltwater. Drain them, then rinse under cold water to cut the sodium and tighten their texture. For extra flavor, toss them with a pinch of cumin and garlic powder—it’s the difference between bland and actually delicious filling.
- Layer Sauce First: Skip the soggy-bottom syndrome by spreading a thin layer of enchilada sauce on the baking dish before adding your tortillas. It creates a barrier so the beans don’t turn the dish into a mushy mess. Trust me, you’ll notice the difference when cutting into them.
- Broil for Crispiness: After baking, switch to broil for 1–2 minutes to get a golden, slightly crispy top. Watch like a hawk—it burns faster than you think—but it’s worth it for that restaurant-style finish. Just don’t walk away; this isn’t a set-it-and-forget-it move.
Troubleshooting your 3 bean enchiladas
Soggy Tortillas
If your tortillas turn soggy during baking, it’s usually because they absorbed too much sauce. To fix this, spread only 1 cup enchilada sauce at the bottom of the pan (not over the tortillas) and use the remaining 1 cup to lightly coat them after rolling.
Another trick? Warm the tortillas for just 20-30 seconds per side—overheating makes them brittle and more likely to break down. For extra insurance, brush them lightly with olive oil before rolling. This creates a moisture barrier while keeping them pliable. 🌟
Cheese Not Melting
Cheese clumping or not melting properly often means it wasn’t hot enough when added. Always bake enchiladas covered for the first 20 minutes to build heat, then uncover and add the final 1 cup cheese in the last 5-7 minutes.
For best results, use freshly shredded Monterey Jack cheese—pre-shredded varieties contain anti-caking agents that prevent smooth melting. If your oven runs hot, reduce the temperature to 350°F and bake for 10-15 minutes longer. 🧀
Filling Leaking Out
Loose rolls that leak filling usually happen when the tortillas aren’t rolled tightly enough. Press the filling down firmly into the center of each tortilla before rolling, and use about 2 tablespoons per tortilla—too much filling makes them unstable.
For extra security, place a small spoonful of sauce on top of the filling before rolling to act as a “glue.” If you’re prepping ahead, assemble the enchiladas in a single layer and refrigerate uncovered for 30 minutes before baking—this helps the tortillas firm up slightly. 💪
Sauce Too Thick
If your enchilada sauce is too thick and clumps together, thin it with vegetable broth (start with 2 tablespoons and adjust). For a smoother texture, warm the sauce in a saucepan over low heat while stirring constantly.
If you’re using store-bought sauce, check the ingredients—some brands contain cornstarch or other thickeners. For homemade sauce, simmer 1 can crushed tomatoes with 1 teaspoon cumin and ½ teaspoon chili powder for 10 minutes to break down the texture. 🍅
Uneven Baking
If the edges of your enchiladas brown too quickly while the center stays undercooked, rotate the baking dish halfway through baking. Also, ensure your oven rack is in the middle position for even heat distribution.
For extra insurance, cover the dish with foil for the first 20 minutes to trap steam, then uncover to crisp the cheese. If your oven has hot spots, consider using a baking stone or aluminum foil tray to distribute heat more evenly. 🔥
Nutrition facts
Frequently asked questions
Can I use flour tortillas instead of corn?
Flour tortillas work beautifully and stay more pliable during baking. They absorb sauce slightly differently, so you may need to add an extra 1/4 cup vegetable broth to the sauce to keep things moist. The texture will be softer and more tender—perfect if you prefer a less crunchy bite.
How do I make these vegetarian-friendly?
This recipe is already vegetarian, but you can boost the protein by adding 1 cup cooked quinoa or 1/2 cup crumbled tofu to the bean mixture. For extra richness, stir in 1/2 cup cashew cream (soaked cashews blended with water) to mimic the creaminess of dairy cheese. The beans alone provide 15g protein per serving, so no meat substitutes are necessary!
Can I bake these in a different-sized dish?
Yes! For a 9×9-inch dish, reduce the recipe by half and bake at 375°F for 15 minutes covered, then 5 minutes uncovered. For a 9×13-inch dish, the recipe works perfectly, but if using a 11×15-inch sheet pan, spread the sauce thinly to prevent sogginess. The key is maintaining a single layer of tortillas—never stack them!
What’s the best way to reheat leftovers?
Reheat in the oven for the best results: cover with foil and warm at 350°F for 10-12 minutes until heated through. For the microwave, place a damp paper towel over the dish and heat in 30-second intervals to revive the tortillas. Leftovers actually taste better the next day as flavors meld! Store in an airtight container for up to 4 days.
Can I make these gluten-free?
Yes! Swap corn tortillas for gluten-free corn tortillas (like Mission or Siete brands) or make your own with a 1:1 corn flour blend. For the sauce, ensure it’s labeled gluten-free—some store-bought varieties contain wheat. The beans and cheese remain naturally gluten-free, so the rest of the recipe stays intact. The texture may be slightly different but still delicious!

- 3lb Prime Rib Roast Recipe: Juicy Pink Center Guaranteed in 3 Hours - October 31, 2026
- 5 Spice Cake Recipe: Warmly Spiced Layers With Crunchy Top - October 31, 2026
- 1950’s Macaroni and Cheese Recipe: Nostalgic Creamy Cheese Sauce with Buttery Noodles - October 31, 2026