
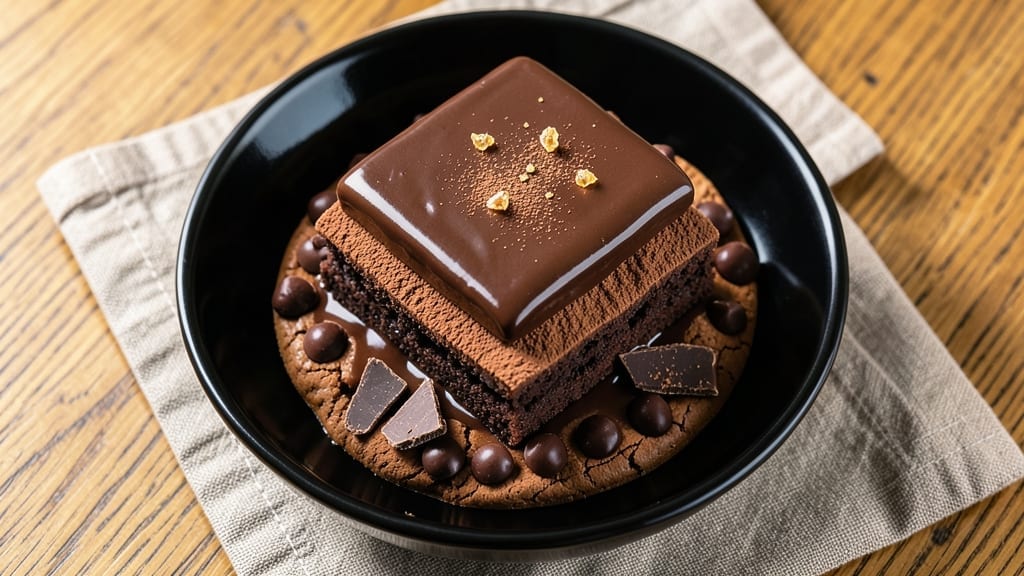
This 3-chocolate brownie recipe delivers the perfect balance of fudgy cracks and caramelized edges—every bite packed with layers of rich cocoa intensity. The secret lies in using three distinct chocolate sources: bittersweet baking chocolate, semi-sweet chocolate chips, and cocoa powder, creating a complex flavor profile that’s impossible to resist.
I’ve perfected this recipe over years of baking, ensuring the texture is dense yet tender, with that signature crackle that makes brownies irresistible.
The recipe begins with a simple yet precise mix of melted butter, sugar, and eggs, then incorporates the three chocolate components for depth. Baking at 350°F for 25-30 minutes yields edges that are just shy of crisp, while the center remains moist and fudgy.
A quick test with a toothpick ensures the perfect doneness—no dryness, no undercooking. This is the kind of brownie that disappears faster than you can say “triple chocolate.”
What makes these brownies truly special is their versatility. You can keep them classic with just the chocolate trio, or elevate them with add-ins like toasted walnuts, sea salt flakes, or a swirl of peanut butter.
The caramelized edges add a subtle sweetness that complements the deep cocoa flavor, while the fudgy cracks promise a satisfying texture with every bite. Perfect for dessert lovers, holiday gatherings, or a simple indulgence.
Once baked, let them cool slightly before slicing—this ensures clean cuts and prevents crumbling. Serve warm with a scoop of vanilla ice cream or dusted with powdered sugar for an extra touch of elegance. The rich aroma alone will have everyone asking for seconds. Ready to bake?
Ingredients for 3 chocolate brownie
Three chocolates, one pan—this is the ultimate brownie game-changer.
| Ingredient | Amount | Notes |
|---|---|---|
| Unsalted Butter 🧈 | 1 cup | Melted, cooled slightly |
| Granulated Sugar 🍚 | 2 cups | Light brown preferred |
| Large Eggs 🥚 | 2 whole | Room temperature |
| Bittersweet Baking Chocolate 🍫 | 8 oz | High-quality, 60-70% cocoa |
| Semi-Sweet Chocolate Chips 🍫 | 1 ½ cups | Enjoy Life brand preferred |
| Unsweetened Cocoa Powder 🍫 | ½ cup | Dutch-processed preferred |
| All-Purpose Flour 🌾 | ¾ cup | Sifted for smooth batter |
| Vanilla Extract 🌿 | 1 tsp | Pure, high-quality |
| Salt 🧂 | ½ tsp | Fine sea salt |
| Toasted Walnuts 🌰 | 1 cup | Optional, chopped fine |
| Flaky Sea Salt 🧂 | ¼ tsp | For garnish, optional |
| Powdered Sugar 🍚 | ¼ cup | For dusting, optional |
The chocolates here are non-negotiable. Ghirardelli bittersweet is my go-to for baking chocolate—it melts smoothly and has that perfect cocoa depth. For chocolate chips, Enjoy Life brand (or any dairy-free if needed) ensures no weird textures. The cocoa powder? Dutch-processed like Hershey’s Special Dark makes these brownies extra fudgy. Butter matters too—use unsalted and melt it gently to avoid burning. I always buy my chocolate from Williams Sonoma or Trader Joe’s—their selection is reliable and high-quality. Pro tip: check expiration dates on chocolate bars—they go stale fast, and stale chocolate makes sad brownies.
No bittersweet baking chocolate? Substitute with high-quality dark chocolate bars (70% cocoa or higher), chopped finely. Running low on semi-sweet chips? Use chopped dark chocolate bars instead—just melt them first for even distribution. Dutch-processed cocoa powder unavailable? Natural cocoa powder works too, but add an extra pinch of baking soda to neutralize the acidity. The walnuts can be swapped for pecans or hazelnuts—whatever you’ve got. For extra richness, add 1 tbsp of instant espresso powder to the batter. And if you’re feeling fancy, a 1 oz square of white chocolate folded in at the end creates beautiful marbling.
Once baked, these brownies develop that perfect crackly crust. Let them cool in the pan for 10 minutes before slicing—this ensures clean cuts. Store leftovers in an airtight container at room temperature for 3-4 days, or freeze for up to 3 months. For serving, I love dusting with powdered sugar and flaky salt right before cutting—it adds that restaurant-quality touch. These reheat beautifully in the oven at 300°F for 5-10 minutes, making them perfect for quick dessert cravings. Make a double batch—they disappear fast!
Why You’ll Love This Recipe
- No Melted Mess: I swear by this method—just melt the butter and chocolate together, then fold in the rest. No waiting for chocolate to temper, no weird graininess. The eggs blend right in, and the sugar dissolves smoothly. It’s how I make sure every bite is rich, not gritty.
- Triple Chocolate Magic: That bittersweet chocolate bar? It’s the star—deep, dark, and just sweet enough to balance the semi-sweet chips. The butter keeps it velvety, not dry, and the eggs add that perfect chew. Honestly, it’s the only brownie I’ll bake when I’m craving something serious.
- Weeknight Crowd-Feeder: This recipe doubles (or triples) without breaking a sweat. Perfect for game day, book club, or when your kid’s soccer team “needs snacks.” Cut into squares, wrap in foil, and they’ll disappear faster than you can say “second helping.”
- Budget Decadence: Bittersweet chocolate is cheaper than fancy truffles, and butter and sugar stretch far. I make a whole pan for under $5, and it lasts for days. Freeze extras—because nothing beats pulling out a thawed brownie when you’re in a rush. (Yes, even on a Tuesday night.)
Step-by-step instructions for fudgy chocolate brownies
Here’s how to create the perfect fudgy brownies with those coveted cracks and caramelized edges.
Melt Butter and Chop Chocolate
Start by melting the 1 cup unsalted butter in a microwave-safe bowl in 30-second intervals, stirring between each until fully melted but not hot. Let it cool slightly—it should be warm to the touch but not liquid. Meanwhile, chop the 8 oz bittersweet baking chocolate into small, even pieces. This ensures it melts smoothly into the batter without clumping.
Place the chopped chocolate in a heatproof bowl set over a pot of simmering water (double boiler method). Stir occasionally until completely melted. Remove from heat and let cool for 5 minutes—this prevents the eggs from scrambling when added later. Here’s the thing: if the chocolate mixture is too hot, you’ll end up with scrambled eggs instead of a silky batter.
Mix Wet Ingredients to a Smooth Batter
In a large mixing bowl, whisk together the 2 cups granulated sugar, 2 whole large eggs, 1 tsp vanilla extract, and 0.5 tsp salt until fully combined. The mixture should be pale and slightly thickened. Add the cooled melted butter and mix until smooth. Here’s where it gets fun—toss in the 1.5 cups semi-sweet chocolate chips and 0.5 cup unsweetened cocoa powder, whisking until everything is evenly distributed.
I like to use a spatula for this step to ensure no dry spots remain. The batter should be thick but pourable—if it looks too stiff, you can add 1-2 tablespoons of milk (though we’re not using it in this recipe, it helps if needed). This is your fudgy foundation, so don’t rush the mixing. The goal is a glossy, velvety batter that’s ready for the oven.
Fold in Dry Ingredients and Walnuts
Gently fold in the 0.75 cup all-purpose flour using a spatula, mixing just until combined. Overmixing develops gluten, which can make brownies tough instead of fudgy. If you’re using the 1 cup toasted walnuts, fold them in now—just make sure they’re evenly distributed throughout the batter. The walnuts add a delightful crunch that contrasts beautifully with the fudgy texture.
Real talk: the batter will look thick and almost dry, but that’s exactly what we want for those perfect cracks and a dense, moist interior. Pour the batter into a 9×13-inch baking pan lined with parchment paper, smoothing the top with a spatula. Tap the pan gently on the counter a few times to remove any air bubbles—this ensures even baking and those coveted cracks.
Bake to Golden Perfection
Preheat your oven to 350°F and bake the brownies for 25-30 minutes. You’re aiming for edges that are just set but still slightly underdone in the center—this is key for that fudgy texture. The brownies are done when a toothpick inserted in the center comes out with a few moist crumbs but no wet batter. Here’s the moment that matters: don’t overbake, or you’ll end up with dry, cakey brownies instead of the rich, fudgy treat you’re after.
Let the brownies cool in the pan for 10 minutes before transferring to a wire rack. This resting period allows them to set slightly, making them easier to cut. Once cooled, sprinkle with 0.25 tsp flaky sea salt and dust with 0.25 cup powdered sugar for that bakery-style finish. Cut into squares and serve warm for the ultimate experience—each bite should deliver rich, chocolatey goodness with a perfect balance of fudgy and slightly crispy edges.
Pro Tips For Making 3 Chocolate Brownie
- Melt Butter Slowly: If you dump cold butter into the mix, you’ll end up with streaks of unmelted fat that make your brownies look like they were made with lard. Heat the butter over medium-low until it’s just liquid—no browning—and then pour it into the dry ingredients. (Yes, even if you’re impatient like me.)
- Chop Chocolate Like It’s 1950: Bittersweet baking chocolate needs to be chopped small and even—think rice-sized pieces, not golf-ball chunks. Use a sharp knife or pulse in a food processor, but don’t over-blend or it’ll turn into a paste. Uneven melting = splotchy brownies. (I learned this the hard way after pulling out a tray with one giant chocolate lump.)
- Don’t Overmix the Batter: Once you add the eggs, stir just until combined—about 10 strokes max. Overmixing introduces too much air, and your brownies will rise like a sad soufflé before collapsing into a dense brick. Fold in the chocolate chips gently after mixing, or they’ll sink to the bottom like a chocolate shipwreck.
- Test for Doneness with a Toothpick: Skip the “look at the edges” trick—it’s unreliable. Insert a toothpick into the center: if it comes out with moist crumbs (not wet batter, not dry), pull them out immediately. Brownies finish cooking as they cool, and overbaking turns them into hockey pucks. (Your future self will thank you.)
Make-ahead tips for 3 chocolate brownie
Prep Ahead for Perfect Brownies
Mix the batter up to 24 hours ahead and store it in an airtight container in the fridge. The flavors meld beautifully overnight, and the texture stays rich. Just whisk it briefly before baking to restore smoothness. This is my secret for stress-free baking—no last-minute scrambling! 💫
Bake and Freeze for Later
Bake the brownies as directed, then let them cool completely. Wrap the pan tightly in plastic wrap and freeze for up to 3 months.
When ready to serve, thaw at room temperature for 1-2 hours or reheat slices in the oven at 300°F for 5-10 minutes to restore that warm, gooey goodness. Perfect for impromptu dessert cravings!
Portion and Store for Convenience
Cut the brownies into squares while still warm and place them in a single layer on a parchment-lined tray. Freeze for 1 hour until solid, then transfer to an airtight container with parchment between layers. This prevents sticking and keeps each slice perfectly fudgy. Grab-and-go dessert, anyone? ✨
Reheat Like a Pro
For the best texture, reheat individual slices in the microwave for 15-20 seconds on medium power. Cover with a damp paper towel to prevent drying. Or, for a restaurant-style finish, warm in a 350°F oven for 3-5 minutes—this caramelizes the edges just enough to make them irresistible.
Trust me, reheated brownies taste even better the second time around!
Make a Double Batch
Double the recipe and bake in two 9×13-inch pans simultaneously. This ensures you always have backup for parties or unexpected guests. Store one pan in the fridge and freeze the other.
Pro tip: Use quart-sized freezer bags for individual portions—just squeeze out excess air before sealing. Label with the date for easy tracking. 🍫
Garnish Before Freezing
Sprinkle the flaky sea salt and powdered sugar on top right after baking, before cutting. This garnish sticks beautifully and adds that bakery-quality finish even after freezing. Just dust again lightly after thawing for maximum impact. A little salt goes a long way in enhancing the chocolate flavor!
Nutrition facts
Frequently asked questions
Why do these brownies have three types of chocolate?
Each chocolate adds a unique dimension to the flavor profile. The bittersweet baking chocolate provides deep cocoa intensity, the semi-sweet chocolate chips add pockets of rich sweetness, and the unsweetened cocoa powder enhances the fudgy texture. Together, they create a complex, layered taste that’s far more satisfying than single-chocolate versions.
Can I make these brownies gluten-free?
Yes! Replace the 0.75 cup all-purpose flour with 0.75 cup gluten-free 1:1 baking flour (like Bob’s Red Mill). For best results, add 1 tsp xanthan gum to help bind the batter. The texture will be slightly denser but still fudgy.
How do I get those perfect cracks on top?
Those coveted cracks happen when the brownies cool slightly in the pan. Bake until edges are set but the center is still soft (25-30 minutes at 350°F), then let them cool in the pan for 10 minutes before transferring. The contrast between the warm center and cooler edges creates the crackle. Tap the pan gently on the counter before baking to release air bubbles too.
What if my brownies turn out too cakey?
Cakey brownies usually mean overbaking or too much flour. For next time, reduce baking time by 2-3 minutes or check for doneness at 23 minutes. Also, make sure your oven isn’t running hot—use an oven thermometer to confirm it’s at 350°F. The secret to fudgy texture is slightly underbaked centers!
Can I add peanut butter to these brownies?
Swirl in ½ cup creamy peanut butter before baking for a nutty-chocolate twist. For extra richness, melt 1 oz white chocolate with the peanut butter first. Or try ¼ cup peanut butter chips folded into the batter. Just be prepared for serious brownie disappearance!

- 3lb Prime Rib Roast Recipe: Juicy Pink Center Guaranteed in 3 Hours - October 31, 2026
- 5 Spice Cake Recipe: Warmly Spiced Layers With Crunchy Top - October 31, 2026
- 1950’s Macaroni and Cheese Recipe: Nostalgic Creamy Cheese Sauce with Buttery Noodles - October 31, 2026