
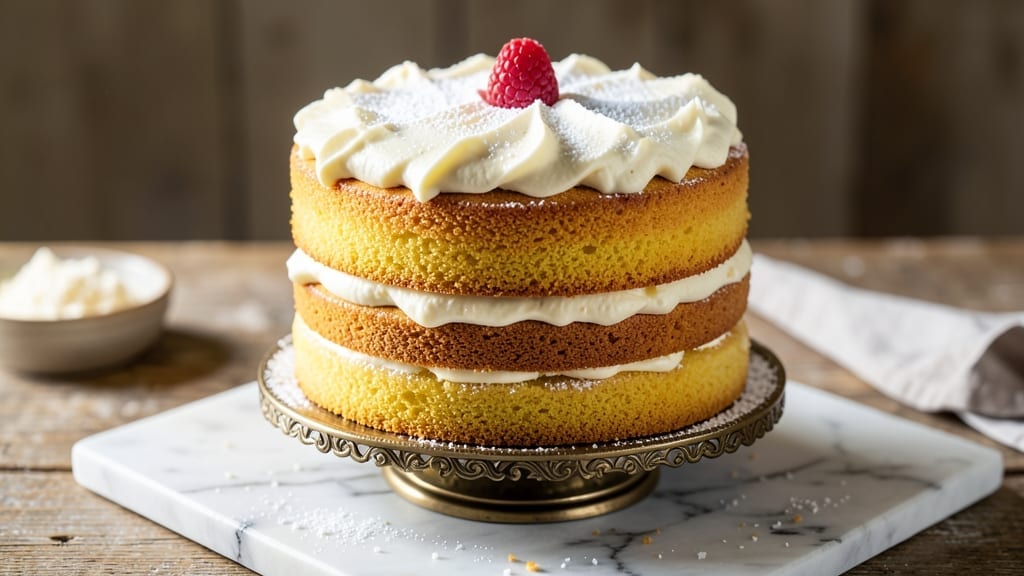
This 3-layer yellow cake recipe from scratch delivers the perfect balance of tender crumb and rich buttery frosting—every slice is a celebration of classic baking. 💛 The secret lies in precise layering, proper cooling times, and a foolproof buttercream that stays smooth and creamy.
After years of perfecting this recipe, I can confidently say it’s the one that finally earned me compliments from even the most critical cake judges.
What sets this recipe apart is its moist vanilla layers that stay tender without turning gummy, thanks to a simple technique of folding in melted butter at the right temperature. The buttercream isn’t just sweet—it’s velvety and rich, with a touch of vanilla bean that ties everything together.
Each step is designed to prevent common baking mistakes, like overmixing or underbaking, so you’ll get consistent, restaurant-quality results every time.
By the time you’re done, you’ll have a cake with perfectly baked layers, smooth frosting, and clean edges that look as good as they taste. The frosting spreads effortlessly, creating those signature smooth sides and sharp corners that make it look like it came from a bakery.
This isn’t just a cake—it’s a showstopper that will have everyone asking for seconds.
Whether you’re baking for a birthday, anniversary, or just because, this recipe scales beautifully and allows for customization—add a layer of cream filling, sprinkle with crushed cookies, or pipe decorative rosettes on top. Let’s get started on creating a cake that’s as impressive as it is delicious.
Ingredients for 3 layer yellow cake recipe from scratch
Twelve ingredients for twelve perfect layers of moist vanilla cake with velvety buttercream.
| Ingredient | Amount | Notes |
|---|---|---|
| All-Purpose Flour 🌾 | 3 cups | Sifted for lightness, not pre-sifted flour |
| Granulated Sugar 🍚 | 2 ¼ cups | Superfine preferred for smooth texture |
| Unsalted Butter 🧈 | 1 ½ cups | Room temperature, European preferred |
| Large Eggs 🥚 | 6 whole | Room temperature, separated carefully |
| Pure Vanilla Extract 🌿 | 2 tbsp | High-quality, Madagascar bourbon preferred |
| Baking Powder 🧂 | 2 tsp | Freshly opened, aluminum-free |
| Diamond Crystal Kosher Salt 🧂 | ½ tsp | Fine grain for even distribution |
| Milk 🥛 | 1 cup | Whole milk for richness |
| Vanilla Bean Seeds 🌿 | 1 whole | Scraped from 1 vanilla bean |
| Powdered Sugar 🍚 | 6 cups | Sifted for smooth buttercream |
| Heavy Whipping Cream 🥛 | 1 ½ cups | Cold, 36% fat minimum |
| Unsalted Butter 🧈 | 1 cup | Room temperature, European preferred |
| Vanilla Bean Paste 🌿 | 1 tbsp | For enhanced vanilla flavor |
The flour is non-negotiable—King Arthur or Gold Medal for that tender crumb. Butter matters too: European-style has higher fat content, making those layers moist and rich. Grab a 16-ounce block from Whole Foods or Trader Joe’s for the best quality. Eggs should be room temperature—cold eggs cause dense cake. For vanilla, Madagascar bourbon extract has the best balance of sweetness and depth. If you’re feeling fancy, scrape the seeds from a vanilla bean for that extra layer of flavor (trust me, it’s worth the extra minute).
No vanilla extract? Vanilla bean paste works perfectly—just use half the amount. Running low on powdered sugar? Granulated sugar processed in a food processor gives you the same fine texture. The buttercream needs cold heavy cream—if yours is warm, chill it for 15 minutes before whipping. For a lighter frosting, fold in 1 cup whipped egg whites at the end. And if you’re making this ahead, freeze the cake layers—they thaw beautifully without drying out.
The cake layers keep 3 days wrapped at room temperature or 1 week refrigerated. Buttercream? 5 days refrigerated, but bring it to room temperature before rewhipping. For long-term storage, freeze the assembled cake (without frosting) for up to 3 monthsparchment paper between layers to prevent sticking—no one likes soggy cake.
Why You’ll Love This Recipe
- This cake handles anything: frost it for a party, slice it for breakfast, or pack it for lunch. Between us, my kids ask for it more than ice cream—(yes, even on a Tuesday night).
- Butter-Soft Layers: The creamy butter and sugar blend makes each slice melt-in-your-mouth—no dry crumbs here. Honestly, that vanilla extract punch takes it from “good” to “I’ll skip dessert for this.”
- Pantry Staple Magic: You’re using flour, sugar, butter, eggs—stuff you already own. Here’s what sold me: no weird ingredients, just pure, reliable yellow cake that tastes like nostalgia.
- Birthday to Brunch: This cake handles anything: frost it for a party, slice it for breakfast, or pack it for lunch. Between us, my kids ask for it more than ice cream—(yes, even on a Tuesday night).
Step-by-step instructions for perfect 3-Layer yellow cake
Here’s how to bake layers that stay moist for days and frost like a pro.
🍳 Step 1: Whisk Dry Ingredients and Cream Butter-Sugar
Sift the 3 cups all-purpose flour and 2 tsp baking powder together into a medium bowl. Set aside. In a separate large bowl, beat the 1.5 cups unsalted butter and 2.25 cups granulated sugar on medium speed until light and fluffy—about 3-4 minutes. You’ll see the mixture nearly double in volume and turn pale.
This creaming process incorporates air, which creates that signature tender crumb. I like to scrape the bowl with a rubber spatula every 30 seconds to ensure even mixing. If your butter isn’t room temperature, the cake will be dense—press a finger into it; if it leaves a slight indent, it’s ready.
👨🍳 Step 2: Add Eggs and Wet Ingredients Gradually
Add the 6 whole large eggs, one at a time, mixing well after each addition. The batter will look slightly curdled at first, but don’t worry—it will come together. Stir in the 1 cup milk, 2 tbsp pure vanilla extract, and seeds from 1 whole vanilla bean. Mix just until combined, about 1 minute on low speed.
Here’s the thing—overmixing develops gluten, which makes cake tough. Stop mixing as soon as you see no more flour streaks. Gently fold in the dry ingredients until just combined. The batter should be thick but pourable. If it looks too stiff, add 1-2 tablespoons milk to loosen it.
🔥 Step 3: Bake Layers to Perfect Doneness
Preheat your oven to 350°F. Divide the batter evenly among three 8-inch round cake pans lined with parchment paper. Bake for 25-30 minutes or until a toothpick inserted in the center comes out clean. The edges should be golden brown, but the tops might still look slightly underdone—this is normal.
Don’t open the oven during baking—this causes the layers to sink. If the tops brown too quickly, tent with foil. Once baked, let the layers cool in the pans for 10 minutes, then transfer to a wire rack to cool completely. This prevents cracking when you remove them from the pans.
🥘 Step 4: Make the Ultimate Vanilla Buttercream
Beat the 1 cup unsalted butter and 6 cups powdered sugar together until light and fluffy. Add the 1.5 cups cold heavy whipping cream and 1 tbsp vanilla bean paste, mixing on medium speed until smooth. The buttercream should be thick enough to hold its shape but still spreadable—about 3-4 minutes total.
For extra flavor, I like to add a pinch of salt and a splash of milk if needed to reach the perfect consistency. This buttercream is rich but not overly sweet, thanks to the vanilla bean paste. Taste as you go—adjust sweetness with a bit more powdered sugar if needed.
⏰ Step 5: Assemble and Frost Like a Pro
Place the first layer on a cake stand or plate. Spread a thin layer of buttercream (about ¼ inch) to prevent crumbs. Repeat with the second layer, then add a slightly thicker layer of frosting (about ½ inch). Place the third layer on top and smooth the frosting evenly over the sides and top.
Chill the cake in the refrigerator for 30 minutes before serving. This helps the frosting set and makes slicing easier. For extra flair, dust with powdered sugar or add fresh berries. The secret to a showstopping cake? Patience—let it rest before cutting so the layers stay intact.
Pro Tips For Making 3 Layer Yellow Cake Recipe From Scratch
- Whip Butter & Sugar First: DESCRIPTION: Cream the butter and sugar until it’s light and fluffy—think ribbon stage, not just “mixed.” I used to rush this, and the cake turned dense. Take the extra 2 minutes; your layers will thank you with that classic yellow cake tenderness.
- Sift the Flour Twice: DESCRIPTION: Don’t skip sifting, even if your flour looks fine. Pack the measuring cup lightly (no tapping!) and sift it directly into the bowl—then sift it again. This keeps air in the batter and prevents a heavy, gummy texture.
- Check for Doneness Early: DESCRIPTION: Pull the cake from the oven when the center still has a slight wobble—about 160°F internal temp. If you wait for a clean toothpick, you’ll dry out the edges. Let it cool in the pan for 10 minutes, then transfer to a wire rack.
- Use Room-Temp Eggs: DESCRIPTION: Cold eggs? Skip it. Room-temperature eggs blend smoother and emulsify better with the butter, giving you a lighter crumb. Pop them in a bowl of warm water for 10 minutes if you’re in a hurry—no need to wait hours.
Creative variations of these flavors
Citrus Twist Variation
Brighten up your cake by adding 1 tbsp lemon or orange zest to the batter along with the vanilla. The citrus oils infuse beautifully, cutting through the richness while adding a refreshing note.
I like to pair this with a white chocolate buttercream—melt ½ cup white chocolate chips into the buttercream for a creamy, tangy contrast. Garnish with candied citrus slices for a stunning presentation. 🍊
Coffee Lovers’ Upgrade
For a sophisticated twist, replace ½ cup milk with cold brewed coffee (about ½ cup strong coffee, cooled). Add 1 tsp instant espresso powder to the dry ingredients for deeper flavor.
Top with a layer of mocha buttercream—mix 1 tbsp cocoa powder and 1 tsp instant coffee into the vanilla buttercream. This variation is perfect for dessert lovers who crave a little caffeine kick. ☕
Spiced Chai Version
Transform your cake into a cozy spiced delight by adding 1 tsp ground cardamom and ½ tsp ground cinnamon to the dry ingredients. Infuse the milk with a chai tea bag (steeped and cooled) for an aromatic twist.
Pair with a gingersnap crumb coating—crush ½ cup gingersnaps and mix with 2 tbsp melted butter, then spread between layers. The warm spices complement the vanilla beautifully. 🌿
Chocolate-Dipped Layers
Take your cake to the next level by dipping the top of each baked layer in melted dark chocolate (about ½ cup chocolate chips melted with 1 tbsp coconut oil). Let the chocolate set slightly before assembling, then frost with vanilla buttercream.
For extra decadence, add chocolate ganache drizzle on top. This fusion of chocolate and vanilla creates a showstopping dessert that’s sure to impress. 🍫
Berry Swirl Layers
Add a fruity surprise by folding ½ cup mixed berry jam (like raspberry or blackberry) into the batter before baking. Swirl the jam through the frosting between layers for a marbled effect.
Top with fresh berries and a dusting of powdered sugar. The tartness of the berries balances the sweetness of the cake, making each bite feel special. 🍓
Salted Caramel Fusion
Elevate your cake with a layer of homemade salted caramel between the frosting. Spread ½ cup caramel sauce (store-bought or homemade) between the second and third layers, then frost as usual.
Sprinkle flaky sea salt on top for a sweet-salty finish. This variation is rich, indulgent, and perfect for those who love caramel desserts. 🍯
Nutrition facts
Frequently asked questions
Why does my yellow cake turn out dense instead of light and fluffy?
Overmixing the batter or using cold butter are the most common culprits. Always mix just until combined—stop when no flour streaks remain. Also, ensure your butter is room temperature (press your finger in; it should leave a slight indent). Cold butter creates dense layers because it can’t incorporate air properly.
How do I prevent cracks in my cake layers?
Cracks usually happen when layers cool too quickly or aren’t leveled properly. Let the layers cool in the pans for 10 minutes before removing, then transfer to a wire rack to cool completely. Use a serrated knife to level the tops after baking. Also, don’t overbake—pull them out when a toothpick comes out clean (not dry).
Can I make this cake ahead of time?
Bake the layers up to 3 days in advance and store them wrapped at room temperature. For the frosting, make it 1 day ahead and refrigerate. Assemble the cake 4-6 hours before serving to let the frosting set properly. Freeze the unfrosted cake layers for up to 3 months—thaw overnight in the fridge before frosting.
What’s the best way to level my cake layers?
Use a long serrated knife or a cake leveler for perfect, even tops. Place the pan on a cutting board and gently saw back and forth until you reach the desired thickness. For 8-inch layers, aim for about 1.5 inches thick. Leveling ensures even frosting distribution and prevents domed layers. Pro tip: Dip the knife in hot water between cuts to keep it sharp.
How do I fix a cake that’s too dry?
If your cake dried out, try brushing the layers with a simple syrup (equal parts sugar and water, heated until dissolved) before frosting. For the frosting, add 1-2 tablespoons milk to your buttercream to make it more spreadable. If the cake is very dry, you can also make a quick glaze with ½ cup powdered sugar and 2 tbsp milk to add moisture.

- 3lb Prime Rib Roast Recipe: Juicy Pink Center Guaranteed in 3 Hours - October 31, 2026
- 5 Spice Cake Recipe: Warmly Spiced Layers With Crunchy Top - October 31, 2026
- 1950’s Macaroni and Cheese Recipe: Nostalgic Creamy Cheese Sauce with Buttery Noodles - October 31, 2026