
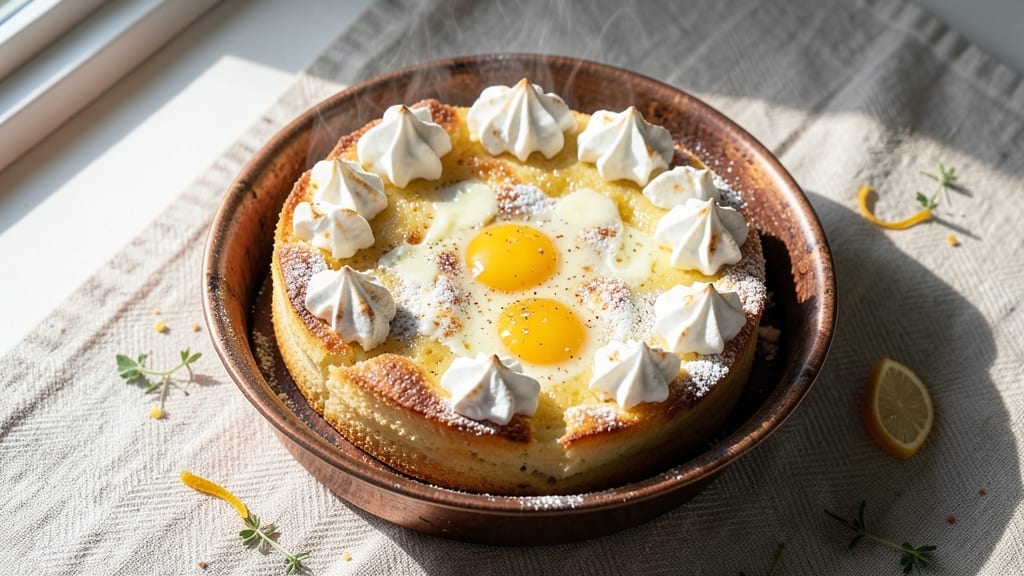
This 6-egg Castella recipe delivers the signature moist, vanilla-infused sponge that Japanese bakeries perfect—without a single crack in sight. The secret lies in the eggs: their high fat content creates that signature tender crumb while the slow bake ensures even moisture distribution.
I’ve refined this method over years of trial (and a few failed attempts) to guarantee a cake that’s light as a cloud yet sturdy enough to slice cleanly.
The process begins with whisking eggs and sugar to ribbons, incorporating air that becomes the foundation for that signature fluffiness. Japanese matcha or vanilla bean elevates the flavor profile beyond basic vanilla, while the water bath baking method prevents cracking while developing that signature golden crust.
What you’ll end up with is a cake that’s so tender it practically melts in your mouth—no dense sponge here.
Perfect for brunch or special occasions, this Castella holds its shape beautifully when sliced, revealing that coveted moist interior. The vanilla flavor shines through without overpowering, making it equally appealing to children and adults.
What makes this version special is the crack-free guarantee—no frustrating failures here, just consistent, professional results every time.
While traditional recipes use matcha, this vanilla adaptation works beautifully for those new to Castella. The same technique applies whether you’re making it for a family gathering or a quiet Sunday breakfast. Let’s get started on creating your perfect Japanese-inspired sponge.
Ingredients for 6 eggs castella
Six eggs, one vanilla bean, and a water bath—this is your crack-free Castella dream team.
| Ingredient | Amount | Notes |
|---|---|---|
| Large Eggs 🥚 | 6 whole | Room temperature, separated yolks/whites |
| Granulated Sugar 🍚 | 1 ½ cups | Superfine preferred for dissolving |
| Vanilla Bean 🌿 | 1 whole | Scraped seeds plus pod |
| Unsalted Butter 🧈 | ½ cup | Softened, European style preferred |
| All-Purpose Flour 🌾 | 1 ½ cups | Sifted, plus extra for dusting |
| Baking Powder 🍳 | ½ tsp | Aluminum-free for tender crumb |
| Salt 🧂 | ¼ tsp | Diamond Crystal preferred |
| Milk 🥛 | ¼ cup | Whole milk for richness |
| Water 💧 | 2 cups | For water bath |
| Aluminum Foil 📄 | 1 sheet | Heavy-duty for baking |
| Granulated Sugar 🍚 | ¼ cup | For topping (optional) |
The eggs are non-negotiable here—room temperature is critical for proper ribbon formation. Pasture-raised eggs from Trader Joe’s or local farms have richer yolks that enhance the tender crumb. If using supermarket eggs, pull them from the fridge 24 hours ahead. The vanilla bean? Madagascar Bourbon from Penzeys delivers the most complex flavor, but any high-quality bean works. For sugar, superfine dissolves faster—if you only have granulated, pulse it in a food processor for 30 seconds. The butter should be soft but not melted; Plugrá or European-style brands add luxurious richness.
No vanilla bean? Pure vanilla extract at double the amount works in a pinch, but you’ll miss that signature speckled look. Substituting milk? Heavy cream adds richness, but reduce by 2 tbsp. For the flour, King Arthur or Gold Medal are reliable, but avoid bread flour—it’s too heavy. The baking powder must be aluminum-free; Clabber Girl is a safe bet. If you can’t find superfine sugar, pulse granulated sugar in a blender for a quick fix. The water bath is essential—don’t skip it—it’s what prevents cracking while creating that signature crust.
This batter is delicate—fold gently to maintain air pockets. Preheat your oven to 325°F for the water bath; any hotter risks cracking. The cake is best served warm or at room temperature—it firms up as it cools. Store wrapped at room temperature for 2 days or refrigerated for 5 days. For longer storage, slice and freeze portions for up to 3 months. The vanilla flavor intensifies overnight, so leftovers taste even better the next day.
Why You’ll Love This Recipe
- No Fuss Baking: I swear by this recipe because it’s basically foolproof—no fancy equipment, just six eggs, sugar, and a little patience. The batter goes together in five minutes, and the oven does all the work while I sip coffee.
- Vanilla Kiss Magic: That split vanilla bean? It’s the star. The slow bake lets the flavor seep into every layer, giving you this buttery, custardy center that’s dangerously addictive. Honestly, store-bought can’t compete.
- Breakfast or Dessert: Serve it warm with tea for a cozy morning treat or slice it cold with whipped cream for a fancy dessert. My kids ask for it after school snacks—yes, even on a Tuesday night.
- Budget-Friendly Luxury: Six eggs and a stick of butter stretch far, and the leftovers stay moist for days. I freeze slices for quick toast or crumble them into oatmeal when I’m lazy. Pure satisfaction.
Step-by-step instructions for the perfect Castella
This delicate Japanese sponge delivers a melt-in-your-mouth texture when done right—here’s exactly how.
Separate Eggs and Whip Yolks to Ribbon Stage
Begin by separating the 6 whole large eggs, placing yolks in one bowl and whites in another. I use room-temperature eggs—they whip up faster and more voluminously. Add the 1.5 cups granulated sugar to the yolks and whisk vigorously until the mixture becomes pale and nearly doubles in volume. This should take about 5-7 minutes—you’re looking for a ribbon stage where the mixture forms ribbons when the whisk is lifted.
Here’s the thing—this step makes or breaks your castella. The sugar should dissolve completely, and the mixture should be thick enough to hold its shape when you lift the whisk. If you see any graininess, whisk a bit longer. The vanilla bean comes next: scrape the seeds and add them along with the whole pod to the yolk mixture. This ensures maximum flavor infusion during baking.
Fold in Butter and Dry Ingredients Gently
In a separate bowl, sift together the 1.5 cups all-purpose flour, 0.5 teaspoon baking powder, and 0.25 teaspoon salt. This prevents lumps that could create texture issues in your delicate sponge. With the mixer on low speed, add the 0.5 cup softened unsalted butter to the yolk mixture and mix until just combined.
Now for the critical folding technique: gradually add the dry ingredients to the yolk mixture in three additions, using a spatula to gently fold rather than beat. This preserves the air incorporated earlier. After the dry ingredients are fully incorporated, add the 0.25 cup milk and mix just until smooth. The batter should be thick but pourable—like heavy pudding. If it’s too thick, add a splash more milk.
Whip Egg Whites to Stiff Peaks and Fold
In a clean, grease-free bowl, whip the egg whites to stiff peaks using an electric mixer. This is where you’ll get that signature castella lightness. The peaks should stand straight up when you lift the whisk, and when you turn the bowl upside down, the whites should hold their shape. This usually takes about 3-5 minutes of whipping.
Now carefully fold one-third of the whipped egg whites into the yolk mixture to lighten it. Then gently fold in the remaining egg whites in two additions, using a spatula to cut through the center and fold from the bottom up. This prevents deflating the air you’ve so carefully incorporated. The final batter should be smooth, glossy, and just thick enough to hold its shape when you lift the spatula.
Prepare the Pan and Bake in a Water Bath
Preheat your oven to 325°F. Line a 9×5-inch loaf pan with parchment paper, leaving an overhang on the sides for easy removal. Lightly grease the parchment with butter. Pour the batter into the prepared pan and smooth the top with a spatula. Sprinkle the optional 0.25 cup granulated sugar topping evenly over the surface.
Here’s where the water bath comes in: place the filled pan in a larger roasting pan. Pour the 2 cups water into the bottom of the roasting pan, being careful not to get any water in the batter. Cover the pan tightly with aluminum foil, sealing it completely to prevent steam from escaping. This creates the perfect humid environment for that signature moist texture.
Bake Low and Slow for Perfect Texture
Bake for 50-60 minutes until the top is golden brown and a toothpick inserted in the center comes out clean. The key here is patience—castella needs time to develop its signature moist crumb. If the top browns too quickly, tent it loosely with foil to prevent over-browning while maintaining moisture.
When done, remove from the oven and let cool in the pan for 15 minutes before turning out onto a wire rack to cool completely. The cooling process is crucial—it allows the castella to set properly without cracking. Once fully cooled, slice with a serrated knife for clean cuts and serve at room temperature. The result should be a tender, melt-in-your-mouth sponge with a delicate vanilla aroma that fills your kitchen.
Pro Tips For Making 6 Eggs Castella
- Whisk Eggs Until Cold: Castella’s texture hinges on air—whisk the eggs until they’re noticeably thicker and pale, not just “a bit frothy.” I used to eyeball it and ended up with a dense, cake-like mess. A cold bowl (chilled in the freezer for 10 minutes) helps too—eggs emulsify better when they start cool.
- Scrape the Vanilla Bean: Don’t just scrape the seeds—split the pod lengthwise and drag a knife along the entire inner surface to get that deep, resinous flavor. I skipped this once and the cake tasted sweet but flat. If you’re lazy, use 1 tsp vanilla extract, but you’ll miss the complexity.
- Don’t Overmix the Batter: Fold in the flour just until combined—lumps are fine. Overmixing develops gluten, and your castella will turn out tough instead of tender. I learned this after a batch that resembled dense pound cake. Stop when the flour disappears, even if it looks uneven.
- Preheat Pan to 325°F: Too hot (350°F+) and the butter melts too fast, causing a greasy top. Too cool (300°F) and it won’t rise properly. I now wait 15 minutes after preheating to let the oven stabilize—my castella bakes evenly with a crackly crust every time. Use an oven thermometer if yours lies.
Creative variations of this 6 eggs castella
Matcha Green Tea
Swap the vanilla bean for 2 tablespoons high-quality matcha powder (I recommend Ippodo Tea or Jade Leaf) dissolved in the milk before adding it to the batter. This creates an authentic Japanese Castella with earthy, umami notes.
For extra richness, add 1 teaspoon honey to the matcha mixture. The matcha enhances the delicate sponge texture while adding vibrant green color—perfect for traditionalists. 🌿
Chocolate Twist
Infuse the batter with ½ cup Dutch-process cocoa powder (like Dutch Bros) and reduce the flour to 1 cup. Add ¼ cup melted dark chocolate (70% cocoa) to the yolk mixture for deep flavor.
Top with a dusting of cocoa powder before baking. This version delivers a decadent dessert that still maintains the signature moist crumb. Pair with whipped cream for a restaurant-worthy treat. 🍫
Citrus Zest
Brighten the flavor profile with 1 tablespoon lemon zest and 1 tablespoon orange zest added to the yolk mixture. For extra citrus punch, fold in 2 tablespoons freshly squeezed lemon juice with the milk.
The zest dissolves beautifully into the batter, creating a subtly tangy castella that’s perfect for spring or summer gatherings. Garnish with thin citrus slices when serving. 🍊
Spiced Chai Version
Warm the milk with ½ teaspoon ground cardamom, ¼ teaspoon cinnamon, and pinch of cloves before adding it to the batter. Add 1 teaspoon vanilla extract to complement the spices.
This aromatic twist transforms Castella into a cozy dessert with warm baking spices. Serve with chai tea for an authentic experience. The spices infuse beautifully without overpowering the delicate texture. 🌶️
Layered Flavors
Create a marbled effect by dividing the batter in half. Add 1 tablespoon strawberry jam or raspberry puree to one portion, then gently fold it in. Pour half the plain batter into the pan, then swirl in the berry-infused batter with a knife before adding the remaining plain batter.
Bake as directed for a stunning presentation with bursts of fruity flavor in every bite. 🍓
Modern Adaptation
For a contemporary twist, replace half the milk with ½ cup coconut milk and add 1 teaspoon coconut extract. Top with toasted coconut flakes before baking. This tropical version keeps the signature moist texture while adding exotic flavors.
It’s especially popular in Hawaii where Castella has become a local favorite. The coconut enhances the vanilla notes beautifully. 🥥
Nutrition facts
Frequently asked questions
Why does this Castella recipe use 6 eggs instead of 4 or 8?
The 6 eggs create the perfect balance between structure and tenderness for this delicate sponge. Fewer eggs (4) would make it too dense, while more (8) could make it dry. The high fat content in eggs gives Castella its signature moist crumb and crack-free texture when baked properly in a water bath.
Can I make this Castella without a water bath?
Technically yes, but you risk cracking and a drier texture. The water bath creates a humid environment that prevents the top from drying out too quickly while allowing even moisture distribution. For a quick alternative, try baking in a 9×5-inch pan lined with foil and covering tightly with foil for the first 30 minutes—just don’t expect the same professional results.
How do I prevent cracks from forming in my Castella?
Cracks usually happen from rapid drying or temperature shifts. To avoid them: 1) Use room-temperature eggs and ingredients, 2) Bake at 325°F (not higher), 3) Keep the oven door closed during baking, and 4) Let the cake cool in the pan for 15 minutes before removing. The water bath is your best defense against cracking!
Can I substitute vanilla extract for the vanilla bean?
Yes, but you’ll lose the speckled appearance and some depth of flavor. Use 2 teaspoons pure vanilla extract (not imitation) for the best results. For a more authentic experience, try scraping seeds from a vanilla bean pod and adding the pod to the batter—it infuses flavor during baking. The extract works in a pinch, though!
How long should I let the Castella cool before slicing?
Wait at least 2 hours (preferably overnight) before slicing for clean cuts. The cake firms up as it cools, making it easier to slice without crumbling. If you’re impatient, chill in the fridge for 1 hour first—just don’t freeze it before slicing, or it’ll be too dense. Patience here makes all the difference!

- 3lb Prime Rib Roast Recipe: Juicy Pink Center Guaranteed in 3 Hours - October 31, 2026
- 5 Spice Cake Recipe: Warmly Spiced Layers With Crunchy Top - October 31, 2026
- 1950’s Macaroni and Cheese Recipe: Nostalgic Creamy Cheese Sauce with Buttery Noodles - October 31, 2026