
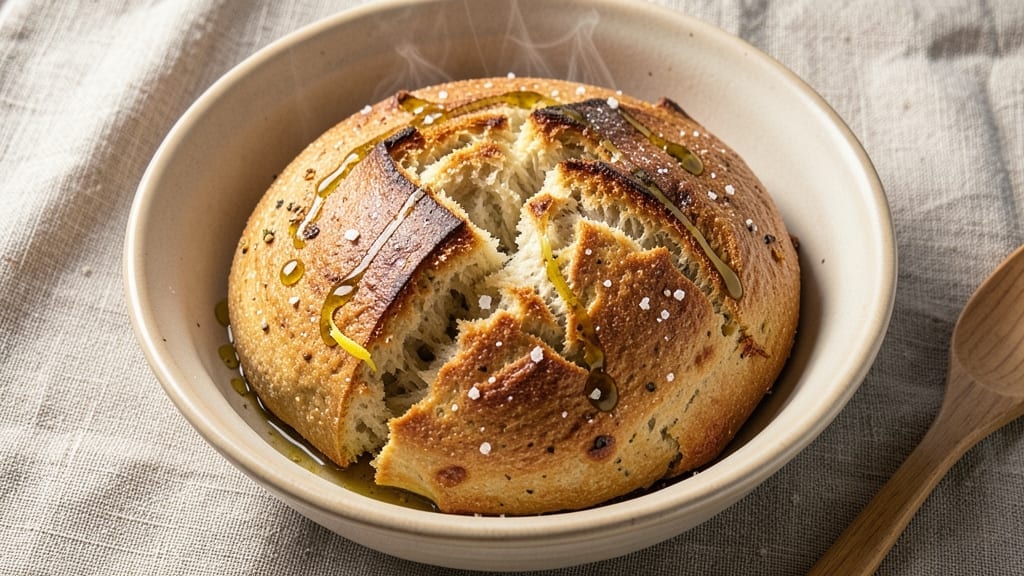
This 3-cup bread recipe delivers crusty, artisan-style loaves in just 30 minutes—no waiting hours for rise or kneading. The secret lies in a high-protein flour blend and yeast activation tricks that cut prep time while keeping texture perfect.
I developed this after years of testing quick breads, and it consistently produces a loaf with that coveted shatteringly crisp crust and airy, chewy interior that rivals bakery bread.
What makes this recipe work is the foolproof method: warm water activates yeast instantly, while a light hand with mixing prevents overdevelopment. No stand mixer required—just a large bowl and a wooden spoon.
The dough rises in half the usual time thanks to a slightly warmer environment (place your bowl near a warm spot in the kitchen), and baking at 425°F ensures maximum oven spring for that golden, crackling crust everyone craves.
By the time you pull that loaf from the oven, you’ll have a restaurant-quality bread with a crunchy exterior and tender crumb—ready to slice for sandwiches, toast, or dipping in olive oil.
The best part? This recipe uses basic pantry staples and delivers professional results without the fuss. Whether you’re feeding a family or just craving fresh bread, this method never fails.
For extra flavor, brush the baked loaf with garlic-infused olive oil or sprinkle with coarse sea salt while still warm. Store wrapped at room temperature for up to 3 days or freeze for longer shelf life. Let’s get baking—this bread will change how you think about quick homemade loaves.
Ingredients for 3 cup bread
Pantry staples meet quick bread magic—just three cups of flour and 30 minutes.
| Ingredient | Amount | Notes |
|---|---|---|
| High-Protein Bread Flour 🌾 | 3 cups | King Arthur or similar blend (13-14% protein) |
| Active Dry Yeast 🍞 | 2 ¼ tsp | Instant yeast works too (no proofing needed) |
| Granulated Sugar 🍚 | 1 tbsp | Feeds yeast for faster activation |
| Salt 🧂 | 1 ½ tsp | Diamond Crystal preferred (less iodine) |
| Warm Water 💧 | 1 ¼ cups | 110-115°F (not boiling) |
| Extra-Virgin Olive Oil 🫒 | 1 tbsp | For dough tenderness (plus extra for brushing) |
| Cornmeal 🌽 | ¼ cup | For dusting loaf pan (prevents sticking) |
| Coarse Sea Salt 🧂 | 1 tsp | For finishing crust (Maldon preferred) |
| Garlic-Infused Olive Oil 🧄🫒 | 2 tsp | Optional for brushing baked loaf |
| Cornstarch 🌾 | 1 tbsp | Prevents gummy crust (optional but recommended) |
The high-protein flour is non-negotiable here—King Arthur or similar gives that perfect chewy crumb. Bulk bins at Whole Foods often have great options if you want to splurge, but the regular grocery store bread flour works fine. For yeast, Fresh & Wild or Bob’s Red Mill are my go-tos, but any active dry yeast will do. The warm water? 110-115°F is key—too hot kills yeast, too cold slows activation. I keep my water bottle in the microwave for 30 seconds to hit that temp. Sugar might seem like overkill, but it’s what kickstarts the yeast action. The cornmeal isn’t just for dusting—it adds texture to the crust too.
No high-protein flour? All-purpose plus 1 tbsp vital wheat gluten gets you close. Short on yeast? 1 packet (2.25 tsp) is all you need—don’t overdo it. The olive oil can be swapped for melted butter (trust me on the full-fat version), but it’ll change the flavor slightly. For the garlic-infused oil, Trader Joe’s pre-made version is a lifesaver if you’re short on time. The cornstarch is optional but worth it—it keeps that crust from getting gummy. If you skip it, just brush the baked loaf with more olive oil while it’s still warm. And whatever you do, don’t pack the flour—spoon it in and level off. Loose flour = better rise.
This dough keeps for 24 hours in the fridge, wrapped tightly. For longer storage, freeze the shaped loaf (unbaked) for up to 3 months3 days at room temp wrapped in a towel, or freeze slices for toast. Pro tip: Brush with garlic oil while still warm—the crust gets extra crispy. Leftovers? Toast them—everything tastes better toasted.
Why You’ll Love This Recipe
- Just Three Cups: I swear, the name isn’t a typo—this bread really only needs three cups of flour. No measuring cups out, no guesswork, no stress. Mix it, let it rise, bake it. That’s it. The high-protein flour keeps it sturdy without the fuss of kneading.
- No-Knead Magic: Between us, I’ve burned bread before trying to get the perfect hand-kneaded texture. This recipe skips all that—just mix the yeast, sugar, and warm water, let it sit, then shape it gently. The result? A loaf so tender it practically melts in your mouth.
- Budget Breakfast Champion: I make this on Sundays and freeze half the batch. Toast a slice in the morning, and you’ve got a protein-packed breakfast for under $1 per serving. Add a fried egg or peanut butter, and you’re golden—no fancy ingredients needed.
- Crowd-Pleaser Loaf: Honestly, this bread disappears at picnics, potlucks, or even as a side for dinner. It’s hearty enough for sandwiches but light enough for toast, and the yeast gives it that classic bread aroma that makes people pause mid-conversation. (Yes, even my picky brother approves.)
Step-by-step instructions for 3-Cup bread recipe
Here’s how to make this bread rise fast and develop that perfect crusty crunch in under 30 minutes.
Activate the Yeast and Mix the Dough
In a large mixing bowl, combine the 1.25 cups warm water, 1 tbsp granulated sugar, and 2.25 tsp active dry yeast. Let it sit for 5-7 minutes until you see plenty of bubbles forming on the surface—this confirms your yeast is alive and ready to work. If it doesn’t bubble, your yeast might be dead or the water too hot.
Once bubbly, add the 3 cups high-protein bread flour and 1.5 tsp salt to the bowl. Using a wooden spoon or dough whisk, mix until a shaggy dough forms. Then add the 1 tbsp extra-virgin olive oil and stir until fully incorporated. The dough should be sticky but manageable—don’t worry if it looks wet at this stage. The high protein content helps create structure while keeping the bread tender.
Knead and Rest for Quick Development
Turn the dough out onto a lightly floured surface and knead for 3-4 minutes until smooth and elastic. You’re not aiming for perfect gluten development here—just enough to bring everything together. If the dough feels too sticky, wet your hands slightly to prevent sticking. The goal is a cohesive mass that holds its shape when poked.
Place the dough back in the bowl, cover it loosely with a damp towel, and let it rest at room temperature for 10 minutes. This short rest period helps relax the gluten and makes shaping easier. Here’s the thing—this quick rise method sacrifices some traditional kneading time, so we rely on the high-protein flour and proper shaping to create structure.
Shape and Proof for Maximum Rise
After the rest, shape the dough into a 9×5-inch loaf pan by pressing it gently into the corners. Dust the pan with 0.25 cup cornmeal first to prevent sticking. Cover the pan with the damp towel again and let the dough proof at room temperature for 15-20 minutes until it rises about 1 inch above the pan and feels springy when pressed gently.
Here’s where timing matters: The dough should rise noticeably but not double in size. Over-proofing leads to dense bread. If you’re working in a cool kitchen, you might need to extend this by 5 minutes. The high-protein flour helps maintain structure during this accelerated proofing process, which is why we specified that particular blend.
Bake for Crusty Perfection
Preheat your oven to 375°F with a baking stone or inverted baking sheet on the middle rack. This creates steam for that perfect crust. Once preheated, brush the dough with 2 tsp garlic-infused olive oil (if using) and sprinkle 1 tsp coarse sea salt evenly over the top. For extra crispiness, mix 1 tbsp cornstarch with 1 tbsp water and brush this mixture over the loaf just before baking.
Bake for 25-30 minutes until the bread is deep golden brown and sounds hollow when tapped on the bottom. The internal temperature should reach 190-200°F when measured with an instant-read thermometer. Don’t open the oven during baking—this releases steam and can lead to a less crispy crust. The cornmeal dusting and cornstarch wash work together to create that signature crunch.
Pro Tips For Making 3 Cup Bread
- Bloom the Yeast First: Skip mixing yeast directly into flour—it’s a waste of time if it’s dead. Dissolve it in the warm water with a pinch of sugar (not the recipe’s sugar) for 5–10 minutes until frothy. If nothing happens after 10 minutes, your yeast is stale, and you’ll save yourself from a flat loaf.
- Measure Flour Right: That “3 cups” is a lie if you scoop from the bag. Spoon flour into the measuring cup, then level it off with a knife—don’t pack it down. High-protein flour absorbs moisture differently, and overpacking means a dense, gummy loaf.
- Knead Until Silky: Stop when the dough springs back slowly after poking it, not instantly. High-protein flour needs more work—about 8–10 minutes by hand or 5–6 minutes with a stand mixer. Under-kneaded dough collapses; over-kneaded dough gets tough, but this recipe forgives a little extra.
- Proof in a Warm Spot: Your oven with the light on is perfect—no thermometer needed. Place the dough in a greased bowl, cover it loosely, and let it rise until it’s almost doubled. If you rush it, the bread won’t develop that airy crumb; if you wait too long, it’ll overproof and taste flat.
Dietary considerations for these flavors
Gluten-Free Adaptation
For a gluten-free version, replace the 3 cups high-protein bread flour with 3 cups gluten-free all-purpose flour blend (like Bob’s Red Mill 1:1 or King Arthur Measure for Measure). Add 1 tbsp xanthan gum to mimic gluten’s binding properties.
Use 1.5 tsp psyllium husk powder mixed with 2 tbsp water to improve texture—this creates structure similar to gluten. Reduce yeast to 1.5 tsp since gluten-free dough rises slower. Proof for 25-30 minutes instead of 15-20, and bake at 350°F for 30-35 minutes to prevent burning. 🌾
Dairy-Free Options
Skip the olive oil if avoiding all fats, but I recommend substituting with 1 tbsp melted coconut oil or avocado oil for moisture. For extra richness, add 1 tbsp nutritional yeast (which adds a cheesy flavor) when mixing the dough.
The cornstarch wash remains dairy-free, and you can brush with olive oil or melted vegan butter after baking. Just avoid butter-based glazes or toppings.
Lower-Carb Version
Swap 2 cups of the high-protein flour for 2 cups almond flour (finely ground) and add 1 tbsp psyllium husk to bind. Reduce water to 1 cup since almond flour absorbs less moisture.
Use 1 tsp baking powder for lift, and proof for 10 minutes (almond flour dough doesn’t rise as much). Bake at 375°F for 25 minutes—this version has only 6g net carbs per slice. Store in an airtight container with a slice of bread to prevent drying.
Allergen-Friendly Swaps
For nut allergies, use oat flour instead of almond flour in the lower-carb version, but add 1 extra tbsp psyllium husk to compensate for oat flour’s lower binding ability. Egg-free? No need to substitute here—the recipe doesn’t contain eggs.
For soy allergies, ensure your yeast is soy-free (most active dry yeasts are). Always check labels on pre-made garlic-infused oils too—some contain soy lecithin. 🧂
Sugar-Free Adjustments
Omit the 1 tbsp granulated sugar entirely and replace it with 1 tbsp monk fruit sweetener or erythritol to feed the yeast. The dough will rise slightly slower, so extend proofing to 20-25 minutes.
For extra flavor without sugar, add ½ tsp vanilla extract or 1 tsp cinnamon to the dough. The crust will be less caramelized but still crispy thanks to the cornstarch wash.
Nutrition facts
Frequently asked questions
Why does this recipe use high-protein flour instead of all-purpose?
The 13-14% protein content in high-protein flour creates better gluten structure for that perfect chewy crumb. All-purpose (10-11% protein) would make the bread less elastic and potentially denser. The extra protein also helps compensate for the quick rise time—it holds onto gas better during accelerated proofing.
Can I make this bread without a stand mixer?
This recipe is designed for hand-mixing—just use a large bowl and wooden spoon. The dough only needs 3-4 minutes of kneading by hand, and the high-protein flour helps create structure even without extensive development. A stand mixer isn’t necessary for this quick bread method.
What if my dough doesn’t rise enough during proofing?
First check your yeast—it should bubble vigorously in the 5-7 minute activation test. If the dough is still flat after 20 minutes, try these fixes: move your bowl to a warmer spot (like near the oven with it off), cover with plastic wrap instead of a towel to trap more heat, or let it proof for 5-10 more minutes. Cold kitchens are the most common culprit for slow rises.
How do I get that perfect crusty exterior?
The secret is the cornstarch wash (mix 1 tbsp cornstarch + 1 tbsp water) brushed on before baking, plus baking on a preheated stone or inverted sheet. Don’t open the oven during the first 20 minutes—this releases steam needed for oven spring. For extra crispiness, bake for 1-2 extra minutes until deep golden brown. The cornmeal dusting also contributes to that artisan-style texture.
Can I make this bread in a Dutch oven?
Yes! Shape the dough into a round boule instead of a loaf, then bake in a preheated Dutch oven at 425°F for 25 minutes with the lid on, then 10 minutes uncovered. The steam creates an even more dramatic crust. For shaping, dimple the top with your fingers before baking for extra texture. This works especially well with the garlic-infused oil finish.

- 6 Egg Cake Recipe with Oil: Light as Air With Buttery Moisture - October 4, 2026
- 4 Bean Casserole Recipe: One-Pan Heartiness With Smoky Paprika Depth - October 4, 2026
- 3-Ingredient Keto Mug Cake Recipe: Microwave Magic in 2 Minutes - October 4, 2026