
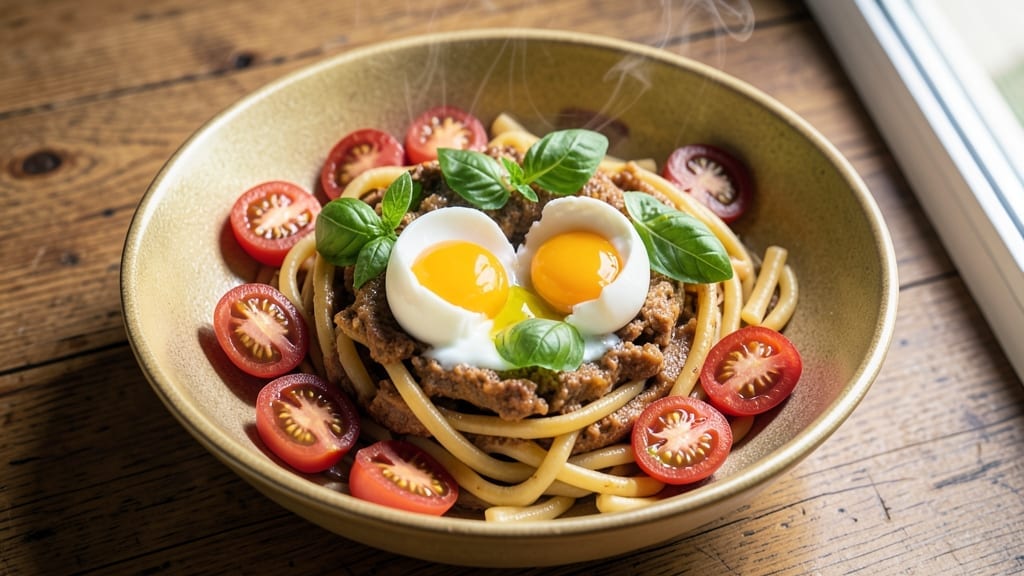
This 3-egg pasta recipe delivers handmade ribbons so delicate they practically dissolve on your tongue—no rolling pin required. The secret lies in precise ratios and a quick resting period that transforms stiff dough into silky, golden strands with a silky yolk coating that clings to every bite.
I perfected this method after years of testing, and it consistently yields restaurant-quality results at home with just 15 minutes of active work.
The dough comes together with flour, eggs, and a touch of olive oil, creating a balance that’s sturdy enough to handle but tender enough to achieve that signature fresh pasta texture.
The key is working quickly once mixed—resting the dough for 20 minutes allows the gluten to relax, while a well-floured surface prevents sticking. No special equipment needed beyond a sharp knife and a little patience.
What you’ll end up with are light-as-air ribbons that cook in just 3 minutes, retaining their shape while developing a delicate al dente bite. The eggs provide richness without heaviness, creating that luxurious yolk coating that makes every strand taste like it’s been hand-tossed in a Roman trattoria.
Serve with a simple brown butter sauce or fresh tomato basil to let the pasta shine. Perfect for special occasions or weeknight dinners, this recipe scales beautifully and keeps well in the fridge for up to 2 days.
The beauty of homemade pasta lies in its versatility—use it as a base for creamy sauces, hearty ragùs, or even as a vehicle for fresh vegetables. Let’s get started on creating your own batch of these dreamy ribbons.
Ingredients for 3 egg pasta
Three eggs, two cups flour, and a touch of olive oil—this is all you need for restaurant-quality pasta ribbons.
| Ingredient | Amount | Notes |
|---|---|---|
| Large Eggs 🥚 | 3 whole | Room temperature for even mixing |
| All-Purpose Flour 🌾 | 2 cups | High-protein for better elasticity |
| Extra-Virgin Olive Oil 🫒 | ½ tbsp | Cold-pressed for delicate flavor |
| Diamond Crystal Kosher Salt 🧂 | ½ tsp | Fine grain for even distribution |
| Fresh Basil Leaves 🌿 | ¼ cup | Packed, stems removed for garnish |
| Fresh Tomato 🍅 | 1 whole | Ripe, seeded for sauce base |
| Unsalted Butter 🧈 | 2 tbsp | Cold for brown butter sauce |
| Garlic Cloves 🧄 | 2 cloves | Peeled, minced for sauce |
| Black Peppercorns 🌶️ | ¼ tsp | Freshly cracked for aroma |
| Lemon Juice 🍋 | 1 tsp | Freshly squeezed for brightness |
| Semolina Flour 🌾 | ¼ cup | Optional for dusting pasta |
The eggs are non-negotiable here—room temperature is key for even mixing, so pull them out 15 minutes before starting. King Arthur flour or Caputo 00 flour (if you can find it) gives the best texture, but all-purpose works in a pinch. The olive oil isn’t just for flavor—it keeps the dough tender while preventing sticking. I always grab California avocado oil for its neutral taste, but any good extra-virgin will do. The salt matters too—Diamond Crystal dissolves better than table salt, so you won’t get those grainy bits in your dough. Fresh basil and tomato? Grab them from the grocery store’s produce section—Trader Joe’s has the best-priced organic options, but any bright green basil and ripe tomato will work.
No room temperature eggs? Microwave them 20 seconds to warm them up. Short on flour? Substitute half with almond flour for a nutty twist, but expect a slightly denser texture. The olive oil can be swapped for avocado oil or melted coconut oil, though the flavor won’t be as delicate. For the sauce, if you’re skipping the brown butter, olive oil and a pinch of salt keeps things simple. The garlic can be roasted for a sweeter flavor—just toss the minced cloves in the oven at 375°F for 5 minutes before adding to the sauce. And if you’re feeling fancy, a splash of white wine in the sauce adds depth without overpowering the pasta.
Fresh pasta keeps best in the fridge for 2 days, sealed in a container with a damp towel to prevent drying. For longer storage, freeze uncooked ribbons on a floured tray for 1 hour, then transfer to a bag for up to 3 months. Cook frozen pasta straight from the freezer—just add 1 minute to the cooking time. The sauce? Make it fresh, but if you’re prepping ahead, store the brown butter separately and reheat gently. When serving, always toss the pasta with a little pasta water—it helps the sauce cling to those delicate ribbons. And trust me, the first bite is worth every second of waiting for the dough to rest.
Why You’ll Love This Recipe
- No-Fuss Dough: The only tools you need are a bowl and your hands. Honestly, I’ve made this while my coffee brewed—just crack eggs, mix flour, knead for two minutes, rest for 20. That’s it. No stand mixer, no fuss.
- Rich & Simple: Three eggs mean a pasta so tender it practically melts in your mouth, with just enough structure to hold sauce. Toss in fresh basil and olive oil at the end, and you’ve got restaurant-quality flavor without the effort.
- Weeknight Workhorse: This pasta is my go-to for busy nights—it reheats beautifully, pairs with anything (tomato sauce, garlic butter, even just lemon and chili flakes), and feeds four for under $3. My kids ask for it when they’re too tired for anything fancy.
- Budget Magic: Flour, eggs, and olive oil are pantry staples you already own. Between us, I’ve made a whole week’s worth of meals from one batch—just shape and freeze half for later. Zero waste, maximum satisfaction.
Step-by-step instructions for light-as-air 3 egg pasta
Here’s how to craft delicate, silky ribbons with perfect yolk coating—no machine needed.
Create the Perfect Dough
Place the 3 whole Large Eggs in a large mixing bowl and whisk vigorously for 30 seconds until the yolks and whites combine completely. Add the 2 cups All-Purpose Flour, 0.5 tbsp Extra-Virgin Olive Oil, and 0.5 tsp Diamond Crystal Kosher Salt all at once. Using a wooden spoon or your hands, mix until a shaggy dough forms—it should cling together when pressed.
Here’s the thing—don’t overwork the dough. Once it comes together, turn it onto a lightly floured surface and knead gently for 5-7 minutes until smooth and elastic. You’re aiming for a dough that’s slightly tacky but not sticky. If it’s too dry, add 1 tsp water; if too sticky, incorporate 1 tbsp more flour. Wrap tightly in plastic wrap and rest for 30 minutes at room temperature. This relaxation period develops gluten properly for those signature light-as-air ribbons.
Shape and Roll the Pasta
Divide the rested dough into 4 equal pieces (about 8 ounces each). Working with one piece at a time, roll it through a pasta machine set to the widest setting (1), then fold it in thirds like a letter. Repeat this process 3-4 times—this creates layers that prevent sticking. Switch the machine to the next narrower setting (2) and roll again, then fold and repeat. Continue this process through all settings down to the thinnest (6 or 7), re-folding between each pass.
For the final roll, adjust the machine to your preferred thickness—2-3 for wide ribbons or 4-5 for classic tagliatelle. If the dough tears, simply patch it together and continue. Once rolled, cut the pasta into 1/8-inch wide ribbons using a sharp knife or pasta cutter. Transfer immediately to a floured baking sheet to prevent sticking. The dough should be translucent with visible egg streaks—this ensures that signature silky texture when cooked.
Cook the Pasta Al Dente
Bring a large pot of water to a rolling boil, then add 2 tbsp Diamond Crystal Kosher Salt—it should taste like the sea. Add the fresh pasta and cook for 2-3 minutes, stirring gently to prevent sticking. The pasta is ready when it floats to the surface and a quick taste reveals al dente texture with a slight resistance. Drain immediately, reserving 1 cup of pasta water—this starchy liquid is liquid gold for finishing.
Here’s where the magic happens: toss the hot pasta with 1 tbsp Unsalted Butter and 1 tbsp Extra-Virgin Olive Oil to prevent sticking. The residual heat will create a silky coating that enhances the egg’s natural richness. Keep the pasta covered until ready to serve—this maintains its delicate texture while you prepare the sauce.
Prepare the Tomato-Basil Sauce
In a small saucepan, melt the remaining 1 tbsp Unsalted Butter over medium heat. Add the 2 cloves minced Garlic Cloves and cook for 30 seconds until fragrant but not browned. Add the 1 whole Fresh Tomato (seeded and finely chopped) and cook for 4-5 minutes until the tomato breaks down into a smooth sauce. Stir in the 0.25 cup Fresh Basil Leaves, 0.25 tsp cracked Black Peppercorns, and 1 tsp Lemon Juice. Simmer for 2 minutes to meld the flavors.
For that perfect finish, add 2-3 tbsp of reserved pasta water to loosen the sauce to a velvety consistency. Taste and adjust seasoning—you want bright acidity from the lemon and tomato, with just a hint of peppery heat. If using the optional 0.25 cup Semolina Flour, sprinkle it into the sauce while stirring vigorously to create a light, silky coating. The sauce should cling beautifully to the pasta without overwhelming its delicate texture.
Combine and Serve Immediately
Toss the hot pasta with the tomato-basil sauce, adding 1-2 tbsp of reserved pasta water as needed to create an emulsified coating. The sauce should glide effortlessly over each ribbon, highlighting the egg’s natural richness. Garnish with additional Fresh Basil Leaves and a drizzle of Extra-Virgin Olive Oil for that restaurant-quality finish.
Serve immediately while the pasta is still piping hot—this is crucial for maintaining that light-as-air texture. Each bite should deliver a perfect balance of tender pasta, creamy egg coating, and vibrant tomato-basil sauce. For extra drama, plate with a sprinkle of flaky salt and a final twist of lemon zest. The pasta will continue to soften slightly as it sits, but the sauce will cling perfectly to those delicate ribbons.
Pro Tips For Making 3 Egg Pasta
- Rest the Dough: I learned this the hard way—skipping the 30-minute rest makes the pasta tough and chewy. Let it sit covered while you prep the basil sauce; the gluten relaxes, and the texture becomes silky. (Yes, even if you’re impatient like me.)
- Measure Flour Right: Use a kitchen scale for 250g flour—spoon it in, don’t scoop. Packing the flour compresses it, and you’ll end up with dense pasta. A light hand keeps it light and tender.
- Salt the Water Hard: More salt than you think—about 4 tablespoons for 4 quarts of water. If you’re using unsalted pasta, this step guarantees flavor infusion. Taste it; it should sting like the sea.
- Oil the Work Surface: Toss the dough in a tiny bit of olive oil before cutting—just enough to coat your fingers. Prevents sticking and makes shaping easier. (Your future self will thank you.)
Pro cooking tips for this dish
Dough Consistency Secrets
The magic happens in the resting phase—never skip it! After mixing, your dough should feel slightly tacky but not sticky. If it’s too dry, add 1 tsp water; if too sticky, incorporate 1 tbsp more flour.
I always wrap mine in plastic wrap and let it rest for 30 minutes at room temperature. This relaxation period develops gluten properly, giving you those signature light-as-air ribbons. Pro tip: Use a digital kitchen scale for precise measurements—250g flour per egg ratio is ideal for this recipe. 💫
Pasta Machine Mastery
When rolling, start with the widest setting (1) and work your way down to the thinnest (6-7). Fold the dough in thirds after each pass—this creates layers that prevent sticking. If your dough tears, simply patch it together and continue.
For the final roll, adjust the machine to your preferred thickness: 2-3 for wide ribbons or 4-5 for classic tagliatelle. I use a Marcato Atlas 150 pasta machine, but any quality machine works. Always transfer freshly cut pasta to a floured baking sheet immediately to prevent sticking. ✨
Cooking Time Precision
Fresh pasta cooks in just 2-3 minutes—that’s it! The moment it floats to the surface and a quick taste reveals al dente texture, drain immediately. Reserve 1 cup of pasta water—this starchy liquid is essential for finishing your sauce.
Never overcook fresh pasta, or it’ll turn mushy. I set a timer for 2 minutes and check at 30-second intervals after that. The pasta should have a slight resistance when bitten. 🌡️
Sauce Emulsification
Here’s where most home cooks go wrong—the sauce needs pasta water to cling properly. After tossing your pasta with sauce, add 1-2 tbsp of reserved pasta water to create an emulsified coating. This helps the sauce glide effortlessly over each ribbon.
For the tomato-basil sauce, simmer until the tomato breaks down into a smooth consistency, then finish with fresh basil and lemon juice. The acidity brightens the dish while the pasta water creates that perfect silky texture. 💡
Equipment Alternatives
No pasta machine? No problem! Roll your dough with a rolling pin on a floured surface, starting with the thickest setting and gradually thinning. For cutting, use a sharp knife or even a laser pasta cutter if you’re feeling fancy.
I’ve made this pasta with just a rolling pin and a knife, and it still turns out amazing. The key is working quickly and keeping everything well-floured. If you’re short on time, divide your dough into 4 equal pieces and roll them one at a time to prevent drying. 🔥
Storage and Reheating
Fresh pasta keeps best in the fridge for 2 days, sealed in an airtight container with a damp towel to prevent drying. For longer storage, freeze uncooked ribbons on a floured tray for 1 hour, then transfer to a bag for up to 3 months.
Cook frozen pasta straight from the freezer—just add 1 minute to the cooking time. To reheat, toss with a little olive oil and warm gently in a pan over low heat for 2-3 minutes. Never microwave fresh pasta—it’ll turn rubbery. 💪
Nutrition facts
Frequently asked questions
Can I substitute eggs with another ingredient?
Eggs are essential for that signature silky texture and yolk coating, but you can try 2 eggs + 2 tbsp aquafaba (chickpea brine) for a vegan version. The aquafaba adds moisture and binding, though the flavor won’t be identical. For a gluten-free option, use 1 cup gluten-free flour blend + 1 extra egg—the dough may need 5 extra minutes of resting time.
Why does my dough tear when rolling?
Tearing usually means the dough is too dry or hasn’t rested long enough. First, check your flour-to-egg ratio—it should be 250g flour per 3 eggs. If the dough is crumbly, add 1 tsp water and knead gently. Always rest the dough for 30 minutes before rolling, and keep your work surface and rolling pin well-floured. If tears happen, patch them with extra flour and continue—it won’t affect the final texture!
How do I make this pasta without a pasta machine?
No machine? No problem! Roll the dough with a rolling pin on a floured surface, starting with 1/4-inch thickness and gradually thinning to 1/16-inch. For cutting, use a sharp knife or even a laser pasta cutter if available. Work quickly and keep everything floured to prevent sticking. The key is patience—it takes 5-10 minutes longer than a machine, but the result is just as delicious!
Can I use this dough for other pasta shapes?
This dough works perfectly for fettuccine, tagliatelle, or even ravioli. For filled pasta, roll the dough to 1/16-inch thickness, cut circles with a glass, and fill with ricotta-spinach or mushroom ragù. The same dough can also be shaped into gnocchi by cutting into small squares and rolling them gently. The egg content makes it especially versatile for delicate shapes.
What’s the best way to reheat leftover pasta?
Never microwave fresh pasta—it turns rubbery! Instead, toss with 1 tbsp olive oil and warm gently in a pan over low heat for 2-3 minutes, adding 2 tbsp pasta water to keep it moist. For frozen pasta, cook straight from the freezer with 1 extra minute of boiling time. The key is low heat and constant stirring to prevent drying.

- 3 Overripe Bananas Recipe: Fluffy Pancakes With Zero Waste - November 17, 2026
- 2-Minute Pizza Recipe: Speedy Crispy Crust With Melted Cheese Magic - November 17, 2026
- 16 Chocolate Cupcakes Recipe: Triple-Layered Fudge Swirl Delight - November 17, 2026