
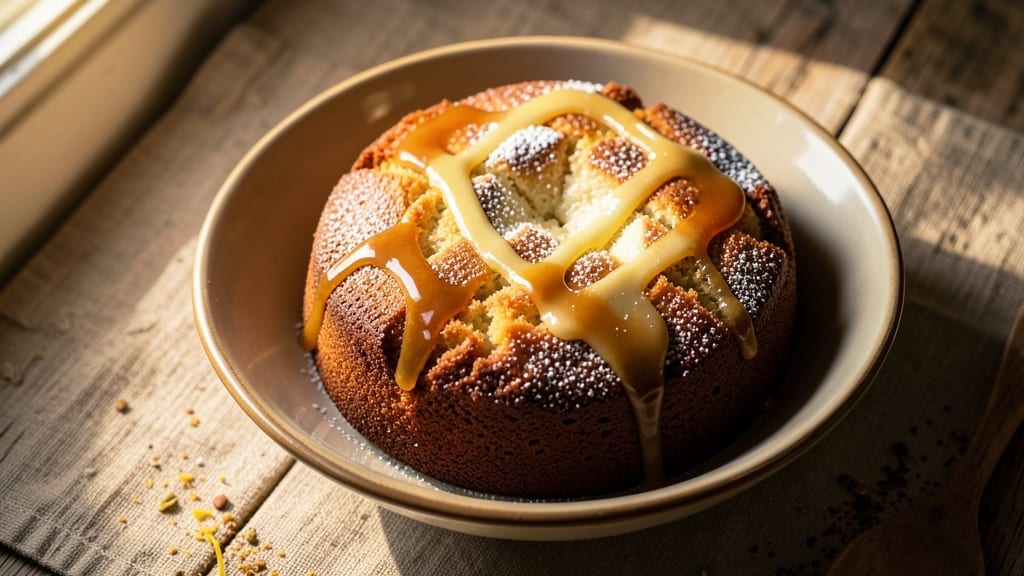
A 3-egg pound cake delivers that legendary moist, tender crumb we all crave—no greasy butter pockets or dry crumb here. This classic vanilla cloud uses a foolproof one-bowl method where creaming butter and sugar properly creates air pockets that expand into that signature fine crumb.
The secret lies in precise mixing order and baking time to lock in moisture without overbaking.
What sets this recipe apart is its ultra-moist texture achieved through a simple technique: folding in eggs one at a time while keeping the batter cool. The cake bakes at 350°F for 45-50 minutes, emerging with a golden dome and a springy texture that crumbles perfectly.
No fancy equipment needed—just a standard mixing bowl and a reliable oven.
The result is a light-as-air vanilla cake with a delicate crumb that melts in your mouth. Slice it warm for maximum tenderness, or layer with whipped cream and fresh berries for a showstopping dessert. This isn’t just pound cake—it’s the kind that makes people ask for seconds.
Perfect for birthdays, holiday gatherings, or satisfying a sweet tooth, this recipe scales easily for any occasion. The one-bowl method keeps prep simple while delivering restaurant-quality results at home. Let’s get baking!
Ingredients for 3 egg pound cake
Nine simple ingredients create this legendary ultra-moist vanilla cloud cake.
| Ingredient | Amount | Notes |
|---|---|---|
| Unsalted Butter 🧈 | 1 cup | Room temperature for creaming |
| Granulated Sugar 🍚 | 2 cups | Superfine preferred for smoothness |
| Large Eggs 🥚 | 3 whole | Room temperature, separated if desired |
| All-Purpose Flour 🌾 | 2 cups | Sifted for light texture |
| Vanilla Extract 🌿 | 2 tsp | Pure extract, not imitation |
| Baking Powder 🍞 | 1 ½ tsp | Aluminum-free for best rise |
| Salt 🧂 | ½ tsp | Fine sea salt preferred |
| Whole Milk 🥛 | ½ cup | Room temperature for smooth batter |
| Vegetable Oil 🫒 | ¼ cup | Light neutral oil, not flavored |
The butter and sugar are your foundation—use unsalted butter for precise flavor control, and let it sit at room temperature for at least 30 minutes before creaming. Superfine sugar dissolves more smoothly, but regular granulated works too if you pulse it in a food processor first. Eggs should be at room temperature for even baking, but don’t overlook the separation technique: folding them in one at a time keeps the batter cool and prevents overmixing. For the best results, grab Land O’Lakes unsalted butter or Organic Valley from your local grocery store’s dairy section—both brands have reliable fat content for perfect creaming.
No vanilla extract? Vanilla bean paste works beautifully, or scrape seeds from a vanilla bean into the batter. Running short on baking powder? Baking soda plus cream of tartar at a 1:2 ratio substitutes well. The milk can be swapped for evaporated milk or buttermilk for slight flavor variations, but whole milk gives the classic tender crumb. Vegetable oil can be replaced with melted butter (reduce other butter by 2 tbsp), but the texture will be slightly denser. For a gluten-free version, use a 1:1 gluten-free flour blend—just expect a slightly denser crumb. The key to success is keeping everything cool during mixing, so don’t rush the process.
Store baked cake in an airtight container at room temperature for up to 3 days—it actually improves overnight as the moisture redistributes. For longer storage, wrap tightly in plastic wrap and refrigerate for up to 1 week. This cake freezes beautifully too—slice before freezing and thaw at room temperature for 15-20 minutes. The secret to reheating is simple: wrap slices in a damp paper towel and microwave for 10-15 seconds to restore moisture. I always bake two cakes at once—one for immediate serving and one to freeze for future cravings.
Why You’ll Love This Recipe
- Three-Egg Magic: I swear by this recipe—just three eggs, butter, and sugar do the heavy lifting. No measuring cups, no guesswork, just fold and bake. Honestly, my lazy Sundays became actual breakfasts after this.
- Butter-Sugar Bliss: That rich, tender crumb? All thanks to creaming butter and sugar until it’s light enough to float a boat. The vanilla? Chef’s kiss. It’s the kind of flavor that makes you want to slice a second piece before the first even cools.
- Weeknight Workhorse: Breakfast, dessert, or midnight snack—this cake handles it all. Toast a slice for brunch, drizzle with honey for a quick treat, or stash it in the fridge for next week’s emergency snack. Between us, I’ve fed a hangover with this.
- Budget-Friendly Luxury: Three eggs mean fewer groceries, but the result feels like a bakery cake. No fancy ingredients, just good basics that taste like you spent hours (but you didn’t). Leftovers? They’re my secret weapon for busy mornings.
Step-by-step instructions for ultra moist vanilla pound cake
Here’s how to achieve a tender, moist crumb without layering or folding—just one bowl and simple technique.
Cream Butter and Sugar Until Light and Fluffy
In a large mixing bowl, combine the 1 cup unsalted butter and 2 cups granulated sugar. Using an electric mixer on medium-high speed, beat for 3-5 minutes until the mixture is pale, thick, and nearly doubles in volume. This creaming process incorporates air, which creates that signature light texture.
I like to press my finger into the mixture at the end—if it leaves a slight indent that slowly fills back in, you’re ready. If it still looks grainy, keep beating another minute. The butter should be completely smooth with no visible lumps, ensuring maximum moisture in the final cake.
Add Eggs and Oil for Extra Tenderness
Add the 3 whole large eggs, one at a time, beating well after each addition until fully incorporated. Then add the 0.25 cup vegetable oil and mix until smooth. This combination of eggs and oil creates a rich, moist crumb that stays tender for days.
Here’s the thing—don’t skip the oil. It adds moisture without making the cake greasy, and it helps prevent dryness that often comes with pound cakes. Mix for about 1 minute after adding the oil to ensure everything is fully combined and the batter looks silky.
Alternate Dry and Wet Ingredients for Even Texture
With the mixer on low speed, add 1 cup of the all-purpose flour (about half the total) to prevent overmixing. Mix just until combined, then add 0.25 cup whole milk. Repeat, alternating between the remaining 1 cup flour and 0.25 cup milk, ending with flour. This gradual addition creates a smooth batter without developing gluten.
After adding all the flour, mix on low speed for just 30 seconds to combine. You should still see small flour streaks—the goal is to distribute the flour evenly without overworking the batter. Overmixing develops gluten, which leads to a tough cake instead of that tender crumb we’re after.
Fold in Vanilla and Baking Powder for Flavor and Rise
Add the 2 teaspoons vanilla extract and mix on low speed for 10 seconds to distribute the flavor evenly. Then gently fold in the 1.5 teaspoons baking powder and 0.5 teaspoon salt using a spatula. Be careful not to overmix—just combine until no dry spots remain.
This is where the magic happens: the vanilla infuses flavor while the baking powder ensures a proper rise. The salt balances sweetness and enhances all the flavors. The batter should be thick but pourable—like a very rich cake batter. If it’s too thick, add 1 tablespoon milk to loosen it slightly.
Bake at Low Temperature for Even Cooking
Preheat your oven to 325°F—this lower temperature prevents the outside from browning too quickly while allowing the center to cook through evenly. Pour the batter into an 8-inch round cake pan lined with parchment paper (or greased and floured if you prefer). Smooth the top with a spatula.
Bake for 50-60 minutes until a toothpick inserted in the center comes out clean. The cake should spring back slightly when pressed gently in the center. If the top browns too quickly, tent loosely with foil after 30 minutes. The goal is a golden dome with a moist, tender interior—not dry or cakey.
Pro Tips For Making 3 Egg Pound Cake
- CREAM BUTTER AND SUGAR LONG: I used to rush this step, but pound cakes demand patience—beat the butter and sugar until it’s pale and fluffy, about 3-5 minutes. That’s how you get the tender crumb this recipe promises, not a dense brick.
- WEIGH YOUR FLOUR: Scooping flour from the bag packs in air, and that’s how you end up with a cake that collapses. Use a kitchen scale and stop at 160 grams—no more, no less. Trust me, your cake will rise properly.
- DON’T OVERMIX THE BATTER: Once you fold in the flour, stop as soon as it’s just combined. Overmixing develops gluten, and that’s how you turn a light pound cake into a chewy loaf. Two turns with a spatula is all it takes.
- BAKE UNTIL 200°F INTERNAL: The recipe might say “golden brown,” but that’s not enough—check the center with a thermometer. At 200°F, it’s fully set and won’t sink later. (Yes, even if it looks underdone.)
Pro cooking tips for perfect results
Butter Temperature Matters
Your butter must be room temperature—not melted, not cold. Press it gently: if it leaves a slight indentation that slowly fills back in, it’s perfect. I use Land O’Lakes unsalted butter cut into chunks and left out for 30 minutes before creaming.
Cold butter won’t incorporate air properly, leading to a dense cake, while melted butter can cause greasy pockets. Test by pinching a piece between your fingers—it should feel soft but still hold its shape. 🧈
Egg Addition Technique
Add eggs one at a time, beating well after each addition. This gradual incorporation prevents sudden temperature spikes in the batter, which can cause curdling. I like to let each egg sit at room temperature for 10 minutes before adding.
For extra insurance, you can separate yolks and whites: fold in yolks first, then gently fold in whites at the very end to maintain maximum airiness. The goal is a smooth, ribbon-like batter that coats the back of your spoon. 🥚
Baking Powder Timing
Add baking powder last and mix just until combined—overmixing develops gluten, which makes the cake tough. I use aluminum-free baking powder for the best rise. For even distribution, sift it with your dry ingredients first, then gently fold it in with a spatula.
The batter should look thick but still pourable. If it looks too dry, add 1 tablespoon milk to restore moisture without deflating the air pockets you’ve worked so hard to create. 🍞
Oven Preheating Secret
Preheat your oven to 325°F—this lower temperature ensures even cooking without browning the top too quickly. I place a small baking dish filled with water on the lower rack 10 minutes before baking to add moisture to the air.
This helps create that signature ultra-moist texture. For best results, use an oven thermometer to verify your oven’s accuracy—many ovens run 25°F hotter than advertised. 🌡️
Toothpick Test Perfection
Your cake is done when a toothpick inserted in the center comes out clean with just a few moist crumbs clinging to it. If it comes out with wet batter, bake 5-10 more minutes. The cake should also spring back slightly when pressed gently in the center.
For an 8-inch pan, 50-60 minutes is typical, but your oven may vary. If the top browns too quickly, tent loosely with foil after 30 minutes to prevent over-browning while allowing the center to finish cooking. 💡
Cooling is Critical
Let the cake cool in the pan for 15 minutes before transferring to a wire rack. This gradual cooling prevents cracking. I run a thin knife around the edges first to loosen it from the pan.
Never refrigerate the cake immediately—temperature shock can cause condensation and make the crumb gummy. For best texture, serve at room temperature after cooling completely for 1-2 hours. This patience ensures that perfect melt-in-your-mouth consistency. ⏳
Nutrition facts
Frequently asked questions
Why does this recipe use only 3 eggs instead of 4 or 5?
Three eggs create a perfectly tender crumb while maintaining structure—fewer eggs prevent a dense, heavy texture. The oil in this recipe adds moisture without needing extra eggs, and the creaming method incorporates air for that signature lightness. Fewer eggs also mean easier mixing and a more delicate flavor profile.
Can I make this cake in a different pan size?
Yes! For a 9-inch pan, reduce baking time by 10-15 minutes (40-50 minutes total). For a 6-inch pan, increase time by 10-15 minutes (60-70 minutes). Adjust oven temperature if needed—325°F works best for even cooking. Always use the toothpick test to confirm doneness.
What’s the best way to store leftover cake?
Wrap tightly in plastic wrap and store at room temperature for up to 3 days in an airtight container. For longer storage, refrigerate for 1 week or freeze slices for 3 months. Thaw at room temperature—never microwave from frozen. To refresh, wrap slices in a damp paper towel and microwave for 10-15 seconds.
Why did my cake turn out dry?
Overbaking is the most common cause—check with a toothpick at 45 minutes if possible. Other culprits: using melted butter instead of room-temperature, overmixing the batter, or opening the oven door too early. For extra moisture, brush warm slices with simple syrup (equal parts sugar and water, heated until dissolved).
Can I substitute butter with oil?
Yes, but reduce butter by 2 tablespoons and add 2 tablespoons melted oil (total oil becomes 0.5 cup). The texture will be slightly denser, but still moist. For best results, use neutral oil like vegetable or canola. Never replace all butter—it’s essential for flavor and structure.

- 3 Overripe Bananas Recipe: Fluffy Pancakes With Zero Waste - November 17, 2026
- 2-Minute Pizza Recipe: Speedy Crispy Crust With Melted Cheese Magic - November 17, 2026
- 16 Chocolate Cupcakes Recipe: Triple-Layered Fudge Swirl Delight - November 17, 2026