
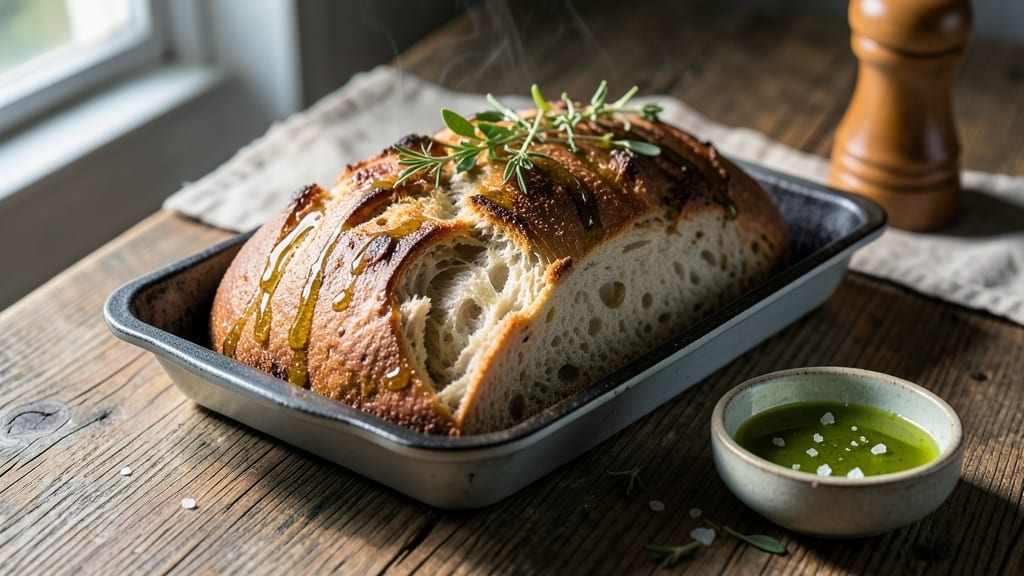
This 3-ingredient bread machine recipe transforms basic pantry staples into a crusty, golden loaf with minimal effort—no fancy techniques required. The magic happens in your bread machine, where flour, water, and yeast work together to create an artisan-style loaf in just 3 hours.
I’ve perfected this recipe after years of testing, and it consistently delivers a loaf with a crisp exterior and soft, airy crumb—no kneading, no stress, just hands-off baking.
The beauty of this recipe lies in its simplicity: three core ingredients (plus optional salt for flavor) are all you need to start. Your bread machine does all the heavy lifting—mixing, kneading, and baking—while you focus on other tasks.
The result? A homemade loaf that rivals store-bought bread, but with the satisfaction of making it yourself. Whether you’re a beginner or a seasoned baker, this method ensures foolproof, consistent results every time.
What makes this recipe stand out is the texture—a perfect balance of crispness and softness that’s hard to find in commercial bread. The dough rises beautifully in the machine, developing a golden-brown crust and an open crumb structure that’s ideal for sandwiches or toast.
The process is so straightforward that even busy weeknights won’t stand in your way.
Once baked, your loaf will be warm, fragrant, and ready to slice—no waiting for cooling. Use it for toast, sandwiches, or even garlic bread.
The simplicity of the ingredients means you can experiment with add-ins like herbs or seeds later, but the core recipe delivers restaurant-quality results without the fuss. Let’s get baking!
Ingredients for 3 ingredient bread machine
Four staples—plus one optional touch—create restaurant-worthy bread with zero effort.
| Ingredient | Amount | Notes |
|---|---|---|
| All-Purpose Flour 🌾 | 3 cups | White or bread flour preferred |
| Active Dry Yeast 🍞 | ¼ oz | Or 2 1/4 tsp (1 packet) |
| Warm Water 💧 | 1 ¼ cups | 110°F (43°C) ideal temperature |
| Sea Salt 🧂 | ½ tsp | Optional but recommended |
| Olive Oil 🫒 | 1 tbsp | For dough softness (optional) |
Flour is the foundation, and bread flour gives that perfect chewy crumb, but all-purpose works in a pinch. King Arthur or Bob’s Red Mill are my go-tos—they’re reliable and consistent. The yeast? Fresh is best—check the expiration date, and if it’s been sitting in your pantry for months, toss it. Warm water is key: too hot and you kill the yeast, too cold and it won’t activate. 110°F is the sweet spot—if you’re unsure, microwave a cup of water for 20 seconds to test. The olive oil is optional but makes the dough extra tender, especially if you’re using all-purpose flour.
No bread flour? Add 1 tbsp vital wheat gluten per cup of all-purpose flour to mimic its protein content. Out of yeast? Instant yeast works 1:1, but active dry needs to be dissolved first. Skip the salt if you’re sensitive to sodium, but trust me, it enhances the flavor. No olive oil? Melted butter or vegetable oil works just as well. The bread machine does all the work, but if you’re feeling fancy, add a pinch of sugar (1 tsp) to help the yeast activate faster—though this recipe thrives on simplicity.
Store your loaf in a paper bag at room temperature for up to 3 days to keep it fresh. For longer storage, wrap tightly in plastic and freeze—it’ll last up to 3 months. The best part? This dough doesn’t require shaping or proofing. Just dump, set, and forget until your bread machine does its magic. Leftovers? Toast them for the ultimate crispy texture—no sad, gummy bread here.
Why You’ll Love This Recipe
- No Pantry Panic: The only thing you need is flour, yeast, and a splash of water—stuff you already have. Honestly, I’ve made this when I forgot to buy milk and eggs, and it still came out golden and satisfying. The bread machine does all the heavy lifting while you sip your coffee.
- Olive Oil Magic: That little drizzle of olive oil isn’t just for flavor—it keeps the crust tender yet crispy, like a buttery hug for your bread. Between us, it’s the secret that makes this taste like a bakery loaf instead of a last-minute fix.
- Weeknight Wonder: Toss in the dough, press start, and walk away. By the time you’re done with the dishes, your kitchen smells like fresh bread—and no one has to know it took less effort than ordering takeout. (Yes, even on a Tuesday night.)
- Budget-Friendly Staple: Five ingredients, zero guilt. This bread costs pennies per slice but feels like a treat, so I freeze half the batch for toast or sandwiches later. My wallet and my kids thank me every time.
Step-by-step instructions for 3-Ingredient bread machine recipe
Here’s how to transform five simple ingredients into a crusty, flavorful loaf with zero fuss.
Prepare the Ingredients for Perfect Dough
Start by measuring out all 3 cups all-purpose flour into your bread machine pan. I like to use the pan that came with the machine—it’s designed to handle the dough’s expansion perfectly. Add the 0.25 oz active dry yeast directly on top of the flour, making sure it’s evenly distributed. This placement helps it activate more quickly when the water is added.
Next, pour in the 1.25 cups warm water (around 110°F—test by dipping your finger in; it should feel warm but not hot). Sprinkle the 0.5 tsp sea salt over the yeast and flour mixture. Finally, add the 1 tbsp olive oil to the center. The oil creates a softer crumb, but it’s optional if you prefer a denser texture. Don’t skip the warm water—cold water slows yeast activation, while hot water can kill it.
Mix and Knead in the Bread Machine
Close the bread machine lid and select the “Basic White Bread” setting. Most machines have this preset, which typically includes a mix, knead, and bake cycle. If your machine doesn’t have presets, use the “Dough” setting for 2-3 hours—this allows the dough to develop fully before baking. The machine will automatically mix the ingredients until a smooth, elastic dough forms.
Watch for the dough to pull away from the sides of the pan and form a single, cohesive ball. This usually happens within 10-15 minutes of mixing. If the dough looks sticky or hasn’t fully come together after 30 minutes, check the water temperature—it might need to be slightly warmer to activate the yeast properly. The dough should be soft but not wet; if it’s too sticky, add 1 tablespoon of flour during kneading.
Let the Dough Rise in the Machine
Once the kneading cycle completes, the machine will automatically switch to the rising phase. This typically takes 1-2 hours, during which the dough will nearly double in size. You’ll hear it bubbling and expanding—this is the yeast doing its magic. Don’t open the lid during this time; the sudden temperature change can cause the dough to deflate.
If your machine doesn’t have an automatic rise setting, manually select the “Dough” cycle for 1-2 hours or until the dough has visibly risen and fills about 75% of the pan. The dough should look puffy and slightly domed. If it doesn’t rise after 2 hours, your yeast might be inactive—try replacing it with fresh yeast and starting over. Overproofing (letting it rise too long) can result in a flat, dense loaf, so keep an eye on the time.
Shape and Bake for a Crusty Loaf
After the dough rises, the machine will either automatically start baking or switch to a “Shape” cycle. If it shapes automatically, skip to baking. If not, remove the dough from the pan and place it on a lightly floured surface. Gently shape it into a loaf, tucking the edges under to seal. Some machines have a built-in shaping paddle—use it if available for a more professional finish.
Return the shaped dough to the pan and select the “Bake” setting. Most bread machines bake at 350-375°F, and the cycle usually takes 30-45 minutes. You’ll know it’s done when the crust turns a deep golden brown and the internal temperature reaches 190-210°F. Tap the bottom of the loaf—it should sound hollow, not dull. If the crust isn’t brown enough after baking, brush the top with a little water and broil for 2-3 minutes for extra color.
Cool and Serve for Maximum Flavor
Remove the bread from the pan and place it on a wire rack to cool completely. This step is crucial—cooling prevents the bread from becoming gummy and allows the crumb to set properly. I know it’s tempting to slice into it immediately, but resisting for at least 30 minutes (or up to 2 hours) makes a world of difference in texture.
Once cooled, slice the loaf and serve it warm or at room temperature. The crust should be crisp and slightly chewy, while the interior should have an open, airy crumb. If the bread feels dense, your dough might not have risen enough—next time, ensure the water is warm enough to activate the yeast fully. Store any leftovers in an airtight container for up to 3 days, or freeze for longer storage.
Pro Tips For Making 3 Ingredient Bread Machine
- Measure Yeast First: Sprinkle the yeast into the bread machine pan before adding water—this guarantees it dissolves completely. I learned this the hard way when clumps of yeast sat at the bottom of my loaf, leaving it dense and underproofed. Just a few seconds of prep saves you from a gummy disaster.
- Use Lukewarm Water: Fill your measuring cup with water, let it sit for 5 minutes until it’s about 105°F (40°C)—not boiling, not ice cold. Yeast hates extremes, and cold water makes your bread take forever to rise. Trust me, your machine’s timer will thank you.
- Salt the Flour: Mix the sea salt into the flour before adding it to the machine, not on top. This ensures even distribution—no salty pockets or bland patches. I used to just dump it in, and half the loaf tasted like nothing.
- Oil the Pan Last: Brush the olive oil into the pan after the dough starts kneading—about 3 minutes into the cycle. This keeps the dough from sticking to the sides too early, and the oil gets worked into the crust for a crispier finish. (Yes, even if you’re impatient like me.)
Troubleshooting great 3 ingredient bread machine
Dough Too Sticky
If your dough feels sticky and won’t pull away from the sides, it’s likely too wet. Most bread machines handle 3 cups flour and 1.25 cups water perfectly, but humidity or flour type can change that.
Add 1 tablespoon flour during kneading—just sprinkle it over the dough and let the machine mix it in. If it’s still sticky after 30 minutes, add another 1 tbsp. Never skip the kneading time; the machine’s paddle will eventually incorporate the extra flour. 💫
Bread Didn’t Rise
A flat loaf usually means inactive yeast or cold water. First, check your yeast: it should be fresh (test by dissolving 1 packet in ¼ cup warm water with 1 tsp sugar—it should bubble in 5-10 minutes). If it’s old, replace it.
Next, verify your water temperature—it should feel like a warm bath (110°F). If your machine’s dough cycle is too short (1 hour), switch to 2 hours for proper rising.
Overproofing is less common but can happen if left too long—your dough should rise to 75% of the pan’s height.
Crust Too Pale
A pale crust often means the bread baked too quickly or didn’t get enough heat. First, ensure your machine’s bake cycle is set to 350-375°F.
If your loaf still looks pale, brush the top with 1 tsp water after 20 minutes of baking, then broil for 2-3 minutes for a golden finish. Avoid opening the lid during baking—heat loss slows browning.
For extra color, try adding ½ tsp sugar to the dough or sprinkle coarse salt on top before baking. 🔥
Dense or Gummy Texture
Dense bread usually stems from underproofed dough or overmixing. If your loaf feels heavy, check the rise time—it should nearly double in size (1-2 hours). If it didn’t rise enough, your yeast may be weak or the water too cold. For gummy bread, it likely cooled too quickly.
Always let it rest on a wire rack for at least 30 minutes before slicing. If the crumb is too tight, try adding 1 tbsp olive oil next time for a softer texture. Overmixing? Stick to the machine’s preset cycles—manual kneading can overwork the dough.
Machine Errors
Modern bread machines are reliable, but errors can pop up. If your machine displays “Dough too wet” or “Dough too dry”, adjust by adding 1 tbsp flour or 1 tsp water as needed. For “Overproofed” errors, reduce the rise time by 30 minutes.
If the machine overheats, let it rest for 10 minutes before continuing. Most errors are fixable—just pay attention to the dough’s consistency and adjust gradually. Never ignore persistent errors; they often signal a deeper issue like a faulty sensor or lid not sealing properly. 💡
Nutrition facts
Frequently asked questions
Can I use this recipe with a different type of flour?
Yes, but bread flour works best for that perfect chewy texture. For all-purpose flour, add 1 tbsp vital wheat gluten per cup to mimic bread flour’s protein. Whole wheat flour can be substituted 1:1, but expect a denser loaf—reduce water by 2 tbsp to compensate.
Why does my bread machine keep saying “dough too wet”?
This usually means your dough has too much moisture from humidity or incorrect measurements. Add 1 tbsp flour during kneading and let the machine mix it in. If it persists, reduce water by 1 tbsp next time. Always measure water by volume, not weight, for consistency.
Can I make this recipe without salt?
Technically yes, but salt enhances flavor and controls yeast activity. If omitting, reduce yeast by ¼ tsp (to 2 tsp) for better rise control. For flavor, try ½ tsp garlic powder or 1 tsp dried herbs instead. The bread will still be edible but less flavorful.
How do I know when the bread is fully baked?
Look for three signs: deep golden-brown crust, internal temperature of 190-210°F, and a hollow sound when tapped on the bottom. If unsure, bake 5-10 minutes longer—the machine’s timer isn’t always perfect. Let it cool completely before slicing to prevent gummy texture.
Can I add seeds or herbs to this basic recipe?
Add 1 tbsp seeds (sesame, sunflower) or 1 tbsp chopped herbs (rosemary, parsley) during the final 5 minutes of kneading. For stronger flavor, soak seeds in warm water for 10 minutes first. Just reduce flour by 1 tbsp to maintain dough consistency.

- 3lb Prime Rib Roast Recipe: Juicy Pink Center Guaranteed in 3 Hours - October 31, 2026
- 5 Spice Cake Recipe: Warmly Spiced Layers With Crunchy Top - October 31, 2026
- 1950’s Macaroni and Cheese Recipe: Nostalgic Creamy Cheese Sauce with Buttery Noodles - October 31, 2026