
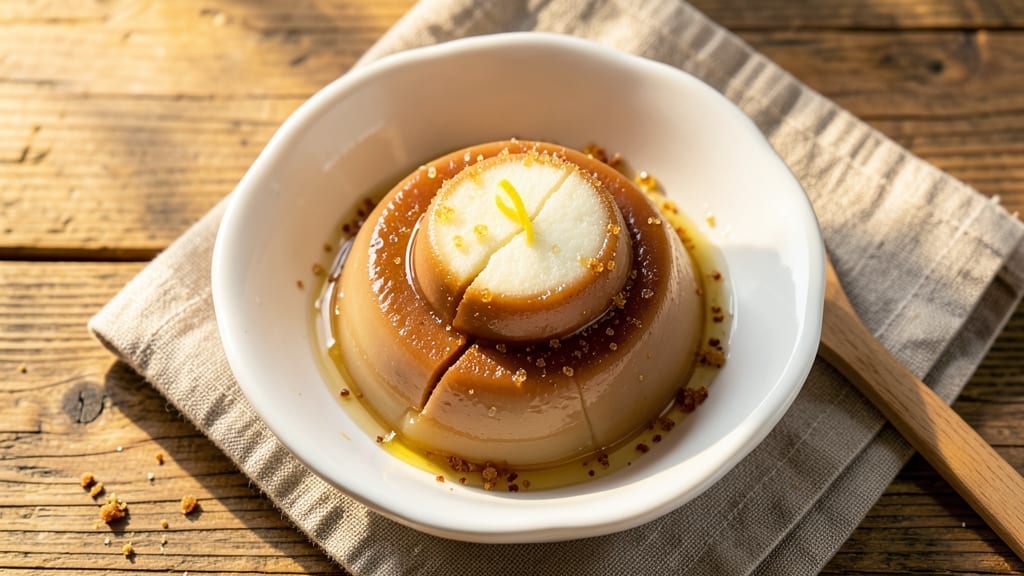
This 3-ingredient milk mochi recipe transforms simple pantry staples into delicate, cloud-like treats with a velvety milk filling—no special skills required. The secret lies in the perfect balance of mochiko flour and milk powder, creating a dough that’s both tender and resilient when shaped.
I developed this version after years of making traditional mochi, stripping it down to its most essential components while preserving that signature chew and melt-in-your-mouth texture.
The beauty of this recipe is its 15-minute preparation time, though the magic happens during the steaming process where the dough transforms into pillowy clouds. What makes it truly special is how the milk filling—just powdered milk and water—develops a subtle sweetness that pairs perfectly with the neutral mochi.
The result is a treat that’s elegant enough for special occasions but simple enough for a weeknight dessert.
By the time you’re done, you’ll have a plate of golden, translucent mochi with a delicate snap when bitten, giving way to that signature chewy texture. The milk filling stays cool and creamy inside, creating a contrast that makes every bite satisfying.
This is mochi that feels indulgent without requiring hours in the kitchen or exotic ingredients.
Serve these as a light dessert after a Japanese meal, or pack them for lunchboxes—they’re sturdy enough to handle travel but delicate enough to feel special. The recipe scales easily too, so you can make just a few for two or a batch to share.
Here’s how to create these silky clouds in your own kitchen.
Ingredients for 3 ingredient milk mochi
Three ingredients transform into pillowy mochi clouds with just a steamer and patience.
| Ingredient | Amount | Notes |
|---|---|---|
| Mochiko Glutinous Rice Flour 🍚 | 2 cups | High-quality, sifted for smooth texture |
| Whole Milk Powder 🥛 | 1 cup | Non-fat or whole, unsweetened |
| Water 💧 | ¾ cup | Room temperature preferred |
| Granulated Sugar 🍚 | ¼ cup | Fine grain for even dissolving |
| Vegetable Oil 🫒 | 1 tbsp | Light, neutral flavor preferred |
| Kosher Salt 🧂 | ¼ tsp | Fine grain for even distribution |
| Cornstarch 🌾 | 1 tbsp | For dusting work surface |
The mochiko flour is non-negotiable here—Japanese brands like Shiratamako or Amazon Basics are reliable. If you can’t find it, glutinous rice flour works in a pinch, but the texture won’t be identical. Milk powder makes all the difference: Nestlé or Carnation are widely available, but avoid flavored varieties. The sugar is just for balancing the dough’s natural sweetness—organic cane sugar dissolves faster if you’re in a hurry. For the oil, light olive oil or avocado oil keeps things neutral, but any vegetable oil will work. Pro tip: sift the flour and milk powder together to avoid lumps in your dough.
No mochiko flour? Sweet rice flour is your next best bet, though the texture will be slightly denser. Swap milk powder for evaporated milk or coconut milk powder, but reduce the water slightly since these are thicker. The sugar can be omitted entirely if you prefer a neutral flavor, but I find it helps the dough bind better. For a richer filling, add 1 tsp vanilla extract to the water before mixing. If your kitchen lacks a steamer, a basket in a pot with boiling water works just as well—just make sure the water doesn’t touch the mochi.
Freshly made mochi keeps for 3 days in an airtight container at room temperature, but it’s best enjoyed within 24 hours for that signature chew. For longer storage, freeze the shaped mochi (before steaming) for up to 3 months. To reheat, steam for 5-7 minutes or microwave for 20 seconds. The filling stays creamy if you reheat gently—microwaving too long turns it rubbery. Dust with extra cornstarch before serving to keep hands from sticking, and always serve with a green tea pairing for that authentic touch.
Why You’ll Love This Recipe
- Pantry Magic: I swear, this recipe is my go-to when I’ve got nothing but a bag of mochiko and a can of milk powder. Mix, steam, repeat—no fancy tools, just a pot and a bit of patience.
- Creamy Chew Perfection: That first bite of warm, chewy mochi with the milk powder’s rich depth? It’s like dessert hugs you. The sugar caramelizes just enough to make it taste homemade, not store-bought.
- Party in a Box: Between us, these are my secret weapon for potlucks or last-minute gifts. Wrap them in plastic, tie a ribbon—suddenly, you’ve got a treat that feels fancy but costs pennies.
- Steam-and-Forget Leftovers: I make a double batch on Sundays, let them cool, and they stay fresh for days. Reheat in the microwave or eat cold—they’re still soft, still sweet, and still my favorite lazy-day snack.
Step-by-step instructions for 3-Ingredient milk mochi
Here’s how to transform simple pantry staples into pillowy, chewy mochi in record time.
Whisk Dry Ingredients for a Smooth Batter
In a large mixing bowl, combine the 2 cups Mochiko Glutinous Rice Flour, 1 cup Whole Milk Powder, 0.25 cup Granulated Sugar, and 0.25 tsp Kosher Salt. Use a whisk to break up any lumps in the milk powder completely—this ensures your mochi will have that signature silky texture. I like to press the mixture through a fine-mesh sieve to eliminate any remaining clumps, which prevents graininess in the final product.
Add the 1 tbsp Vegetable Oil and mix until fully incorporated. The oil helps create that signature chewiness and prevents the mochi from becoming too dense. At this stage, the mixture should resemble fine sand with no visible dry spots. If you notice any flour clinging stubbornly to the bowl, give it a quick scrape with a rubber spatula to ensure everything gets evenly distributed.
Gradually Add Water for Perfect Dough Consistency
Begin adding the 0.75 cup Water to the dry mixture, one tablespoon at a time, while whisking continuously. You’re aiming for a dough that’s slightly tacky but still manageable—think of it like wet sand that holds together when squeezed but doesn’t stick to your fingers. This texture is crucial; too much water makes the mochi gummy, while too little results in dry, crumbly pieces.
After adding most of the water, switch to your hands. Knead the dough vigorously for about 3-4 minutes until it becomes smooth and elastic. You’ll know it’s ready when it forms a tight ball that doesn’t stick to your palms. If the dough feels too dry, add water 1 teaspoon at a time until it reaches the perfect consistency. The dough should be pliable but not sticky enough to leave residue on your hands.
Divide and Shape the Mochi
Lightly dust your work surface with the 1 tbsp Cornstarch to prevent sticking. Divide the dough into 12 equal portions (about 1.5 ounces each) and roll each piece into a ball. For perfectly round mochi, I like to use the palm of my hand to gently press down while rolling between my fingers—this creates that classic smooth, glossy surface.
Place each mochi ball on the cornstarch-dusted surface and cover them with a clean kitchen towel to prevent drying. Work with one piece at a time to maintain moisture. The key here is consistency—each piece should be identical in size for even cooking. If you notice any cracks forming, gently press the surface smooth with your fingers before proceeding to the next step.
Steam Until Pillowy Perfection
Set up a steamer by filling a pot with 2 inches of water and bringing it to a rolling boil. Place a heatproof plate or steamer basket inside, ensuring it doesn’t touch the water. Arrange the mochi balls in a single layer on the plate, leaving about ½ inch of space between each piece. This prevents them from sticking together during steaming.
Cover with a clean kitchen towel and steam over medium-high heat for 12-15 minutes. You’ll know they’re perfectly cooked when they’ve nearly doubled in size and develop a glossy sheen on the surface. The interior should be completely opaque with no translucent center—this indicates they’ve absorbed enough moisture to become silky and tender. Be careful not to oversteam, or they’ll turn gummy rather than chewy.
Pro Tips For Making 3 Ingredient Milk Mochi
- STEAM ON LOW: After boiling the mochi dough, resist the urge to blast it with high heat—low steam (just a few inches of water in the pot, lid on tight) keeps the texture tender without turning it gummy. I learned this the hard way when my first batch came out chewy instead of pillowy.
- SIFT THE FLOUR FIRST: Skip the lumps by sifting the mochiko flour into your mixing bowl before adding anything else. The fine particles blend smoother, and you’ll avoid that weird grainy bite in the final mochi. (Yes, even if you’re impatient like me.)
- DON’T OVERWORK THE DOUGH: Once the dough comes together, knead it just until it’s cohesive—overmixing makes it tough. A few gentle folds are enough; the gluten in mochiko is already sticky enough to hold. I used to punch and fold like I was making bread, and the mochi turned out like rubber.
- USE COLD WATER FOR ROLLING: Wet your hands with cold water before shaping the mochi—it prevents sticking and keeps the surface smooth. (Bonus: It’s easier to roll out thin, even layers.) I was skeptical until I tried it, and now I won’t go back.
Flavor customization for 3 ingredient milk mochi
Sweet & Creamy Variations
For a richer milk filling, replace ½ cup of the water with heavy cream—this creates a velvety texture that pairs beautifully with the chewy mochi. I like to add ½ tsp vanilla extract to the cream for depth.
For a tropical twist, swap ¼ cup of the milk powder for coconut milk powder and add 1 tsp lime zest to the dough. The citrus brightens the natural sweetness while keeping the mochi’s signature chew. 🌴
Spiced & Warm Flavors
Infuse the milk filling with warmth by adding ¼ tsp cinnamon and a pinch of nutmeg to the dry ingredients. For a more robust flavor, use chai spice mix (½ tsp) in place of the vanilla.
If you love matcha, fold 1 tbsp matcha powder into the dough—this gives the mochi a delicate green hue and earthy sweetness. Serve with a dusting of kinako (roasted soybean flour) for extra texture. 🍵
Fruity & Refreshing Twists
Transform your mochi into a fruity delight by mixing 2 tbsp jam (like raspberry or mango) into the dough before shaping. For a more elegant presentation, pipe a thin layer of strawberry or passionfruit purée between two mochi halves before steaming.
Another idea: roll the finished mochi in freeze-dried fruit powder (like lychee or blueberry) for a pop of color and flavor. 🍓
Savory-Sweet Balance
For a unique twist, add ½ tsp soy sauce and a pinch of sesame oil to the dough—this creates a subtle umami note that pairs surprisingly well with the sweet milk filling. Top with a sprinkle of toasted sesame seeds or crushed peanuts for crunch.
This variation works beautifully with a cup of jasmine tea for balance. The contrast between sweet and savory makes every bite exciting. 🥜
Seasonal Adaptations
In summer, swap the milk filling for a coconut milk and lime version—mix ½ cup coconut milk powder with water and add 1 tsp lime juice.
For autumn, incorporate pumpkin spice into the dough and fill with a maple cream mixture (mix ¼ cup maple syrup with the milk powder). Winter calls for ginger and honey—add ½ tsp grated ginger and 1 tbsp honey** to the filling.
Each season brings a fresh take on this classic treat. ❄️
Nutrition facts
Frequently asked questions
Can I make these mochi without a steamer?
Use a heatproof plate or basket in a pot with 2 inches of boiling water—just make sure the mochi doesn’t touch the water. Cover with a towel and steam for 12-15 minutes over medium-high heat. For even cooking, rotate the plate halfway through.
Why did my mochi turn out too chewy instead of soft?
Oversteaming or underkneading causes excessive chewiness. Aim for 12-15 minutes of steaming and check for a glossy sheen—no translucent center. If the dough was too dry during shaping, add 1 tsp water at a time until pliable. The oil in the recipe helps balance texture, so don’t skip it!
How do I store leftover mochi?
Keep them in an airtight container at room temperature for 3 days, but they’re best enjoyed fresh. For longer storage, freeze unsteamed mochi balls for up to 3 months. To reheat, steam for 5-7 minutes or microwave for 20 seconds—never overheat, or the filling becomes rubbery.
Can I make these with regular rice flour instead of mochiko?
Regular rice flour won’t work—the glutenous starch in mochiko is essential for that signature chew. If you can’t find mochiko, try sweet rice flour (like glutinous rice flour), but expect a slightly denser texture. For the closest result, use 2.5 cups of sweet rice flour and reduce water by 1 tbsp.
What’s the best way to fill these mochi?
For the classic milk filling, mix ½ cup milk powder with ¼ cup water until smooth, then pipe into the center of each mochi half before sealing. For a firmer filling, chill the mixture for 10 minutes before using. Pro tip: Dust with cornstarch before filling to prevent sticking!

- 3lb Prime Rib Roast Recipe: Juicy Pink Center Guaranteed in 3 Hours - October 31, 2026
- 5 Spice Cake Recipe: Warmly Spiced Layers With Crunchy Top - October 31, 2026
- 1950’s Macaroni and Cheese Recipe: Nostalgic Creamy Cheese Sauce with Buttery Noodles - October 31, 2026