
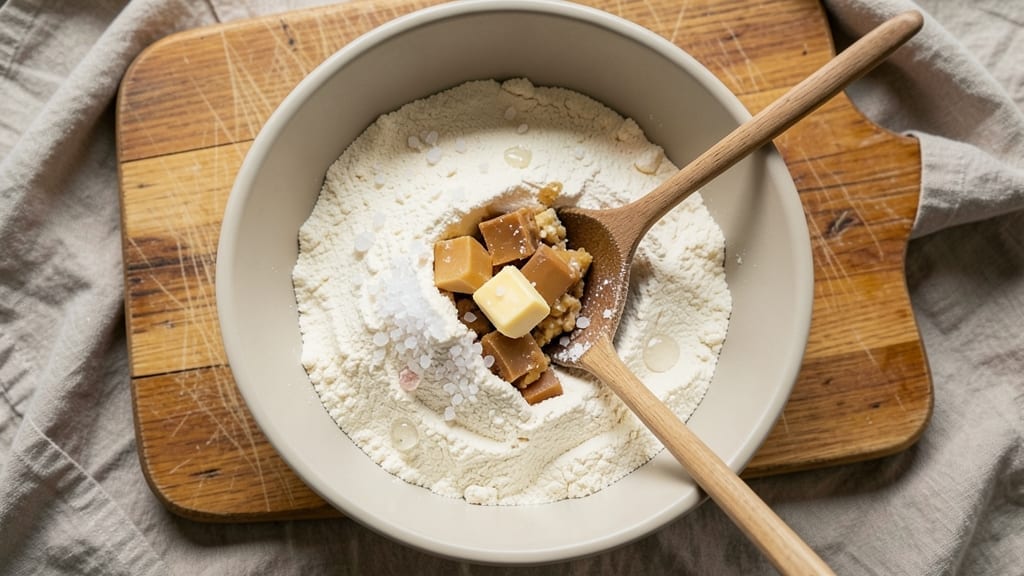
This 3-ingredient pie dough recipe delivers flaky, golden layers with zero fuss—no rolling required. The secret lies in cold butter cut into dry ingredients, creating delicate pockets of air that transform into crisp, buttery flakes.
I perfected this shortcut after years of burning through store-bought dough; now, I make it from scratch in under 10 minutes without a food processor.
What sets this apart is the cold butter technique, where chilled cubes of butter remain firm during mixing, ensuring those signature flaky layers. The dough handles like a dream—roll it out for classic pies, press it into tart pans, or even freeze it for later.
No eggs, no dairy substitutes, just three ingredients that work every time.
By the time you bake it, you’ll have a restaurant-quality crust with a tender crumb and crisp edges—no soggy bottoms here. The dough’s versatility means you can use it for sweet pies, savory tarts, or even hand pies.
And because it’s made with just flour, butter, and salt, you control the quality without the guesswork.
For extra flakiness, chill the dough for 30 minutes before rolling. Store leftovers in the fridge for up to 5 days or freeze for 3 months. This is the foolproof foundation for perfect pies—no matter your skill level. Let’s get started.
Ingredients for 3 ingredient pie dough
Three ingredients. Zero rolling. Flaky layers guaranteed with this cold butter shortcut.
| Ingredient | Amount | Notes |
|---|---|---|
| All-Purpose Flour 🌾 | 2 ½ cups | Unbleached, spooned and leveled |
| Unsalted Butter 🧈 | 1 cup | Cold, cubed, European-style preferred |
| Diamond Crystal Kosher Salt 🧂 | ½ tsp | Fine grain, not iodized |
The butter is everything here—European-style butter has more fat content, which translates to extra flakiness. Grab a 1-pound block from Whole Foods or your local specialty shop; it’s worth the splurge. Cut it into 1/2-inch cubes and freeze for 10 minutes before mixing to keep it rock-hard. If you’re in a pinch, regular unsalted butter works fine, but chilling it thoroughly is non-negotiable. The flour? King Arthur or Gold Medal brands are my go-tos—they’re consistent and handle well. No need for bread flour here; all-purpose does the trick perfectly.
No European butter? Regular unsalted butter is fine, but don’t skip the chilling step. Short on time? Use frozen butter straight from the freezer—it’ll thaw just enough during mixing. The salt is optional, but I always include it for flavor balance. If you’re making a savory tart, you might even bump it up to 1 teaspoon. For the flour, whole wheat or spelt flour can replace up to half, but the texture will be denser. And if you’re worried about the dough sticking, use cold water to wet your hands instead of flour—it keeps the butter cold longer.
This dough is best used fresh, but it keeps for 5 days in the fridge wrapped tightly in plastic. For longer storage, freeze it for up to 3 months—just thaw it in the fridge overnight before using. The magic happens when you chill it for 30 minutes before rolling, so don’t skip that step. And if you’re prepping ahead, make the dough, shape it, and freeze it in a pan—bake straight from frozen for a shortcut crust. It’s the kind of dough that rewards patience, but it’s also forgiving if you rush.
Why You’ll Love This Recipe
- No Pantry Overload: I keep a bag of flour and a stick of butter on hand anyway—this dough just uses what I’ve got. No eggs, no vinegar, no fuss. The cold butter cuts right into the flour like butter should, and in five minutes, I’ve got a workable crust without measuring cups or extra ingredients.
- Butter-Lover’s Dream: That rich, cold butter folded into the flour? It’s the secret. The final dough tastes like a cross between a flaky pie crust and a buttery shortbread—no one will guess it’s only three things. Honestly, I’ve used this for hand pies, and my kids still ask for seconds, even when they’re supposed to be “full.”
- Weeknight Wonders: This dough is my go-to for impromptu dinners. Need a pie for a potluck? Done. Craving a quick galette? No problem. I’ve even used it for mini tart shells when I’m too tired to roll out a full crust. The beauty? It’s just as good when it’s rustic as when it’s precise.
- Budget-Friendly Magic: A single bag of flour and a pound of butter stretch for so many pies. Between us, I’ve made enough of this to feed a family of six for under $10. And since the dough keeps well in the fridge, I can prep ahead—no wasted ingredients, just pure, reliable flavor whenever I need it.
Step-by-step instructions for 3-Ingredient pie dough
Here’s how to create restaurant-quality flaky layers with just three ingredients.
Cut the Cold Butter into the Flour
Place the 2.5 cups all-purpose flour in a large mixing bowl. Add the 0.5 tsp Diamond Crystal kosher salt and whisk together briefly to distribute evenly. This ensures consistent seasoning throughout the dough.
Next, add the 1 cup cold, cubed unsalted butter. I like to use European-style butter for its higher fat content—it creates more flaky layers. Using your fingers or a pastry cutter, work the butter into the flour mixture until you have pea-sized crumbs with some larger butter pieces remaining. This texture is crucial for achieving those signature flaky layers.
If you’re using a food processor, pulse briefly to combine—just until the mixture resembles coarse crumbs with some butter still visible. Over-processing develops gluten and makes the dough tough. The goal is to create a rough, sandy texture that will create pockets of steam when baked.
Hydrate the Dough with Just Water
Add 2-3 tablespoons of ice water, one tablespoon at a time, to the flour-butter mixture. Use a fork or your fingers to gently stir until the dough begins to come together. You want just enough moisture to bind the dough without making it sticky.
I know it seems counterintuitive to use water with butter, but this minimal hydration creates the perfect balance of tenderness and flakiness. The butter will melt during baking, creating steam that puffs the layers. If the dough feels too dry, add another tablespoon of water. It should hold together when pressed but not be sticky to the touch.
Once the dough forms a shaggy mass, turn it out onto a lightly floured surface and gently shape it into a rough rectangle. This makes it easier to roll out without sticking. If the dough cracks or crumbles, don’t worry—just press it back together gently.
Chill the Dough for Maximum Flakiness
Wrap the shaped dough tightly in plastic wrap and refrigerate for at least 30 minutes, or up to 48 hours. This chilling step is non-negotiable for flaky pie crust. The cold temperature firms up the butter, preventing it from melting too quickly during rolling and baking.
I like to press the dough into a flat disk before wrapping to save space in the fridge. The longer you chill it, the better the layers will develop. If you’re in a hurry, you can freeze the dough for 15 minutes as a shortcut, but chilling in the fridge gives the best results.
When you’re ready to use the dough, remove it from the refrigerator and let it sit at room temperature for 5-10 minutes before rolling. This prevents cracking when you handle it. The dough should be cold but pliable—not rock hard or sticky.
Roll and Transfer for Perfect Fit
On a lightly floured surface, roll the chilled dough into a 12-inch circle about ⅛-inch thick. I use a rolling pin with guides to maintain even thickness. Keep the dough covered with a floured towel to prevent sticking and drying.
Gently transfer the rolled dough to your pie dish by carefully lifting it with a rolling pin or dough scraper. The dough will naturally spring back slightly, so don’t force it. Press it gently into the dish, letting it drape over the edges. Trim any excess dough with kitchen shears, leaving about ½-inch overhang for crimping later.
For extra flakiness, I like to dock the bottom with a fork—prick it all over in a diamond pattern. This prevents air pockets from forming during baking and allows steam to escape, creating those beautiful, even layers. The dough should be cold but workable when you handle it.
Pro Tips For Making 3 Ingredient Pie Dough
- Use Ice Water for Butter: Cut your unsalted butter into cubes and freeze them for 10 minutes before mixing—this keeps the dough from getting too soft and sticky while you work. I learned this the hard way after ending up with a greasy mess that wouldn’t hold shape.
- Chill the Dough Twice: After mixing, flatten the dough into a disc, wrap it tightly, and refrigerate for at least 30 minutes. Then, before rolling, pop it back in the fridge for another 10 minutes—this prevents shrinking and makes rolling a breeze. Yes, even if you’re impatient like me.
- Weigh the Flour: Scooping flour from the bag is a disaster waiting to happen. Use a kitchen scale for precision—this recipe relies on the ratio of flour to butter, and too much or too little makes all the difference. (I know, I know, but trust the process.)
- Work Fast After Rolling: Once you’ve rolled out the dough, transfer it to your pie dish immediately—don’t let it sit on the counter. The butter starts melting faster than you think, and a few extra minutes can turn a perfect crust into a greasy, floppy disaster. Move quick, or deal with the consequences.
Regional styles of this dish
Classic American Pie Dough
This is the dough I grew up with—simple, sturdy, and perfect for apple or cherry pies. The key here is using European-style butter for that signature flakiness, and I always chill the dough for at least 30 minutes before rolling.
For a classic pie, roll it out to ⅛-inch thickness and fit it into a 9-inch pie dish. Brush the bottom with a bit of egg wash before adding your filling to create a golden crust. 🍏
I like to add a pinch of sugar (about 1 tablespoon) to the flour mixture for sweet pies, which helps balance the tartness. For savory tarts, skip the sugar and use 1 teaspoon extra salt to enhance flavors like spinach or caramelized onions.
The dough handles well for lattice tops too—just roll it out, cut into strips, and weave over your pie filling.
Southern-Style Shortcrust
In the South, pie dough often leans toward a shortcrust style—less flaky, more tender, and perfect for pecan or sweet potato pies. To adapt this recipe, replace ½ cup of the butter with ½ cup shortening (like Crisco) for a richer, more compact texture.
Roll it slightly thicker (¼-inch) and bake at 375°F for a firmer crust that holds up to dense fillings. 🥜
For extra richness, some Southern cooks add 1 tablespoon of cornmeal to the flour mixture. This gives the crust a slightly grainy texture that absorbs moisture beautifully, preventing soggy bottoms.
I’ve found that chilling the dough for 1 hour before baking makes it even more stable for heavy fillings like pumpkin pie.
French-Style Pâte Brisée
This French variation is all about refined flakiness—think of it as the gourmet cousin of your basic pie dough. The trick is to fold the butter into the flour instead of cutting it, creating thin, delicate layers.
Use 1 cup of all-purpose flour and ½ cup + 2 tablespoons of cold butter (instead of 1 cup), then add 1 tablespoon ice water and ½ teaspoon salt. Roll it out ⅛-inch thick for a tart or ¼-inch thick for a pie. 🥖
For a true French touch, I like to brush the baked crust with melted butter and sprinkle fine sugar before adding the filling. This creates a crisp, almost biscuit-like texture that pairs perfectly with fruit tarts or quiches.
The dough should be very cold when rolled—almost too hard to handle—because the butter needs to stay firm until it hits the oven.
Midwest Hand Pie Dough
Hand pies are a Midwest staple, and this dough is made for them—small, sturdy, and easy to fold. The secret is to roll the dough slightly thicker (⅛ to ¼-inch) and cut it into 4-inch circles for individual pies.
Fill with apples, cherries, or peaches, then fold and crimp the edges tightly. Brush with egg wash and bake at 375°F for 20-25 minutes. 🍒
For extra flair, I like to add a pinch of cinnamon to the flour mixture—it pairs amazingly with fruit fillings. The dough should be cold but pliable when rolling, and I always use a pastry brush to seal the edges after folding to keep fillings from leaking.
These pies are perfect for potlucks because they’re easy to transport and eat!
Nutrition facts
Frequently asked questions
Can I make this dough without a food processor?
This recipe is designed to work perfectly by hand. Use your fingers or a pastry cutter to work the cold butter into the flour until you get pea-sized crumbs. The key is keeping everything cold—this creates those signature flaky layers without needing a machine.
Why does my dough keep cracking when I roll it?
Cracking usually happens when the dough is too warm or not properly chilled. Always refrigerate the dough for at least 30 minutes before rolling, and keep your rolling surface and tools cold. If cracks appear, just press them back together gently—they won’t affect the final texture.
How do I prevent a soggy bottom in my pie?
Prevent soggy bottoms by pre-baking the crust for 5-7 minutes at 375°F before adding filling. You can also sprinkle a thin layer of dry breadcrumbs or semolina between the crust and filling to absorb moisture. A well-chilled, properly docked crust also helps create steam pockets for even baking.
Can I use this dough for savory dishes like quiche?
Yes! This dough works beautifully for savory applications. For quiche, roll it out slightly thicker (¼-inch) and blind-bake at 375°F for 10 minutes before adding your egg mixture. You can also add 1 teaspoon extra salt to enhance savory flavors like spinach or cheese.
How far ahead can I make and store the dough?
The dough keeps well in the fridge for up to 5 days wrapped tightly in plastic. For longer storage, freeze it for 3 months—just thaw overnight in the fridge before using. You can even shape it into a pie crust and freeze it in the pan for a ready-to-bake shortcut.

- 3lb Prime Rib Roast Recipe: Juicy Pink Center Guaranteed in 3 Hours - October 31, 2026
- 5 Spice Cake Recipe: Warmly Spiced Layers With Crunchy Top - October 31, 2026
- 1950’s Macaroni and Cheese Recipe: Nostalgic Creamy Cheese Sauce with Buttery Noodles - October 31, 2026