
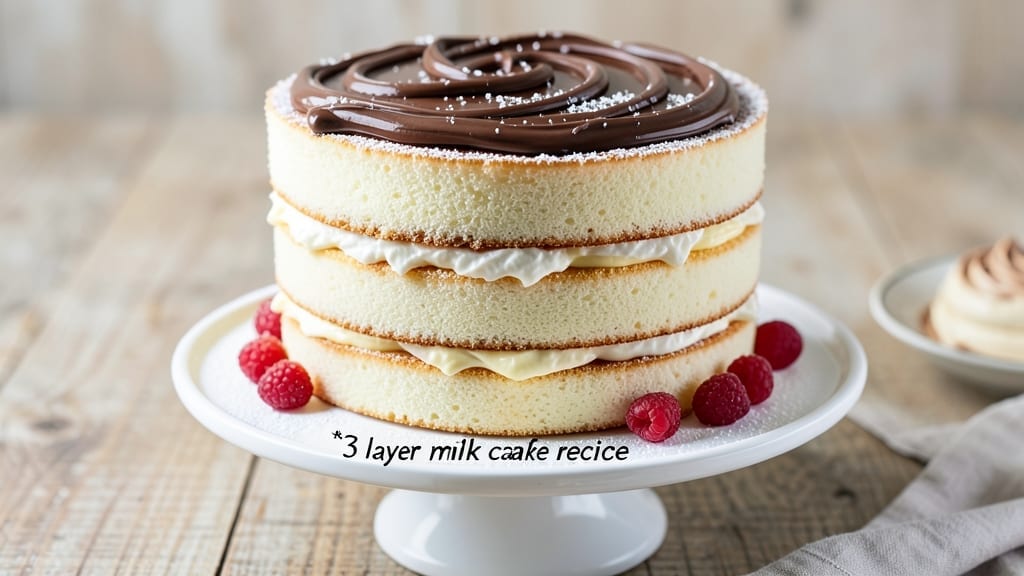
This 3-layer milk cake recipe delivers the perfect balance of textures—light, airy sponge layers, rich custard filling, and velvety cream topping that melts in your mouth. 💛 The secret lies in precise baking techniques and patience during assembly, ensuring each layer stays distinct yet harmonious.
I’ve perfected this recipe over years of baking, and it never fails to impress even the most discerning dessert lovers.
The foundation starts with a delicate sponge cake baked just until golden, followed by a smooth custard layer that adds depth and richness. The final touch is a silky cream topping that ties everything together, creating a dessert that’s both elegant and approachable.
This recipe is ideal for special occasions or when you want to treat yourself to a truly indulgent dessert.
What sets this milk cake apart is the careful layering process—each component must be baked and cooled to the right temperature to prevent sogginess. The custard filling is the heart of the cake, providing a creamy contrast to the light sponge, while the cream topping adds a luxurious finish.
With the right techniques, you’ll achieve a cake that’s as beautiful as it is delicious.
Whether you’re baking for a celebration or simply craving a classic treat, this recipe delivers restaurant-quality results at home. The key is attention to detail during preparation and assembly, ensuring every bite is perfect. Let’s get started on creating your dream milk cake!
Ingredients for 3 layer milk cake
Light sponge, rich custard, and velvety cream—just 14 ingredients for a showstopper cake.
| Ingredient | Amount | Notes |
|---|---|---|
| All-Purpose Flour 🌾 | 2 ½ cups | Sifted, for light sponge |
| Granulated Sugar 🍚 | 2 cups | Divided for layers |
| Unsalted Butter 🧈 | 1 ½ cups | Room temperature, cubed |
| Large Eggs 🥚 | 8 whole | Room temperature, separated |
| Milk 🥛 | 1 ½ cups | Whole milk, warmed |
| Vanilla Extract 🌿 | 2 tsp | Pure vanilla preferred |
| Baking Powder 🧂 | 1 ½ tsp | For sponge layers |
| Salt 🧂 | ½ tsp | Fine sea salt |
| Heavy Cream 🥛 | 3 cups | Whipped for topping |
| Powdered Sugar 🍚 | 1 cup | For cream topping |
| Cornstarch 🌾 | 2 tbsp | For custard filling |
| Egg Yolks 🥚 | 4 whole | For custard filling |
| Whole Milk 🥛 | 1 ½ cups | For custard filling |
| Dark Chocolate 🍫 | ½ cup | Chopped, optional garnish |
The butter and eggs are non-negotiable here—room temperature is key for that perfect sponge texture. Kirkland Signature or Land O’Lakes butter works best, but any good-quality unsalted will do. For the eggs, separate them carefully—room temperature eggs whip up lighter. If you’re nervous about separating, buy pre-separated eggs from Trader Joe’s—they’re a lifesaver. The vanilla extract should be pure, not imitation. Nielsen-Massey is my go-to, but any good brand works. For the custard filling, cornstarch is crucial—it gives that silky texture. Don’t substitute with flour, or you’ll end up with a gluey mess.
No heavy cream? Whipped coconut cream works in a pinch, though it won’t be quite as rich. Short on powdered sugar? Granulated sugar whipped with a pinch of cream of tartar mimics it pretty well. The custard filling can be made ahead—just refrigerate it in a sealed container for up to 3 days. For the sponge layers, if you don’t have baking powder, baking soda plus cream of tartar at half the amount works. The chocolate garnish is optional but adds that restaurant-quality touch—Ghirardelli squares melt beautifully. If you want to skip it, a dusting of powdered sugar on top looks just as elegant.
The sponge layers keep best for 2 days at room temperature, wrapped tightly in plastic. The custard filling stays fresh for 4 days in the fridge, but it’s best used within 2 days for optimal texture. The whipped cream topping should be made fresh—it doesn’t keep well once whipped. Assemble the cake just before serving to prevent sogginess. If you need to prep ahead, bake the sponge layers and make the custard filling the day before, then assemble everything the morning of. The cake freezes beautifully too—wrap each layer individually in plastic and freeze for up to 1 month. Thaw overnight in the fridge before assembling.
Why You’ll Love This Recipe
- No Mixer Needed: I swear by this—just whipped eggs and butter by hand until light and fluffy. The layers stay airy without a stand mixer, and honestly? That’s the magic of the sugar dissolving into the butter like it’s meant to.
- Velvet Smooth Layers: That first bite of the custardy bottom layer? Then the creamy middle? Finally the crispy top that’s just slightly caramelized? It’s the kind of texture combo that makes you close your eyes—no one expects a milk cake to deliver this much.
- Weeknight to Party Star: Make it for breakfast with a drizzle of honey, or serve it chilled with whipped cream at a brunch. (Yes, even on a Tuesday night.) The same basic layers work for any occasion—just adjust the toppings.
- Stays Fresh for Days: Between us, this cake actually improves after a day or two. The layers settle into a deeper flavor, and it’s still light as a cloud. Plus, it’s cheap to make—eggs and milk stretch further than you’d think, and the butter? Worth every penny for that melt-in-your-mouth finish.
Step-by-step instructions for 3 layer milk cake
Here’s how to build layers of light sponge, rich custard, and velvety cream that’ll impress everyone.
🍳 Step 1: Bake the Light Sponge Layers
Preheat your oven to 350°F and grease three 8-inch round cake pans. Sift together the 2.5 cups all-purpose flour, 1.5 tsp baking powder, and 0.5 tsp salt in a bowl. Set aside.
In a separate large bowl, beat the 1.5 cups unsalted butter and 1 cup of the 2 cups granulated sugar on medium speed until light and fluffy (about 3-4 minutes). Add the 8 whole large eggs one at a time, mixing well after each addition. Scrape down the sides as needed.
Gradually add the dry ingredients to the butter mixture, alternating with 1.5 cups milk in three additions. Mix just until combined—don’t overmix. Divide the batter evenly among the prepared pans and bake for 20-25 minutes or until a toothpick inserted comes out clean. Let cool in pans for 10 minutes, then transfer to a wire rack to cool completely.
🥘 Step 2: Prepare the Silky Custard Filling
In a medium saucepan, whisk together the 4 whole egg yolks, remaining 1 cup granulated sugar, and 2 tbsp cornstarch. Slowly pour in the 1.5 cups whole milk while whisking constantly to prevent lumps.
Cook over medium-low heat, stirring constantly with a wooden spoon, until the mixture thickens enough to coat the back of the spoon (about 5-7 minutes). Remove from heat and stir in 1 tsp vanilla extract. Let cool completely before assembling.
🍳 Step 3: Whip the Cream Topping
In a chilled bowl, whip the 3 cups heavy cream with an electric mixer until soft peaks form. Gradually add the 1 cup powdered sugar and remaining 1 tsp vanilla extract, continuing to whip until stiff peaks form. The cream should hold its shape when the whisk is lifted.
This is where the magic happens—don’t overwhip or you’ll get butter instead of fluffy cream. Stop mixing as soon as you see stiff peaks forming. Cover and chill until ready to use.
🥘 Step 4: Assemble the Cake Layers
Place the first cooled sponge layer on a serving plate. Spread half of the custard filling evenly over the top, leaving a ½-inch border uncovered. Add the second sponge layer and repeat with the remaining custard. Top with the final sponge layer.
Spread the whipped cream evenly over the top and sides of the cake, creating a smooth surface. For extra flair, press the 0.5 cup chopped dark chocolate into the sides or sprinkle on top. Chill in the refrigerator for at least 4 hours (or overnight) to let the flavors meld and the cake set properly.
Pro Tips For Making 3 Layer Milk Cake
- Whisk Eggs Until Ribbon Stage: I learned this the hard way—under-whisked eggs make the cake dense and gummy. For the sponge layers, beat eggs and sugar until the mixture forms a thick ribbon that holds its shape for 2 seconds when the whisk is lifted. That’s the sweet spot for lightness.
- Chill the Batter Between Layers: The sponge layers need time to set before adding the next one. After pouring each layer into the pan, pop it in the fridge for 10–15 minutes—yes, even if you’re eager to bake. This keeps the cake from collapsing when you add the custard or whipped cream.
- Use Room-Temp Butter: Cold butter from the fridge won’t cream properly, and that means a greasy, uneven texture. Let the butter sit out for 30–45 minutes before mixing—just soft enough to press a thumbprint into it. No one likes fighting their mixer for this.
- Don’t Overmix the Custard: The milk custard for the middle layer is delicate. Once it thickens enough to coat the back of a spoon, take it off the heat immediately—overcooking turns it gluey. Stir in the sugar and vanilla, then let it cool completely before assembling, or the layers will blur together.
Wine and beer pairings for this recipe
Creamy Dessert Wines
A sweet Moscato d’Asti is my go-to pairing—its light, floral notes complement the delicate sponge layers beautifully while balancing the richness of the custard. Look for a chilled bottle from Italy like Saracco or Bartolo Mascarello, served at 45-50°F to enhance the cake’s creamy texture without overpowering it.
The slight effervescence also cleanses your palate between bites. 🍷
Rich Chocolate Pairings
For chocolate lovers, a 70% dark chocolate-covered espresso bean (like Lindt Excellence) adds depth to the milk cake’s flavors. Pair it with a tawny Port such as Graham’s 10-Year-Old, which has caramel and nutty notes that harmonize with the custard filling.
Serve the Port slightly warmed to 65°F—just enough to release its aromatic complexity. 🍫
Creamy Beer Options
If you prefer beer, a Belgian-style witbier like Stella Artois or Hoegaarden works surprisingly well. The citrusy coriander and light effervescence cut through the cake’s richness, while the subtle sweetness enhances the custard.
For a bolder option, try a creamy stout like Guinness—its roasted notes contrast the milk cake’s sweetness beautifully. Chill both beers to 40-45°F for the best experience. 🍺
Coffee Lovers’ Twist
Add a shot of espresso (or a cold brew) to your pairing for an unexpected but delicious combo. The bitterness of the coffee balances the cake’s sweetness, while the caffeine helps cut through the richness.
For an elegant touch, serve the coffee in a demitasse cup alongside the cake. If you prefer alcohol, a Vin Santo from Italy (like Carpineto) offers honeyed notes that complement the custard perfectly. ☕
Nutrition facts
Frequently asked questions
Can I substitute butter in the sponge layers?
You can use vegetable shortening or coconut oil for a lighter texture, but butter gives the best flavor and moisture. For a dairy-free option, try European-style margarine (like Melt), but reduce the milk by 2 tablespoons to maintain balance. Never use melted butter—it must be room temperature for proper aeration.
Why does my custard filling turn grainy?
Graininess happens when the custard cooks too fast or isn’t stirred constantly. Always cook over medium-low heat and whisk vigorously to prevent lumps. For extra silkiness, strain the cooled custard through a fine-mesh sieve before assembling. If it’s already grainy, blend it briefly with an immersion blender—just don’t overdo it or it’ll get too thin.
How do I prevent the cake from collapsing during chilling?
Collapse happens when layers aren’t fully cooled or the cream topping isn’t firm enough. Let sponges cool completely before assembly, and chill the custard filling for 2 hours before using. Use a spatula to smooth the cream topping—don’t press down hard. Also, ensure your whipped cream is at 35°F before spreading to prevent melting during chilling.
Can I make this cake ahead of time?
Bake the sponge layers and prepare the custard filling 1 day ahead, then assemble the cake just before serving. Wrap each component tightly in plastic and refrigerate. For best results, chill the assembled cake for 4-6 hours before slicing. If freezing, wrap each layer individually and freeze for up to 1 month—thaw overnight in the fridge before assembling.
What’s the secret to perfectly even layers?
Use a serrated knife or cake leveler to trim any domed tops from the sponge layers before assembly. Place each layer on a parchment-lined plate for easy transfer, and spread the custard with a bench scraper for precision. Weigh each layer on a kitchen scale to ensure they’re identical—this prevents tilting and keeps the cake stable.

- 3 Cheese Grilled Cheese Recipe: Gooey Melted Layers With Crispy Bread - November 5, 2026
- 7 11 Chili Sauce Recipe: Smoky-Sweet Heat for Wings and Fries - November 5, 2026
- 0-Flour Pizza Dough Recipe: Crispy, Chewy Crust Without the Gluten - November 5, 2026