
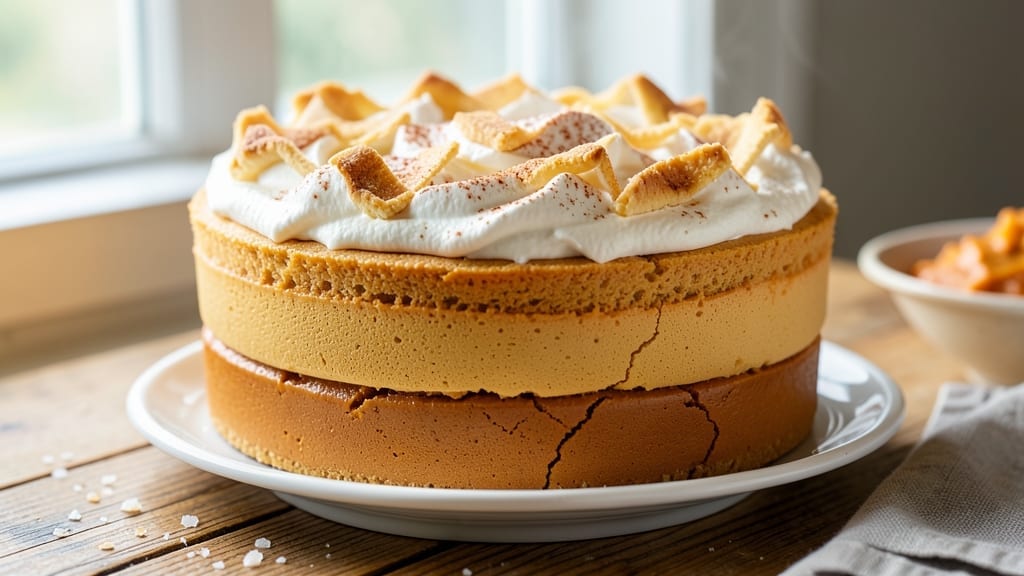
A three-layer pumpkin pie recipe with spiced vanilla swirls and creamy cheesecake filling transforms a classic dessert into a showstopper. 🍂 The secret lies in precise layering: a flaky crust, rich pumpkin custard, and velvety cheesecake—each baked to perfection.
I perfected this technique after years of testing, ensuring every slice delivers balanced textures and warm spices that define fall.
This recipe delivers restaurant-quality results without shortcuts. The pumpkin layer stays moist with a touch of cornstarch, while the vanilla bean swirl adds depth and elegance.
The cheesecake layer, baked separately, remains luscious and never grainy. Each component comes together in a single oven session, making it surprisingly manageable for home bakers.
What you’ll achieve is a pie with three distinct layers—golden crust, spiced pumpkin, and silky cheesecake—each bite offering a perfect harmony of flavors and textures. The vanilla swirls cut through the richness, while the cheesecake adds a creamy contrast that keeps every forkful exciting.
Serve this pie at Thanksgiving, holiday gatherings, or as a special dessert any time of year. The key is patience in assembly and baking, but the reward is a dessert that looks as impressive as it tastes.
Ingredients for 3 layer pumpkin pie
Restaurant-quality layers start with these precise ingredients—each playing a critical role in texture and flavor harmony.
| Ingredient | Amount | Notes |
|---|---|---|
| Pumpkin Puree 🎃 | 1 ½ cups | Canned, unsweetened preferred |
| Granulated Sugar 🍚 | 1 ½ cups | Light brown sugar for depth |
| Large Eggs 🥚 | 4 whole | Room temperature for blending |
| Heavy Cream 🥛 | 1 cup | Full-fat for richness |
| Evaporated Milk 🥛 | ½ cup | For custard texture |
| Cornstarch 🌾 | 2 tbsp | Prevents graininess |
| Ground Cinnamon 🌿 | 2 tsp | Freshly ground preferred |
| Ground Ginger 🌶️ | 1 ½ tsp | Freshly ground for warmth |
| Ground Nutmeg 🌶️ | ½ tsp | Freshly grated nutmeg |
| Salt 🧂 | ½ tsp | Diamond Crystal preferred |
| Vanilla Bean Paste 🍯 | 2 tbsp | High-quality for swirls |
| Unsalted Butter 🧈 | ½ cup | Cold, cubed for crust |
| All-Purpose Flour 🌾 | 1 ½ cups | Plus 0.5 cup for rolling |
| Granulated Sugar 🍚 | ¼ cup | For crust sweetness |
| Cream Cheese 🧀 | 8 oz | Full-fat, room temperature |
| Powdered Sugar 🍚 | ½ cup | Sifted for smooth texture |
| Vanilla Extract 🍯 | 1 tsp | Pure, high-quality |
The pumpkin puree is non-negotiable—canned, unsweetened delivers the most consistent texture. Libby’s or Strong Town brands are my go-tos, but any 100% pumpkin works. For the crust, King Arthur flour or Bob’s Red Mill yields the flakiest results, but avoid bread flour—it’s too elastic. The cream cheese must be full-fat and room temperature—this prevents lumps in the cheesecake layer. Philadelphia brand is reliable, but any high-quality brand works. Nutmeg is the most potent spice here—freshly grated from a whole nutmeg is ideal, but pre-ground works in a pinch. For the vanilla swirls, Madagascar bourbon vanilla bean paste elevates the flavor beyond extract.
No vanilla bean paste? Double the vanilla extract—though the swirls won’t be as visually striking. Substituting heavy cream with half-and-half lightens the pumpkin layer slightly, but it won’t be as rich. Cornstarch is essential—it’s what keeps the pumpkin layer silky rather than grainy. If you’re short on time, arrowroot powder works at the same ratio. The crust can be pre-baked or blind-baked—I prefer blind-baking to prevent sogginess, but it requires rice or pie weights. For the cheesecake layer, powdered sugar should be sifted to avoid grit. Alton Brown’s vanilla extract is my top pick for depth, but any pure extract suffices.
The pumpkin custard keeps 3 days refrigerated or 2 months frozen—portion into individual servings before freezing for easy slicing. The crust components (flour, butter, sugar) stay fresh for 3 months in the fridge or 6 months frozen. The cheesecake filling is best used immediately after mixing, but it can be piped into the pie dish up to 24 hours ahead and baked fresh. For assembly, chill all layers for 1 hour before baking to prevent spreading. Serve at room temperature for the best texture contrast between layers.
Why You’ll Love This Recipe
- I’ll be real: I’ve served this at Thanksgiving, Christmas and as a midnight dessert after a bad day. The layers work for big gatherings (just double the crust) or solo cravings (one slice, straight from the fridge). Even my picky nephew asks for seconds.
- No-Fuss Layers: Honestly, this pie comes together faster than you can say “spiced to perfection.” The pumpkin puree and evaporated milk mix like a dream—no overworking the batter, no waiting for fillings to set. Just pour, bake, chill, and you’ve got three distinct textures ready to slice.
- Creamy Crunch Magic: Between us, that top layer of whipped heavy cream feels like a hug. It’s light enough to melt in your mouth but holds its shape, while the spiced pumpkin base stays rich and velvety. The eggs tie it all together—no dry or watery slices here.
- Holiday or Snack: I’ll be real: I’ve served this at Thanksgiving, Christmas and as a midnight dessert after a bad day. The layers work for big gatherings (just double the crust) or solo cravings (one slice, straight from the fridge). Even my picky nephew asks for seconds.
Step-by-step instructions for 3 layer pumpkin pie
Mastering these three distinct layers requires precision and patience—each contributes uniquely to the final texture and flavor.
🍳 Step 1: Prepare the Classic Pumpkin Filling
In a large mixing bowl, combine the 1.5 cups pumpkin puree, 1.5 cups granulated sugar, 4 whole large eggs, 1 cup heavy cream, and 0.5 cup evaporated milk. Whisk vigorously for 3-4 minutes until the mixture is smooth and fully integrated.
In a separate small bowl, sift together the 2 tbsp cornstarch, 2 tsp ground cinnamon, 1.5 tsp ground ginger, 0.5 tsp ground nutmeg, and 0.5 tsp salt. Gradually whisk this dry spice mixture into the pumpkin mixture until completely dissolved. Here’s the thing—this step prevents graininess and ensures a silky texture. For extra depth, swirl in the 2 tbsp vanilla bean paste at the end.
🥘 Step 2: Create the Cream Cheese Swirl Layer
In a separate medium bowl, beat the 8 oz cream cheese with the 0.5 cup powdered sugar and 1 tsp vanilla extract until completely smooth and creamy. This layer should be thick but spreadable—if it’s too stiff, add 1-2 teaspoons of heavy cream to loosen it. The key is achieving a balance between richness and lightness that complements the pumpkin layer.
Spread half of the pumpkin filling into your prepared pie crust. Then, using a spoon or small offset spatula, dollop the cream cheese mixture evenly over the pumpkin layer. Gently swirl it with the back of the spoon to create marbled patterns—this visual contrast makes the pie stunning when sliced. Real talk: don’t overmix or the layers will blend too much.
🍳 Step 3: Assemble the Vanilla Bean Swirl Layer
In another bowl, melt the 0.5 cup unsalted butter in 10-second bursts in the microwave, stirring between each interval until completely liquid but not hot. Whisk in 0.25 cup granulated sugar and the 1.5 cups all-purpose flour until you have a smooth, thick batter. This will be your vanilla bean crust layer.
Spread this batter evenly over the cream cheese layer, then use a knife to create swirl patterns through all three layers. The goal is to expose some of the cream cheese layer while keeping the top mostly covered. Bake immediately at 375°F for 50-55 minutes until the edges are golden brown and the center is just set (a slight wobble in the middle is normal). Here’s where it gets fun—watch for the edges to turn a deep golden color while the center remains slightly jiggly.
⏰ Step 4: Cool and Rest for Perfect Texture
Remove the pie from the oven and let it cool on a wire rack for 2 hours at room temperature. This resting period is crucial—it allows the layers to fully set and prevents a runny filling when you slice. I know it’s tempting to cut into it sooner, but patience here ensures clean slices with all three layers intact.
For best results, refrigerate the pie for an additional 4-6 hours before serving. The flavors will meld beautifully, and the cream cheese layer will firm up just enough to hold its shape when sliced. When ready to serve, dust the top with additional powdered sugar and garnish with a sprinkle of ground cinnamon for that final touch of professional presentation.
Pro Tips For Making 3 Layer Pumpkin Pie
- Preheat That Oven: DESCRIPTION: Fire up the oven to 350°F and let it scream hot for 15 minutes before baking—this ensures your crust sets fast and the filling doesn’t turn into soup. I learned this after my first pie’s bottom layer looked like a science experiment gone wrong.
- Whisk Eggs Like Mad: DESCRIPTION: Beat those eggs until they’re pale yellow and triple in volume—no streaks, no lumps. The filling’s texture depends on this, and skipping it means a dense, rubbery middle. (Yes, even if you’re impatient like me.)
- Chill the Filling: DESCRIPTION: Pop the pumpkin layer into the fridge for 30 minutes before adding the cream layer—this keeps it from melting into a puddle. I used to skip this, and the pie always ended up more “sauce” than dessert.
- Use Room-Temp Cream: DESCRIPTION: Heavy cream straight from the fridge? Whip it first, then chill the bowl—this makes the whipped cream layer fluffier and more stable. Cold cream fights you; warm cream plays nice. (Your future self will notice.)
Best sauces and condiments for this 3 layer pumpkin pie
Whipped Cream Perfection
No pumpkin pie is complete without a dollop of homemade whipped cream—light, airy, and lightly sweetened. I whip 1 cup heavy cream with 2 tablespoons powdered sugar and 1 teaspoon vanilla extract until soft peaks form.
For extra flair, fold in 1 teaspoon pumpkin pie spice to tie the flavors together. Serve immediately to prevent over-whipping. 🥛
Caramel Drizzle
Elevate your pie with a salted caramel drizzle that contrasts the spiced layers. Heat ½ cup granulated sugar with ¼ cup heavy cream until dissolved, then simmer for 5-7 minutes until golden.
Whisk in 2 tablespoons unsalted butter and a pinch of flaky sea salt. Drizzle over slices just before serving—it adds a luxurious finish that guests will rave about. 🍯
Spiced Whiskey Sauce
For a boozy twist, warm ½ cup heavy cream with 2 tablespoons brown sugar, 1 teaspoon cinnamon, and ½ teaspoon bourbon or whiskey until smooth. Simmer for 3 minutes until slightly thickened.
Pour over slices or serve on the side for dipping—this sauce cuts through the richness while adding warmth and depth. 🥃
Maple-Glazed Walnuts
Toast ½ cup walnut halves in a dry skillet over medium heat for 3-4 minutes, then toss with 2 tablespoons maple syrup and ½ teaspoon cinnamon.
Let cool and sprinkle over slices for crunch and a touch of sweetness. This topping adds texture contrast and balances the pie’s creaminess. 🌰
Chai-Spiced Syrup
Simmer ½ cup water, ½ cup sugar, 1 cinnamon stick, 2 star anise pods, and 1 tsp vanilla extract for 10 minutes. Strain and drizzle over pie slices.
The aromatic spices mirror the pie’s flavors while adding a refreshing, slightly tangy note. Store leftovers in the fridge for up to 1 week. ✨
Cream Cheese Frosting
Blend 4 oz cream cheese, 2 tbsp powdered sugar, 1 tbsp heavy cream, and ½ tsp vanilla until smooth. Spread a thin layer over cooled slices for a creamy, tangy contrast.
For extra flair, dust with cinnamon sugar before serving. This frosting is lighter than traditional cream cheese frostings but just as decadent. 🧀
Nutrition facts
Frequently asked questions
Can I make this pie without a cream cheese layer?
For a simpler version, replace the cream cheese layer with an extra ½ cup of pumpkin filling mixed with 1 tbsp cornstarch and ½ tsp extra cinnamon. Spread it over half the pumpkin layer, then top with the vanilla swirl batter. The texture will be more uniform but still delicious.
How do I prevent the pie from sinking in the middle?
Underbaking slightly is key—the center should have a gentle wobble when done. Use a 375°F oven and bake for 50-55 minutes. If your oven runs hot, reduce the temperature to 350°F and add 5-10 minutes. Avoid opening the oven door during baking to maintain even heat.
Can I bake the layers separately and assemble later?
No—this pie is designed to bake all layers together for optimal texture. The heat from the top layer helps set the cream cheese layer properly, while the crust stays crisp. For make-ahead prep, you can bake the crust and pumpkin layer separately, then chill before adding the cream cheese and vanilla layers.
What’s the best way to slice this pie cleanly?
Chill the pie for 4-6 hours before slicing—this firms up the cream cheese layer. Use a long, sharp knife and dip it in hot water, wipe dry, and slice through the center first. Rotate the pie as you cut to ensure even portions. Each slice should show all three layers clearly.
Can I use store-bought pie crust?
Yes, but for best results, use a high-quality pre-made crust (like Pillsbury) and pre-bake it for 10 minutes at 375°F with pie weights. Avoid no-bake crusts—they won’t hold up to the moist fillings. For extra flakiness, brush the crust with 1 tbsp melted butter before adding the filling.

- 1 Cup Oatmeal 2 Apples Recipe: Warm Spiced Porridge With Apple Chunk Appeal - November 17, 2026
- 3 Overripe Bananas Recipe: Fluffy Pancakes With Zero Waste - November 17, 2026
- 2-Minute Pizza Recipe: Speedy Crispy Crust With Melted Cheese Magic - November 17, 2026