
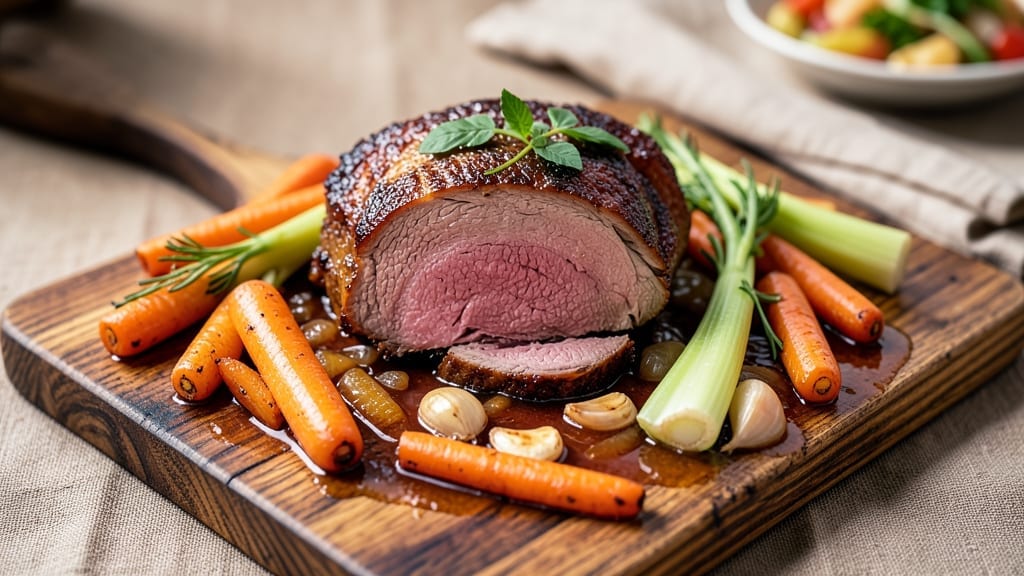
A 3 lb chuck roast crock pot recipe transforms tough, affordable cuts into melt-in-your-mouth perfection with minimal effort. The slow braising process breaks down fibers, creating a dish so tender it practically falls apart at the touch.
I’ve perfected this method over years of testing—no guesswork, just foolproof results every time.
This recipe relies on three key elements: high-quality beef, aromatic vegetables for depth, and the right liquid ratio to create a rich, flavorful broth. Cooking on low heat for 8 hours ensures the meat reaches its ideal texture without drying out.
The beauty of crock pot cooking is its hands-off nature—just prep, set, and let the appliance do the work while you focus on other tasks.
By the time you’re ready to serve, you’ll have a restaurant-quality roast with juicy, fork-tender meat and a sauce so flavorful it deserves its own bowl. The aroma alone will have everyone gathered at the table, and the first bite will silence any doubts about homemade slow cooking.
This is comfort food at its finest, elevated by simplicity.
Pair with mashed potatoes, crusty bread, or a fresh green salad to round out the meal. The leftovers reheat beautifully, making this an excellent choice for meal prep or feeding a crowd. Let’s get started on creating your most tender chuck roast yet.
Ingredients for 3 lb chuck roast crock pot
Nothing fancy—just a few quality ingredients that turn tough beef into melt-in-your-mouth perfection.
| Ingredient | Amount | Notes |
|---|---|---|
| Chuck Roast 🥩 | 3 lb | Well-marbled, bone-in preferred |
| Yellow Onion 🧅 | 1 whole | Chopped into wedges |
| Carrots 🥕 | 4 whole | Baby carrots or sliced |
| Celery Stalks 🌿 | 3 whole | Trimmed and chopped |
| Garlic Cloves 🧄 | 6 cloves | Smashed for flavor |
| Beef Broth 💧 | 2 cups | Low-sodium preferred |
| Red Wine 🍷 | 1 cup | Bold dry variety |
| Tomato Paste 🍅 | 2 tbsp | Smooth, not chunky |
| Dried Thyme 🌿 | 1 tsp | Or 1 tbsp fresh |
| Bay Leaves 🍃 | 2 whole | Removed before serving |
| Salt 🧂 | 1 ½ tsp | Kosher or sea salt |
| Black Peppercorns 🌶️ | 1 tsp | Freshly cracked |
| Olive Oil 🫒 | 1 tbsp | For searing meat |
| Flour 🌾 | 2 tbsp | All-purpose, for dredging |
The chuck roast is the star here, so pick one with good marbling—that white fat streaked through the meat is what makes it tender. Costco or Walmart usually have great deals on the 3 lb size, but check the butcher counter at Whole Foods if you want to splurge on a higher-quality cut. Bone-in is ideal (it adds flavor), but boneless works too. Pat it dry before searing—this helps the crust form better. I always grab the biggest roast I can find because it’s cheaper per pound and makes more leftovers—perfect for meal prep.
No red wine? Beef broth with a splash of balsamic vinegar works in a pinch, though the acidity won’t be the same. Fresh thyme is ideal, but dried works at one-third the amount. If you’re using baby carrots, no need to peel them—just trim the ends. The tomato paste can be a squeeze tube from Trader Joe’s if you don’t want to open a can. And if your garlic smells like dust, toss it—fresh garlic is non-negotiable here. The flour is just for dredging before searing, so any all-purpose brand will do.
This reheats like a dream—better the next day when all the flavors meld. Store in the fridge for 4-5 days or freeze for up to 3 months. I portion mine into containers so lunches are sorted for the week. The sauce thickens as it cools, so add a splash of broth if it’s too thick when reheating. And save those bay leaves—they’re great for soups next time.
Why You’ll Love This Recipe
- Deep, Meat-Focused Magic: The chuck roast turns insanely tender, almost falling apart at the touch, while the onions and garlic infuse every bite. Honestly, the first time I tasted it, I thought, “Wait, this is supposed to be easy?”—then took another bite.
- Lunchbox Hero: Between us, this is my go-to for meal prep. Shred the cooled roast, toss it with the veggies, and you’ve got a week’s worth of sandwiches or wraps. My kids grab it before school without complaint—(yes, even on a Tuesday night).
- Budget Stretch King: A 3 lb chuck roast feeds six for dinner and leaves enough for leftovers that taste just as good cold. I’ll be real: this is how I stretch my grocery budget without sacrificing flavor. The veggies add bulk, but the meat stays the star.
Step-by-step instructions for slow-braised chuck roast
Here’s how to transform a tough chuck roast into melt-in-your-mouth perfection using your crock pot.
Sear the Chuck Roast for Maximum Flavor
Heat a large skillet over medium-high heat and add the 1 tablespoon olive oil. Once shimmering, add the 3 lb chuck roast and sear on all sides until deeply browned, about 5-7 minutes per side. This step creates a flavorful crust that infuses into the braising liquid later.
While the roast sears, prepare the vegetables by chopping the 1 whole yellow onion into wedges, slicing the 4 whole carrots into 2-inch pieces, and chopping the 3 whole celery stalks into ½-inch pieces. Set these aside—they’ll join the roast in the crock pot shortly.
Build the Flavor Base in the Crock Pot
Transfer the seared chuck roast to your crock pot. In the same skillet, add the 6 cloves garlic cloves (smashed with the side of a knife) and cook for 30 seconds until fragrant. Remove the garlic and set aside.
To the skillet, add the 2 tablespoons flour and stir constantly for 1 minute until lightly browned. This creates a roux that will thicken your braising liquid. Immediately pour in the 1 cup red wine and scrape up any browned bits from the bottom of the pan. Let this mixture simmer for 2 minutes until slightly reduced.
Layer Ingredients for Perfect Braising
Pour the wine mixture over the chuck roast in the crock pot. Add the chopped vegetables, 2 cups beef broth, 2 tablespoons tomato paste, 1 teaspoon dried thyme, 2 whole bay leaves, 1.5 teaspoons salt, and 1 teaspoon black peppercorns. Stir gently to combine.
Here’s the thing—don’t worry if the vegetables don’t look completely submerged. The roast will release enough moisture as it cooks to create a flavorful sauce. The key is to arrange the vegetables around the roast so they cook evenly.
Cook on Low for Maximum Tenderness
Cover the crock pot and cook on low heat for 8-10 hours. This long, slow cook time is essential for breaking down the tough muscle fibers in the chuck roast. The roast is done when it’s fork-tender and easily pulls apart with minimal resistance.
About 1 hour before serving, check the roast’s tenderness by inserting a fork into the thickest part. If it slides in easily and the meat is falling apart, it’s ready. If not, continue cooking for another hour. The vegetables should also be tender but still hold their shape.
Rest and Serve with Confidence
Once the roast is tender, carefully remove it from the crock pot and transfer it to a cutting board. Tent loosely with foil and let it rest for 15-20 minutes. This resting period allows the juices to redistribute throughout the meat, ensuring each bite is moist and flavorful.
While the roast rests, skim any excess fat from the cooking liquid and discard the bay leaves. You can serve the roast sliced against the grain with the vegetables and sauce spooned over the top. The result should be succulent, flavorful beef that practically melts in your mouth—exactly what you want from a chuck roast.
Pro Tips For Making 3 Lb Chuck Roast Crock Pot
- SEAR THE ROAST FIRST: I learned this the hard way—skipping the sear means flavor hiding in slow-cooker limbo. Hit a screaming-hot skillet with 1 tablespoon oil, then brown the chuck roast on all sides (3-4 minutes per side) before dumping it in the crock pot. The crust locks in juices and adds depth the slow cooker alone can’t match.
- CHOP VEGETABLES UNIFORM: Big onion chunks and uneven carrots mean some veggies turn to mush while others stay crunchy. Cut everything—onions, carrots, celery—into 1-inch pieces (same size as your garlic cloves). This ensures even cooking and a consistent texture that actually tastes good, not like a vegetable soup disaster.
- DON’T OVERFILL THE POT: I used to cram everything in, thinking more liquid = more flavor. Wrong. Fill the crock pot only 2/3 full—this lets the meat and veggies simmer properly without steaming like a sad, waterlogged stew. If needed, add a splash of broth later, but start with room to breathe.
- SMASH THE GARLIC: Whole garlic cloves? They’ll just sit there like flavorless pebbles. Crush each clove with the flat side of your knife or a garlic press before adding to the pot. This releases the oils and infuses the meat with real garlic punch—not just a hint of “something was here.” (Yes, even if you’re impatient like me.)
Pro cooking tips for this recipe
Sear Like a Pro
Don’t skip the searing step—this is where the magic happens. Use a heavy cast-iron skillet (like a Lodge) over medium-high heat for maximum crust formation. Pat the roast completely dry with paper towels before searing—this ensures a better brown.
I like to sear each side for 5-7 minutes until deep golden brown. The crust locks in juices and adds depth to the final dish. 🔥
Low and Slow Wins
Set your crock pot to low heat for 8-10 hours—this is non-negotiable for tender results. High heat might cook faster, but it won’t break down the tough fibers properly.
I’ve found that 8 hours works for a 3 lb roast, but if you’re short on time, 6 hours on high can work in a pinch (though texture may be slightly firmer).
Vegetable Prep Matters
Chop your onions, carrots, and celery into even-sized pieces—about 1-2 inches—so they cook uniformly. Larger chunks stay crunchy, while smaller pieces turn mushy. I like to arrange them around the roast in a single layer so they absorb flavors without overcrowding.
This also makes serving easier—just scoop them up with the meat!
Deglaze for Depth
After searing, don’t let those flavorful browned bits go to waste! Add 2 tbsp flour to the skillet and cook for 1 minute to make a quick roux. Then, deglaze with 1 cup red wine—this creates a rich, flavorful base for your braising liquid.
If you’re avoiding alcohol, use beef broth instead, but the acidity won’t be the same. 🍷
Check for Doneness
About 1 hour before serving, test the roast with a fork. It should slide in easily and the meat should fall apart with minimal pressure. If it’s still tough, return it to the crock pot for another 1-2 hours.
The internal temperature should reach 195-205°F—this is the safe zone for melt-in-your-mouth tenderness.
Rest for Juiciness
Never skip the 15-20 minute rest after cooking! This lets the juices redistribute, so every bite is moist. Tent the roast loosely with foil and let it sit while you skim fat from the sauce.
Pro tip: Use a slotted spoon to remove the roast—this keeps the sauce intact for serving. The wait is worth it for that restaurant-quality texture! 💫
Nutrition facts
Frequently asked questions
Can I use a smaller or larger chuck roast than 3 lbs?
For a 2 lb roast, reduce cooking time to 6-7 hours on low, while a 4 lb roast may need 9-10 hours. Adjust liquid slightly too – 1 cup broth per pound works well. The key is maintaining the low-and-slow approach to ensure tenderness.
What if I don’t have red wine? Can I substitute?
Yes! Use 1 cup beef broth plus 1 tablespoon balsamic vinegar for similar acidity, or 1 cup apple cider for a sweeter profile. Avoid white wine—it lacks the bold flavor needed to complement beef. The sauce will still be delicious, just with a different depth of flavor.
How do I know when the chuck roast is perfectly tender?
Test it about 1 hour before serving by inserting a fork into the thickest part. If it slides in easily and the meat falls apart with minimal pressure, it’s ready. The internal temperature should be 195-205°F. If still tough, return to the crock pot for 1-2 more hours.
Can I make this recipe in an Instant Pot instead?
Yes! Sear the roast first, then add all ingredients and cook on high pressure for 60 minutes, followed by a 10-minute natural release. The Instant Pot version cooks faster but requires careful monitoring to prevent overcooking. The texture will be slightly different but still delicious.
What are the best sides to serve with this dish?
Classic pairings include creamy mashed potatoes, crusty sourdough bread, or roasted garlic green beans. For a heartier meal, add buttery egg noodles or a fresh mixed greens salad with a tangy vinaigrette. The rich beef pairs beautifully with anything that balances its depth.

- 3lb Prime Rib Roast Recipe: Juicy Pink Center Guaranteed in 3 Hours - October 31, 2026
- 5 Spice Cake Recipe: Warmly Spiced Layers With Crunchy Top - October 31, 2026
- 1950’s Macaroni and Cheese Recipe: Nostalgic Creamy Cheese Sauce with Buttery Noodles - October 31, 2026