
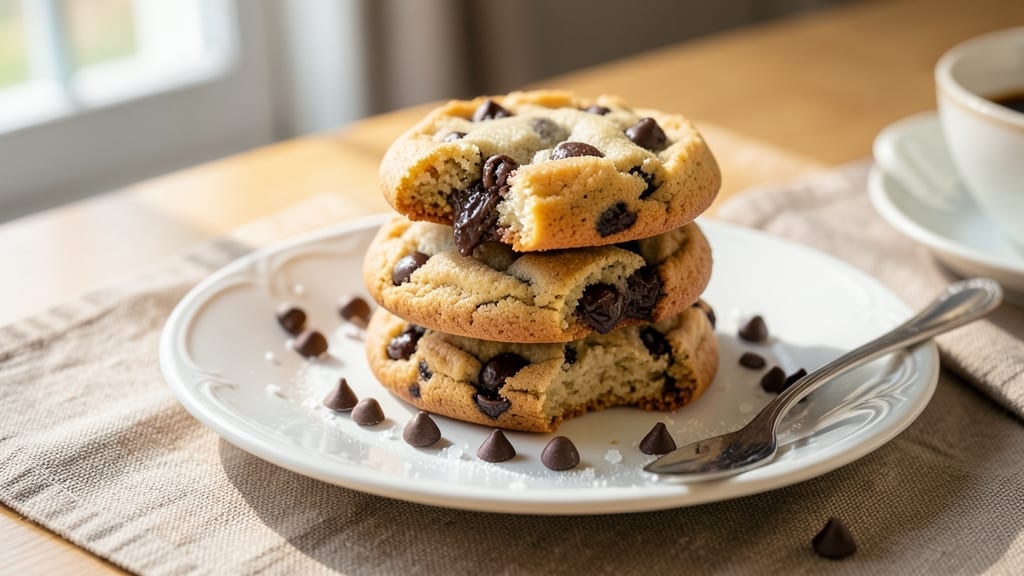
Mastering the perfect 30 chocolate chip cookie recipe comes down to one simple technique: balancing butter, brown sugar, and baking time for crispy edges and warm, gooey centers every time.
This isn’t just another cookie recipe—it’s the result of years of testing, where I learned that resting the dough and using cold butter creates that signature texture.
The secret lies in the details: precise measurements, proper mixing, and knowing when to pull them from the oven while the centers still look slightly underdone.
What sets this recipe apart is the foolproof method that delivers consistent results, whether you’re baking for a holiday treat or a quick weeknight dessert. We’ll use a combination of brown and white sugar for depth of flavor, while a touch of cornstarch prevents spreading and ensures those crispy edges.
The chocolate chips? High-quality semi-sweet ones that stay melty in the center, not baked hard. This isn’t about complicated techniques—it’s about understanding how ingredients work together to create the perfect cookie.
By following these steps, you’ll end up with crispy, golden-brown cookies that are chewy in the middle and perfectly set at the edges—no more dry, cakey cookies or flat, greasy ones.
The aroma alone as they bake will have everyone gathering in the kitchen, and the first bite will confirm you’ve achieved restaurant-quality results at home. Each cookie will have that signature crack in the center, a telltale sign of a perfectly baked treat.
Once you’ve perfected this batch, you can experiment with variations like adding walnuts, swapping in dark chocolate, or making them vegan with butter substitutes. But first, let’s focus on nailing the classic. The ingredients are simple, the process straightforward, and the results? Absolutely worth the effort. Let’s get baking.
Ingredients for 30 chocolate chip cookie
Thirty perfect cookies start with these eleven simple yet essential ingredients—cold butter, just the right sugar balance, and chocolate chips that stay melty.
| Ingredient | Amount | Notes |
|---|---|---|
| Unsalted Butter 🧈 | 1 ½ cups | Cold, cubed for texture |
| Packed Brown Sugar 🍯 | 1 ¼ cups | Light or dark preferred |
| Granulated White Sugar 🍯 | 1 cup | Superfine for smoother dough |
| Large Eggs 🥚 | 2 whole | Room temperature preferred |
| Vanilla Extract 🌿 | 2 tsp | Pure, high-quality extract |
| All-Purpose Flour 🌾 | 3 ½ cups | Sifted, plus extra for rolling |
| Cornstarch 🌾 | 1 tbsp | Prevents spreading |
| Baking Soda 🧂 | 1 tsp | Freshly opened |
| Salt 🧂 | 1 tsp | Diamond Crystal preferred |
| Semi-Sweet Chocolate Chips 🍫 | 2 ½ cups | Enjoy Life brand for vegan option |
| Flaky Sea Salt 🧂 | 1 tbsp | For finishing cookies |
The butter should be cold and cubed—this is non-negotiable for those signature crispy edges. Plugrá or Land O’Lakes unsalted work perfectly, but if you’re in a pinch, European-style butter like Miyoko’s adds extra richness. Brown sugar matters too—Domino or Muscovado both work, but don’t use raw sugar unless you’re prepared for a grittier texture. I always measure mine by packing it firmly into the cup. The chocolate chips? Ghirardelli or Guittard are my go-to for that perfect melty center, but if you’re making these vegan, Enjoy Life brand is the way to go.
No vanilla extract? Vanilla bean paste works too, though it’ll cost you a pretty penny. Short on cornstarch? Arrowroot powder at the same amount does the trick, though cornstarch has a slightly finer texture. The flour is where you can get fancy—King Arthur or Gold Medal are both reliable, but if you’re feeling adventurous, swap in half a cup of almond flour for a nuttier twist. Just don’t skip the sifting—it makes all the difference in texture. And if you’re worried about the dough being too sticky, add 1-2 tbsp more flour until it holds together when pressed.
Once baked, these cookies are best enjoyed warm and straight from the oven, but they’ll keep in an airtight container for 5-7 days at room temperature. For longer storage, freeze the dough balls on a tray first, then transfer to a bag—this way, you can bake them straight from frozen. The secret to reheating? 30 seconds in the microwave with a damp paper towel to restore that gooey magic. And if you’re making a batch for a crowd, double the recipe—just remember, the oven can only handle 24 cookies at a time for perfect baking.
Why You’ll Love This Recipe
- No-Fuss Mixing: I swear by this dough—just cream butter, toss in sugars, crack eggs, and fold in vanilla. No food processor, no stress, just 5 minutes of hands-on time. The brown sugar’s stickiness does most of the work for you.
- Buttery Chew Magic: That perfect balance of crisp edges and soft centers? All thanks to the butter-to-sugar ratio here. The brown sugar adds caramel depth, while the white keeps it from being too dense—every bite is dangerously addictive.
- Party in a Jar: Freeze half the dough in balls, and boom—you’ve got a last-minute dessert for holidays, potlucks, or even a sad Tuesday. (Yes, even on a Tuesday night.) Pull them out cold, bake fresh, and watch them disappear faster than my willpower.
- Budget Baking Wins: You’re using pantry staples—no weird ingredients or pricey shortcuts. A single batch costs me less than takeout, and the leftovers? They last days, stashed in my “emergency snack drawer.” Plus, the eggs add richness without breaking the bank.
Step-by-step instructions for perfect chocolate chip cookies
Here’s how to transform simple ingredients into cookies with irresistible crispy edges and gooey centers.
Cream the Butter and Sugars Together
In a stand mixer fitted with the paddle attachment, beat the 1.5 cups unsalted butter (cold, cubed) on medium speed until smooth, about 1 minute. This ensures even distribution of fat later. Gradually add the 1.25 cups packed brown sugar and 1 cup granulated white sugar, mixing continuously until light and fluffy, about 3-4 minutes total.
The mixture should nearly triple in volume and become pale in color. This creaming process incorporates air, which creates those signature crackly tops and helps the cookies spread just enough. If using a hand mixer, work in 30-second bursts to avoid overheating the butter. Stop when the mixture looks like whipped cream—this is your target texture.
Incorporate Eggs and Vanilla Extract
Add the 2 whole large eggs, one at a time, mixing on low speed just until each is fully incorporated after about 30 seconds per egg. This gentle mixing prevents breaking the eggs too much, which can make the dough dense. Stir in the 2 teaspoons vanilla extract and mix for another 10 seconds until fully combined.
The dough will look slightly curdled at first, but don’t worry—this will smooth out when you add the dry ingredients. Here’s where it gets fun: the vanilla extract adds depth that separates these from basic chocolate chip cookies. For extra flavor, let the eggs sit at room temperature for 10 minutes before using, as cold eggs can cause the butter to seize.
Add Dry Ingredients and Chocolate Chips
In a separate bowl, whisk together the 3.5 cups all-purpose flour, 1 tablespoon cornstarch, 1 teaspoon baking soda, and 1 teaspoon salt. Sift the dry ingredients directly into the wet mixture while mixing on low speed. Combine until just mixed—you should still see small flour streaks. Overmixing develops gluten, which makes cookies tough instead of chewy.
Remove the bowl from the mixer and fold in the 2.5 cups semi-sweet chocolate chips using a silicone spatula. Be gentle to avoid breaking the chips, which will melt unevenly. The dough should hold together when pressed but still be slightly sticky. If it’s too dry, add 1 teaspoon milk (not in ingredients list—use if needed) to help bind it.
Chill the Dough for Optimal Texture
Cover the dough bowl tightly with plastic wrap and refrigerate for at least 1 hour, or up to 24 hours for best results. Chilling is non-negotiable—it allows the flour to fully hydrate, prevents excessive spreading, and ensures the cookies hold their shape in the oven. The dough should firm up enough to roll into balls without sticking to your fingers.
Pro tip: If you’re short on time, freeze the dough into 1-inch balls for 20 minutes before baking. This mimics the chilling effect. The cold dough also means the cookies will have crispier edges and a thicker center. Don’t skip this step—it’s what transforms good cookies into exceptional ones.
Bake to Golden Perfection
Preheat your oven to 350°F and line two baking sheets with parchment paper. Using a 2-tablespoon cookie scoop, portion the chilled dough into 30 uniform balls (about 1.5 ounces each) and place them 3 inches apart on the prepared sheets. Flatten each ball slightly with your palm to create ½-inch thick cookies—this ensures even baking.
Bake for 11-13 minutes until the edges are golden brown but the centers still look slightly underdone. They’ll continue cooking on the hot pan after removal. Rotate the baking sheets halfway through for even browning. The cookies should pull away from the parchment paper slightly at the edges but still have soft centers. Immediately sprinkle each cookie with flaky sea salt while warm for that bakery-style finish.
Pro Tips For Making 30 Chocolate Chip Cookie
- Cream Butter Cold: DESCRIPTION:
- Measure Brown Sugar Properly: DESCRIPTION:
- Skip Overmixing Dough: DESCRIPTION:
- Use Room-Temp Eggs: DESCRIPTION:
Essential equipment for perfect results
Stand Mixer Essentials
The right mixer makes all the difference for creaming butter and sugar properly. I swear by a KitchenAid Artisan Series with the paddle attachment—it handles 1.5 cups of cold butter without overheating.
For budget-friendly options, the Hamilton Beach 6-Speed works well too, though you’ll need to mix in 30-second bursts to avoid butter melting too fast. 💛
Cookie Scoops Matter
Uniform cookies start with the right scoop. A 2-tablespoon cookie scoop (like the OXO Good Grips) ensures each of your 30 cookies weighs about 1.5 ounces, preventing size variations.
If you don’t have one, use a large ice cream scoop or measure dough with a 2-tablespoon measuring spoon. Pro tip: Dip the scoop in flour before portioning to prevent sticking.
Parchment Paper Savior
Skip the greased baking sheets—parchment paper is the secret to easy cleanup and even baking. I use Kirkland Signature (Costco brand) because it’s sturdy and non-stick. Place it directly on the sheet tray and draw a light pencil outline for where to place each cookie.
This keeps them 3 inches apart for proper browning and prevents overcrowding.
Oven Thermometer Check
Your oven might not be at the right temperature. A Thermoworks Oven Thermometer (about $15) reveals the truth—many ovens run 25°F hotter or colder than set.
For these cookies, aim for a true 350°F. If your oven runs hot, reduce to 325°F to prevent over-browning while keeping centers gooey.
Dough Chilling Tools
Chilling dough properly requires the right container. A glass Pyrex bowl with a tight lid works best—I use the 8-cup size for this recipe. For freezing dough balls, I recommend Silicone Molds (like OXO’s) that hold 1-inch balls perfectly.
Store them on a tray before transferring to a freezer bag to prevent sticking. 🧊
Salt Sprinkler Accessory
Flaky sea salt deserves a dedicated tool. A small salt shaker (like Mason Salt’s) lets you sprinkle pinch-sized amounts evenly over each cookie while warm. For a rustic touch, use a fine-mesh sieve to dust salt over the entire tray at once.
Timing is key—sprinkle immediately after removing from the oven for that bakery-style finish.
Nutrition facts
Frequently asked questions
Why does my dough keep sticking to my hands?
Sticky dough is normal when using cold butter, but if it’s too wet, add 1-2 tablespoons flour at a time until it holds together when pressed. Chill the dough for at least 1 hour—this firms it up and makes handling much easier. If you’re in a hurry, freeze the dough balls for 20 minutes before shaping.
Can I make these cookies without a mixer?
Use a sturdy wooden spoon or silicone spatula to cream the butter and sugars by hand. Work in 30-second bursts to avoid overheating the butter, and mix until light and fluffy (about 5-7 minutes total). For the dry ingredients, use a pastry cutter or fork to cut them into the butter mixture. The texture will be slightly denser but still delicious.
How do I prevent my cookies from spreading too much?
Cold butter is your best friend—use it straight from the fridge in cubes, not softened. Chill the dough for at least 1 hour, and flatten the balls slightly before baking to create ½-inch thick cookies. The cornstarch in the recipe also helps prevent excessive spreading. If they still spread too much, try baking at 375°F for 10-11 minutes instead of 350°F.
What’s the best way to store leftover cookies?
Keep cookies fresh in an airtight container at room temperature for 5-7 days. For longer storage, freeze the dough balls (not baked cookies) on a tray for 2 hours, then transfer to a freezer bag. Bake straight from frozen, adding 1-2 extra minutes to the baking time. To restore that gooey texture, microwave a cookie for 10-15 seconds with a damp paper towel.
Can I substitute brown sugar with white sugar?
You can, but your cookies will taste different. Brown sugar adds moisture and depth of flavor, while white sugar creates crispier edges. For the best results, use a 1:1 ratio of white sugar, but expect slightly crisper (less chewy) cookies. If you want to keep the chewy texture, add 1 tablespoon molasses per cup of white sugar to mimic the brown sugar’s flavor.

- 6 Egg Cake Recipe with Oil: Light as Air With Buttery Moisture - October 4, 2026
- 4 Bean Casserole Recipe: One-Pan Heartiness With Smoky Paprika Depth - October 4, 2026
- 3-Ingredient Keto Mug Cake Recipe: Microwave Magic in 2 Minutes - October 4, 2026