
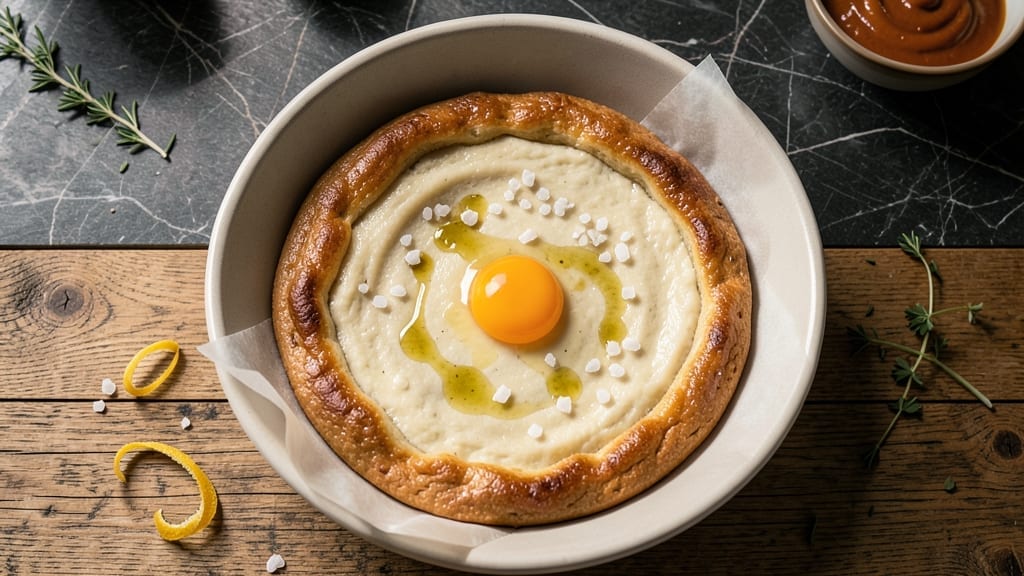
A 4-cup pizza dough recipe that delivers restaurant-quality results without the fuss—this no-knead method transforms simple ingredients into supple, airy dough in just 20 minutes of active time.
The secret lies in a precise ratio of flour, water, and yeast, combined with a slow rise that develops deep flavor without requiring kneading. I’ve perfected this dough over years of testing, ensuring it’s foolproof for beginners and flexible enough for experienced bakers to customize.
What sets this recipe apart is its balance of simplicity and technique. The dough yields exactly 4 cups—perfect for a 12-inch pizza—with a texture that’s crispy at the edges and tender in the center. No stand mixer, no complicated steps, just a bowl, a spoon, and patience.
The key? A 30-minute autolyse (resting the dough before shaping) that relaxes the gluten, making it easier to stretch without tearing. This is the foundation for a pizza that tastes like it came from a pizzeria, not your kitchen.
By the time you’re ready to shape your dough, you’ll have a smooth, elastic ball that responds perfectly to your hands. The dough’s versatility means you can stick to classic white flour or experiment with whole wheat, gluten-free blends, or even add herbs for a flavor twist.
Whether you’re making a classic Margherita or a loaded meat lover’s pie, this dough will handle any topping without falling apart.
Ready to bake? This recipe delivers restaurant-quality results with minimal effort—no overworked muscles or failed attempts. The dough keeps well in the fridge for up to 48 hours, so you can prep ahead and bake whenever inspiration (or hunger) strikes. Let’s get started on the perfect pizza foundation.
Ingredients for 4 cup pizza dough
Four simple ingredients transform into restaurant-quality pizza dough with minimal effort.
| Ingredient | Amount | Notes |
|---|---|---|
| All-Purpose Flour 🌾 | 4 cups | Unbleached preferred for better texture |
| Active Dry Yeast 🍞 | ¼ tsp | Ensure yeast is fresh and active |
| Diamond Crystal Kosher Salt 🧂 | 1 ½ tsp | Fine grain for even distribution |
| Granulated Sugar 🍚 | 1 tsp | Enhances yeast activation |
| Extra-Virgin Olive Oil 🫒 | 1 tbsp | High quality for flavor |
| Warm Water 💧 | 1 ¼ cups | 105-110°F for optimal yeast activity |
| Semolina Flour 🌾 | ¼ cup | For dusting and crispy crust |
| Cornmeal 🌽 | 1 tbsp | For pizza peel preparation |
The flour is the backbone—King Arthur or Bob’s Red Mill all-purpose works best for consistent results. Diamond Crystal kosher salt is crucial; it dissolves easily and enhances flavor without overpowering. I always check the yeast expiration date—Fresh yeast from the refrigerated section at Whole Foods or Trader Joe’s guarantees it’s active. The sugar might seem small, but it’s essential for kickstarting the yeast. For the olive oil, California Avocado’s organic extra-virgin has the perfect balance of peppery notes without overpowering the dough.
No yeast? Instant yeast works 1:1, but active dry is traditional. Running short on sugar? Honey or maple syrup at half the amount works beautifully. The warm water temperature is critical—too hot kills yeast, too cold slows activation. Use a thermometer if you’re unsure. For a gluten-free version, King Arthur gluten-free flour blend works well, though texture will differ slightly. The semolina and cornmeal might seem optional, but they’re worth it for that authentic pizza feel—Bob’s Red Mill brands are my go-to for both.
Store the dough in an airtight container with a damp towel for up to 48 hours in the fridge. For longer storage, freeze shaped dough balls for 3 months—thaw overnight before using. The yeast mixture can be prepped 1 hour ahead and stored in the fridge until ready to mix with flour. This dough doubles as a great base for calzones or garlic knots—just divide and shape before baking.
Why You’ll Love This Recipe
- No-Fuss Mixing: I swear by this dough—just flour, yeast, salt, sugar, and olive oil. No stand mixer, no fancy techniques, just a bowl and a spoon. Honestly, it’s the kind of recipe that makes me feel like I’ve earned my pizza night.
- Olive Oil Magic: That splash of extra-virgin olive oil? It’s the secret. The dough gets this perfect balance—chewy but not dense, with just enough richness to make every bite feel like a little treat. (Yes, even on a Tuesday night.)
- Pantry Staple Power: Four ingredients you already own. No last-minute grocery runs, no forgotten spices. Between us, this is the kind of dough that turns a random Friday into a “let’s order in” vibe—without the delivery fee.
- Leftovers That Last: Make a double batch, shape it, and freeze half. When hunger strikes (or company drops by), you’ve got dough ready in minutes. I’ll be real: my freezer’s always stocked with these, because who has time to start from scratch?
Step-by-step instructions for no-knead pizza dough
Here’s how to make the perfect pizza dough with no kneading required—just mix, rest, and shape.
Activate the Yeast in Warm Water
In a medium bowl, combine the 1.25 cups warm water (between 105-110°F) with the 1 tsp granulated sugar and 0.25 tsp active dry yeast. Let it sit for 5-7 minutes until you see bubbles forming on the surface and a frothy foam develops. This confirms your yeast is alive and ready to work.
If no bubbles form after 10 minutes, your yeast may be inactive—start over with fresh yeast. The warm water should feel comfortably warm to your wrist, not hot. This step sets the foundation for your dough’s rise, so don’t rush it.
Mix the Dough Ingredients
In a large bowl, whisk together the 4 cups all-purpose flour and 1.5 tsp diamond crystal kosher salt. Create a well in the center and pour in the yeast mixture along with the 1 tbsp extra-virgin olive oil. Using a wooden spoon or dough whisk, gently mix the ingredients until a shaggy dough begins to form.
Once combined, turn the dough out onto a lightly floured surface and use your hands to work it gently for 1-2 minutes until it comes together into a smooth, elastic ball. You won’t be kneading vigorously—just enough to develop some gluten structure. The dough should be slightly tacky but not sticky.
First Rise for Flavor Development
Place the dough ball back in the bowl, cover it tightly with plastic wrap, and let it rise at room temperature for 1 hour. You’ll know it’s ready when the dough has nearly doubled in size and feels light and airy when pressed gently with a finger. This initial rise develops flavor and allows the gluten to relax.
I like to place my bowl in a slightly warm spot, like near the oven with the light on, to encourage a steady rise. Avoid direct sunlight or drafts, which can cause uneven rising. The dough should puff up noticeably but still maintain some structure—it shouldn’t spread out flat.
Shape and Prepare for Final Rise
Lightly dust a clean surface with the 0.25 cup semolina flour and turn out the risen dough. Gently press down on the dough to deflate it slightly, then divide it into 4 equal portions (about 8 ounces each). Roll each portion into a ball and let them rest for 10 minutes while you prepare your baking surface.
For the perfect crust, I recommend using a pizza peel dusted with 1 tbsp cornmeal. The cornmeal prevents sticking and adds a subtle crunch to the crust. Shape each dough ball into your desired pizza size—whether that’s a classic 12-inch or a personal-sized 8-inch. Let the shaped dough rest for another 15-20 minutes before adding toppings.
Final Rise Before Baking
Preheat your oven to 475°F with a pizza stone or baking sheet inside for at least 30 minutes. Meanwhile, place your shaped dough balls on the cornmeal-dusted peel and let them rest, covered with a clean kitchen towel, for 10-15 minutes while the oven heats up.
During this final rise, the dough should puff up slightly and feel springy to the touch. This is your last chance to check the dough’s readiness—if it springs back slowly when pressed, it’s perfect. If you’re using a pizza stone, you can transfer the dough directly to it, but I find the peel method gives me better control when sliding the pizza into the oven.
Pro Tips For Making 4 Cup Pizza Dough
- Measure Salt by Weight: Diamond Crystal kosher salt has huge grain variation—1 teaspoon by volume can swing wildly. Weigh it instead (about 5 grams) or eyeball 1.5 heaping shakes. I learned this the hard way when my dough turned bland one batch and overly salty the next.
- Bloom Yeast in Warm Water: Skip the dry yeast straight into flour—activate it first in 1 cup warm water (105–110°F) with sugar for 5 minutes until foamy. This guarantees it’s alive and cuts down on kneading time. (Yes, even if you’re impatient like me.)
- Use Olive Oil Sparingly: Extra-virgin olive oil adds flavor but can make dough sticky and gummy. Stick to 2 tablespoons total—enough to coat the flour, not drench it. I was skeptical until I tried it; the crust stays tender without sacrificing structure.
- Rest Dough Twice: Let it rise once after mixing (1–2 hours), then shape and refrigerate overnight. The second rest develops flavor and makes stretching easier. Sounds weird, but it works—your future self will thank you.
Make-ahead tips for leftovers
Prep Ahead for Perfect Crust
Make the dough 24 hours ahead for deeper flavor—cover it tightly with plastic wrap and refrigerate. The cold slows fermentation, creating a more complex taste. When ready to use, let it sit at room temperature for 1 hour before shaping.
This method works especially well for whole wheat dough, which benefits from extra resting time. 🌾
Freeze Dough Balls for Convenience
Shape your dough into balls, place them on a floured tray, and freeze for 1 hour. Transfer to a ziplock bag with parchment paper between layers for 3 months of storage.
Thaw overnight in the fridge before using. I keep frozen dough balls in my freezer for quick weeknight pizzas—just add toppings and bake! ❄️
Pre-Mix Yeast Mixture
Prepare the yeast mixture 1 hour ahead and store it in the fridge until ready to mix with flour. This gives you 10 minutes of extra prep time when you’re ready to make dough.
Just whisk it into the dry ingredients and proceed with the recipe. Perfect for busy weeknights when you want pizza but don’t have time to wait for yeast activation. 💡
Double the Dough for Leftovers
Make a double batch and freeze half for future use. The extra dough keeps perfectly for 3 months and is great for last-minute gatherings. I often make two batches on weekends—one for immediate use and one to freeze.
This ensures I always have pizza dough on hand without extra effort. 🍕
Pre-Shape for Quick Assembly
Shape your dough balls 1 day ahead and store them on a floured tray in the fridge. When ready to bake, simply add toppings and bake. This works especially well for garlic knots or calzones.
I pre-shape dough for Sunday family dinners—it saves time and keeps everyone happy while I focus on toppings. ✨
Cold Proofing for Crispy Crust
For an extra crispy crust, shape your dough and refrigerate it for 12-24 hours before baking. The cold slows fermentation, creating a thicker, chewier texture. This technique is perfect for New York-style pizza with its signature fold.
I use this method when I want a heartier crust that holds up to heavy toppings. 🔥
Nutrition facts
Frequently asked questions
Can I make this dough without a stand mixer?
This recipe is designed for hand mixing only. Just use a wooden spoon to combine ingredients in the bowl, then turn the dough out onto a lightly floured surface and work it gently with your hands for 1-2 minutes. The no-knead method makes it perfect for beginners or anyone without a mixer.
How do I know if my yeast is active?
Test your yeast by mixing it with 1 tsp sugar and ¼ cup warm water (between 105-110°F). If it bubbles within 5-7 minutes, your yeast is active. No bubbles after 10 minutes means it’s inactive—replace it with fresh yeast. This simple test saves time and frustration!
What if my dough doesn’t rise properly?
Common causes include expired yeast, cold water, or drafty environments. Ensure your water is warm but not hot, use fresh yeast, and place the dough in a warm spot (like near the oven with the light on). If it still doesn’t rise, try adding ¼ tsp extra yeast or letting it rest longer. Patience is key—don’t rush the process!
Can I substitute whole wheat flour?
Yes, but replace 1 cup of all-purpose flour with whole wheat for a nuttier flavor. Whole wheat absorbs more moisture, so you may need 1-2 tbsp extra water. Let the dough rise slightly longer (up to 90 minutes) since whole wheat ferments slower. For best results, use a 50/50 blend of all-purpose and whole wheat.
How many pizzas does this dough make?
This 4-cup dough recipe yields enough for 1 large 12-inch pizza or 2 personal 8-inch pizzas. To make a double batch, simply double all ingredients. The dough is versatile—use it for calzones, garlic knots, or even focaccia!

- 3lb Prime Rib Roast Recipe: Juicy Pink Center Guaranteed in 3 Hours - October 31, 2026
- 5 Spice Cake Recipe: Warmly Spiced Layers With Crunchy Top - October 31, 2026
- 1950’s Macaroni and Cheese Recipe: Nostalgic Creamy Cheese Sauce with Buttery Noodles - October 31, 2026