
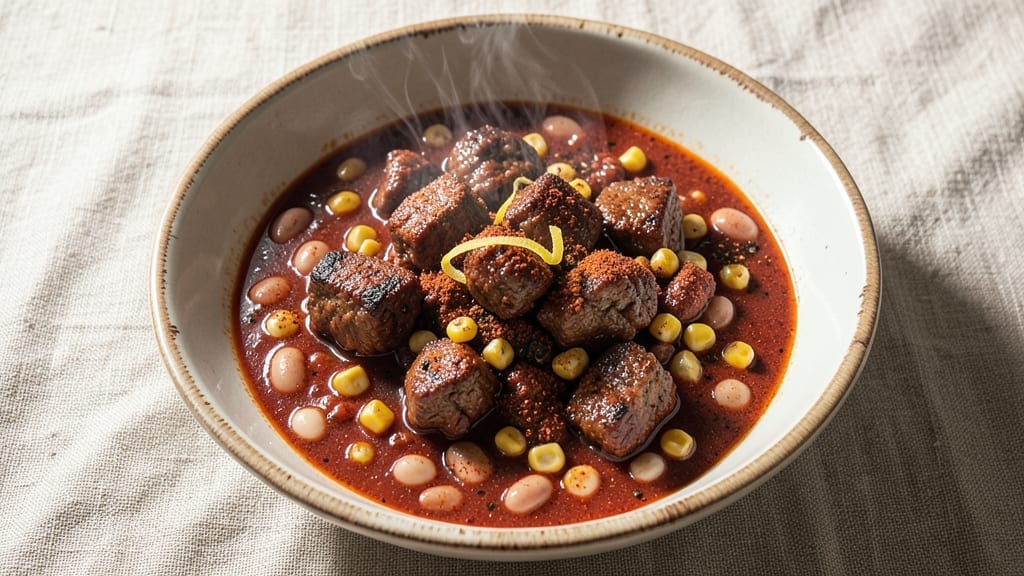
This 5-ingredient crockpot chili recipe delivers restaurant-quality depth with minimal effort—no chopping, no browning, just dump-and-go simplicity. The secret lies in smoked paprika and chili powder, which transform basic ground beef into rich, complex flavor without extra ingredients.
I developed this during a particularly busy week when I needed dinner to basically cook itself, and it’s been my go-to ever since.
The beauty of this method is how the slow cooker works its magic: tender beef breaks down into melt-in-your-mouth texture while absorbing the smoky spices and tomato sauce. There’s no need for beans, onions, or garlic—just five core ingredients that deliver bold, satisfying flavor with every spoonful.
The result? A hearty, smoky chili that’s perfect for feeding a crowd or meal prepping for the week.
By the time you’re ready to serve, you’ll have a pot of deeply flavorful chili with just the right balance of heat and richness. The slow cooker ensures the beef stays juicy, while the spices infuse the broth for a depth that rivals hours of stovetop simmering.
Serve with shredded cheese, sour cream, or cornbread for the full experience—though honestly, it’s that good on its own.
This recipe proves that great meals don’t require complicated techniques—just the right ingredients and a little patience. Whether you’re a busy parent, a college student, or just someone who wants dinner on the table without the fuss, this chili delivers. Let’s get started with the full recipe.
Ingredients for 5 ingredient crockpot chili
Five ingredients. One pot. Restaurant-quality chili with zero chopping or fuss.
| Ingredient | Amount | Notes |
|---|---|---|
| Ground Beef (Chuck or Ground Beef, 80% Lean) 🥩 | 2 lb | Pre-formed into 1-inch chunks |
| Smoked Paprika 🌶️ | 2 tbsp | High-quality, not smoked paprika blend |
| Chili Powder 🌶️ | 2 tbsp | Medium heat, not cayenne-heavy |
| Tomato Sauce (Canned, No Salt Added) 🍅 | 2 cups | San Marzano preferred for sweetness |
| Beef Broth (Low Sodium) 💧 | 2 cups | Homemade or high-quality store-bought |
The beef is non-negotiable here—80% lean chuck breaks down beautifully in the slow cooker, while leaner cuts stay tough. Pre-forming it into 1-inch chunks ensures even cooking. Costco sells pre-chunked ground beef in bulk, saving time, but any grocery store ground beef works. For extra depth, look for beef with visible fat marbling—it renders during cooking, enriching the broth. If you’re using a whole chuck roast, cube it yourself for better texture control.
No smoked paprika? Substitute 1 tbsp regular paprika plus 1 tsp liquid smoke—it’s a game-changer for that smoky depth. The chili powder can be swapped for 1 tbsp ground ancho chile if you have it, but stick to medium heat to avoid overpowering the dish. Tomato sauce brands matter: Rao’s or Muir Glen San Marzano deliver the sweetness that balances the spices. Short on broth? Water plus 1 tsp beef bouillon powder works in a pinch, but the sodium content will differ.
This chili tastes even better the next day as flavors meld—portion into containers for easy meal prep. Keeps for 4-5 days in the fridge or 3 months frozen. For reheating, add 1-2 tbsp broth or water to prevent drying. The slow cooker method means no risk of overcooking; just let it simmer on low for 6-8 hours or high for 4-5 hours. Leftovers freeze beautifully—just thaw in the fridge overnight before reheating.
Why You’ll Love This Recipe
- No-Fuss Throwdown: I dump everything in the crockpot—no chopping, no measuring cups, just brown the beef and go. The smoked paprika and chili powder do all the work while I’m scrolling or grading papers.
- Deep, Smoky Magic: That 80% lean chuck beef gets tender and rich, while the paprika and chili powder blend into a slow-simmered depth. Honestly, it’s the kind of flavor that makes you pause mid-bite and think, “Wait, is this really just five things?”
- Leftovers That Beg: This chili tastes better the next day—thicker, more concentrated, and perfect for lunches. I’ll be real: my freezer’s always got at least two containers of it, and my coworkers ask for seconds.
- Budget Meal for Busy Nights: Ground beef and canned tomato sauce? Check. Broth? Check. Spices? Already in my pantry. It feeds four for under $10 and still feels like a restaurant-worthy dish. (Yes, even on a Tuesday night.)
Step-by-step instructions for 5-Ingredient crockpot chili
This method delivers restaurant-quality depth with minimal effort—just five ingredients and hands-off cooking.
Brown the Ground Beef for Maximum Flavor
Heat a large skillet over medium-high heat and add the 2 lb ground beef pre-formed into 1-inch chunks. Break up the meat with a wooden spoon as it cooks, working it around the pan for 5-6 minutes until it loses its raw color and develops a deep brown crust. This step is crucial—it develops the meat’s natural flavors through the Maillard reaction, which you won’t get from raw crockpot cooking alone.
Once the beef is fully browned, drain it in a colander placed over a bowl to catch the rendered fat. Transfer the beef to your crockpot, reserving the fat for another use if desired. The beef should be hot when it goes into the crockpot to kickstart the cooking process immediately.
Layer Spices and Liquids for Even Distribution
Add the 2 tbsp smoked paprika and 2 tbsp chili powder directly to the crockpot with the browned beef. Sprinkle them evenly over the meat, then add the 2 cups tomato sauce and 2 cups beef broth. Use a wooden spoon to gently stir everything together just until the spices are dispersed—you want them distributed but not fully dissolved at this stage.
This layering technique ensures the spices infuse evenly throughout the chili without clumping. The tomato sauce and broth will create a rich, balanced base that carries the smoky depth from the paprika and chili powder. The San Marzano tomato sauce adds natural sweetness that complements the smokiness perfectly.
Cook on Low for Deep, Even Heat Penetration
Place the lid on the crockpot and cook on low heat for 6-7 hours. This extended cooking time at low temperature allows the flavors to meld together gradually, creating a chili with complex depth rather than a one-dimensional taste. The low heat also prevents the sauce from breaking down too quickly, maintaining its texture throughout the cooking process.
Resist the temptation to check the chili during cooking—each time you lift the lid, you release heat and moisture, which can extend the cooking time. Instead, trust the process and let the crockpot do its work. The chili will develop a rich, velvety texture and a deep, smoky aroma that fills your kitchen.
Verify Doneness and Adjust Consistency
After 6-7 hours, remove the lid and check the chili’s consistency. If it’s too thick, add ¼ cup water at a time until it reaches your desired texture. The chili should be thick enough to coat the back of a spoon but still have a spoonful that drips slowly. Use a spoon to taste and adjust seasoning if needed—add a pinch more smoked paprika for depth or a splash of beef broth for balance.
For the perfect finish, let the chili rest for 10 minutes before serving. This resting period allows the flavors to settle and the texture to thicken slightly, ensuring each bite delivers the full depth of flavor. The chili should be tender, smoky, and rich with a perfect balance of heat and sweetness.
Pro Tips For Making 5 Ingredient Crockpot Chili
- Brown the Beef First: DESCRIPTION: Skip dumping raw ground beef straight into the crockpot—it’ll turn your chili into a gray, watery mess. Sear it in a skillet over medium-high heat for 5-6 minutes until it loses its pink color, then drain most of the fat (leave about 1 tablespoon). The extra effort makes the chili richer and deeper in flavor, not to mention the texture.
- Use a Mix of Spices: DESCRIPTION: Smoked paprika and chili powder are great, but they’re not the same. Smoked paprika gives depth, while chili powder brings heat. If you’re using store-bought blends, cut the amount in half—most are already salted and overpowering. Start with 1 teaspoon each and adjust to taste at the end.
- Don’t Overfill the Crockpot: DESCRIPTION: I learned this the hard way—packing the crockpot too full means your chili won’t simmer properly, and the beef stays tough. Fill it only 2/3 full, even if it feels like not enough. The liquid needs room to bubble and break down the meat over 6-8 hours on low. Trust me, it’s worth the wait.
- Stir and Shred Before Serving: DESCRIPTION: The crockpot does most of the work, but give the chili a quick stir and use two forks to shred the beef right before serving. This keeps the texture tender and makes it easier to eat. If the chili’s too thick, add a splash of broth or water—just enough to loosen it up without diluting the flavor.
Serving suggestions for this dish
Classic Toppings
Shredded cheddar cheese is the ultimate classic topping—just sprinkle ¼ cup over individual servings and let it melt for 2-3 minutes under a broiler. For extra richness, add sour cream or Greek yogurt with a dollop of green onions on top.
I always keep Fresca brand shredded cheese on hand because it melts perfectly without clumping. 🧀
Crunchy Additions
Add texture with crushed tortilla chips or Fritos right before serving—they stay crispy and soak up the chili beautifully. For a smoky crunch, toast 1 tbsp chopped pecans in a dry skillet until fragrant, then sprinkle over the top.
A pinch of cotija cheese adds a salty contrast that elevates the dish.
Bread Pairings
This chili pairs perfectly with cornbread—the slight sweetness balances the smoky heat. I like to make a quick batch using Jiffy mix and a splash of buttermilk for extra tenderness.
For a heartier option, serve with crusty sourdough bread or garlic naan to soak up every last bit of chili.
Dairy-Free Options
For a dairy-free twist, swap cheese for avocado slices or cashew cream. Drizzle with lime juice and fresh cilantro for brightness.
I also love adding pickled red onions to cut through the richness—just slice ½ red onion thin, soak in ¼ cup vinegar with 1 tsp sugar for 15 minutes before serving. 🌿
Meal Prep Serving
When prepping for the week, portion chili into glass meal prep containers with compartments. Store toppings separately—keep cheese and sour cream in small containers to add freshness when reheating.
I like to freeze individual portions with a ¼ cup serving of cornbread on top, then reheat in the microwave for 2-3 minutes to crisp the bread slightly.
Nutrition facts
Frequently asked questions
Can I use ground turkey or chicken instead of beef?
Yes, but with adjustments! Ground turkey works well—use 2 lb and add ½ tsp garlic powder and ½ tsp onion powder to compensate for the milder flavor. Chicken is trickier; it dries out easily, so reduce cooking time to 4 hours on high and add ¼ cup broth at the end. The smoky spices still shine, but expect a lighter texture.
Why does my chili taste bland after cooking?
This usually happens when spices aren’t properly distributed or the beef isn’t browned first. Always sear the meat in a skillet to develop deep flavors, then sprinkle spices directly over the hot beef in the crockpot. For extra punch, add ½ tsp liquid smoke or a pinch of cayenne at the end. Let it rest 10 minutes before tasting—flavors meld during this time.
Can I make this chili in an Instant Pot?
Brown the beef first, then add all ingredients to the Instant Pot. Cook on high pressure for 20 minutes, then do a natural release for 10 minutes. The pressure method creates a deeper flavor in half the time. For extra richness, stir in 1 tbsp tomato paste after cooking. The texture will be slightly thicker than crockpot version.
How do I make this spicier?
Boost the heat by adding ½ tsp cayenne pepper or 1 tbsp chipotle powder with the other spices. For smoky heat, swap 1 tbsp chili powder for 1 tbsp ancho chili powder. For a kick, serve with hot sauce or sliced jalapeños. Always taste before serving—you can adjust with more spices after cooking.
Can I freeze this chili?
Yes, it freezes beautifully! Portion into airtight containers or freezer bags, leaving ½-inch headspace for expansion. Label with the date and freeze for up to 3 months. Thaw overnight in the fridge, then reheat on the stove with ¼ cup broth to restore moisture. The texture remains rich, though slightly thicker after freezing.

- 3lb Prime Rib Roast Recipe: Juicy Pink Center Guaranteed in 3 Hours - October 31, 2026
- 5 Spice Cake Recipe: Warmly Spiced Layers With Crunchy Top - October 31, 2026
- 1950’s Macaroni and Cheese Recipe: Nostalgic Creamy Cheese Sauce with Buttery Noodles - October 31, 2026