
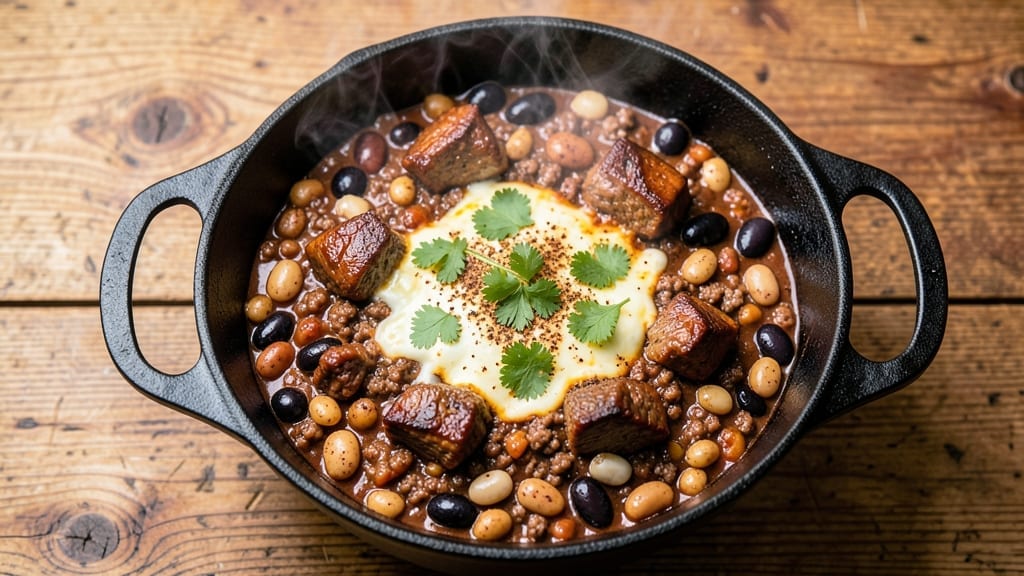
This 4-gallon chili recipe transforms a simple pot into a spice-packed centerpiece for gatherings—deep, smoky, and packed with hearty beef, beans, and bold flavors that feed a crowd without the fuss.
The secret lies in slow-cooked tenderness and layered spices that develop over hours, creating a chili so rich it disappears faster than you can say “second helping.” I’ve perfected this version to handle 20+ servings while keeping the texture perfect: thick enough to ladle, thin enough to sip.
What sets this apart is the balance of ground beef and chuck roast, which delivers both texture and deep flavor, while a blend of chili powder, cumin, and cinnamon builds complexity without overpowering.
The beans—kidney, black, and pinto—absorb the broth into something heartier than store-bought, and the tomatoes add a tangy brightness that cuts through the richness. It’s the kind of chili that turns casual dinners into legendary meals, and the best part? One pot, minimal cleanup.
By the time it’s done, you’ll have a deeply aromatic, smoky-sweet chili with layers of flavor that reward every spoonful. The beef stays tender, the beans are perfectly integrated, and the spices harmonize into a warm, inviting depth.
Serve it with cornbread, tortilla chips, or just a dollop of sour cream—it’s that good. This isn’t just chili; it’s the kind of dish that makes people ask for the recipe before they even finish their first bowl.
The beauty of this recipe is its flexibility: scale it down for a family dinner or double it for a party, and it reheats beautifully for leftovers. Whether you’re feeding a crowd or stocking the freezer for winter, this chili delivers restaurant-quality results with minimal effort. Let’s get cooking!
Ingredients for 4 gallon chili
Four pounds of beef, three kinds of beans, and a spice blend that turns one pot into a crowd-pleaser.
| Ingredient | Amount | Notes |
|---|---|---|
| Chuck Roast 🥩 | 4 lb | Cut into 1-inch cubes, trim excess fat |
| Ground Beef (80/20) 🥩 | 2 lb | 80% lean for extra flavor |
| Kidney Beans 🌱 | 1 lb | Drained and rinsed from can |
| Black Beans 🌱 | 1 lb | Drained and rinsed from can |
| Pinto Beans 🌱 | 1 lb | Drained and rinsed from can |
| Chili Powder 🌶️ | ¾ cup | Medium or hot blend preferred |
| Ground Cumin 🌿 | ½ cup | Toasted for deeper flavor |
| Garlic Powder 🧄 | ¼ cup | Freshly ground preferred |
| Onion Powder 🧅 | ¼ cup | For balanced flavor |
| Dried Oregano 🍃 | 0.1 cup | Mexican oregano if available |
| Cayenne Pepper 🔥 | 2 tbsp | Adjust for heat preference |
| Ground Cinnamon 🌿 | 1 tbsp | Adds subtle warmth |
| Salt 🧂 | 2 tbsp | Kosher or sea salt |
| Black Pepper 🌶️ | 1 tbsp | Freshly ground preferred |
| Tomato Paste 🍅 | 1 cup | Squeeze tube or canned |
| Diced Tomatoes (46 oz can) 🍅 | 2 cans | San Marzano preferred |
| Beef Broth 💧 | 4 cups | Low-sodium preferred |
| Dark Brown Sugar 🍚 | ¼ cup | Enhances depth of flavor |
| Yellow Onion 🧅 | 3 whole | Diced, medium size |
| Garlic Cloves 🧄 | 8 cloves | Minced for even distribution |
| Jalapeño Pepper 🌶️ | 1 whole | Seeds removed for mild heat |
| Fresh Cilantro 🌿 | ¼ cup | Chopped, for garnish |
The beef is where this chili earns its reputation. Chuck roast gives you that melt-in-your-mouth texture, while 80/20 ground beef keeps it rich and flavorful. Grab the chuck from Costco or your local butcher—it’s cheaper per pound and stays tender. If you’re short on time, pre-cubed chuck from the grocery store freezer section works great. The beans? No need to soak—just drain, rinse, and toss them in. I always buy three brands of canned beans so I can mix flavors, but any store-brand will do. The key is using all three types—kidney, black, and pinto—for that classic chili texture.
No chili powder? Mix 2 tbsp each of paprika, cumin, and coriander for a close substitute. Running low on cumin? Cardamom at half the amount adds a different but delicious complexity. The tomato paste can be the squeeze tube kind from Trader Joe’s—it’s perfect for this recipe and lasts forever. Fresh jalapeño? Pickled works too, just drain it first. The brown sugar might sound odd, but trust me—it balances the heat and adds a caramelized depth that makes this chili next-level. And if you’re worried about the cinnamon, it’s just a teaspoon—barely noticeable, but it rounds out the spices beautifully.
This chili tastes even better the next day, so make it ahead if you can. Keeps in the fridge for 5-6 days and freezes perfectly for up to 6 months. I always portion it into quart-sized containers before freezing—just thaw and reheat for easy lunches. The broth will thicken as it cools, so add a splash of water when reheating if it’s too stiff. And save those cilantro stems—they’re packed with flavor too!
Why You’ll Love This Recipe
- One-Pot Wonder: I swear by this—dump everything in a Dutch oven, stir once, and walk away. The chuck roast and ground beef practically melt into tender perfection while you handle the rest of life.
- Deep, Meat-Focused Richness: That 80/20 ground beef? Pure fat-packed flavor. The slow-cooked chuck roast turns into shreds so tender they fall apart at the touch, while the three-bean mix (kidney, black, pinto) adds just enough heartiness without overpowering.
- Tailgate or Taco Night: Between us, this chili works everywhere. Serve it in bowls for a crowd, ladle it into buns for a game-day staple, or turn it into nachos—no one will question why you made so much.
- Wallet-Friendly Feast: Four gallons means leftovers for a week, and the ingredients? Budget-friendly without sacrificing taste. A chuck roast and a pound of ground beef stretch to feed 12+ for under $30—no guilt, just satisfaction.
Step-by-step instructions for crowd-feeding chili
Here’s how to build a chili so rich and bold it’ll disappear faster than you can say “second helping.”
Brown the Meats for Maximum Flavor
Fire up a large Dutch oven over medium-high heat and add the 4 lb chuck roast cut into 1-inch cubes. Let it sear undisturbed for 3-4 minutes until you see a deep golden crust form. This step is non-negotiable—it builds the chili’s foundation. Once browned on all sides, remove and set aside.
In the same pot, add the 2 lb ground beef (80/20) and cook until it loses its raw color and starts to brown, about 5-6 minutes. The fat from the beef will help create a rich sauce. Don’t rush this—you want those beef bits nicely browned. Once done, remove and set aside with the chuck roast.
Sauté Aromatics and Build the Spice Base
In the same Dutch oven (no need to wipe it clean—those browned bits are flavor gold), add 3 whole yellow onion diced and 8 cloves garlic minced. Cook over medium heat for 5-6 minutes until the onions are soft and translucent. Add the 1 whole jalapeño pepper (seeds removed) and cook for another 1 minute.
Now it’s time to build the spice bomb. Add the 0.75 cup chili powder, 0.5 cup ground cumin, 0.25 cup garlic powder, 0.25 cup onion powder, 0.1 cup dried oregano, 2 tbsp cayenne pepper, 1 tbsp ground cinnamon, 2 tbsp salt, and 1 tbsp black pepper. Stir constantly for 1-2 minutes until the spices are fragrant and the oil starts to bubble—this releases their full flavor potential.
Combine Everything and Simmer Low and Slow
Return the browned meats to the pot and add the 1 cup tomato paste, 2 cans diced tomatoes, 4 cups beef broth, and 0.25 cup dark brown sugar. Stir everything together until well combined. Bring the mixture to a boil, then reduce heat to low and let it simmer uncovered for 1 hour.
After the initial hour, add the 1 lb kidney beans, 1 lb black beans, and 1 lb pinto beans (all drained and rinsed). Stir gently to incorporate. The beans will absorb some of the liquid, so we’ll add more broth later if needed. Let it simmer uncovered for another 2-3 hours until the chuck roast is fork-tender and the flavors have melded together beautifully.
Adjust Consistency and Finish
After the long simmer, check the consistency. If it’s too thick, add ½ cup beef broth at a time until you reach your desired thickness—it should be thick enough to coat the back of a spoon but still spoonable. Taste and adjust seasoning if needed, adding more salt, chili powder, or cayenne as necessary.
Let the chili rest off the heat for 15-20 minutes before serving. This allows the flavors to settle and the chili to thicken slightly. Garnish with 0.25 cup fresh cilantro just before serving—it adds a bright finish that cuts through the richness. Serve with cornbread or crusty rolls to soak up every last drop of that incredible chili.
Pro Tips For Making 4 Gallon Chili
- Brown the Chuck First: I learned this the hard way—skipping this step means your chili will taste like it’s missing something. Cut the chuck roast into 1.5-inch chunks, sear them in batches in a Dutch oven over medium-high heat until deeply browned (about 3-4 minutes per side). That crust is where the flavor lives, and it won’t dissolve even after hours of simmering.
- Soak Beans Overnight: Dried beans are the lazy cook’s shortcut, but they need love. Rinse and soak kidney, black, and pinto beans in separate bowls overnight—yes, even if you’re using a mix. Drain and rinse before adding them to the pot, and trust me, your chili won’t turn into a mushy, waterlogged disaster. (Pro move: Use 1 cup beans per pound of meat.)
- Simmer Low and Long: After the initial 30 minutes of boiling to blend flavors, drop the heat to a bare simmer—think tiny bubbles, not rolling. Four hours is the magic number for a 4-gallon pot, but don’t rush it. I’ve seen people speed this up, and the result? Grainy, underdeveloped chili. Patience here makes all the difference.
- Deglaze with Beer: That browned meat and bean juices stuck to the pot? Don’t scrape them out—deglaze with 1 cup of beer (or broth) right after browning the meat. Scrape hard with a wooden spoon, let it bubble for 2 minutes, then add your tomatoes and spices. It’s the easiest way to boost depth without extra effort. (Bonus: The alcohol burns off, leaving behind richness.)
Troubleshooting your 4 gallon chili
Chili Too Thin?
If your chili ends up watery, it’s likely because the beans released too much liquid or the broth wasn’t reduced enough. My go-to fix is to simmer uncovered over medium-low heat for an extra 30-45 minutes—this evaporates excess moisture without overcooking the meat.
For a quicker fix, mix 2 tablespoons cornstarch with 2 tablespoons cold water, stir into the chili, and simmer for 5 minutes until thickened. 🌡️
Meat Still Tough?
Overcooking is the usual culprit here. If your chuck roast is chewy, it likely didn’t simmer long enough to tenderize. Next time, aim for a total cook time of 3-4 hours (including the initial hour before beans are added).
For a rescue, shred the tough pieces and stir them back in—they’ll absorb flavors and soften as the chili sits. Alternatively, add 1 cup beef broth and simmer for another hour on low.
Flavor Too Mild?
If your chili lacks depth, it might need more umami and acidity. Boost the flavor by adding 1-2 tablespoons soy sauce or 1 teaspoon fish sauce (trust me, it works!). For acidity, stir in 1-2 tablespoons apple cider vinegar or a splash of lemon juice at the end.
If the spices seem weak, add 1 extra teaspoon of chili powder or ½ teaspoon smoked paprika for a smoky kick.
Beans Too Soft?
Overcooked beans turn mushy and lose their texture. To prevent this, add the beans only after the first hour of simmering, as mentioned in the recipe.
If they’re already too soft, drain ½ cup of the chili (with beans) into a bowl, mash the beans slightly with a fork, and stir them back in. This thickens the chili and prevents a watery consistency.
Burnt or Scorched Bottom?
This happens when the chili sticks to the pot or simmers too aggressively. Always use a heavy-bottomed Dutch oven (like Lodge) and stir occasionally to prevent sticking. If it’s already scorched, scrape off the burnt bits with a wooden spoon—don’t use metal, as it can scratch the pot.
For next time, add 1 extra tablespoon of oil when browning the meat to create a protective layer.
Spices Too Overpowering?
If the heat or spice levels are overwhelming, balance them with sweetness or acidity. Stir in 1-2 tablespoons of brown sugar or 1 tablespoon honey to mellow the heat.
A splash of tomato juice or apple cider vinegar also helps. For a smoother finish, garnish with sour cream, shredded cheese, or avocado—these add creaminess that counteracts the spice.
Nutrition facts
Frequently asked questions
Can I make this chili in a slow cooker instead of a Dutch oven?
Transfer all ingredients to a 6-8 quart slow cooker after browning the meats. Cook on low for 6-7 hours or high for 3-4 hours, then add beans and simmer for another 2 hours. The slow cooker keeps flavors deep while preventing sticking. Just stir occasionally to distribute heat evenly.
How do I adjust this for a vegetarian version?
Swap the beef for 2 lbs each of crumbled tempeh and extra-firm tofu (pressed and pan-fried first). Use 4 cups vegetable broth instead of beef broth, and add 1 cup corn kernels for texture. Boost umami with 1 tbsp soy sauce and 1 tsp liquid smoke. The spices and beans will carry the flavor beautifully.
What’s the best way to reheat leftovers?
Reheat chili in a pot over medium-low heat with ½ cup broth or water per gallon to prevent drying. Stir frequently to distribute heat. For microwave reheating, cover with a damp paper towel and heat in 1-minute intervals, stirring between each. Never reheat past 165°F to maintain food safety.
Can I freeze this chili?
Yes! Let it cool completely, then portion into quart-sized freezer bags or airtight containers. Freeze for up to 6 months. Thaw overnight in the fridge—never at room temperature. The texture holds up perfectly, though it may thicken slightly after freezing. Add a splash of broth when reheating if needed.
Why does my chili taste better the next day?
The flavors deepen as the spices and acids meld together overnight! The beans absorb more liquid, the meat continues to tenderize, and the spices develop complexity. This is why many chefs call chili a “better-the-next-day” dish. Store leftovers in the fridge for 5-6 days or freeze portions for later.

- 3 Overripe Bananas Recipe: Fluffy Pancakes With Zero Waste - November 17, 2026
- 2-Minute Pizza Recipe: Speedy Crispy Crust With Melted Cheese Magic - November 17, 2026
- 16 Chocolate Cupcakes Recipe: Triple-Layered Fudge Swirl Delight - November 17, 2026