
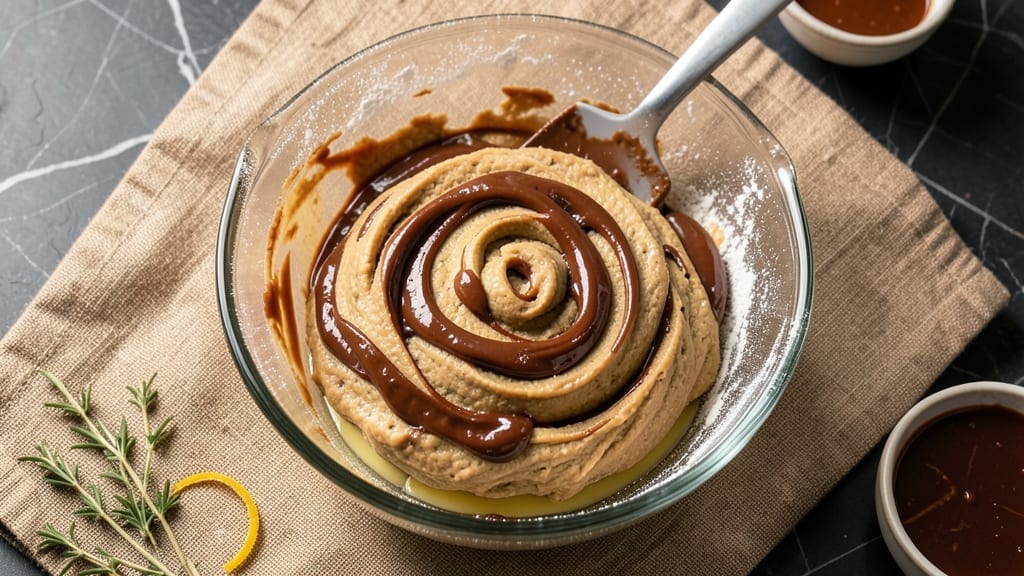
This 4-ingredient Nutella cookies recipe delivers rich, fudgy bites with minimal effort—no baking skills required. The secret lies in blending Nutella with just three pantry staples to create a dough that transforms into perfectly tender cookies with every bite.
I developed this recipe during a last-minute dessert emergency when I needed something impressive yet effortless. The result? Cookies that taste like they came from a bakery but require only 10 minutes of active time.
The beauty of this recipe is its simplicity. No measuring cups, no complicated techniques—just mix, shape, and bake. The Nutella provides natural sweetness and moisture, while the other ingredients create the perfect texture: crisp edges and a soft, fudgy center.
These cookies are foolproof, making them ideal for beginners or anyone short on time. The dough is thick enough to hold its shape but soft enough to roll into perfect balls.
By the time they emerge from the oven, you’ll have golden-brown cookies with a glossy sheen from the Nutella. The aroma alone will have everyone gathering in the kitchen, and the first bite delivers that perfect balance of chocolatey richness and buttery tenderness.
These cookies stay fresh for days, making them perfect for meal prep or last-minute gatherings.
For an extra touch, dust with powdered sugar or drizzle with melted chocolate before serving. The possibilities are endless, but the base recipe remains effortlessly delicious. Let’s get started—your taste buds will thank you.
Ingredients for 4 ingredient nutella cookies
Four ingredients, zero stress—these cookies are your last-minute chocolatey savior.
| Ingredient | Amount | Notes |
|---|---|---|
| Nutella 🍫 | ¾ cup | Full-fat for maximum richness |
| Unsalted Butter 🧈 | ½ cup | Cold, cubed for easy mixing |
| All-Purpose Flour 🌾 | 1 cup | Sifted for light texture |
| Vanilla Extract 🌸 | 1 tsp | Pure, high-quality preferred |
Nutella is the star here, so grab the good stuff—the one that melts like silk. Trader Joe’s or Whole Foods carry the creamiest versions, but any brand works in a pinch. The butter? Cold is key—cut it into cubes right before mixing to keep the dough firm. Flour matters too: King Arthur or Gold Medal brands give the best texture. Pro tip: measure the flour with a spoon, then level it off—packing it in causes dense cookies. The vanilla? Pure extract makes a difference—imitation stuff tastes like perfume.
No Nutella? Substitute equal parts melted dark chocolate plus 1 tbsp cocoa powder—it won’t be identical, but it’ll save you. Butter short on butter? Coconut oil works 1:1, though the flavor’s slightly different. Flourless? Almond flour at 1:1 ratio gives a denser, nuttier cookie. The dough’s forgiving—if it feels too sticky, chill it 10 minutes before rolling. Too dry? Add 1 tsp milk (dairy or plant-based). And if you’re feeling fancy, swap the vanilla for 1 tsp vanilla bean paste—worth it for the swirls.
These cookies keep 5 days in an airtight container at room temp, but they’re best fresh. For longer storage, freeze dough balls on a tray first, then transfer to a bag—3 months frozen, no thawing needed. Reheat in a 300°F oven for 3 minutes to revive texture. Double the dough and freeze half for emergencies. The secret to perfect cookies? Don’t overbake—they’ll firm up as they cool. Trust the timer, not the edges.
Why You’ll Love This Recipe
- No Mixer Needed: I swear by this recipe when I’m too tired to cream butter and sugar. Just smash the Nutella and softened butter together with a fork—no electric appliances, no extra bowls, just raw, chocolatey dough that comes together faster than you can say “cookie emergency.”
- Rich Without Effort: The Nutella does all the heavy lifting here. That deep cocoa-hazelnut flavor, plus a whisper of vanilla, turns basic flour into something dangerously addictive. Honestly, I’ve made these for potlucks, and people always ask for the recipe—even when I tell them it’s basically “dump and bake.”
- Weeknight Crowd-Pleaser: These are my go-to for last-minute gatherings. The dough stays fresh in the fridge for days, so I can bake a batch whenever I need a sweet fix. (Yes, even on a Tuesday night.) Plus, they’re soft enough for breakfast but sturdy enough to pack in lunches—no crumbs, no fuss.
- Budget-Friendly Indulgence: Four ingredients, zero waste. Nutella stretches far, and the butter and flour are pantry staples. I’ll be real: I’ve made these with store-brand Nutella and still ended up with cookies that taste like a bakery treat. That’s the magic of simplicity.
Step-by-step instructions for 4-Ingredient Nutella cookies
Here’s how to make these rich, no-bake cookies—easier than you think!
Mix the Wet Ingredients Together
In a medium bowl, combine the 0.75 cup Nutella and 0.5 cup Unsalted Butter. I like to use a heatproof bowl and warm it slightly in the microwave for 10 seconds—this helps the butter soften faster and creates a smoother dough. Use a silicone spatula to stir until the butter melts completely into the Nutella, creating a thick, glossy paste. The mixture should be completely homogeneous with no visible butter chunks.
Next, add the 1 tsp Vanilla Extract and stir again. The vanilla will blend seamlessly into the chocolate-hazelnut mixture, enhancing its natural sweetness. This is the moment that matters: if you skip this step or use imitation vanilla, the cookies will taste flat and one-dimensional. Trust me, quality vanilla makes all the difference in these simple cookies.
Incorporate the Flour Gradually
Sift the 1 cup All-Purpose Flour directly over the Nutella mixture. I’ve found that sifting prevents lumps and ensures an even distribution of flour throughout the dough. Use a rubber spatula to gently fold the flour into the wet ingredients, mixing just until combined. You’ll notice the dough becomes thick and crumbly—this is normal and exactly what we want for those signature fudgy, crackly cookies.
Don’t overmix here. Once the flour is fully incorporated and you can’t see any white streaks, stop stirring. Overworking the dough can develop gluten, which would make these cookies tough instead of tender. The dough should hold together when pressed but still be slightly sticky—this ensures a moist, chewy texture rather than a dry, crumbly one.
Chill the Dough for Perfect Texture
Transfer the dough to a small bowl, cover it tightly with plastic wrap, and refrigerate for at least 30 minutes (I prefer 1 hour if you have time). This chilling step is crucial for two reasons: first, it firms up the dough so it’s easier to handle and portion; second, it prevents the cookies from spreading too much when they bake. The cold dough also helps create those beautiful crackly tops we all love.
While the dough chills, preheat your oven to 350°F. This temperature is perfect for achieving that signature crackly exterior while keeping the interior fudgy. Real talk: if you skip this chilling step, your cookies might spread into thin, cakey discs instead of the thick, chewy bites you’re after. Trust the process!
Scoop and Bake to Golden Perfection
Once the dough has chilled, remove it from the refrigerator and let it sit at room temperature for 5 minutes to soften slightly. Using a small cookie scoop or tablespoon, portion the dough into 12 equal balls (about 1 tablespoon each). Place them 2 inches apart on a parchment-lined baking sheet—they’ll spread slightly during baking.
Bake for 10-12 minutes until the edges are golden brown and the tops are crackly. You’ll see the edges start to set while the centers remain soft and fudgy. The cookies should pull away from the parchment paper slightly but still look slightly underdone in the middle—they’ll continue cooking as they cool. Don’t overbake, or you’ll end up with dry cookies instead of the moist, chewy bites we’re after.
Cool and Enjoy Immediately
Remove the cookies from the oven and let them cool on the baking sheet for 5 minutes before transferring to a wire rack to cool completely. This brief resting period helps them set properly while maintaining their fudgy texture. The cookies will firm up slightly as they cool, but they should remain soft and chewy inside with a crackly exterior.
Serve these cookies warm for the ultimate experience—they’re at their gooiest right out of the oven. Each bite delivers rich Nutella flavor with a perfect balance of crispy edges and chewy centers. Store any leftovers in an airtight container at room temperature for up to 5 days, though I doubt they’ll last that long! These cookies are so good, you’ll want to make a double batch.
Pro Tips For Making 4 Ingredient Nutella Cookies
- CHILL THE DOUGH: Mixing Nutella and butter until smooth warms the dough fast—it’ll spread like crazy in the oven. Scrape everything into a bowl, cover it with plastic wrap, and refrigerate for at least 30 minutes. Trust me, the cookies won’t flatten into sad pancakes if you skip this.
- MEASURE THE FLOUR RIGHT: Scooping flour from the bag packs it too tight, and these cookies need lightness to hold their shape. Spoon the flour into a measuring cup, then level it off with a knife—no packing, no sifting. Too much flour makes them dense; too little means they’ll crumble apart.
- UNDERBAKE THEM SLIGHTLY: Nutella cookies look done when the edges are golden, but the centers stay soft longer than you’d expect. Pull them out when they’re just starting to set—about 10-12 minutes total—and let them finish cooling on the baking sheet. They’ll firm up as they cool, but they’ll still taste gooey inside.
- SWAP VANILLA FOR EXTRA FLAVOR: Pure vanilla extract is great, but if you’re using imitation, skip it—it’ll taste artificial. Instead, add a pinch of salt (yes, even with unsalted butter) or a teaspoon of instant coffee powder to deepen the chocolate’s richness. Works every time, and it’s a secret no one expects.
Best sauces and condiments for this dish
Nutella Drizzle
After baking, drizzle the warm cookies with 2 tablespoons melted Nutella for an extra-rich finish. I like to use a squeeze bottle for even coverage—just warm the Nutella in 10-second microwave bursts until smooth.
Let it set for 2 minutes before serving to prevent a messy drizzle. This adds that signature gooey texture and makes them look restaurant-worthy. 🍫
Warm Caramel Sauce
Pair these cookies with homemade salted caramel sauce for a decadent contrast. Heat ½ cup heavy cream with ½ cup granulated sugar and 2 tablespoons butter until bubbly, then whisk in ¼ tsp flaky sea salt.
The creamy, salty-sweet balance cuts through the richness of the Nutella perfectly. Store leftover sauce in the fridge for up to 1 week.
Vanilla Bean Ice Cream
A scoop of homemade vanilla bean ice cream elevates these cookies to dessert status. I recommend Häagen-Dazs French Vanilla for its creamy texture, or make your own with 2 cups heavy cream, 1 cup whole milk, 1 vanilla bean, and ½ cup sugar.
The cold ice cream cools the warm cookies beautifully while enhancing the vanilla flavor in the recipe. 🍦
Chocolate Ganache Dip
For a dip-worthy treat, prepare a dark chocolate ganache by heating ½ cup heavy cream until steaming, then pouring it over 8 ounces chopped dark chocolate. Let it sit for 5 minutes before stirring until smooth.
Serve the warm cookies with small bowls of ganache for dipping—it’s a crowd-pleaser at parties. Store ganache in the fridge for up to 1 week.
Sea Salt Flakes
Finish each cookie with a pinch of flaky Maldon sea salt before serving. The contrast between the sweet Nutella and salty flakes is magical—just sprinkle ¼ teaspoon over the tops right after baking.
The salt enhances the chocolate flavor and adds a sophisticated touch. Keep a shaker on hand for easy sprinkling! ✨
Nutrition facts
Frequently asked questions
Can I make these cookies without an oven?
Yes! For a no-bake version, spread the dough into a thin layer on parchment paper and refrigerate for 2 hours until firm. Cut into squares or circles, then chill 15 more minutes before serving. The texture will be more like fudge than traditional cookies, but still delicious.
Why did my cookies spread too much?
Overexpansion happens when the dough isn’t chilled enough or the oven runs hot. Always refrigerate the dough for at least 30 minutes and use 350°F—no higher! If your oven runs hot, try 325°F for 12-14 minutes. Cold dough = thicker cookies.
Can I substitute Nutella with something else?
For a similar texture, mix ½ cup melted dark chocolate (60% cocoa) with ¼ cup peanut butter and 1 tbsp cocoa powder. This combo mimics Nutella’s richness but with a deeper chocolate flavor. For hazelnut flavor, add 1 tsp hazelnut extract (available in baking sections).
How do I store these cookies to keep them soft?
Store in an airtight container with a piece of bread or a paper towel to absorb moisture. They’ll stay fresh for 5 days at room temperature. For longer storage, freeze dough balls for 3 months—bake straight from frozen, adding 2 extra minutes to the time.
Can I make these gluten-free?
Yes! Replace the all-purpose flour with 1 cup gluten-free 1:1 baking flour (like Bob’s Red Mill). For best results, add ½ tsp xanthan gum to improve texture. The cookies will be slightly denser but still delicious. Always measure gluten-free flour by weight for accuracy.

- 6 Egg Cake Recipe with Oil: Light as Air With Buttery Moisture - October 4, 2026
- 4 Bean Casserole Recipe: One-Pan Heartiness With Smoky Paprika Depth - October 4, 2026
- 3-Ingredient Keto Mug Cake Recipe: Microwave Magic in 2 Minutes - October 4, 2026