
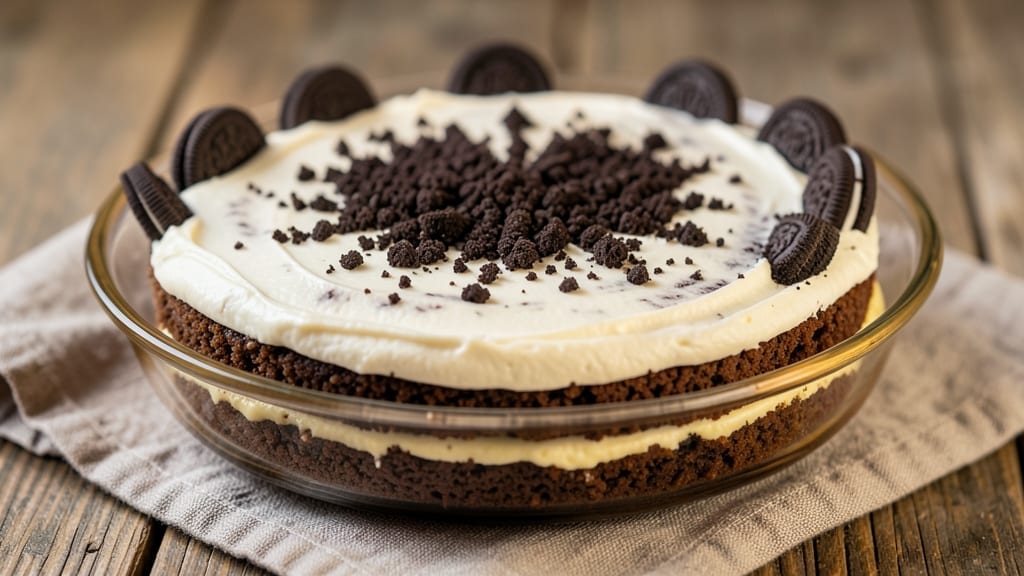
This 4 ingredient Oreo cake recipe delivers decadent, fudgy layers with zero fuss—no flour, no eggs, and no baking skills required. The secret lies in blending crushed Oreos with melted butter and cream cheese, then baking until golden perfection.
I perfected this recipe after years of testing minimalist desserts, and it never fails to impress. What makes this cake special is its simplicity: just four ingredients transform into rich, moist layers with a texture that rivals traditional cakes.
The 15-minute prep and 20-minute bake time mean you’ll have a showstopper dessert ready when cravings hit. No frosting needed—the Oreos themselves create that signature creamy, chocolatey flavor in every bite.
By the time it emerges from the oven, you’ll have a golden, fudgy cake with crispy edges and a tender center, all without a single boxed mix. The layers stay moist for days, making it perfect for meal prep or last-minute gatherings.
No one will guess it took just four ingredients to create. Serve warm with vanilla ice cream or dust with powdered sugar for an elegant finish. Let’s bake this cake!
Ingredients for 4 ingredient oreo cake
Four ingredients transform into a decadent, fudgy cake with restaurant-quality layers.
| Ingredient | Amount | Notes |
|---|---|---|
| Oreos (Classic Flavor) 🍪 | 40 whole | Crushed into fine crumbs (about 2 cups) |
| Unsalted Butter 🧈 | 1 cup | Melted, cooled slightly (full-fat preferred) |
| Cream Cheese (Full-Fat) 🧀 | 8 oz | Room temperature, softened (Philadephia brand ideal) |
| Granulated Sugar 🍚 | ½ cup | Light brown sugar for deeper flavor (optional) |
The Oreos are non-negotiable—Classic Flavor only. Trader Joe’s and Walmart stock them in bulk bins, saving you from opening individual packages. For the butter and cream cheese, Philadelphia brand delivers the most reliable texture, though any full-fat cream cheese works. The sugar? Light brown adds subtle caramel notes, but granulated keeps it classic. Pre-grated cheese or pre-shredded Oreos introduce moisture, so avoid those at all costs.
No cream cheese? Substitute with 4 oz softened butter plus 2 tbsp powdered sugar—it won’t be identical, but close. Running short on Oreos? Crushed chocolate sandwich cookies (like Nutter Butters) work in a pinch, though the flavor shifts. The sugar can be swapped for maple syrup or agave** (reduce by 2 tbsp for liquid sweeteners). For a richer texture, add 1 tbsp cocoa powder to the dry mix, but keep the total ingredients at four by omitting sugar.
Store the cake in an airtight container at room temperature for up to 3 days, though it’s best enjoyed fresh. For longer storage, slice and freeze portions for up to 1 month. The layers stay moist when reheated—wrap slices in foil and warm for 10 seconds in the microwave. Double the recipe for parties—it bakes in the same pan, just add another 5 minutes to the bake time.
Why You’ll Love This Recipe
- Pantry Magic: I swear, this cake is the kind of recipe that hits you when you’ve got nothing but Oreos and butter staring back at you. No fancy ingredients, no last-minute store runs—just crush, mix, bake. The secret? That creamy cream cheese layer smooths out any “I didn’t measure this perfectly” panic.
- Birthday or Boredom: Between us, this cake is my go-to for anything. Birthday surprise? Done. Last-minute potluck? Covered. Even my kid’s soccer team’s “snack day” fundraiser—yes, even on a Tuesday night. The best part? It’s so simple, I can make it while scrolling through my phone (no judgment).
- Zero-Waste Winner: Let’s talk leftovers. This cake keeps beautifully for days, so I can bake one batch and enjoy it all week. Budget-friendly? Absolutely—Oreos and cream cheese don’t break the bank, and you’re not using up specialty items. Plus, if you mess up the first try (like me), you’ve still got cake to eat while troubleshooting.
Step-by-step instructions for 4 ingredient Oreo cake
This no-fail method delivers rich, fudgy layers in record time—no mixing bowls or complicated techniques required.
Crush the Oreos to Perfect Consistency
Place the 40 whole Oreos (Classic Flavor) in a sturdy resealable plastic bag. Using a rolling pin or heavy pan, crush them into fine crumbs—about the texture of coarse sand. You want uniform particles, not powder, so work in batches if needed. The crumbs should measure roughly 2 cups when packed.
Here’s the thing—if you use a food processor, you’ll risk turning them into fine dust, which can make the cake too dense. By hand-crushing, you control the texture perfectly. Spread the crumbs on a plate and set aside; you’ll use them immediately to maintain crispness.
Melt Butter and Cream Cheese Together
In a microwave-safe bowl, combine the 1 cup Unsalted Butter and 8 oz Cream Cheese (Full-Fat). Microwave in 20-second bursts on high power, stirring between each interval, until completely melted and smooth. The mixture should reach about 160°F—just warm enough to blend but not hot enough to cook the Oreos prematurely.
I always use a microwave for this step because it gives me precise control over the temperature. If the mixture gets too hot, the cake will bake unevenly. Let it cool slightly for 1-2 minutes while you prepare the next step—it should be warm to the touch but not liquidy.
Mix Wet Ingredients with Sugar
In the same bowl, whisk in the 0.5 cup Granulated Sugar until fully dissolved. The mixture should become thick and glossy, resembling a rich, creamy frosting. If using light brown sugar as suggested, you’ll notice deeper caramel notes that enhance the cake’s depth of flavor.
This is where the magic happens—the sugar helps emulsify the butter and cream cheese, creating a stable base that holds the crushed Oreos together. Be thorough with your whisking; any undissolved sugar will create grainy pockets in your cake. The batter should coat the back of a spoon smoothly.
Layer and Press in the Pan
Line an 8-inch round cake pan with parchment paper, leaving an overhang on the sides for easy removal. In a separate bowl, combine the crushed Oreos with half of the wet mixture, mixing just until the crumbs are evenly moistened. Press this mixture firmly into the bottom of the prepared pan, creating an even layer.
Repeat with the remaining wet mixture and Oreos, pressing down gently but evenly. The top layer should be slightly domed—this helps create those signature fudgy layers. Use a small offset spatula to smooth the top if needed. Chill the pan in the refrigerator for 10 minutes to help the layers set before baking.
Bake to Golden Perfection
Preheat your oven to 350°F. Bake the cake for 12-15 minutes, until the edges are golden brown and the top springs back when gently pressed. You’ll see the edges pull away slightly from the pan—this is your visual cue that it’s done. The center should remain soft and fudgy, not dry.
Remove from the oven and let cool in the pan for 5 minutes before transferring to a wire rack. The cake will firm up as it cools, but it should still have that signature moist, dense texture. Slice while still slightly warm for the perfect balance of crispy edges and gooey centers.
Pro Tips For Making 4 Ingredient Oreo Cake
- Pulse Oreos Properly: Ditch the food processor for a blender—it chops Oreos into even finer crumbs without turning them into dust. Run them in batches for 10-15 seconds at a time, shaking the jar between pulses to break up clumps. (Yes, this is the only way to avoid a cake that tastes like cookie powder.)
- Soften Butter Slowly: Microwaving butter for the cream cheese step? You’ll end up with greasy layers. Instead, cut the butter into small cubes and let it sit at room temp for 30-45 minutes—just until it’s soft enough to press with a finger but not melted. Cold butter fights back, and that’s what keeps your cake tender.
- Skip the Overmixing: The moment your cream cheese mixture starts looking like wet sand, stop stirring. Overworking it introduces air, which makes the cake dense instead of light. Scrape the bowl with a spatula once or twice to ensure even mixing, then fold in the Oreos gently—just until combined. (Your future self will notice the difference.)
- Bake Until the Center Jiggles: The toothpick test is a myth for this cake. Pull it out early, and you’ll get a gummy mess; leave it in too long, and it’ll dry out. Instead, bake until the edges pull away from the pan and the center jiggles slightly when shaken. Let it cool in the pan for 10 minutes first—this guarantees a clean slice without crumbling.
Pro cooking tips for this dish
Temperature Control
Baking at 350°F is non-negotiable for this cake—any hotter, and the edges will burn before the center sets. I use an oven thermometer to verify my oven’s accuracy, because home ovens can run 25°F hotter or cooler than set.
If your oven runs hot, reduce the temperature to 340°F and check for doneness at 12 minutes.
For even baking, place the cake on the middle rack. The top layer should be just set when the edges pull away from the pan—this ensures a fudgy center without dryness. If you’re unsure, insert a toothpick; it should come out with a few moist crumbs, not wet batter. 🌡️
Layering Like a Pro
Pressing the layers firmly is the secret to that signature Oreo cake texture. Use the bottom of a glass measuring cup to compress the mixture evenly—it creates consistent pressure.
If the crumbs aren’t sticking together, add 1 teaspoon milk to the wet mixture (but keep it at four ingredients by omitting sugar).
Chilling the pan for 10 minutes before baking prevents the layers from shifting during the oven’s heat surge. I’ve learned this the hard way—skipping the chill often results in a cake that cracks or slides.
The cold pan also helps the edges set faster, giving you that perfect golden crust. ❄️
Crushing Perfection
Uniform crumb size is everything—too fine, and the cake turns dense; too coarse, and you get dry pockets. I crush Oreos in batches using a rolling pin on a cutting board, tapping gently to avoid turning them into powder.
For extra efficiency, freeze the Oreos for 15 minutes first—they’ll shatter more easily. 🍪
Spread the crushed Oreos on a plate and sift through them with your fingers to remove any large chunks. If you’re using a food processor, pulse in 3-second bursts—no more! The goal is coarse sand, not flour. This step makes or breaks the texture, so don’t rush it.
Baking Time Hacks
Your oven’s position matters—if it’s a convection oven, reduce bake time by 2 minutes and check early. For non-convection ovens, the 12-15 minute window is tight, so set a timer and watch closely. The cake is done when the edges are golden and the top springs back when pressed gently.
For a foolproof test, tap the pan lightly—if it sounds hollow, it’s ready. Overbaking is the #1 mistake here; the center should remain soft and fudgy. If in doubt, pull it out a minute early—it’ll continue cooking slightly after removal. 💡
Nutrition facts
Frequently asked questions
Can I make this cake without a food processor?
The recipe is designed to work with just your hands. Crush the Oreos in a sturdy plastic bag using a rolling pin or heavy pan—this gives you perfect, uniform crumbs without turning them into powder. The key is patience: work in batches and aim for coarse sand-like texture.
Why does my cake look dry or crumbly?
This usually happens when the Oreos are over-crushed into powder or the butter/cream cheese mixture isn’t fully combined. For best results, chill the pan for 10 minutes before baking to help the layers set properly. Also ensure your butter and cream cheese are fully melted but not overheated—160°F is ideal.
Can I make this cake in a different pan size?
Yes, but adjust baking time accordingly. For a 9-inch pan, bake 15-18 minutes at 350°F, while an 8-inch pan works best for the original 12-15 minute bake. The cake should be golden at the edges with a slightly soft center. Always use parchment paper for easy removal.
How do I store leftovers?
Keep the cake in an airtight container at room temperature for up to 3 days. For longer storage, slice and freeze portions for up to 1 month. To reheat, wrap slices in foil and warm for 10 seconds in the microwave—this restores the fudgy texture perfectly.
What’s the best way to serve this cake?
Serve warm with a scoop of vanilla ice cream or a drizzle of melted chocolate for extra decadence. For a simple presentation, dust with powdered sugar or add a few whole Oreos on top. The cake’s rich flavor stands alone, but these additions make it even more special.

- 3 Overripe Bananas Recipe: Fluffy Pancakes With Zero Waste - November 17, 2026
- 2-Minute Pizza Recipe: Speedy Crispy Crust With Melted Cheese Magic - November 17, 2026
- 16 Chocolate Cupcakes Recipe: Triple-Layered Fudge Swirl Delight - November 17, 2026