
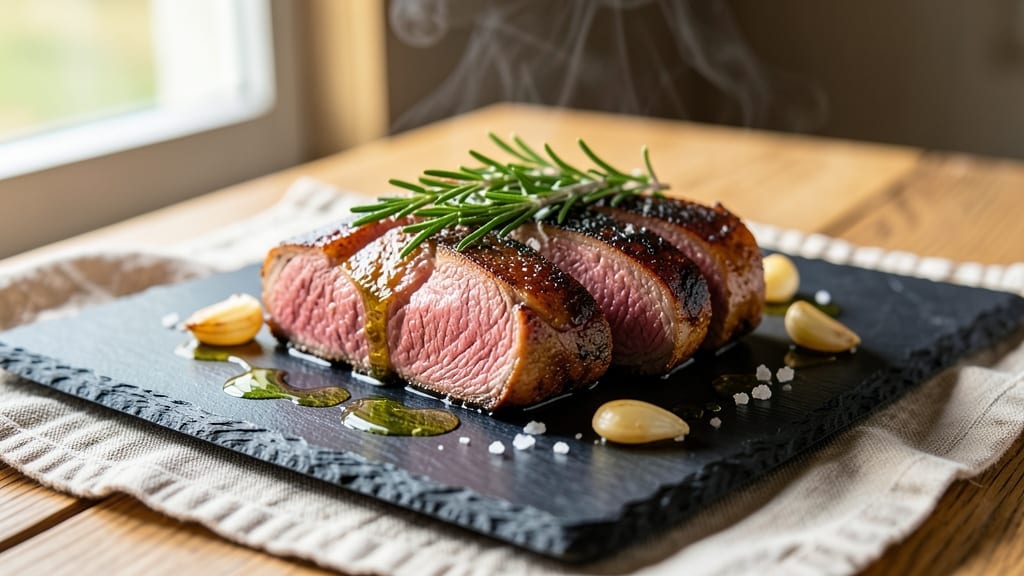
A 4-pound beef tenderloin cooked to perfection delivers melt-in-your-mouth tenderness with a juicy pink center—this reverse-sear method guarantees restaurant-quality results every time. The secret lies in low-and-slow roasting followed by a high-heat sear to lock in flavor and moisture, transforming a simple cut into a showstopping centerpiece.
With precise temperature control and minimal handling, even home cooks achieve professional outcomes without stress.
This technique preserves the beef’s natural tenderness by cooking it slowly to an internal temperature of 125°F, then finishing with a quick sear to create a caramelized crust.
The result is a juicy, pink center surrounded by a flavorful exterior, making it ideal for special occasions or when you want to impress. Proper resting time ensures clean slices every time, while complementary sides like garlic mashed potatoes or roasted asparagus elevate the meal.
What sets this recipe apart is the balance of simplicity and precision—no fancy equipment required, just patience and attention to temperature. The reverse-sear method eliminates guesswork, ensuring your tenderloin stays tender and moist from edge to edge.
Whether serving for a holiday dinner or a weekend celebration, this approach delivers consistent, foolproof results.
Pair with red wine reduction or herb butter for extra richness, and serve with roasted vegetables or crusty bread to complete the presentation. The key to success is timing and temperature control, which we’ll break down step-by-step to guarantee a perfect outcome. Let’s get started!
Ingredients for 4 pound beef tenderloin
Precision-cut ingredients transform a simple tenderloin into a restaurant-worthy centerpiece with melt-in-your-mouth perfection.
| Ingredient | Amount | Notes |
|---|---|---|
| Beef Tenderloin 🥩 | 4 lb | Center-cut, trimmed of silver skin |
| Kosher Salt 🧂 | 1 ½ tbsp | Diamond Crystal preferred, coarse grain |
| Freshly Ground Black Pepper 🌶️ | 1 tbsp | Cracked peppercorns preferred |
| Garlic Cloves 🧄 | 8 cloves | Smash lightly for even seasoning |
| Extra-Virgin Olive Oil 🫒 | ¼ cup | High-quality, fruity variety |
| Fresh Rosemary 🌿 | ¼ cup | Needles finely chopped |
| Fresh Thyme 🌿 | ¼ cup | Leaves only, stems removed |
| Unsalted Butter 🧈 | ½ cup | Cold, cubed for searing |
| Red Wine 🍷 | 1 cup | Bold dry variety like Cabernet |
| Beef Stock 🍲 | ½ cup | Homemade or quality store-bought |
| All-Purpose Flour 🌾 | 1 tbsp | For thickening reduction |
| Fresh Parsley 🌿 | ¼ cup | Chopped, for garnish |
The beef tenderloin is the star, so source it from a trusted butcher or high-end grocery store like Whole Foods or D’Agostino. Look for a center-cut piece with minimal marbling—this ensures tenderness without excess fat. The 4-pound size is ideal for 4 servings with generous slices, but adjust if serving more. For herb quality, Costco or local farmers markets often carry fresher rosemary and thyme than standard grocery stores. The key is vibrant green color and a strong, fresh aroma—never wilted or dried-out stems. Prep the herbs by stripping leaves from stems and chopping finely; this maximizes flavor without bitterness.
No fresh rosemary? Dried works at one-fourth the amount, but toast it first for depth. Substituting red wine? Beef stock with a splash of balsamic vinegar mimics the acidity. For the butter sear, ghee works equally well if avoiding dairy. The flour for thickening can be swapped for cornstarch if you prefer a glossier reduction. If your beef stock lacks richness, add a bouillon cube or splash of Worcestershire sauce. The garlic should be smashed—not minced—to release flavor without turning bitter. For extra insurance, pat the beef dry with paper towels before seasoning to ensure even crust formation.
The tenderloin should rest at room temperature for 1 hour before cooking—this ensures even doneness. Store any unused herbs in the fridge wrapped in damp paper towels for up to 5 days. The red wine reduction keeps for 3 days refrigerated or 3 months frozen in ice cube trays. For leftovers, slice and store in an airtight container with a thin layer of beef fat or butter to preserve moisture. Reheat gently in a skillet to maintain tenderness. The herb butter can be frozen for 6 months in a sealed container, perfect for future searing sessions.
Why You’ll Love This Recipe
- The secret’s in the crust: high-heat sear with kosher salt and cracked pepper locks in juices while building that golden, crackling exterior. Slice into it—juicy pink center, tender as can be. Honestly, it’s the kind of beef that makes you close your eyes and sigh.
- I’ll be real: most roast beef leftovers turn into sad, dry sandwiches. Not this. The tenderloin stays moist for days, perfect for grain bowls, salads, or even breakfast hash. (Yes, even on a Tuesday.) It’s the only roast I actually look forward to reheating.
Step-by-step instructions for reverse-seared beef tenderloin
Master this technique and you’ll achieve a perfectly pink center with a caramelized crust every time.
Prepare the Beef Tenderloin for Low-Temperature Cook
Remove the beef tenderloin from the refrigerator and pat it completely dry with paper towels. This drying step is crucial—moisture on the surface creates steam instead of allowing that beautiful crust to form later. Place the tenderloin on a wire rack set over a rimmed baking sheet to ensure even air circulation on all sides.
In a small bowl, combine the 1.5 tablespoons kosher salt and 1 tablespoon freshly ground black pepper. Rub this mixture all over the tenderloin, including the ends. The salt will penetrate the meat and enhance flavor throughout. Let the seasoned tenderloin sit at room temperature for 30 minutes before cooking. This resting period ensures even cooking from edge to center.
Low-Temperature Roast to Perfect Doneness
Preheat your oven to 250°F. Place the seasoned tenderloin on the rack and insert a meat thermometer into the thickest part of the meat. Roast for 45-60 minutes until the internal temperature reaches 115°F. This slow cooking method builds heat from the center outward, guaranteeing a perfectly pink interior.
Here’s the key: resist the urge to open the oven door during cooking. Every time you peek, you lose heat and extend cook time. The meat should look pale pink inside when you check the thermometer—this is your target doneness for medium-rare. Remove the tenderloin from the oven and let it rest on a cutting board for 15 minutes before searing.
Create the Perfect Crust with High-Heat Sear
While the tenderloin rests, prepare your searing station. Heat a large cast-iron skillet over high heat until it’s screaming hot. Add 0.25 cup extra-virgin olive oil and let it shimmer. Add the 0.5 cup cold cubed unsalted butter and let it melt completely, creating a flavorful oil-butter mixture.
Carefully place the rested tenderloin in the skillet and sear for 2-3 minutes per side until it develops a deep golden-brown crust. The butter will foam and bubble—this is normal and creates incredible flavor. Transfer the seared tenderloin to a cutting board and let it rest for another 5 minutes before slicing. This final rest ensures all the juices redistribute for maximum tenderness.
Prepare the Herb Wine Reduction
Return the searing skillet to high heat and add the 8 smashed garlic cloves. Cook for 30 seconds until fragrant but not browned. Add the 0.25 cup finely chopped fresh rosemary and 0.25 cup fresh thyme leaves, cooking for another 30 seconds to release their aromatic oils.
Pour in the 1 cup bold red wine and scrape up all the browned bits from the bottom of the pan. Let it reduce by half—about 3-4 minutes—until it reaches a syrupy consistency. Add the 0.5 cup beef stock and 1 tablespoon all-purpose flour, stirring constantly. Simmer for 2 minutes until the sauce thickens slightly. Strain the sauce through a fine-mesh sieve to remove any herb bits, then return it to the skillet.
Slice and Serve with Herb Wine Sauce
Using a sharp carving knife, slice the tenderloin against the grain into ½-inch thick slices. Arrange the slices on a warm serving platter and spoon the herb wine reduction generously over the top. Garnish with 0.25 cup chopped fresh parsley for a pop of color and freshness.
The result should be a stunning presentation with a perfectly pink center, caramelized crust, and rich herb-infused sauce. Each slice should be incredibly tender, with juices flowing freely. Serve immediately with roasted vegetables or a simple green salad to complement the rich beef flavors.
Pro Tips For Making 4 Pound Beef Tenderloin
- Trim the Fat Pockets: Tenderloin hides little fat pockets—don’t skip cutting them out before seasoning. I learned this the hard way when a hidden pocket of fat turned my perfectly seared crust into a greasy mess halfway through cooking.
- Salt the Night Before: Generously coat that 4-pound beast with salt at least 12 hours ahead. The dry brine works magic, keeping the meat juicy and letting the crust form like a dream—no last-minute guesswork.
- Sear in Batches: A 4-pound roast won’t fit in a crowded pan. Sear one side at a time, then flip only once—rushing this step guarantees uneven cooking. (Yes, even if you’re impatient like me.)
- Use a Meat Thermometer: Guessing temperatures leads to overcooked, dry meat. Pull it at 125°F for medium-rare—then let it rest 10 minutes. That’s the only way to guarantee perfect doneness every time.
Essential equipment for 4 pound beef tenderloin
Precision Thermometer
Invest in a laser thermometer like the ThermoWorks Smoke or Meater—these provide instant, accurate readings without piercing the meat. I use mine to monitor both the oven temperature and internal temp of the tenderloin.
A probe thermometer with two probes is ideal: one for the oven air and one for the meat. Never rely on oven dials alone, as they can be off by 50°F or more. 🌡️
Cast-Iron Skillet
A 12-inch cast-iron skillet from Lodge or Victorio is non-negotiable for the high-heat sear. Its ability to retain heat ensures an even crust without hot spots.
Season your skillet thoroughly before use—I like to heat it empty on the stove for 10 minutes to ensure it’s screaming hot before adding oil. Avoid nonstick pans; they can’t withstand the high heat needed for a proper sear.
Wire Rack & Baking Sheet
Use a perforated wire rack (like OXO Good Grips) over a rimmed baking sheet to elevate the tenderloin. This allows air to circulate evenly, preventing steam buildup that can turn your crust soggy.
I prefer a half-sheet pan for stability, but any rimmed sheet will work. Pro tip: Place the rack directly on oven racks if your pan is too shallow—just ensure it fits snugly.
Meat Tenderizer (Optional)
For extra tenderness, use a meat mallet like the Westmark brand to gently pound the tenderloin before seasoning. This breaks down surface fibers slightly, allowing seasonings to penetrate deeper.
I only recommend this for thicker cuts or if your tenderloin feels particularly tough. Apply even pressure and don’t overdo it—just 2-3 light taps per side is enough. 💪
Sharp Carving Knife
A 10-12 inch carving knife with a flexible blade (like Dexter-Russell or Wüsthof) makes slicing effortless. The flexibility helps you cut against the grain without tearing the meat.
Always slice at a 45-degree angle for clean, uniform pieces. A dull knife crushes fibers, leading to dry slices—sharpen yours with a honing steel before serving.
Instant-Read Thermometer
While your precision thermometer monitors the cooking process, keep an instant-read thermometer (like Thermoworks Thermapen) handy for final checks. These are perfect for verifying doneness at the table or checking the internal temp of sliced portions.
I keep mine in my apron pocket for quick access—no more guessing games about pink centers! 🔥
Nutrition facts
Frequently asked questions
What’s the best internal temperature for medium-rare beef tenderloin?
For a perfectly pink center, aim for 125°F internal temperature before the final sear. This accounts for the 10-15°F rise that occurs during resting. The reverse-sear method ensures even cooking while maintaining tenderness. Always use a reliable meat thermometer for accuracy.
Can I cook a 4-pound tenderloin without a thermometer?
While challenging, you can estimate by using the 15-20 minutes per pound guideline for medium-rare. For a 4-pound roast at 250°F, plan for 60-80 minutes total (including sear time). However, without a thermometer, you risk overcooking or undercooking. A laser thermometer is the best investment for consistent results.
How do I prevent the tenderloin from drying out?
Keep the meat moist by using the reverse-sear method and avoiding high oven temperatures. Pat the beef dry before seasoning to promote crust formation, but don’t overcook it. The 15-minute rest after roasting and 5-minute rest after searing are critical—they allow juices to redistribute. Slice against the grain for maximum tenderness.
What’s the best way to reheat leftover tenderloin slices?
Reheat slices gently in a skillet over medium-low heat with a splash of beef stock or butter for 1-2 minutes per side until warmed through. Avoid microwaving, as it can dry out the meat. For extra flavor, add a pinch of salt and pepper while reheating. Store leftovers in an airtight container with a layer of butter or beef fat to preserve moisture.
How much wine reduction should I make for a 4-pound tenderloin?
This recipe’s 1 cup red wine reduction is perfect for 4 servings. For larger gatherings, double the sauce ingredients. The reduction should coat the back of a spoon when finished. If making ahead, store it in the fridge for up to 3 days or freeze in ice cube trays for 3 months. Thaw overnight in the refrigerator before reheating.

- 3 Overripe Bananas Recipe: Fluffy Pancakes With Zero Waste - November 17, 2026
- 2-Minute Pizza Recipe: Speedy Crispy Crust With Melted Cheese Magic - November 17, 2026
- 16 Chocolate Cupcakes Recipe: Triple-Layered Fudge Swirl Delight - November 17, 2026