
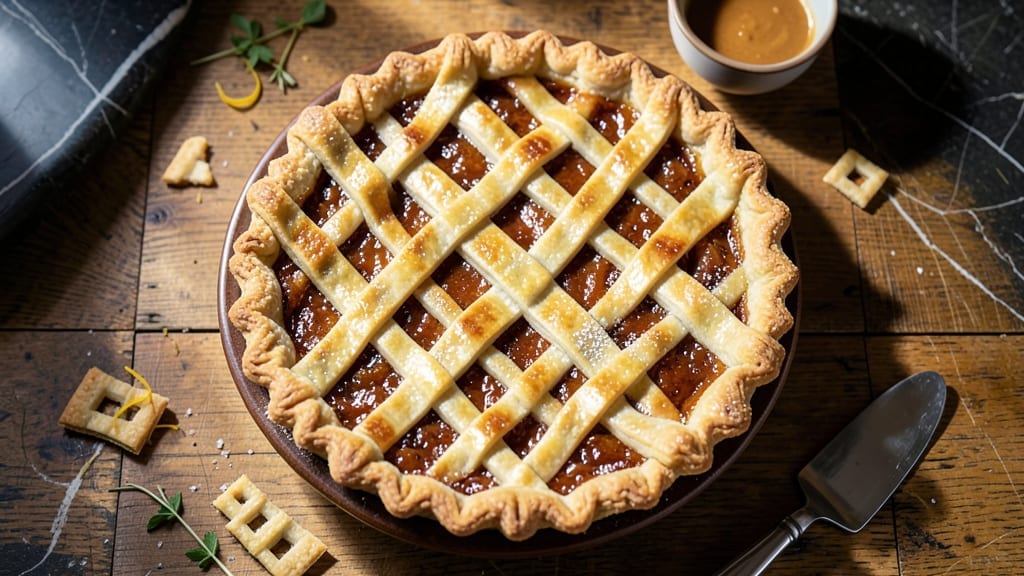
Mastering a 10-inch double crust pie with a flaky lattice top and golden brown crust is simpler than you think—this recipe delivers bakery-quality results every time. The secret lies in chilled pie dough, precise layering, and a slow bake that ensures even cooking without a soggy bottom.
I’ve perfected this technique through years of testing, and the difference between a good pie and a great one comes down to these key steps: proper dough handling, venting the lattice, and baking at the right temperature.
This recipe starts with a classic pie dough—either homemade or store-bought—that’s rolled out and chilled before assembly to prevent shrinking. The filling, whether fruit-based or custard, is pre-cooked to the right consistency so it sets properly without weeping.
The lattice top isn’t just decorative; it allows steam to escape while keeping the filling warm and the crust crisp. With a few simple tools and patience, you’ll achieve that signature flaky texture and even golden-brown color that makes pies worth the effort.
The result is a pie with a flaky, buttery crust that holds its shape, a perfectly set filling, and a lattice pattern that’s both functional and beautiful.
The aroma alone will have everyone gathering around the table, and the first bite delivers that satisfying contrast of crisp crust and tender filling. This is the kind of pie that earns compliments and requests for seconds—no shortcuts needed.
Whether you’re baking for a holiday gathering or just treating yourself, this recipe scales easily and adapts to your favorite fillings. Let’s get started with the step-by-step instructions to ensure your pie turns out perfectly every time.
Ingredients for 10 inch double crust pie
The secret to that signature flaky crust and golden-brown lattice lies in these 14 ingredients.
| Ingredient | Amount | Notes |
|---|---|---|
| All-Purpose Flour 🌾 | 3 ½ cups | Sifted for even texture |
| Unsalted Butter 🧈 | 1 ¼ cups | Cold and cubed (not softened) |
| Ice Water 💧 | ½ cup | Chilled for crisp dough |
| Diamond Crystal Kosher Salt 🧂 | ½ tsp | Fine grain preferred |
| Granulated Sugar 🍚 | ¾ cup | For filling sweetness |
| Cornstarch 🌾 | 2 tbsp | Thickens fruit filling |
| Lemon Juice 🍋 | 2 tbsp | Freshly squeezed |
| Vanilla Extract 🌿 | 1 tsp | Pure, high-quality |
| Egg Yolks 🥚 | 2 whole | Large, room temperature |
| Heavy Cream 🥛 | ½ cup | Cold for custard |
| Fresh Berries 🍓 | 4 cups | Mixed variety (strawberries, blueberries, raspberries) |
| Ground Cinnamon 🌿 | 1 tsp | For filling warmth |
| Egg Wash 🥚 | 1 whole | Beaten egg for brushing |
| Coarse Sugar 🍚 | ¼ cup | For lattice topping |
The dough starts with cold butter—never softened—and Diamond Crystal kosher salt for that perfect balance. I always grab European-style butter from Whole Foods or Trader Joe’s for extra richness, but any good brand works if it’s cold. For the lattice, all-purpose flour matters—King Arthur or Bob’s Red Mill are my go-tos because they’re finely milled and consistent. If using store-bought dough, check the ingredients—some brands add shortening, which can make the crust less flaky. Chill your dough for at least 30 minutes before rolling, or it’ll shrink when you bake it.
No fresh berries? Frozen works in a pinch—just thaw and drain them first. The cornstarch is non-negotiable for thick fillings—it’s what keeps that perfect set without weeping. Short on vanilla? Almond extract at half the amount gives a similar depth. If you’re making a savory pie, swap the sugar for 2 tbsp of cornstarch and add 1 tsp of Dijon mustard to the filling. The egg yolks need to be room temperature, or they won’t emulsify properly with the cream. For the lattice, cut the dough strips just under 1/4-inch wide—they’ll expand slightly in the oven.
Dough keeps for 4 days wrapped in plastic in the fridge or 3 months frozen between parchment paper. The filling can be prepped a day ahead and stored in the fridge—just bake straight from cold. For the lattice, practice cutting the strips before assembling the pie—it’s easier than it looks. Once baked, pies reheat beautifully: 350°F for 10 minutes with a splash of water in the pan to refresh the crust. Leftovers? Slice and freeze for up to 2 months—just thaw overnight in the fridge.
Why You’ll Love This Recipe
- No-Fuss Dough: I swear, the butter cut into flour with ice water—just a few minutes of mixing—gives me that perfect flaky, sturdy crust every time. No food processor, no stress, and no waiting for the dough to rest for hours.
- Sweet-Salty Magic: That first bite? The sugar-kissed crust with the buttery layers? It’s the kind of balance that makes you close your eyes. Honestly, the salt in the crust (just a pinch of that kosher salt) takes it from good to ridiculously good.
- Make-Ahead Miracle: Between us, I’ve made this pie the night before Thanksgiving, packed it for a potluck, and even reheated slices for breakfast. The double crust holds up like a champ—just blind-bake the top if you’re prepping ahead, and no one will guess it’s not fresh.
- Pantry Staple Power: Four ingredients, zero specialty items. If you’ve got flour, butter, and sugar, you’ve got this. I’ll admit, I’ve pulled this out when I was low on everything else—still came out perfect, and cost me less than takeout.
Step-by-step instructions for 10-Inch double crust pie
Here’s how to create a perfect pie with a flaky lattice top and golden crust—every slice will be worth the effort.
Make the Pie Crust Dough
In a large bowl, combine the 3.5 cups all-purpose flour and 0.5 tsp Diamond Crystal kosher salt. Cut in the 1.25 cups unsalted butter using a pastry cutter or your fingers until the mixture resembles coarse crumbs with pea-sized butter pieces. This texture is crucial—it ensures flaky layers.
Add the 0.5 cup ice water gradually, 1 tablespoon at a time, mixing gently with a fork until the dough just comes together. Avoid overmixing—you want to keep the gluten development minimal for that tender, flaky texture. Once combined, divide the dough into two equal portions, flatten into discs, wrap in plastic, and refrigerate for at least 1 hour.
Prepare the Fruit Filling
In a large bowl, combine the 4 cups fresh berries, 0.75 cup granulated sugar, 2 tbsp cornstarch, 2 tbsp lemon juice, 1 tsp vanilla extract, and 1 tsp ground cinnamon. Mix gently to coat the fruit evenly. Let the mixture sit for 15-20 minutes—this allows the berries to release their juices and the cornstarch to begin thickening.
In a separate small bowl, whisk together the 2 whole egg yolks and 0.5 cup heavy cream until smooth. Gently fold this custard mixture into the berry preparation. The custard will create a luscious, creamy texture that complements the tartness of the berries. Taste and adjust sweetness if needed—remember, the crust’s saltiness will balance the flavors.
Roll Out and Assemble the Crust
Preheat your oven to 375°F. On a lightly floured surface, roll out one of the chilled dough discs into a 12-inch circle—just slightly larger than your pie dish. Transfer the dough to a 10-inch pie dish, gently pressing it into the bottom and up the sides. Trim any excess dough hanging over the edge, leaving about a ½-inch overhang. This will help create a sealed crust.
Pour the fruit filling into the crust, mounding it slightly in the center. Roll out the second dough disc into a 12-inch circle for the lattice top. Cut the dough into ½-inch wide strips, then cut every other strip in half to create the classic lattice pattern. Arrange the strips over the filling in a crisscross design, leaving a ½-inch border around the edge. Brush the lattice with the 1 whole egg wash for a golden finish.
Bake to Golden Perfection
Place the pie on a baking sheet to catch any drips, then bake for 45-50 minutes until the crust is deep golden brown and the filling is bubbling. If the lattice starts to brown too quickly, loosely cover it with aluminum foil to prevent burning while the filling finishes cooking.
Remove the pie from the oven and let it cool completely on a wire rack for at least 2 hours. This resting period is essential—it allows the filling to set and the juices to distribute evenly. Sprinkle the 0.25 cup coarse sugar over the lattice top just before serving for a touch of sparkle and crunch.
Pro Tips For Making 10 Inch Double Crust Pie
- Chill the Dough Twice: I learned this the hard way—skip the extra 30 minutes in the fridge and your crust will shrink like a sad balloon. After rolling, wrap the dough tightly in plastic and stash it in the coldest part of your fridge (or freezer for 10 minutes) before filling. This keeps it from puffing up when it hits the hot oven, and your pie will hold its shape like a pro.
- Cut Butter Like You Mean It: Cold butter makes flaky crusts, but too many big chunks? You’ll end up with greasy pockets instead of layers. Cut your unsalted butter into ¼-inch cubes—small enough to distribute evenly but not so fine it turns to soup. Pulse in a food processor or chop by hand with a knife, then freeze for 10 minutes if it gets too soft. Trust me, this is the thing that matters most for that perfect shatter.
- Prevent the Soggy Bottom: Even with a double crust, moisture from the filling will sneak through. Before adding your top crust, sprinkle a thin layer of granulated sugar (about 1 tablespoon) over the filling—it creates a crust-like barrier. Brush the bottom crust edges with a little ice water before sealing, too. Sounds weird, but it works: that sugar barrier keeps the bottom crisp while the top gets golden.
- Roll Out, Not Over: I used to roll my crusts straight from the fridge, and they’d crack like dry toast. Instead, let the dough sit at room temp for 5–10 minutes before rolling—just until it’s pliable but not sticky. Roll from the center outward, rotating the dough (not the board) to keep it even. And for a 10-inch pie, aim for a 12-inch circle—it’ll shrink a little, but not enough to leave you scrambling for extra dough.
Troubleshooting great 10 inch double crust pie
Soggy Bottom Fix
If your pie crust turns out soggy, it’s usually due to underbaked filling or insufficient crust thickness. First, ensure your filling is fully pre-cooked to a thick, spoonable consistency before pouring into the crust—this prevents excess moisture.
For extra insurance, I recommend blind-baking the bottom crust for 10-12 minutes at 375°F with pie weights or dried beans before adding filling. This pre-baking creates a sturdy base that won’t absorb filling juices. 💧
Lattice Collapsing
A lattice that collapses during baking often happens when the dough strips are too wide or the filling isn’t set enough. Cut strips exactly ½-inch wide (no wider) and arrange them in a tight crisscross pattern, leaving ¼-inch gaps between strips for steam to escape.
Chill the lattice-topped pie for 30 minutes before baking to firm up the dough. If the lattice still sags, it might be due to overfilling—reduce filling by ½ cup for a 10-inch pie. ✨
Uneven Baking
Uneven browning or cooking usually means your oven has hot spots or the pie wasn’t centered properly. Rotate your pie halfway through baking (after 25 minutes) for even heat exposure. Use a light-colored metal pie dish (like aluminum) to reflect heat more evenly than dark dishes.
If the edges brown too quickly, cover them loosely with aluminum foil after 20 minutes to protect while the center cooks. 🌡️
Filling Too Runny
A runny filling is almost always caused by insufficient thickening. For fruit fillings, cornstarch is your best friend—use the full 2 tbsp and let the mixture sit for 15-20 minutes before baking to maximize thickening.
For custard fillings, whisk the egg yolks and cream until fully emulsified and cook until it reaches 170°F on a thermometer. If your filling still runs, sprinkle 1 tbsp extra cornstarch over the top before baking. 🍓
Crust Shrinking
Shrinking crusts happen when dough isn’t chilled enough or rolled too thin. Always keep dough cold (refrigerate for at least 1 hour) and roll it to 12 inches—just ¼-inch thick—for a 10-inch pie.
Avoid overworking the dough, and let it rest 10 minutes before transferring to the pie dish. If the crust shrinks during baking, brush it with egg wash and bake at 350°F (instead of 375°F) to slow the process. 🧈
Nutrition facts
Frequently asked questions
Can I use store-bought pie dough for this recipe?
Store-bought dough saves time and works perfectly for this recipe. Just ensure it’s chilled before rolling to prevent shrinking. If using refrigerated dough, let it sit at room temperature for 10-15 minutes first to make it easier to handle. For the best results, choose a brand with high butter content (at least 30%) for maximum flakiness.
How do I adjust this recipe for a smaller or larger pie?
For a 9-inch pie, reduce all ingredients by 15-20% and bake at 375°F for 35-40 minutes. For a 12-inch pie, increase by 30-35% and bake for 50-55 minutes. Always adjust baking time based on your oven—insert a toothpick into the center to check doneness (it should come out clean).
Can I make the lattice pattern without cutting strips?
Yes! For a simpler look, roll out the second dough disc and cut it into 1-inch squares, then arrange them in a staggered pattern over the filling. Brush with egg wash and bake as directed. This method creates a rustic, textured top that still allows steam to escape while keeping the filling warm.
Why does my pie filling sometimes weep after baking?
Weeping usually happens when the filling isn’t thickened enough before baking or the crust isn’t fully baked. Always pre-cook your filling until it reaches a thick, spoonable consistency (it should coat the back of a spoon). For extra insurance, sprinkle 1 tbsp cornstarch over the filling before adding the lattice top. Also, ensure your crust is fully baked before removing from the oven.
How can I reheat leftover pie?
To refresh your pie, preheat your oven to 350°F and place slices on a baking sheet. Cover loosely with aluminum foil and warm for 10-12 minutes. For a crispier crust, broil for 1-2 minutes at the end. Avoid microwaving—it makes the crust soggy. Alternatively, slice and freeze portions for up to 2 months—thaw overnight in the fridge before reheating.

- 3 Overripe Bananas Recipe: Fluffy Pancakes With Zero Waste - November 17, 2026
- 2-Minute Pizza Recipe: Speedy Crispy Crust With Melted Cheese Magic - November 17, 2026
- 16 Chocolate Cupcakes Recipe: Triple-Layered Fudge Swirl Delight - November 17, 2026