
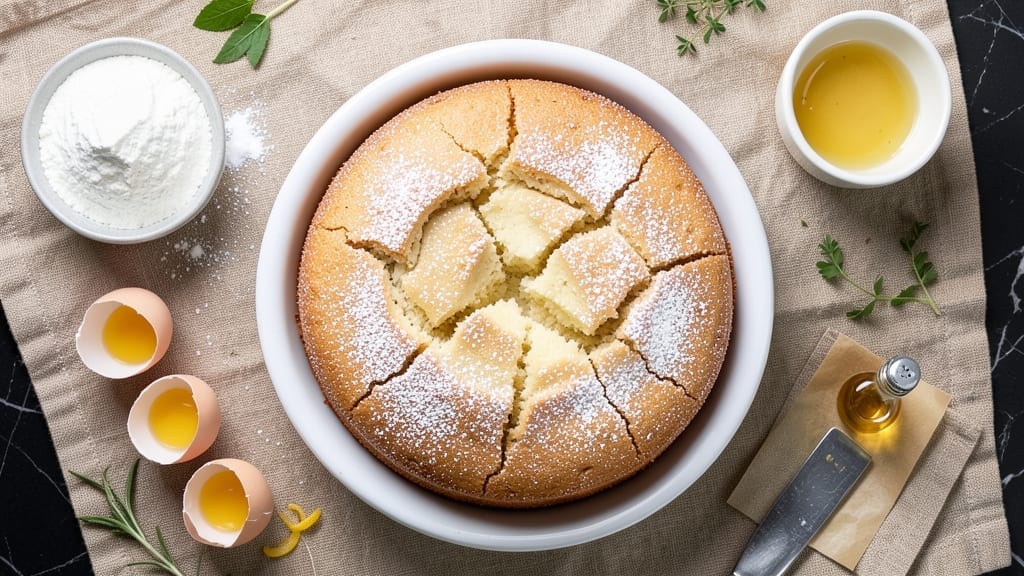
A 4.5-inch cake delivers all the elegance of a full-sized dessert in a perfectly portable package, and this vanilla bean buttercream swirl version is designed to impress without overwhelming. The secret lies in precise measurements and gentle folding—no guesswork, just consistent results every time.
This recipe is built for special occasions where you want to serve individual slices that still feel luxurious, like weddings, baby showers, or elegant dinner parties where mini desserts steal the show.
The cake itself is a tender vanilla sponge with just the right balance of moisture and structure, baked at 350°F for 18-22 minutes to achieve that golden dome without overbaking. The real magic happens with the vanilla bean buttercream—rich, velvety, and swirled through the layers for that showstopping visual appeal.
What makes this recipe foolproof is the step-by-step approach to achieving the exact 4.5-inch height, ensuring each slice is uniform and visually stunning.
By the time you’re done, you’ll have a cake that’s as beautiful as it is delicious—golden layers encased in creamy buttercream, with swirls that look like they came from a professional bakery.
The vanilla bean flavor shines through in every bite, offering a sophisticated yet approachable dessert that’s perfect for any occasion. This recipe transforms a simple baking project into a showpiece that will have your guests asking for the recipe.
Whether you’re serving these at a brunch buffet, a holiday gathering, or as a special treat for a loved one, the 4.5-inch size makes them ideal for sharing without the commitment of a full cake.
The frosting can be adjusted for different dietary needs, and the recipe scales easily if you need to make multiple cakes. Let’s get started on creating these mini masterpieces.
Ingredients for 4.5 inch cake
Four layers of vanilla sponge and swirls of velvety buttercream—this mini cake packs big flavor in perfect proportions.
| Ingredient | Amount | Notes |
|---|---|---|
| All-Purpose Flour 🌾 | 1 ½ cups | Sifted for light texture |
| Granulated Sugar 🍚 | 1 ½ cups | Superfine preferred for smoothness |
| Unsalted Butter 🧈 | 1 cup | Room temperature, full-fat |
| Large Eggs 🥚 | 3 whole | Room temperature for even baking |
| Vanilla Extract 🌿 | 2 tsp | Pure vanilla extract preferred |
| Baking Powder 🧂 | 2 tsp | Freshly measured for lift |
| Salt 🧂 | ½ tsp | Fine sea salt preferred |
| Milk 🥛 | ½ cup | Room temperature |
| Vanilla Bean Paste 🌿 | 1 tbsp | For authentic vanilla flavor |
| Heavy Whipping Cream 🥛 | 1 ½ cups | Full-fat for stability |
| Powdered Sugar 🍚 | 2 cups | Sifted for smooth buttercream |
| Vanilla Bean Seeds 🌿 | 1 whole | Scraped from 1 pod |
| Unsalted Butter 🧈 | 1 cup | Room temperature for buttercream |
| Parchment Paper 📄 | 1 sheet | For lining cake pans |
The vanilla bean paste is non-negotiable for that authentic, luxurious flavor—Trader Joe’s or Williams Sonoma carry great options, but even a single pod from a specialty store makes a difference. If you can’t find vanilla bean paste, high-quality vanilla extract plus scraped seeds works too. The butter should be room temperature—press a finger into it, it should leave a slight indent but not be greasy. For the flour, King Arthur or Gold Medal brands are my go-tos—they bake consistently. Sift everything before mixing to avoid dense layers, and measure your dry ingredients by spooning and leveling for accuracy.
No vanilla bean paste? Pure vanilla extract plus 1 tsp scraped vanilla bean seeds gets you close. The cake layers can be made a day ahead—they actually taste better once the flavors meld. For the buttercream, if you’re short on time, store-bought vanilla frosting works in a pinch, but trust me on making your own. The powdered sugar should be sifted to avoid lumps, and the heavy cream must be cold—chill the bowl and beaters for 10 minutes before whipping. Substituting milk? Almond or oat milk works, but dairy gives the best texture. And if you’re making multiple cakes, double the recipe—the pans are small but the effort is worth it.
The cake layers keep beautifully in the fridge for 3 days wrapped tightly in plastic, and the buttercream can be made 2 days ahead—just whip it again briefly before using. For serving, I like to slice them with a serrated knife dipped in hot water for clean cuts. These cakes freeze 1 month if wrapped airtight—they thaw at room temperature in about 2 hours. Pro tip: Chill the cake for 30 minutes before slicing for perfect layers. And if you’re making these for a party, assemble them the morning of—they look stunning and taste even better fresh.
Why You’ll Love This Recipe
- No Fuss, One Bowl: I swear by this recipe when I’m in a hurry—just cream butter and sugar, crack eggs, fold in flour. No sifting, no extra mixing, no stress. The cake comes out tender and golden every single time, and honestly? That’s all I ask for.
- Butter-Sugar Magic: That classic combo of melted butter and sugar creates layers of flavor you won’t find in boxed mixes. The vanilla ties it all together, but it’s the eggs that make it rich—no dry crumb here, just pure, moist satisfaction. (Yes, even on a Tuesday night.)
- Perfect Portion Control: A 4.5-inch cake is just right for two people—or one very hungry person. It’s small enough to enjoy fresh without worrying about leftovers going stale, but big enough to feel special. I’ll be real: my go-to for date nights or lazy Sundays.
- Budget-Friendly Luxury: You’re using pantry staples—flour, sugar, butter—so it’s cheap to make but still feels like a treat. The eggs add richness without breaking the bank, and the recipe scales down perfectly if you only need a single serving. My secret weapon for when I want something indulgent without the grocery splurge.
Step-by-step instructions for mini vanilla bean cakes
Let’s create these delicate 4.5-inch cakes with silky vanilla bean buttercream swirls.
Prepare the Cake Batter
Preheat your oven to 350°F and line a 4.5-inch round cake pan with the provided parchment paper, pressing it firmly against the bottom and sides. In a medium bowl, whisk together the 1.5 cups all-purpose flour, 2 tsp baking powder, and 0.5 tsp salt. Sift this mixture to remove any lumps and set aside.
In a separate large bowl, cream together the 1 cup unsalted butter and 1.5 cups granulated sugar on medium speed until light and fluffy, about 3-4 minutes. Add the 3 whole large eggs one at a time, mixing well after each addition. Stir in the 2 tsp vanilla extract and 1 tbsp vanilla bean paste, scraping down the sides of the bowl as needed.
Gradually add the dry ingredients to the wet mixture, alternating with the 0.5 cup milk, beginning and ending with the flour mixture. Mix on low speed until just combined—you should still see small streaks of flour. Overmixing develops gluten, which can make your cakes dense. Pour the batter into the prepared cake pan and smooth the top with a spatula.
Bake to Perfection
Bake the cake in the preheated oven for 25-30 minutes, or until a toothpick inserted into the center comes out clean. The edges should be golden brown, and the top should spring back when gently pressed. I like to check the cake at the 22-minute mark—your oven might run hot, so start checking early to avoid overbaking.
Once the cake is done, remove it from the oven and let it cool in the pan for 10 minutes. Then, carefully transfer it to a wire rack to cool completely. This cooling process is crucial—it allows the cake to set properly and prevents it from becoming gummy when you add the filling.
Make the Vanilla Bean Buttercream
While the cake cools, prepare the buttercream by beating the 1 cup unsalted butter in a stand mixer fitted with the paddle attachment until smooth and creamy, about 2-3 minutes. Gradually add the 2 cups powdered sugar, mixing on low speed until combined. Increase the speed to medium and beat for another 2-3 minutes until the mixture is light and fluffy.
Add the 1.5 cups heavy whipping cream, 2 tsp vanilla extract, and the 1 whole vanilla bean seeds (scraped from the pod). Mix on medium-high speed for 2-3 minutes until the buttercream is smooth and holds its shape when piped. Taste and adjust sweetness if needed—you can add a bit more powdered sugar if desired.
Assemble and Swirl the Buttercream
Once the cake is completely cool, place it on a cake stand or plate. Use a serrated knife to level the top if needed. Spread a thin layer of the vanilla bean buttercream over the cake to create a smooth base for the swirls. This layer helps the filling stay in place and adds extra flavor.
To create the swirls, pipe a generous amount of buttercream onto the cake in a spiral pattern, starting from the outer edge and working your way toward the center. Use a small offset spatula to gently drag the buttercream into swirls, creating an elegant, marbled effect. For a cleaner look, you can also pipe the buttercream directly onto the cake and use the spatula to spread and swirl it evenly.
Chill and Serve
Place the assembled cake in the refrigerator for at least 1 hour before serving. This chilling time allows the buttercream to set and makes it easier to slice. The cakes are best served at room temperature, so let them sit for 10-15 minutes before serving to enjoy the perfect balance of texture and flavor.
Slice the cake into 4 equal servings using a sharp knife dipped in hot water and wiped clean between cuts. Each slice should reveal the beautiful vanilla bean buttercream swirls, creating a stunning presentation that’s as delicious as it is elegant. Enjoy your mini masterpiece!
Pro Tips For Making 4.5 Inch Cake
- MEASURE FLOUR LIKE A PRO: Spoon it into the cup, don’t scoop—packing flour compresses it, throwing off your cake’s structure. I learned this the hard way when my first batch turned dense as a brick. For a 4.5-inch cake, level it off with a knife after scooping, or use a kitchen scale if you’re feeling fancy (250g is your target).
- CREAM BUTTER AND SUGAR UNTIL PALE: Stop when the mixture looks like wet sand, not butter caramel. I used to overdo it, and the cake ended up tasting buttery instead of light. Beat on medium-high for 3-5 minutes—just until the sugar dissolves and the butter loses its graininess.
- ROOM-TEMP EGG PREP: Crack cold eggs straight into the bowl, but let the batter sit 10 minutes before baking. Cold eggs mix better and won’t curdle, while letting the batter rest prevents a sunken center. Trust me, your future self will notice the difference.
- BAKE AT 350°F—NO EXCUSES: Preheat the oven for 20 minutes, and don’t open the door for the first 15. I skipped this once and ended up with a cake that baked unevenly—one side dry, the other gummy. A toothpick should come out clean (or with a few crumbs) after 25-30 minutes.
Flavor customization for these flavors
Citrus Zest Twist
Brighten up your vanilla cake with a 1 tablespoon lemon or orange zest added to the batter. The citrus complements the vanilla beautifully while adding a refreshing pop of flavor.
I like to use organic lemons from the grocery store—just grate the zest finely and mix it into the wet ingredients. For extra flair, add ½ teaspoon citrus extract alongside the vanilla extract. This works especially well if you’re serving the cake at brunch or outdoor gatherings. 🍋
Chocolate Swirl Surprise
Transform your vanilla cake into a decadent treat by adding ½ cup melted dark chocolate to the buttercream. Mix it in until fully combined, then pipe and swirl as usual. For a marbled effect, spread a thin layer of chocolate ganache between cake layers.
I recommend using Ghirardelli 60% dark chocolate for a rich, bittersweet balance. This variation is perfect for chocolate lovers who still want that classic vanilla base. 🍫
Spiced Chai Infusion
Give your cake warm, aromatic notes by adding 1 teaspoon chai spice blend (or ½ teaspoon each of cinnamon, cardamom, and ginger) to the dry ingredients. For the buttercream, infuse ½ cup heavy cream with 1 chai tea bag for 10 minutes before whipping.
This creates a cozy, spiced flavor that pairs wonderfully with vanilla. I often use this variation during fall or winter holidays. 🌶️
Coffee Lover’s Upgrade
For a sophisticated twist, stir 1 tablespoon instant espresso powder into the dry ingredients or mix 1 teaspoon coffee extract into the wet ingredients. The coffee enhances the vanilla flavor while adding depth.
I recommend using Starbucks Via Instant Coffee for consistent results. This version is ideal for dessert lovers who enjoy mocha-style treats. ☕
Berry Swirl Delight
Add a fruity surprise by folding ½ cup fresh raspberries or blackberries into the buttercream before swirling. For a more intense flavor, lightly crush the berries with a fork.
I like to use organic berries in season for the best taste. This variation adds a burst of freshness that balances the rich buttercream perfectly. 🍓
Salted Caramel Drizzle
Take your cake to the next level by drizzling 2 tablespoons salted caramel sauce over the top before serving. I make my caramel with ½ cup granulated sugar, ¼ cup heavy cream, and a pinch of flaky sea salt.
This adds a sweet-salty contrast that elevates the vanilla flavor. The caramel can be made ahead and stored in the fridge for up to 1 week. 🍯
Nutrition facts
Frequently asked questions
How do I ensure my 4.5-inch cake stays perfectly round?
Use a 4.5-inch round cake pan with a removable bottom and line it with parchment paper pressed firmly against the sides. Tap the pan gently on the counter 3-4 times before baking to settle the batter. Avoid overfilling—fill the pan only 2/3 full to prevent doming. Bake at 350°F for 18-22 minutes and let it cool completely before removing from the pan.
Can I make this cake gluten-free?
Yes! Replace the 1.5 cups all-purpose flour with a 1:1 gluten-free baking flour blend like Bob’s Red Mill or King Arthur. Add ½ teaspoon xanthan gum to help bind the cake. For the buttercream, use a gluten-free powdered sugar. Note that gluten-free cakes may be slightly denser—check doneness at 20 minutes.
Why did my cake crack on top?
Cracking usually happens from sudden temperature changes or overbaking. Ensure your oven is fully preheated and the batter is at room temperature. Bake for 22-25 minutes max—a toothpick should come out with a few moist crumbs, not wet batter. For extra insurance, place the pan on the middle rack and avoid opening the oven door during baking.
How many servings does this recipe actually make?
This recipe yields 4 generous servings (one per 4.5-inch cake). For a party, multiply the recipe by 3-4 to make 12-16 mini cakes using the same pan size. Each serving is about 2-inch diameter—perfect for individual plates or dessert trays. Need more? Make a double batch and bake in batches.
Can I use this recipe for cupcakes instead?
Reduce the batter to 1/3 cup per lined cupcake liner (about 6-8 cupcakes per batch). Bake at 350°F for 12-15 minutes until a toothpick comes out clean. Top with the same buttercream and swirl decoratively. For a fun twist, use mini cupcake wrappers and serve on a tiered stand.

- 6 Egg Cake Recipe with Oil: Light as Air With Buttery Moisture - October 4, 2026
- 4 Bean Casserole Recipe: One-Pan Heartiness With Smoky Paprika Depth - October 4, 2026
- 3-Ingredient Keto Mug Cake Recipe: Microwave Magic in 2 Minutes - October 4, 2026