
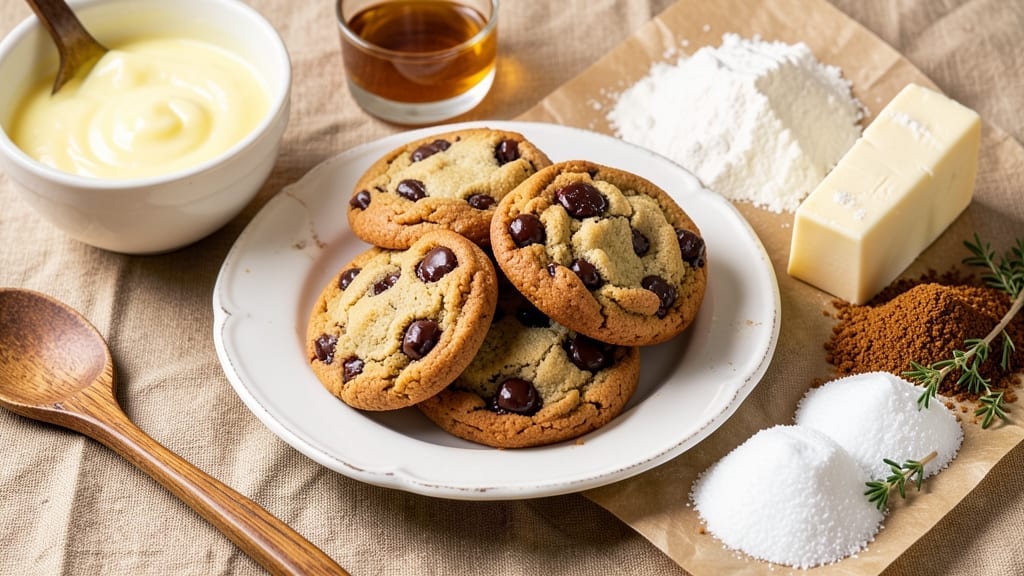
This 5-step chocolate chip cookie recipe delivers the perfect balance of crispy edges and gooey centers every time—no baking degree required. I’ve tested countless variations, and this method consistently produces cookies that rival bakery-quality results with minimal effort.
The secret lies in precise measurements and a simple technique that eliminates guesswork.
The beauty of this recipe is its simplicity: just five steps, 15 minutes of prep, and 10–12 minutes in the oven at 350°F. No chilling the dough (unless you want thicker cookies), no special tools, and no risk of overbaking.
The combination of brown and white sugar creates the ideal texture—crispy around the edges while staying soft and chewy in the center. Even the chocolate stays melty, just like you remember from childhood.
What makes this recipe foolproof is the technique: scooping the dough into perfectly sized balls and baking them on a parchment-lined sheet ensures even cooking. The result is a batch of cookies that’s hard to resist—golden brown, fragrant with vanilla, and packed with rich chocolate chunks.
Whether you’re baking for a family gathering or just satisfying a sweet craving, this recipe delivers restaurant-quality results at home.
Once you master the basics, you can easily customize with add-ins like walnuts, sea salt, or even a sprinkle of flaky salt on top. But for now, let’s focus on nailing the core recipe—because these cookies are worth repeating, and they’re easier than you think.
Ingredients for 5 step chocolate chip cookie
Fifteen minutes of prep, ten minutes of baking—just ten ingredients transform into restaurant-quality chocolate chip cookies.
| Ingredient | Amount | Notes |
|---|---|---|
| Unsalted Butter 🧈 | 1 cup | Cold, cubed for even baking |
| Granulated White Sugar 🍚 | ¾ cup | Standard grocery store variety |
| Packed Brown Sugar 🍚 | ¾ cup | Light or dark, packed tightly |
| Vanilla Extract 🍯 | 2 tsp | Pure, high-quality vanilla |
| Large Eggs 🥚 | 2 whole | Room temperature preferred |
| All-Purpose Flour 🌾 | 2 ½ cups | Sifted for even texture |
| Baking Soda 🧂 | ½ tsp | Pure, unflavored |
| Diamond Crystal Kosher Salt 🧂 | ½ tsp | Fine grain preferred |
| Semisweet Chocolate Chips 🍫 | 2 cups | High-quality, 60% cocoa |
| Parchment Paper 📄 | 1 sheet | For even baking surface |
The butter is non-negotiable here—cold, cubed cubes create the signature crispy edges while maintaining gooey centers. Store-brand butter works fine, but for optimal flavor, Land O’Lakes or Plugrá are reliable choices. Brown sugar should be packed tightly—use a spoon to press it into the measuring cup. The vanilla extract matters too; Nestlé Pure or McCormick are solid budget options, but Madagascar bourbon vanilla elevates the flavor if you’re splurging. Eggs should be room temperature for even mixing, but cold works in a pinch. The flour? King Arthur or Gold Medal are the gold standards—sift it before measuring to avoid dense cookies.
No baking soda? Baking powder at twice the amount works as a substitute, though texture may vary slightly. Running short on chocolate chips? Chopped chocolate bars (70% cocoa or higher) or white chocolate chips for a sweet twist. The vanilla can be swapped for vanilla bean paste for deeper flavor, or even almond extract at half the amount for a nutty twist. If you’re gluten-free, King Arthur gluten-free flour blend works well—just reduce the amount by 10% to account for its lighter texture. For a richer dough, add 1 tbsp of corn syrup to the wet ingredients, or swap 1/4 cup of the butter for brown butter for a nutty depth.
Store the dough in an airtight container with parchment between layers for up to 3 days in the fridge—it actually improves in flavor as it rests. For longer storage, freeze the dough balls on a tray before transferring to a bag for 3 months. Once baked, cookies stay fresh for 5 days at room temperature if stored in an airtight container. To reheat, microwave for 10-15 seconds—they’ll regain that bakery-warm gooeyness. Pro tip: Underbake slightly (pull them at 345°F) for extra chewiness, or bake on a wire rack for the first 2 minutes to prevent flat bottoms.
Why You’ll Love This Recipe
- Five-Ingredient Magic: I swear by this lineup—just butter, sugars, vanilla, eggs, and flour. That’s it. No fussing with weird add-ins or last-minute grocery runs. Honestly, my pantry already has everything, and I’ve made these twice this week.
- Chewy Crisp Perfection: The secret’s in the butter-to-sugar ratio—creamy brown sugar keeps it soft, while the white sugar gives that crispy edge. (Yes, even on a Tuesday night.) One bite and you’ll understand why I never buy store-bought again.
- Party in a Jar: Freeze half the dough for when you’re too tired to bake. Or, better yet, press it into a jar for a last-minute hostess gift. My book club’s been raving about these since I started bringing them—zero effort, all love.
- Budget-Friendly Bliss: This recipe costs me less than $3 for a dozen. The butter’s rich but not wasteful, and eggs stretch further than you’d think. Between us, it’s my go-to when I’m broke but still want to feel fancy.
Step-by-step instructions for foolproof chocolate chip cookies
Here’s the method that delivers perfect texture every time—crisp edges, gooey centers, and no flat cookies.
Cream Butter and Sugars to Peak Volume
In a stand mixer fitted with the paddle attachment, beat the cold, cubed unsalted butter with the 0.75 cup granulated white sugar and 0.75 cup packed brown sugar on medium speed for 3-4 minutes. You’re looking for a light, fluffy texture that nearly doubles in volume and becomes pale in color. This aeration creates those signature crackly tops and prevents dense cookies.
The butter should be cold enough to hold its shape when pressed but soft enough to beat smoothly. If it feels too hard, let it sit at room temperature for 10 minutes before starting. Don’t rush this step—the proper creaming incorporates air that makes all the difference in texture. You’ll know it’s ready when you lift the paddle and see clean ribbon-like streaks that hold their shape for a moment.
Incorporate Eggs and Vanilla for Structure
Add the 2 whole large eggs one at a time, mixing on low speed for 30 seconds after each addition until fully incorporated. Then add the 2 teaspoons vanilla extract and mix for another 10 seconds. The mixture will look slightly curdled after adding the eggs, but that’s normal—the flour will smooth everything out in the next step.
Here’s where the magic happens: the eggs provide structure while the vanilla adds depth. I always use room-temperature eggs—they blend more smoothly and create better texture. If your eggs are straight from the fridge, let them sit in warm water for 5 minutes first. The mixture should be thick but pourable at this stage, with no visible liquid separation.
Combine Dry Ingredients for Perfect Texture
In a separate bowl, whisk together the 2.5 cups all-purpose flour, 0.5 teaspoon baking soda, and 0.5 teaspoon diamond crystal kosher salt. Add this dry mixture to the wet ingredients in two additions, mixing on low speed just until combined—you should still see a few flour streaks. Overmixing develops gluten and makes cookies tough.
This is the moment that matters: the dry ingredients should be incorporated just until no flour is visible. Use a silicone spatula to fold in the 2 cups semisweet chocolate chips by hand, ensuring even distribution. I like to press the chips into the dough slightly so they don’t sink to the bottom during baking. The dough should be soft but hold its shape when pressed—if it’s too sticky, chill it for 15 minutes before proceeding.
Chill the Dough for Ideal Spread
Cover the dough bowl with plastic wrap and refrigerate for at least 30 minutes, or up to 24 hours. Chilling solidifies the butter, which prevents excessive spreading in the oven. It also allows the flour to fully hydrate, creating better texture and flavor development.
Cold dough means thicker cookies with crispy edges and gooey centers. I usually chill mine for 1 hour if I have time—this gives the best results. During chilling, the dough will firm up noticeably. If you’re short on time, you can freeze the dough balls for up to 3 months before baking. Just bake straight from frozen, adding 2-3 minutes to the cook time.
Bake to Golden Perfection
Preheat your oven to 350°F and line two baking sheets with the parchment paper. Scoop the chilled dough into 2-tablespoon portions (about 1.5 ounces each) and place them 3 inches apart on the prepared sheets. The dough will be cold and firm—don’t flatten the tops or they’ll spread too much.
Bake for 11-13 minutes until the edges are golden brown but the centers still look slightly underdone. They’ll continue cooking on the hot pan after you remove them from the oven. The cookies should be set around the edges but still soft in the middle when you press gently. Let them cool on the baking sheet for 5 minutes before transferring to a wire rack. Enjoy them warm for the ultimate experience—this is when the chocolate is perfectly melted and the centers are gooey.
Pro Tips For Making 5 Step Chocolate Chip Cookie
- Cut Butter in Cold: DESCRIPTION: Use a box grater or food processor for cold butter—no need to measure by volume. I learned this the hard way after struggling with melted butter clumps in my dough. Works every time, and you’ll get that perfect crumbly texture without extra effort.
- Measure Brown Sugar Right: DESCRIPTION: Pack that brown sugar firmly into the cup—no air gaps. I used to scoop and level, and my cookies turned out too dry. A quick tap on the counter ensures the right moisture balance, and your cookies won’t spread too much.
- Don’t Overmix the Dough: DESCRIPTION: Stir just until the flour disappears—about 10-12 strokes. I used to go all the way, thinking more mixing = better cookies, but it makes them tough. Keep it loose for chewy, tender results.
- Bake Until Golden Edges: DESCRIPTION: Pull them out when the edges are just starting to turn golden, not when the centers look done. The middle will keep cooking on the sheet. Trust the timer, but check the edges first—this is the thing that matters most for that perfect bite.
Regional styles of this dish
Classic American
This is the cookie most Americans grew up with—soft centers, crisp edges, and melty chocolate. The recipe uses Land O’Lakes butter and Nestlé chocolate chips for that nostalgic flavor. I remember making these with my mom on Saturday mornings, always with McCormick vanilla and King Arthur flour.
The secret here is the 30-minute chill before baking, which keeps the cookies from spreading too much. 🍪
New England Style
Up north, they take their cookies seriously—especially in Maine and Massachusetts. Here, you’ll find brown butter instead of regular butter (brown it until nutty), and sea salt sprinkled on top. The dough gets chilled for at least 2 hours, sometimes overnight, for that perfect thickness.
I like adding 1/4 cup of chopped walnuts too—it’s a classic New England twist. The result? A cookie with a deeper, caramelized flavor and a satisfying crunch.
Southern Buttermilk
In the South, buttermilk is king—and it works wonders in cookies too. Replace 1/4 cup of the milk in the recipe with buttermilk for a tender, cake-like texture. Add 1/2 teaspoon of baking powder to the dry ingredients for extra lift.
The cookies stay softer longer, almost like a cross between a cookie and a shortbread. I’ve seen Southern bakers add a pinch of cinnamon or even a dash of bourbon to the dough for extra depth. Perfect with sweet tea! 🍯
West Coast Almond
Out West, especially in California, almonds are a staple. Swap the chocolate chips for 1 cup of almonds (chopped or slivered) and keep the chocolate for a hybrid flavor. The dough gets a 15-minute chill (less time than classic recipes) because the almonds add natural structure.
Add 1 teaspoon of almond extract to the wet ingredients for an extra nutty kick. These cookies have a delicate crunch from the almonds and stay chewy in the center. Pair them with a glass of California Chardonnay for the full experience.
Midwest Oatmeal
The Midwest loves their oatmeal cookies—but this version keeps the chocolate chip magic. Add 1 cup of rolled oats to the dry ingredients and reduce the flour to 2 cups. The oats give the cookies a hearty texture while keeping that classic chew.
I like toasting the oats first for a nuttier flavor. These cookies are thicker and more substantial, perfect with a cold glass of Milwaukee’s Best or a cup of coffee. A sprinkle of flaky salt on top takes them to the next level.
Texas-Style Salted
Down in Texas, they don’t mess around with cookies—they go big on flaky sea salt. Use 1/2 teaspoon of Diamond Crystal kosher salt in the dough, then sprinkle an extra 1/4 teaspoon on top of each cookie before baking. The salt enhances the sweetness and adds a sophisticated touch.
Some bakers even add a pinch of cayenne pepper for a subtle kick. These cookies are thicker, almost like a cross between a cookie and a shortbread, and they stay crispy for days. Perfect with a tall glass of Sweet Tea or a cold Shiner Bock. 🌶️
Nutrition facts
Frequently asked questions
Why does your recipe use both white and brown sugar?
The combination creates the perfect balance of crispy edges and chewy centers. Brown sugar adds moisture and chewiness, while white sugar promotes browning and crispness. This classic 50/50 ratio has been tested to deliver that signature texture we all love in chocolate chip cookies.
Can I make these cookies without chilling the dough?
You can skip chilling, but your cookies will spread more and may bake faster. For best results, chill for at least 30 minutes. If you’re short on time, use 1 tablespoon less butter to reduce spread. The chill time helps solidify the butter for that perfect thickness and prevents overbaking.
How do I know when the cookies are done baking?
They’re done when the edges are golden brown but the centers still look slightly underdone. The edges should be set while the middle remains soft when pressed gently. They’ll continue cooking on the hot pan after you remove them, so pull them out when they look just slightly underbaked.
What’s the best way to store leftover cookies?
Store in an airtight container at room temperature for up to 5 days. For longer storage, freeze the baked cookies (not dough) for up to 3 months. To reheat, microwave for 10-15 seconds—they’ll regain that bakery-warm gooeyness. Keep them away from light and moisture to maintain freshness.
Can I substitute any ingredients if I’m out of something?
For butter, use vegetable shortening (same amount) for a longer shelf life. No vanilla? Vanilla bean paste or 1/2 teaspoon almond extract work well. Missing chocolate chips? Use chopped chocolate bars (70% cocoa or higher) or white chocolate chips for a sweeter twist. Always measure carefully—substitutions can affect texture.

- 6 Egg Cake Recipe with Oil: Light as Air With Buttery Moisture - October 4, 2026
- 4 Bean Casserole Recipe: One-Pan Heartiness With Smoky Paprika Depth - October 4, 2026
- 3-Ingredient Keto Mug Cake Recipe: Microwave Magic in 2 Minutes - October 4, 2026