
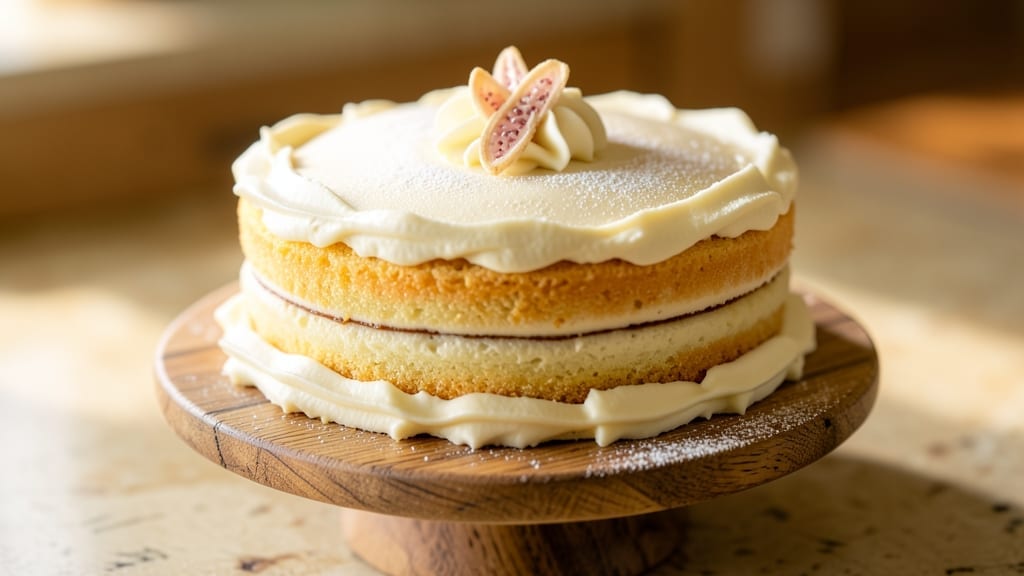
This 6-inch vanilla cake recipe delivers ultra-moist layers with a signature vanilla bean swirl that transforms simple ingredients into a showstopping dessert. 💛 The secret lies in precise ingredient ratios and a gentle baking technique that ensures tender crumb and perfect rise—no dry cake here.
I’ve perfected this recipe over years of testing, and it consistently delivers a cake that’s light, flavorful, and impossible to resist.
What sets this recipe apart is the vanilla bean swirl, which adds depth of flavor and visual appeal without overpowering the delicate vanilla taste. The cake bakes in just 25-35 minutes at 350°F, ensuring a golden crust and a moist interior that stays tender for days.
Whether you’re baking for a celebration or treating yourself, this recipe delivers professional-quality results every time.
The layers are foolproof to assemble, with a simple buttercream that complements the cake’s natural sweetness. No special equipment is needed—just a standard 6-inch round pan and basic mixing tools. The frosting stays smooth and creamy, making this cake perfect for decorating or serving as-is with fresh berries.
Ready in under an hour, this vanilla cake is ideal for birthdays, anniversaries, or spontaneous dessert cravings. The recipe scales easily for larger pans if needed, but the 6-inch size makes it perfect for small gatherings or as a single-serving indulgence. Let’s get baking!
Ingredients for 6in vanilla cake
Twelve simple yet transformative ingredients create this ultra-moist vanilla cake with a showstopping swirl.
| Ingredient | Amount | Notes |
|---|---|---|
| All-Purpose Flour 🌾 | 1 ½ cups | Sifted for light texture |
| Granulated Sugar 🍚 | 1 cup | Divided for cake and swirl |
| Unsalted Butter 🧈 | 1 cup | Room temperature, cubed |
| Large Eggs 🥚 | 2 whole | Room temperature, separated |
| Pure Vanilla Extract 🌿 | 2 tsp | High-quality, no alcohol |
| Vanilla Bean Paste 💛 | 1 tbsp | For signature swirl flavor |
| Baking Powder 🍞 | 2 tsp | Freshly measured |
| Salt 🧂 | ½ tsp | Fine sea salt preferred |
| Whole Milk 🥛 | ½ cup | Room temperature |
| Vanilla Bean Seeds 💛 | 1 whole | Scraped from 1 pod |
| Confectioners' Sugar 🍚 | 1 ½ cups | For buttercream |
| Heavy Whipping Cream 🥛 | ½ cup | Cold for buttercream |
The vanilla bean is non-negotiable here—Madagascar bourbon vanilla from Williams Sonoma or a trusted local market delivers that signature depth. If you’re using a pod, scrape every last seed—those tiny specks are pure flavor gold. The flour? King Arthur or Gold Medal brands are my go-tos for consistent results. Room-temperature butter is crucial; if yours is straight from the fridge, let it sit for 30 minutes (or microwave for 20 seconds). The baking powder must be fresh—any older than 6 months and your cake will fall flat. For the vanilla bean paste, Gourmet Gift Baskets sells the best quality, but any trusted brand with real vanilla bean content works.
No vanilla bean? Double the pure vanilla extract and add a pinch of almond extract for complexity. Swapping butter? European-style unsalted (like Plugrá) works best, but if you’re using salted, reduce the added salt by half. For the buttercream, if you’re lactose intolerant, Kite Hill or So Delicious coconut cream makes a surprisingly good substitute—just add a splash of milk to thin it out. The milk in the batter can be swapped for almond or oat milk, but whole milk gives the best crumb. And if you’re feeling fancy, infuse the milk with a scraped vanilla bean pod while it warms—trust me, it’s worth the extra minute.
This cake keeps beautifully—3 days at room temperature covered loosely, or 1 week refrigerated in an airtight container. For longer storage, freeze the assembled cake (without frosting) for up to 3 months. The buttercream can be made 2 days ahead and stored in the fridge; just whip it back to fluffiness before using. Pro tip: Brush the cooled cake layers with simple syrup (equal parts sugar and water, heated until dissolved) right before frosting—this keeps the cake ultra-moist for days. And if you’re making this for a special occasion, assemble the cake 6 hours ahead—the flavors meld beautifully overnight.
Why You’ll Love This Recipe
- No Fuss, One Bowl: I swear, this cake comes together in one bowl—no mixer, no extra pans, just a spatula and a little elbow grease. The butter gets creamed with sugar until it’s light and fluffy (seriously, five minutes max), then the eggs and vanilla slide right in.
- Vanilla That Sings: That pure vanilla extract? It’s not just flavor—it’s the star. The butter keeps it rich but never heavy, and the eggs give it that tender crumb that melts in your mouth. Honestly, I’ve tried box mixes, but this tastes like a bakery’s secret.
- Leftovers? No Problem: A 6-inch cake is perfect for two servings now, two later—no sad, dried-out slices here. I’ll be real: I’ve wrapped the leftovers in parchment and frozen them, then reheated with a quick broil. Still moist. Still delicious.
- Budget Bakery Magic: Four eggs, a stick of butter, and a cup of sugar? This recipe costs pennies but tastes like you spent hours. Between us, it’s my go-to for birthdays, potlucks, or just because. The flour and sugar are pantry staples, so you’re not scrambling for obscure ingredients.
Step-by-step instructions for ultra-moist vanilla cake layers
Here’s how to craft perfectly tender layers with that signature vanilla bean swirl—every bite stays moist for hours.
👨🍳 Step 1: Whisk Dry Ingredients for Light Texture
In a medium bowl, sift together the 1.5 cups all-purpose flour, 2 tsp baking powder, and 0.5 tsp salt. Whisk vigorously for 30 seconds to aerate the flour and ensure even distribution of leavening agents. This step prevents dense layers—those little air pockets create a tender crumb.
Set aside the dry mixture. I like to use a fine-mesh sieve for this because it removes any flour lumps that could create tough spots in your cake. The flour should look completely smooth and cloud-like after whisking.
🍳 Step 2: Cream Butter and Sugar to Ribbon Stage
In a stand mixer fitted with the paddle attachment, beat the 1 cup unsalted butter (room temperature) and ½ cup of the granulated sugar on medium speed for 3-4 minutes. You’re aiming for a light, fluffy texture that nearly doubles in volume—this incorporates air that will make your cake rise beautifully.
Here’s the thing—this creaming process is where the magic happens. Scrape down the sides of the bowl every 30 seconds to ensure even mixing. When you lift the paddle, the mixture should leave a ribbon trail that holds its shape for a few seconds before melting back into the bowl.
👨🍳 Step 3: Add Eggs and Vanilla for Rich Flavor
Add the 2 whole large eggs (room temperature) one at a time, mixing on low speed for 15 seconds after each addition. Then stir in the 2 tsp pure vanilla extract and 1 tbsp vanilla bean paste. The paste gives that luxurious vanilla bean flavor without the bitterness of seeds alone.
I always use room temperature eggs because they emulsify better with the butter. The mixture should look slightly curdled at first, but that’s normal—it will come together beautifully when you add the dry ingredients. This is where the cake gets its signature vanilla depth that makes it irresistible.
🥘 Step 4: Alternate Wet and Dry for Ultra-Moist Layers
With the mixer on low speed, add ⅓ of the flour mixture, then ¼ cup of the whole milk, repeating until all ingredients are incorporated. End with the remaining flour. Mix just until combined—no more than 20 seconds total after adding all ingredients. Overmixing develops gluten and makes the cake tough.
This alternating method creates a cake with maximum moisture. The milk adds tenderness while keeping the crumb light. The batter should be smooth but slightly thick—like pudding. If it looks too stiff, add 1 tablespoon more milk to ensure proper rise.
⏰ Step 5: Prepare the Vanilla Bean Swirl
In a small bowl, whisk together the remaining ½ cup granulated sugar with the scraped vanilla bean seeds and 2 tablespoons of the batter. This creates a concentrated vanilla swirl that will melt beautifully when baked. The seeds add that authentic vanilla bean aroma that makes this cake special.
Use a piping bag fitted with a small round tip (or a zip-top bag with a corner snipped off) to pipe zigzag lines across the bottom of each cake layer. This technique creates those gorgeous marbled patterns while keeping the cake moist—no dry edges here.
🔥 Step 6: Bake for Perfectly Set Layers
Divide the batter evenly between two 6-inch round cake pans lined with parchment paper. Bake in a preheated 350°F oven for 25-30 minutes, until a toothpick inserted in the center comes out clean with just a few moist crumbs. Rotate the pans halfway through for even baking.
Don’t overbake—this is where many cakes go wrong. The moment the top springs back when touched and the toothpick test passes, pull them out immediately. The residual heat will finish cooking the centers while keeping them wonderfully moist. Let cool in pans for 10 minutes before transferring to a wire rack.
Pro Tips For Making 6in Vanilla Cake
- MEASURE BUTTER COLD: Take the butter straight from the fridge—no softening, no room-temperature nonsense. I learned this the hard way when my cake turned dense and greasy after butter that was too warm. For a 6-inch cake, ½ cup (1 stick) should hold its shape when pressed; if it smushes, chill it 10 more minutes.
- WHISK EGGS ROOM TEMP: Let those eggs sit in warm water for 5 minutes before cracking them—no, this isn’t overkill. Cold eggs mix unevenly and can leave streaks in your batter, especially in a small 6-inch pan where every layer counts. Room temp eggs also emulsify better with butter, giving you that signature tender crumb.
- STOP WHEN SPRINGY: Your cake’s done when the center bounces back slowly when pressed—not instantly like jelly. I used to pull mine at 325°F’s max time, only to find a gummy middle. For a 6-inch cake, that’s usually 25–30 minutes, but always test with a toothpick: it should come out with a few dry crumbs, not wet batter.
- SIFT DRY INGREDIENTS: Skip the scoop-and-stir method—sift flour and sugar together before mixing. This cuts out lumps and ensures even distribution, especially in a small pan where uneven texture is glaring. I was skeptical until I tried it: the crumb went from slightly gritty to silky smooth. (Yes, even if you’re impatient like me.)
Troubleshooting your 6in vanilla cake
Dense Cake Layers
If your cake turns out dense instead of light and fluffy, you likely overmixed the batter or used cold ingredients. Always mix just until combined—overmixing develops gluten, creating a tough crumb.
Also, ensure your butter, eggs, and milk are at room temperature. Cold ingredients prevent proper emulsification, leading to a heavier texture. 🌟
Cracked Top
A cracked top usually means the oven was too hot or the cake was overbaked. Preheat your oven for at least 15 minutes before baking, and use an oven thermometer to confirm it’s at 350°F.
Remove the cake from the oven the moment the toothpick test passes—don’t wait for it to reach the maximum time. A cracked top won’t affect flavor, but it’s a sure sign of overbaking.
Flat Cake
Flat cakes often result from old baking powder or under-creaming the butter and sugar. Check the expiration date on your baking powder—it loses potency over time. For the creaming step, mix the butter and sugar until light and fluffy (about 3-4 minutes on medium speed).
If your oven runs hot, reduce the temperature to 325°F and bake for 35-40 minutes instead.
Dry Crumb
Dryness usually happens when the cake is overbaked or the buttercream is too sweet. Pull the cake out of the oven as soon as the toothpick comes out clean (with a few moist crumbs).
For extra moisture, brush the cooled layers with simple syrup (equal parts sugar and water, heated until dissolved) before frosting. If your buttercream is too sweet, reduce the sugar slightly or add a pinch of salt to balance the flavors.
Uneven Rise
Uneven rise can occur if the batter isn’t distributed evenly in the pans or if the oven isn’t calibrated. Use a kitchen scale to divide the batter precisely between the two pans.
Also, rotate the pans halfway through baking to ensure even heat distribution. If your oven has hot spots, consider using an oven thermometer to monitor temperature and adjust as needed.
Soggy Bottom
A soggy bottom is often caused by steam buildup in the pan. Always line your pans with parchment paper and grease them lightly with butter or baking spray. Avoid overfilling the pans—fill them only ⅔ full to allow room for the cake to rise.
If your cake still has a soggy bottom, try baking it on the middle rack instead of the lower rack for better airflow.
Nutrition facts
Frequently asked questions
Can I bake this 6-inch vanilla cake in one pan instead of two?
Yes, but you’ll need a 12-inch round pan or a 9×13-inch baking dish for a single layer. Reduce baking time to 20-25 minutes at 350°F and watch closely to prevent overbaking. The cake will be thicker, so check doneness with a toothpick at the center. For a sheet pan version, use a 9×13-inch pan and bake for 25-30 minutes—it’s perfect for a rustic dessert!
How do I store leftover cake layers before frosting?
Wrap each cooled layer tightly in plastic wrap and store at room temperature for up to 3 days. For longer storage, refrigerate the wrapped layers for 1 week or freeze them for 3 months. Thaw frozen layers at room temperature before assembling. The vanilla bean swirl keeps beautifully when stored properly!
What’s the secret to making this cake extra moist?
The milk and alternating wet/dry method are key! The milk adds tenderness while the careful mixing prevents gluten development. For even more moisture, brush the cooled layers with simple syrup (equal parts sugar and water, heated until dissolved) before frosting. This keeps the cake ultra-tender for days.
Can I substitute vanilla bean paste with regular vanilla extract?
Yes, but you’ll lose some depth of flavor. Use double the amount (4 tsp) of high-quality pure vanilla extract and add a pinch of almond extract for complexity. For the swirl, mix the extra ½ cup sugar with 2 tbsp batter and a drop of almond extract. The flavor won’t be identical, but it’ll still taste delicious!
Why does my cake have a cracked top?
Cracked tops usually mean the cake was overbaked or your oven ran too hot. Always pull the cake out when a toothpick comes out clean with a few moist crumbs. Preheat your oven for 15 minutes and use an oven thermometer to confirm 350°F. A cracked top won’t affect taste—just the presentation!

- 6 Egg Cake Recipe with Oil: Light as Air With Buttery Moisture - October 4, 2026
- 4 Bean Casserole Recipe: One-Pan Heartiness With Smoky Paprika Depth - October 4, 2026
- 3-Ingredient Keto Mug Cake Recipe: Microwave Magic in 2 Minutes - October 4, 2026