
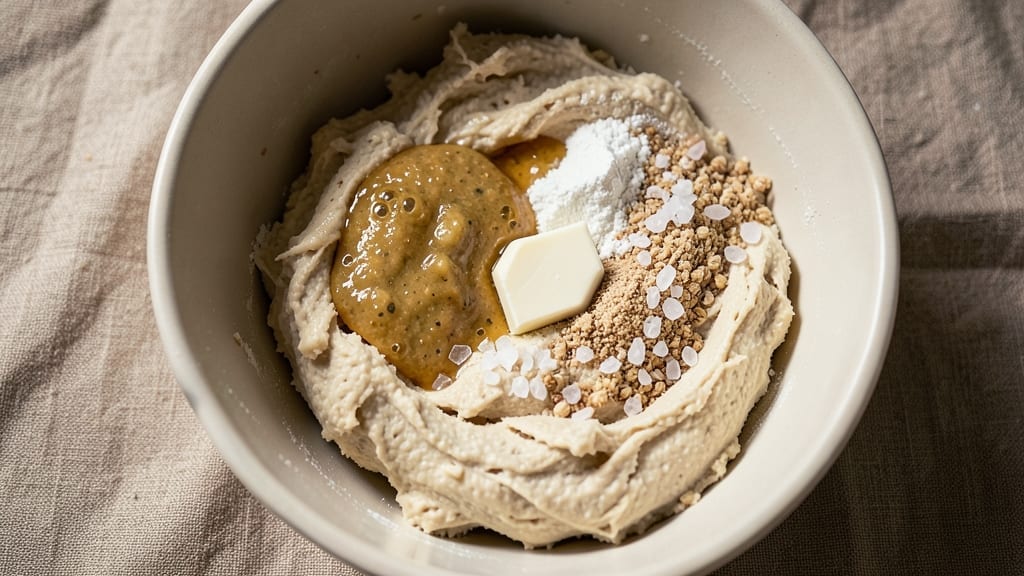
This 48-hour sourdough bread recipe transforms simple ingredients into an artisan loaf with a fermented crust and tangy depth that rivals bakery favorites. The secret lies in the extended fermentation—letting time work its magic to develop complex flavors and a light, airy crumb.
I’ve perfected this method over years of baking, and the results speak for themselves: a crust that crackles with each bite and a crumb so open it practically melts in your mouth.
Unlike rushed bread recipes, this 48-hour process builds flavor gradually, creating a loaf with rich, tangy notes and a texture that’s impossible to resist.
You’ll start with a simple starter and flour mixture, but the real magic happens during the slow bulk fermentation and cold proof, where the dough develops its signature character. No special equipment is needed—just patience and a Dutch oven for that signature oven spring.
The final loaf will boast a deep golden crust with a crisp exterior and a soft, chewy interior, all punctuated by an aromatic tang that lingers long after the last bite.
The 48-hour timeline ensures every bite is packed with flavor, making this the perfect project for a weekend baking adventure. Whether you’re a beginner or a seasoned baker, this recipe delivers restaurant-quality results at home.
Ready to bake? Here’s everything you need to create a loaf that’ll have everyone asking for seconds. Let’s get started with the ingredients and step-by-step instructions.
Ingredients for 48 hour bread
Nine essential ingredients for a loaf with restaurant-quality depth and texture.
| Ingredient | Amount | Notes |
|---|---|---|
| Active Sourdough Starter 🍞 | ½ cup | 100% hydration, bubbly and active |
| Bread Flour 🌾 | 4 cups | High-protein, 12-14% protein content |
| Whole Wheat Flour 🌾 | ½ cup | For added texture and nutrition |
| Granulated Sugar 🍚 | 1 tbsp | Feeds starter and promotes fermentation |
| Unsalted Butter 🧈 | ¼ cup | Cold, cubed for flavor and richness |
| Diamond Crystal Kosher Salt 🧂 | 1 ½ tsp | Adjusts to taste after baking |
| Water 💧 | 2 ¼ cups | Filtered or dechlorinated preferred |
| Cornmeal 🌽 | ¼ cup | For dusting and scoring |
| Ice Water ❄️ | ½ cup | For autolyse and dough handling |
The sourdough starter is non-negotiable—it’s the heart of this recipe. King Arthur or a trusted home starter works best, but any active starter will do. Look for bubbly, jiggly activity when you feed it; if it’s sluggish, give it an extra hour. Bread flour is critical here—its high protein content develops gluten for that signature open crumb. King Arthur or Caputo are industry standards, but any 12-14% protein flour will work. The whole wheat flour adds subtle depth and prevents a gummy texture. Store it in an airtight container to preserve freshness, and sift before measuring for consistency.
No bread flour? All-purpose flour plus 1 tbsp vital wheat gluten mimics the protein structure. Short on whole wheat? Substitute with rye flour at half the amount—it adds a nice earthiness. The butter should be cold; if it’s too soft, chill it for 20 minutes before cubing. European-style butter like Plugrá has higher fat content, which enhances flavor. For scoring, a razor blade is ideal, but a sharp knife or lame works too. If your starter isn’t ready, commercial biga or poolish can be used as a substitute, though the flavor won’t be identical. The ice water is key for autolyse—it keeps the dough cool during the initial mix, preventing overdevelopment.
Store your starter in a glass jar with a loose lid in the fridge; it’ll last 2 weeks if fed weekly. Flours keep best in airtight containers in a cool, dark place for up to 6 months. The dough can be shaped and cold-proofed overnight for 24 hours in the fridge, extending the 48-hour process to 72 hours if you prefer. For scoring, practice on a scrap of dough first—consistent tension is key. The final loaf stays fresh for 3-4 days at room temperature, wrapped in a towel. Freeze slices for up to 3 months to preserve freshness.
Why You’ll Love This Recipe
- No-Knead Magic: I’ll admit, the 48-hour wait feels long—but once you set it and forget it, that’s the beauty. Mix the dough (sourdough starter + bread flour + a touch of sugar), let it rise overnight, then shape and bake. No punishing kneading, no constant checking. Just hands-off perfection.
- Buttery Crust, Tangy Soul: The whole wheat adds chew, the butter makes the crust shatter like a dream, and that sourdough starter? It’s the secret weapon—tangy, complex, and impossible to resist. Honestly, the first slice out of the oven might just steal the show.
- Weeknight Workhorse: This bread is my go-to for sandwiches, toast, or even French toast. (Yes, even on a Tuesday night.) The dough keeps well in the fridge, and a single batch feeds my family for days—no last-minute grocery runs needed.
- Budget-Friendly Staple: Whole wheat flour and a small amount of butter stretch further than you’d think. I’ve made three loaves from one dough batch, and the leftovers? Perfect for croutons, breadcrumbs, or freezing. Your wallet—and your lunchbox—will thank you.
Step-by-step instructions for fermented sourdough bread
Master this 48-hour process for bread with an open crumb and complex tangy flavor.
Create the Autolyse and Mix the Dough
In a large mixing bowl, combine the 4 cups bread flour, 0.5 cup whole wheat flour, and the 0.5 cup ice water. Use your hands or a dough whisk to gently mix until no dry patches remain. The ice water helps strengthen gluten development during the long fermentation.
Let this mixture rest for 30 minutes at room temperature. You’ll notice the dough becomes more cohesive and elastic as the gluten begins to hydrate. This autolyse stage improves oven spring and texture in the final loaf.
After resting, add the 0.5 cup active sourdough starter and the 1 tbsp granulated sugar. Mix thoroughly until fully incorporated. The sugar feeds the yeast during fermentation, enhancing flavor development.
Incorporate Fat and Salt for Structure
Cut the 0.25 cup unsalted butter into small cubes and add to the dough along with the 1.5 tsp diamond crystal kosher salt. Using a dough scraper, gently fold these ingredients into the dough until evenly distributed. The butter adds richness while the salt balances fermentation flavors.
Knead the dough by hand or with a stand mixer fitted with a dough hook for 8-10 minutes until smooth and elastic. You’ll know it’s ready when it passes the windowpane test – stretch a small piece and it should thin enough to see light through without tearing.
Cover the dough with a damp towel and let it rest for 1 hour at room temperature. This bulk fermentation allows the gluten to relax and the dough to develop flavor before shaping.
Perform Bulk Fermentation at Controlled Temperature
Place the dough in a lightly oiled bowl and cover with plastic wrap. Ferment in a 75°F environment for 18-20 hours. I use my oven with the light on for consistent temperature control. The dough should roughly double in size and develop bubbles throughout.
After 18 hours, perform a series of stretch and folds every 30 minutes for 2 hours. Wet your hands and gently stretch one side of the dough while folding it over itself. This builds strength and creates surface tension for better oven spring.
During the final hour of bulk fermentation, the dough should be noticeably puffy with large bubbles. It should spring back slowly when poked with a finger – about ½ inch depression that remains. This indicates proper fermentation development.
Shape and Final Proof
Turn the dough onto a lightly floured surface and shape into a tight round boule. To create surface tension, work from the center outward, pulling the dough toward you while rotating the boule. The goal is to create a smooth, taut surface that will help trap gases during baking.
Place the shaped dough seam-side up in a banneton or bowl dusted with 0.25 cup cornmeal. Cover and refrigerate for 12-16 hours. The cold slows fermentation while allowing flavors to develop. The dough will rise noticeably during this cold proof.
Bake with Steam for Maximum Crust Development
Preheat your oven to 450°F with a Dutch oven inside for 1 hour. This ensures proper heat distribution. Turn the dough onto parchment paper and score the top with a razor blade at a 45-degree angle using a crosshatch pattern.
Carefully transfer the dough and paper to the hot Dutch oven. Bake covered for 20 minutes, then remove the lid and bake for another 20-25 minutes until the internal temperature reaches 205°F and the crust is deep golden brown.
Let the bread cool on a wire rack for at least 2 hours before slicing. The internal structure will firm up during this time, making it easier to achieve clean slices with an open crumb. The extended fermentation creates that signature tangy depth while the butter adds richness to every bite.
Pro Tips For Making 48 Hour Bread
- Weigh Your Butter: DESCRIPTION: Butter’s density throws off volume measurements—1 cup of packed butter isn’t the same as 1 cup of scooped. Use a kitchen scale for the butter in this recipe; 85g is what you want, not an eyeballed cup. I learned this the hard way when my first batch turned out denser than a brick.
- Skip the Whole Wheat Rush: DESCRIPTION: Whole wheat flour absorbs water like a sponge, and if you don’t account for it, your dough will feel sluggish. Mix the whole wheat flour with the bread flour first, then add water gradually—this prevents a gummy, overhydrated mess. Trust me, your kneading session will be smoother.
- Proof at Room Temp: DESCRIPTION: Cold dough proofs slower, but a warm kitchen speeds it up too much. Aim for a consistent 75°F (24°C) environment—if your kitchen runs hotter, proof the dough in a turned-off oven with the light on. I used to rush this, and my loaves either collapsed or never rose right.
- Use a Banneton, Not a Bowl: DESCRIPTION: A floured bowl leaves dough marks and weakens structure. A well-floured banneton (or even a clean towel-lined bowl) gives even support and prevents sticking. If you don’t have one, a bowl lined with a floured tea towel works—but don’t skip the extra flour.
Serving suggestions for this recipe
Classic Pairings
This 48-hour sourdough shines with simple, rich toppings that complement its tangy depth. Slather cultured butter (like Plugrá) on warm slices and add a drizzle of honey—I love Manuka honey for its floral notes.
For a savory twist, top with aged cheddar or Gouda that melts into the open crumb. The butterfat in the bread pairs beautifully with sharp cheeses, creating a flavor harmony that’s hard to beat. 🧈
Breakfast Spreads
Elevate your morning routine by serving this bread with scrambled eggs and crispy bacon—the sourdough’s crust soaks up runny yolks perfectly. I also love adding avocado slices and a sprinkle of flaky sea salt (like Maldon) for a brunch-worthy plate.
The extended fermentation gives the bread a subtle tang that cuts through rich breakfast foods. For a lighter option, try Greek yogurt with a drizzle of local honey and a pinch of cinnamon.
Sandwich Potential
This bread is a sandwich game-changer. Try a classic Reuben with corned beef, sauerkraut, and Russian dressing—its tangy crust balances the sweetness of the dressing. For a vegetarian option, layer roasted red peppers, provolone, and pesto for a Mediterranean-inspired bite.
The dense, chewy texture holds up perfectly to hearty fillings, making it ideal for lunch or dinner. I always toast slices lightly before assembling to enhance the crust’s crunch. 🥪
Dessert Applications
Don’t stop at savory—this bread stars in desserts too! Use it for French toast by slicing thickly, soaking in a mix of eggs, milk, and vanilla, then pan-frying until golden. Top with powdered sugar and berries for a decadent breakfast or brunch treat.
For a no-bake option, layer slices with whipped cream, jam, and chopped nuts for a rustic trifle. The bread’s structure holds up beautifully to both hot and cold desserts.
Wine and Coffee Pairings
Enhance your experience with the right beverages. A dry Riesling or Pinot Noir complements the bread’s tangy, fermented flavors, while a robust espresso brings out its nutty undertones. For a non-alcoholic option, chicory coffee or spiced chai pairs wonderfully with the bread’s caramelized crust.
The acidity in the wine cuts through the richness, making each bite feel balanced and refreshing. ☕
Gift-Worthy Presentation
Wrap cooled loaves in burlap or kraft paper tied with twine for a rustic, giftable presentation. Add a small jar of homemade jam or a spice blend (like everything bagel seasoning) for a thoughtful touch.
The bread’s artisanal quality makes it perfect for holidays or housewarming gifts. I often include a handwritten note with baking tips to add a personal touch—your recipients will appreciate the effort and delicious results. 🎁
Nutrition facts
Frequently asked questions about 48-Hour fermented bread
Why does this recipe need 48 hours?
The extended 48-hour process develops complex flavors through slow fermentation. The first 18-20 hours at 75°F builds gluten structure while the 12-16 hour cold proof enhances tangy depth and improves texture. This creates that signature artisan taste you can’t get with quick methods.
Can I speed up the fermentation?
You can reduce total time to 24 hours by skipping the cold proof and fermenting at 80°F for 12 hours instead of 18. However, the flavor won’t be as developed. For best results, maintain the full 48-hour schedule—the slow process is what creates that restaurant-quality taste.
What if my starter isn’t ready?
Use a commercial biga (pre-fermented dough) or poolish instead, but expect slightly less tang. For a quick fix, feed your starter 2 extra times (every 12 hours) to boost activity. Never skip the starter—it’s what gives this bread its signature flavor profile.
How do I know when the dough is properly fermented?
Look for 50% rise with large bubbles and a ½-inch spring-back when poked. The dough should feel soft but not sticky, and have a slightly sour aroma. If it’s too slow, try a warmer fermentation spot (up to 80°F) or add ½ tsp extra sugar to feed the yeast.
Can I make this without a Dutch oven?
Yes! Use a cast iron skillet or place the dough on a baking sheet with a tray of boiling water below for steam. For best results, bake at 475°F instead of 450°F to compensate for the lack of steam retention. The crust won’t be as crisp, but the interior will still be excellent.

- 3lb Prime Rib Roast Recipe: Juicy Pink Center Guaranteed in 3 Hours - October 31, 2026
- 5 Spice Cake Recipe: Warmly Spiced Layers With Crunchy Top - October 31, 2026
- 1950’s Macaroni and Cheese Recipe: Nostalgic Creamy Cheese Sauce with Buttery Noodles - October 31, 2026