
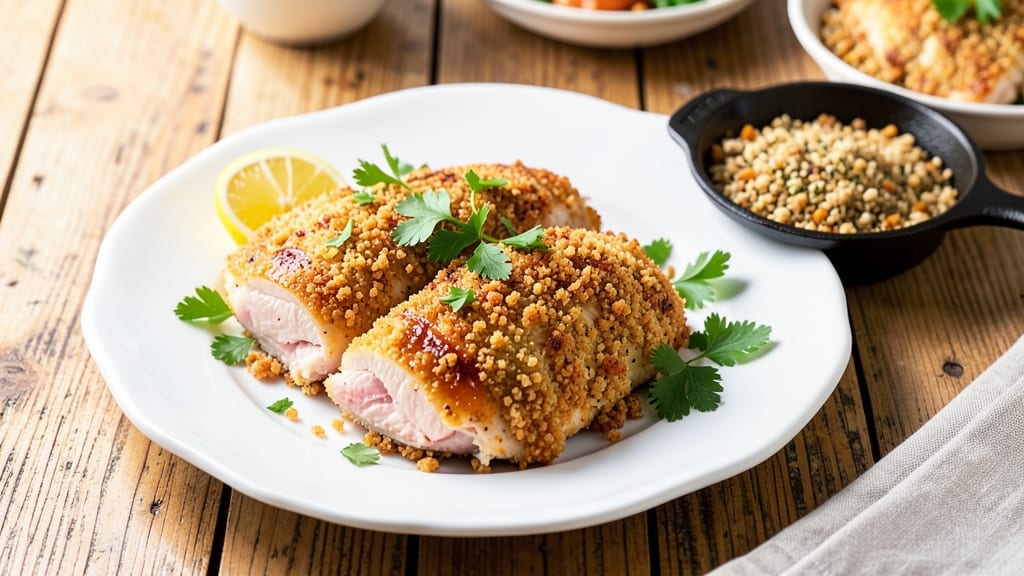
Mastering 4 cups of bread crumbs for chicken transforms ordinary pieces into restaurant-quality bites with a coating that stays crispy through every bite.
The secret lies in a double-breading technique and precise frying or baking temperatures—375°F for oven or 350°F for deep-frying—to lock in that golden crunch without turning soggy. I’ve perfected this method after years of trial and error, ensuring the breading doesn’t fall off or lose its texture mid-bite.
This recipe delivers foolproof results whether you’re feeding a family or prepping for game day. The breading process is straightforward: combine the 4 cups of bread crumbs with seasonings, then apply two layers for maximum crunch.
For extra security, I recommend a light egg wash between layers—it acts as a glue without making the coating greasy. The chicken stays juicy inside while the exterior becomes a satisfying crunch.
By the time your chicken emerges from the fryer or oven, you’ll have perfectly golden, crispy breading that holds up even when cutting into the meat. The texture is a balance of airy and crunchy, with a flavor that’s savory and slightly toasted.
Serve with lemon wedges, tartar sauce, or a side of roasted vegetables to round out the meal.
Pro tip: Keep the breaded chicken warm in a 200°F oven while you finish sides—this maintains crispiness until serving. The recipe scales easily, so double the batch for parties or meal prep. Let’s get cooking!
Ingredients for 4c bread crumbs chicken
Four cups of breadcrumbs create the perfect crunchy shield for juicy chicken bites.
| Ingredient | Amount | Notes |
|---|---|---|
| Boneless, Skinless Chicken Breasts 🍗 | 1 ½ lb | Pounded to even thickness |
| All-Purpose Flour 🌾 | ½ cup | For dredging first layer |
| Large Eggs 🥚 | 2 whole | Beaten lightly for wash |
| Panko Breadcrumbs 🍞 | 2 cups | For first breading layer |
| Seasoned Breadcrumbs 🍞 | 2 cups | For second crunchy layer |
| Garlic Powder 🧄 | 1 tbsp | For seasoned breadcrumbs |
| Onion Powder 🧅 | 1 tbsp | For seasoned breadcrumbs |
| Paprika 🌶️ | 1 tbsp | Smoked or sweet variety |
| Salt 🧂 | 1 tsp | Kosher or sea salt |
| Black Pepper 🌶️ | ½ tsp | Freshly ground preferred |
| Vegetable Oil 🫒 | 2 cups | For frying (or baking spray) |
| Lemon Wedges 🍋 | 4 whole | For serving (optional) |
Panko is your secret weapon here—it stays crispy better than regular breadcrumbs. Trader Joe’s sells it in bulk, but any brand works if it’s fresh. For the seasoned breadcrumbs, I mix garlic powder, onion powder, paprika, salt, and black pepper right into the 2 cups. Penzeys spices add extra depth if you want to splurge, but grocery store brands are fine. The key is toasting the breadcrumbs in a dry pan for 3-4 minutes before mixing with seasonings—this removes any moisture so your coating stays crispy. Chicken breasts should be pounded to an even 1/4-inch thickness for consistent cooking.
No panko? Regular breadcrumbs plus cornstarch (1 tbsp) mimics that extra crunch. Short on eggs? 1/4 cup sparkling water + 1 tbsp cornstarch makes a great wash substitute. The double-breading technique is non-negotiable for that restaurant-quality crunch—first dip in flour, egg wash, breadcrumbs, then repeat. For baking instead of frying, use 375°F for 18-20 minutes—spray with oil first. The lemon wedges? Only add them right before serving so they stay bright and zesty.
Keep your breaded chicken warm in a 200°F oven while you finish sides—this maintains crispiness until serving. Prep ahead by mixing all dry ingredients (flour, breadcrumbs, spices) in advance. Store dry ingredients in airtight containers for up to 1 month, and cooked chicken holds for 3 days in the fridge. Freeze breaded (uncooked) chicken for 2 months—just thaw in the fridge before cooking.
Why You’ll Love This Recipe
- No-Fuss Coating: I swear by the four-step method—flour, egg, panko, seasoned crumbs—because it actually works. No fancy techniques, just dredge and dip. The panko gives that satisfying crunch without turning into a science experiment.
- Double-Crunch Magic: That extra layer of seasoned breadcrumbs? Game-changer. The panko handles the crisp, while the seasoned crumbs add depth—herbs, garlic, maybe even a hint of paprika—so every bite has texture and flavor.
- Weeknight Workhorse: Between us, this is my go-to when I’m staring at a fridge full of veggies and need protein fast. Toss it with roasted potatoes or a simple salad, and dinner’s done. (Yes, even on a Tuesday night.)
- Budget Crunch Savior: Chicken breasts stretch further when you cut them into strips, and the crumbs make them feel special. Plus, panko and seasoned crumbs are cheap staples—no need for pricey breading mixes. Leftovers? Reheat and crisp again—no one’s the wiser.
Step-by-step instructions for crispy breaded chicken
Here’s how to get that perfect crunchy coating that stays crispy through every bite.
Pound and Season the Chicken
Place each of the 1.5 lb boneless, skinless chicken breasts between two sheets of plastic wrap. Using a meat mallet, pound them to an even ½-inch thickness—this ensures they cook through evenly without drying out. I press down firmly but evenly, working from the center outward to avoid tearing the edges.
Season both sides generously with 1 tsp salt and ½ tsp black pepper. I like to press the seasoning into the meat so it sticks. This step is crucial because the seasoning gets trapped under the breading, infusing every bite with flavor. Let the seasoned chicken rest for 10 minutes while you prepare the next components.
Create the Breading Station
Set up three shallow bowls. In the first, place the ½ cup all-purpose flour. In the second, crack the 2 whole large eggs and whisk them lightly with a fork—just until combined, no need to make it frothy. The third bowl gets the 2 cups panko breadcrumbs for the first layer.
In a separate small bowl, mix the 2 cups seasoned breadcrumbs with 1 tbsp garlic powder, 1 tbsp onion powder, and 1 tbsp paprika. This creates a flavorful second layer that adds depth to each bite. I like to use my fingers to gently crush any large breadcrumb pieces so they stick better to the chicken.
Bread the Chicken for Maximum Crunch
Starting with the first piece of chicken, dip it into the all-purpose flour, shaking off any excess. Then dip into the egg wash, letting any excess drip off. Finally, press the chicken into the panko breadcrumbs, coating all sides completely. Place on a wire rack set over a baking sheet.
Repeat with all pieces, then dip each one again into the egg wash and press into the seasoned breadcrumb mixture. This double-dipping creates that extra-thick, extra-crispy coating. I press firmly but not so hard that the breading falls off. Let the breaded chicken rest for 10 minutes while you heat the oil.
Fry Until Golden and Crispy
Pour 2 cups vegetable oil into a deep skillet or Dutch oven and heat over medium-high heat until it reaches 350°F. You’ll know it’s ready when a drop of water sizzles vigorously when touched. Carefully add the breaded chicken in a single layer—don’t overcrowd the pan or the temperature will drop and the coating won’t crisp properly.
Fry for 3-4 minutes per side until the coating is deep golden brown and the chicken reaches an internal temperature of 165°F. I use tongs to flip carefully, being mindful not to break the crunchy coating. Transfer the fried chicken to a paper towel-lined plate to drain excess oil. The coating should remain crispy, not soggy.
Serve Immediately with Lemon
Let the chicken rest for 2-3 minutes before serving—this helps the juices redistribute. The coating will stay crispy if you serve it right away. Arrange the pieces on a platter and serve with the 4 whole lemon wedges on the side for a bright, tangy contrast to the rich, savory chicken.
Each bite should deliver that satisfying crunch followed by tender, juicy chicken. The secret to keeping the coating crispy is frying at the right temperature and not overcrowding the pan. Serve with your favorite dipping sauce or a simple side salad to complete the meal.
Pro Tips For Making 4c Bread Crumbs Chicken
- Dry the Chicken Thoroughly: Wet chicken won’t crisp—pat those breasts aggressively with paper towels after pounding, especially around the edges where moisture hides. I learned this the hard way when my first batch came out soggy despite perfect timing.
- Mix Cold Eggs with Flour First: Whisk the egg and all-purpose flour together before dipping the chicken—this creates a smoother, stickier coating that clings better than dipping raw chicken into separate ingredients. Yes, it’s an extra bowl, but the crust stays put.
- Don’t Overcrowd the Pan: Cook in batches if needed—overloading the pan steams the chicken instead of browning it. I used to rush this and ended up with uneven, pale breading. Two minutes per side on medium-high heat is all you need.
- Toast the Panko Separately: Lightly toast the panko in a dry pan for 30 seconds before mixing it into your seasoned breadcrumbs—this adds extra crunch without burning the chicken. (Pro move: Save the toasted bits for garnish if you’re feeling fancy.)
Flavor customization for this 4c bread crumbs chicken
Spicy Kick Options
For heat lovers, add 1 tbsp cayenne pepper or 1 tsp chili powder to your seasoned breadcrumbs. I like using Penzeys hot honey> drizzled over finished chicken for a sweet-spicy contrast. Start with ½ tsp cayenne>—you can always add more! 🌶️
Herb Variations
Swap out the garlic powder for 1 tbsp dried oregano> or 1 tbsp dried thyme> for a Mediterranean twist. Fresh herbs like 1 tbsp chopped parsley> mixed into the seasoned breadcrumbs add vibrant color and freshness.
I often use 2 tbsp chopped basil> for an Italian-inspired flavor profile.
Cheesy Crunch
Add ½ cup grated Parmesan cheese> to your seasoned breadcrumbs for an extra cheesy crunch. For a Southern-style twist, mix in ¼ cup crushed Ritz crackers> with the seasoned breadcrumbs. The crackers add a buttery, slightly sweet contrast that pairs perfectly with the savory chicken.
Sweet & Tangy
Mix 1 tbsp brown sugar> with your seasoned breadcrumbs for a caramelized crust. I also love adding 1 tsp smoked paprika> and a pinch of cinnamon for a subtle sweetness.
Serve with a side of spicy honey mustard> for dipping—this combo is a crowd-pleaser at any gathering. 🍯
Global Flavors
For a Japanese-inspired version, replace the paprika with 1 tbsp furikake seasoning> and add 1 tsp sesame seeds> to the breadcrumbs. For a Mexican twist, use 1 tbsp taco seasoning> and top with sliced jalapeños> after frying.
These variations keep the crispy texture while adding exciting new flavors.
Extra Crunchy Boost
Add 2 tbsp crushed potato chips> (like Lay’s Classic>) to your seasoned breadcrumbs for an extra-crunchy texture. For a nutty variation, mix in ¼ cup crushed pecans> or walnuts**>—just toast them lightly in a dry pan first to enhance their flavor.
This adds a delightful contrast to the crispy coating. 🥜
Nutrition facts
Frequently asked questions
Can I use regular breadcrumbs instead of panko?
Yes, but your coating won’t be as crispy. Regular breadcrumbs work best when mixed with 1 tablespoon cornstarch per 2 cups to improve texture. For the same crunch factor, use 2.5 cups regular breadcrumbs + 1.5 cups panko instead of the full 4 cups panko called for.
How do I keep the breading from falling off?
Double-dip is your secret weapon! After the first egg wash and breadcrumb layer, let the chicken rest 10 minutes before adding the second layer. Also press firmly when coating and avoid overcrowding the pan during frying. A light egg wash between layers acts like glue without making the coating greasy.
Can I bake this instead of frying?
Preheat oven to 375°F and spray a baking sheet with oil. Bake for 20-25 minutes, flipping halfway, until golden brown and internal temp reaches 165°F. For extra crispiness, broil for 2-3 minutes at the end. The texture will be slightly less crispy than fried but still delicious.
Why did my breading get soggy?
Overcrowding the pan or frying at too low a temperature causes soggy breading. Always fry in batches and maintain 350°F oil. Another common mistake is not draining excess egg wash between layers—pat pieces dry with paper towels after each dip. Also ensure your breadcrumbs are completely dry before mixing with seasonings.
How long can I store breaded chicken before cooking?
Store breaded (uncooked) chicken in an airtight container in the fridge for up to 24 hours. For longer storage, freeze for 2 months. Thaw overnight in the fridge before cooking. The breading stays crispy if you cook immediately after thawing—don’t let it sit at room temperature for more than 30 minutes.

- 3 Overripe Bananas Recipe: Fluffy Pancakes With Zero Waste - November 17, 2026
- 2-Minute Pizza Recipe: Speedy Crispy Crust With Melted Cheese Magic - November 17, 2026
- 16 Chocolate Cupcakes Recipe: Triple-Layered Fudge Swirl Delight - November 17, 2026