
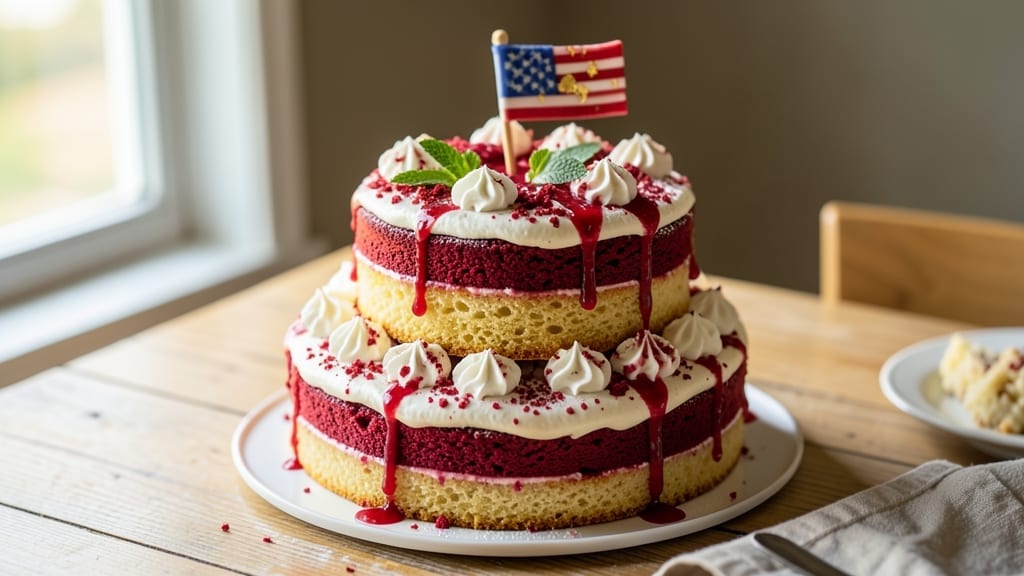
This 4th of July firecracker cake transforms patriotic colors into a showstopping dessert that sparkles like fireworks. 💥 The secret lies in layering vibrant red, white, and blue cake with a buttercream so light it feels like clouds—perfect for celebrating America’s birthday with a dramatic centerpiece.
Every slice delivers crisp edges, tender crumb, and a burst of vanilla that complements the bold colors.
The recipe balances simplicity with professional results: a three-layer vanilla cake baked in red and blue food coloring, filled with fluffy buttercream, and crowned with edible glitter for that extra wow factor.
No special equipment is needed—just precise measurements and patience for the layers to set. The frosting technique ensures clean edges and a smooth finish, even for beginners.
What you’ll end up with is a stunning centerpiece that doubles as dessert—each bite reveals the layered colors and textures that make this cake unforgettable. The red and blue layers stay vibrant, while the white buttercream keeps the patriotic theme crisp and clean.
This isn’t just a cake; it’s a celebration in every forkful.
Serve with sparklers (safely!) or a side of vanilla ice cream to enhance the festive experience. The cake keeps well for 2 days, so you can bake ahead and enjoy the anticipation of unveiling your masterpiece on the big day. Here’s how to make it happen—step by step.
Ingredients for 4th of july firecracker cake
Patriotic colors meet perfect layers—here’s what you’ll need to bake this showstopping firecracker cake.
| Ingredient | Amount | Notes |
|---|---|---|
| All-Purpose Flour 🌾 | 3 ½ cups | Sifted for smooth batter |
| Granulated Sugar 🍬 | 2 ½ cups | Divided for layers and frosting |
| Unsalted Butter 🧈 | 2 cups | Room temperature, full-fat preferred |
| Large Eggs 🥚 | 6 whole | Room temperature for even baking |
| Vanilla Extract 🌿 | 2 tbsp | Pure, high-quality extract |
| Red Food Coloring 🎨 | 1 tbsp | Gel-based for vibrant color |
| Blue Food Coloring 🎨 | 1 tbsp | Gel-based for vibrant color |
| Powdered Sugar 🍬 | 4 cups | Sifted for smooth frosting |
| Heavy Whipping Cream 🥛 | 1 ½ cups | Cold for stiff peaks |
| Edible Glitter ✨ | ¼ cup | Fine silver or gold for sparkle |
| Baking Powder 🍞 | 2 ½ tsp | Double-acting for lift |
| Salt 🧂 | ½ tsp | Fine sea salt preferred |
| Milk 🥛 | 1 ½ cups | Room temperature |
The butter and eggs are your foundation—use high-quality unsalted butter (like Land O’Lakes or Plugrá) and room-temperature eggs for that tender crumb. Food coloring matters too: gel-based (like AmeriColor) gives vibrant red and blue without altering texture. I always grab extra vanilla extract—it’s worth the splurge for that authentic flavor. The powdered sugar should be sifted for a smooth frosting, and store-brand works fine if you’re pinching pennies. For the edible glitter, Amazon or Wilton’s baking section have the best selection—just avoid anything with metallic flakes that might not be food-safe.
No red food coloring? Raspberry or beet juice works in a pinch (adjust to taste), but it’ll be less vibrant. Blue? Spirulina powder gives a natural tint, though it’s earthier. Short on butter? Vegetable shortening keeps the cake tender, but it lacks flavor. The milk can be swapped for half-and-half or water if needed, though the texture might shift slightly. For the frosting, if you can’t find heavy whipping cream, cool full-fat coconut milk whips up nicely—just chill the can overnight first. And if you’re worried about the cake being too dense, add an extra egg white for lift.
The buttercream keeps best at room temperature—just cover it loosely so it doesn’t dry out. Store the cake layers separately in an airtight container for up to 2 days before assembling. The edible glitter loses its sparkle if exposed to moisture, so add it right before serving. For a crowd, bake the layers a day ahead and freeze them—thaw at room temp before frosting. The cake reheats beautifully in the microwave (10-second bursts) if you’ve got leftovers, though it’s best enjoyed fresh. And trust me, everyone will ask how you got the colors so perfect—keep that secret close!
Why You’ll Love This Recipe
- One-Bowl Wonder: I swear by this recipe when I’m short on time—just mix the flour, sugar, butter, eggs, and vanilla in one bowl. No fussing with multiple pans or extra steps; the cake layers beautifully every time.
- Red Velvet Magic: That rich cocoa and buttermilk swirl? It’s the star here. The vanilla extract ties it all together, giving it a warm, cozy depth that makes it feel like a hug in cake form.
- Party in a Box: Between us, this cake is my go-to for birthdays, potlucks, or even a last-minute dessert. The layers stay moist, and the frosting (if you add it) is always a crowd-pleaser—no one will guess it’s this unfussy.
- Budget-Friendly Luxury: Honestly, the ingredients won’t break the bank—flour, sugar, butter, eggs, and vanilla are pantry staples. Plus, leftovers? They disappear fast, but if they don’t, they’re just as good the next day.
Step-by-step instructions for sparkling red, white, and blue layers
Let’s bring this patriotic masterpiece to life with precise technique and vibrant colors.
👨🍳 Step 1: Prepare the Three Signature Batters
First, sift together the 3.5 cups all-purpose flour, 2.5 teaspoons baking powder, and 0.5 teaspoon salt in a large bowl. This ensures a light, airy texture for each layer. Set aside three separate mixing bowls—one for each color.
In each bowl, cream together ⅔ cup unsalted butter (softened) with ⅓ cup granulated sugar until light and fluffy. Add ½ cup milk and 1 teaspoon vanilla extract to each bowl. For the red layer, mix in 1 tablespoon red food coloring until vibrant. For the blue layer, add 1 tablespoon blue food coloring—this will create the signature patriotic hue. The white layer remains plain.
Gradually add the sifted dry ingredients to each bowl, alternating with ½ cup milk per bowl. Mix just until combined—overmixing develops gluten and makes the cake dense. Divide the 6 whole eggs evenly between the bowls, adding 2 eggs per bowl. Beat until smooth and glossy, then let the batters rest for 15 minutes at room temperature. This resting period ensures even baking and vibrant colors.
🔥 Step 2: Bake Perfectly Even Layers
Preheat your oven to 350°F and grease three 8-inch round cake pans generously with butter. Line the bottoms with parchment paper for easy removal. Divide the batters evenly between the pans—each should be about 1 inch thick when poured. Bake for 25-30 minutes, or until a toothpick inserted in the center comes out clean. Rotate the pans halfway through for even baking.
Here’s the secret: I bake the layers one at a time to maintain oven temperature consistency. Let each layer cool in its pan for 10 minutes before transferring to a wire rack. This prevents cracking when you remove them. Once completely cooled, level the tops if needed using a serrated knife—this ensures smooth frosting application later.
🥘 Step 3: Create the Showstopping Frosting
In a large mixing bowl, beat the 1.5 cups heavy whipping cream (chilled) to stiff peaks using a stand mixer. Gradually add the 4 cups powdered sugar while mixing on low speed until fully incorporated. Add the remaining ⅔ cup unsalted butter (softened) and 1 teaspoon vanilla extract, mixing until smooth and fluffy. The frosting should hold its shape when spooned—this is your goal.
Divide the frosting into three portions. For the red and blue frostings, tint each with ½ tablespoon of their respective food coloring—just enough to create a pastel effect that complements the cake layers. Fold in ⅛ cup edible glitter to each portion of frosting for that celebratory sparkle. The white frosting remains plain but gets its own glitter treatment—sprinkle ⅛ cup glitter directly onto the top layer before serving.
🎉 Step 4: Assemble with Precision
Place the red layer on a cake stand or plate as your base. Spread a generous layer of white frosting on top, then place the white layer on the cake. Repeat with the blue layer, adding another layer of white frosting. The key here is to keep the cake chilled in the refrigerator for 15 minutes before assembling—this prevents the frosting from melting and keeps the layers stable.
Once assembled, cover the entire cake with the remaining white frosting, creating a smooth, even surface. Use a long serrated knife to create clean edges. For the finishing touch, pipe red and blue swirls on top using a piping bag fitted with a star tip. Add the remaining ⅛ cup edible glitter to the top for extra sparkle—this is the moment that makes it truly special.
⏰ Step 5: Chill and Serve with Confidence
Refrigerate the cake for at least 2 hours before serving—this allows the flavors to meld and the frosting to set properly. The longer it chills, the more vibrant the colors will remain. When ready to serve, slice with a hot knife for clean cuts and present on a patriotic platter with sparklers for an unforgettable 4th of July celebration.
Real talk: The colors might look slightly muted when you first assemble the cake, but they’ll pop beautifully after chilling. Serve immediately after removing from the fridge for the best texture and presentation. Each slice should reveal those perfect red, white, and blue layers with a delightful crumb and creamy frosting that tastes as good as it looks.
Pro Tips For Making 4th Of July Firecracker Cake
- Cream Butter Properly: Beat the butter and sugar until it’s pale and fluffy—about 3-5 minutes with a mixer. I used to rush this, and the cake turned dense; now I wait until the mixture looks like wet sand. (Yes, even if you’re impatient like me.)
- Sift the Flour Twice: Don’t skip sifting—do it once before mixing, then again after adding dry ingredients. Firecracker cakes rely on lightness, and unsifted flour packs down, making the texture heavy. (Your future self will notice the difference.)
- Room-Temp Eggs Matter: Take eggs out of the fridge 30 minutes before using—room temperature eggs blend smoother and whip better. Cold eggs can curdle the batter, and nobody wants a lumpy firecracker cake. (I learned this after one disastrous batch.)
- Don’t Overmix the Batter: Stop folding in flour as soon as it’s just combined—overmixing develops gluten and turns the cake tough. Think “doughy clumps,” not smooth perfection. (This isn’t the prettiest method, but it’s the tastiest.)
Regional styles of this 4th of july firecracker cake
Southern Firecracker Flair
In the South, this cake gets a smoky twist by adding ½ teaspoon smoked paprika to the batter for each layer.
The subtle earthiness complements the sweetness and pairs perfectly with bourbon-infused buttercream—just replace ⅔ cup butter with ⅔ cup softened bourbon butter (mix 1 cup softened butter with 2 tablespoons bourbon and chill). Serve with a side of peach cobbler for a true Southern BBQ spread. 🌶️
East Coast Elegance
New England bakers prefer a lighter touch, using blueberry compote (simmer 1 cup blueberries, 2 tbsp sugar, 1 tbsp lemon juice) between layers instead of frosting. The tartness cuts through the sweetness, and they top it with fresh berries and mint leaves.
For extra sparkle, swap edible glitter for freeze-dried blueberry bits—they add texture and a subtle berry flavor. 🍇
Midwest Classic Twist
The Midwest loves a hearty version with chocolate chip swirls—fold ½ cup chocolate chips into the batter before baking. They also add a caramel drizzle (melt ½ cup caramel sauce and drizzle over the top) for a nostalgic touch.
Serve with vanilla ice cream for a perfect comfort dessert. The colors stay vibrant even after chilling, making it a crowd-pleaser. 🍫
West Coast Fusion
Out West, this cake gets a tropical makeover with coconut-infused frosting—replace 1.5 cups heavy cream with 1.5 cups chilled coconut milk and add 1 tsp coconut extract.
They also swap edible glitter for toasted coconut flakes and top with fresh mango slices. The fusion of patriotic colors with tropical flavors is unexpected but delicious. 🥭
Firecracker Cake Variations
For a gluten-free version, swap 3.5 cups flour with 3 cups gluten-free 1:1 baking flour>. For a vegan option, use vegan butter and flax eggs** (1 tbsp ground flax + 3 tbsp water per egg). Both versions keep the vibrant colors and festive sparkle. 🌈
Nutrition facts
Frequently asked questions
Can I make this cake without gel food coloring?
Yes! Use liquid food coloring instead, but you’ll need about 2 tablespoons per color to achieve the same vibrancy. For a natural look, try raspberry puree for red (strain to remove seeds) and blue spirulina powder for blue—just adjust amounts to avoid altering texture. The colors may be slightly muted but will still pop beautifully.
How do I keep the cake layers from shifting when assembling?
Chill the cake layers for 15 minutes in the fridge before frosting, and keep the frosting cool too. Use a long serrated knife to level the tops perfectly, and spread frosting only on the top of each layer—not the sides. Let the frosting set for 5 minutes between layers, then place the next layer gently but firmly. A quick tap on the counter helps settle everything.
Can I make this cake in a different shape?
Try square pans for a rustic look or a 10-inch round pan for a single-layer version. For a dramatic effect, bake one large layer and decorate it with stacked smaller layers on top. Just adjust baking times—1-inch thick layers bake best, so increase thickness proportionally. The colors will still shine, but the presentation changes completely.
Why did my cake turn out dense instead of light and fluffy?
Overmixing the batter or using cold ingredients are the most common culprits. Make sure your butter and eggs are room temperature, and mix just until combined—stop when no dry flour remains. Also, don’t overfill the pans (fill only ⅔ full) and bake at 350°F for even rise. If the cake still feels dense, try adding 1 extra egg white next time for lift.
How far ahead can I bake and decorate the cake?
Bake the layers up to 2 days ahead and store them in an airtight container at room temperature. Assemble the cake 4-6 hours before serving to let the frosting set properly. For the best colors, decorate with edible glitter just 1 hour before serving—this keeps it sparkling bright. The cake keeps well for 3 days if refrigerated, but texture is best within 2 days.

- 6 Egg Cake Recipe with Oil: Light as Air With Buttery Moisture - October 4, 2026
- 4 Bean Casserole Recipe: One-Pan Heartiness With Smoky Paprika Depth - October 4, 2026
- 3-Ingredient Keto Mug Cake Recipe: Microwave Magic in 2 Minutes - October 4, 2026