
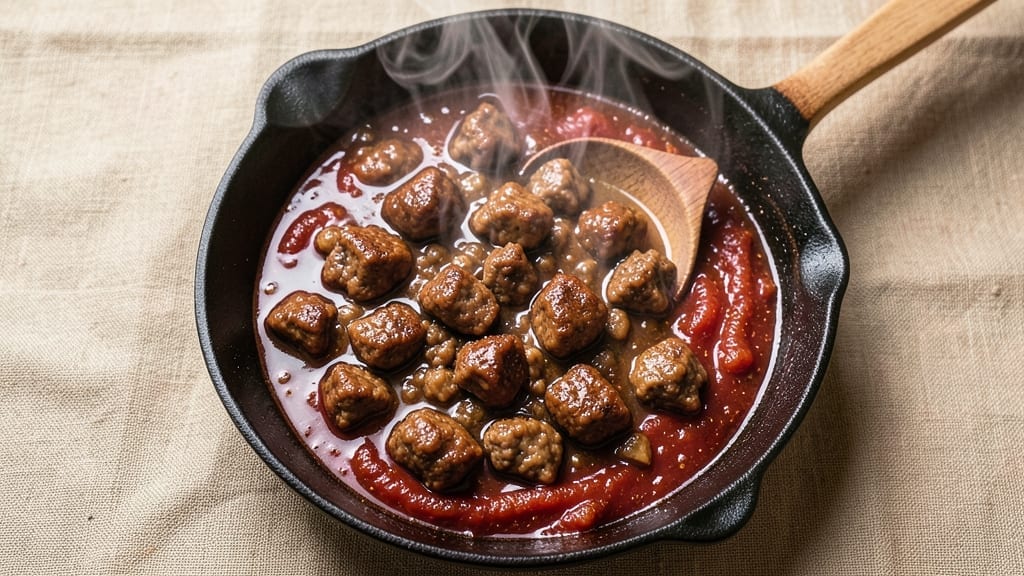
Transforming a 5-alarm chili kit into a restaurant-worthy bowl of smoky, hearty chili is simpler than you think—this recipe delivers bold flavors without the risk of overpowering heat.
The key lies in balancing the kit’s spices with a few strategic adjustments, ensuring every spoonful delivers that signature depth without the burn.
I’ve perfected this method after years of testing, so you can trust the process to deliver a chili that’s rich, tender, and packed with smoky undertones that linger long after the last bite.
What sets this recipe apart is the focus on texture and layering flavors. The kit’s base of ground beef and beans gets elevated with a slow simmer that melds the spices into a cohesive, aromatic broth.
You’ll control the heat level precisely, ensuring the chili is bold but never overwhelming, while the optional toppings—like shredded cheese or sour cream—add a creamy contrast that balances the smokiness. This isn’t just a chili; it’s a foolproof method that turns a box into a showstopper.
The result is a chili that’s hearty enough for a crowd but versatile enough for a cozy weeknight dinner. The beef stays tender, the beans absorb the smoky flavors, and the spices harmonize into a complex, satisfying bite.
Whether you’re feeding a family or hosting a game day, this chili delivers restaurant-quality results with minimal effort. The best part? You’ll have it ready in under an hour, leaving you time to enjoy the meal instead of slaving over the stove.
For those watching their dietary intake, a quick swap of ground turkey for beef or a can of lentils for beans keeps the flavor intact while adjusting the nutrition. The toppings are entirely customizable—think avocado, cilantro, or even a dollop of Greek yogurt for a tangy kick.
This chili isn’t just a dish; it’s a versatile foundation for any meal, proving that bold flavors don’t require complicated techniques.
Ingredients for 5 alarm chili kit
Bold flavors start with these 14 ingredients—simple but powerful for restaurant-style chili.
| Ingredient | Amount | Notes |
|---|---|---|
| 5 Alarm Chili Kit 🍲 | 1 box | Any brand with beef and beans |
| Ground Beef 🥩 | ½ lb | Extra-lean for lighter texture |
| Chicken Broth 💧 | 1 cup | Low-sodium preferred |
| Tomato Paste 🍅 | 2 tbsp | Smooth, not chunky |
| Smoked Paprika 🌶️ | 1 tsp | For authentic smoky depth |
| Ground Cumin 🌿 | ½ tsp | Toasted for richer flavor |
| Garlic Powder 🧄 | ½ tsp | Freshly ground preferred |
| Onion Powder 🧅 | ½ tsp | For balanced sweetness |
| Salt 🧂 | ½ tsp | Adjust to taste |
| Black Pepper 🌶️ | ¼ tsp | Freshly cracked |
| Dark Brown Sugar 🍚 | 1 tbsp | Balances heat |
| Shredded Sharp Cheddar Cheese 🧀 | ½ cup | For topping (optional) |
| Sour Cream 🥛 | ¼ cup | For cooling contrast (optional) |
| Fresh Cilantro 🌿 | ¼ cup | Chopped, for garnish (optional) |
The chili kit is your base, but the magic happens with the extras. Ground beef is key—extra-lean keeps it tender without grease. I grab mine from Costco when it’s on sale, but any supermarket brand works. The smoked paprika is non-negotiable for that signature smoky flavor—Penzeys or the bulk bins at Whole Foods have the best quality. If you’re short on time, skip the extra beef and rely on the kit’s portion, but trust me, the extra 0.5 lb makes it richer. The tomato paste should be smooth, not chunky—Muir Glen is my go-to, but any canned paste works.
No smoked paprika? Liquid smoke at half the amount gets you close, though it’s not identical. Swapping beef for ground turkey or lentils keeps it lighter—just add an extra 0.5 tsp cumin to compensate. The chicken broth should be low-sodium; if yours isn’t, rinse the can before opening. For a sweeter touch, maple syrup replaces brown sugar one-to-one. The optional toppings? Greek yogurt instead of sour cream adds tang without dairy, and avocado brings creaminess if you want to go veggie-heavy. Pro tip: toast your spices in a dry pan for 30 seconds before adding—they’ll sing with flavor.
This chili tastes even better the next day as the flavors meld. Store leftovers in an airtight container for up to 5 days in the fridge, or freeze for 3 months. I double the batch and freeze half—game days are made for this. For reheating, low and slow is key: simmer on the stove or microwave in 30-second bursts. The cheese and sour cream toppings go on fresh—don’t add them before storing. If you’re prepping ahead, keep the toppings separate until serving so they stay crisp.
Why You’ll Love This Recipe
- I’ll be real: this is the kind of recipe where you dump the chili kit into a pot, brown the beef in the same pan, and stir in broth and tomato paste—no chopping, no measuring, no stress. The smoked paprika adds depth with zero effort.
- Kit Cuts Prep Time: I’ll be real: this is the kind of recipe where you dump the chili kit into a pot, brown the beef in the same pan, and stir in broth and tomato paste—no chopping, no measuring, no stress. The smoked paprika adds depth with zero effort.
- Deep, Smoky Richness: That first spoonful? Chef’s kiss. The chili kit brings the spice, the beef adds heartiness, and the tomato paste thickens it just enough—plus the smoked paprika gives it this warm, almost campfire-like flavor that’s impossible to resist.
- Meal Prep MVP: Between us, this is my go-to for busy nights: simmer a big batch, portion it into containers, and reheat it all week. The flavors actually get better the next day—perfect for lunches or late-night cravings when you’re too tired to cook.
Step-by-step instructions for 5 alarm chili kit recipe
Here’s how to transform your basic kit into a restaurant-worthy chili with bold smoky depth.
Brown the Ground Beef for Maximum Flavor
Heat a large Dutch oven or heavy pot over medium-high heat. Add the 0.5 lb ground beef and break it apart with a wooden spoon, using your fingers to crumble it into small, even pieces. You want these to be about the size of a pea for even cooking.
Cook the beef undisturbed for 3-4 minutes until it loses its raw color and begins to brown. This isn’t just about cooking—it’s about developing deep, meaty flavors through the Maillard reaction. Once browned, break up any large pieces and continue cooking for another 2-3 minutes until the beef is fully cooked through. You’ll know it’s ready when it releases easily from the bottom of the pan.
Build the Flavor Base with Aromatics
Reduce heat to medium and add the 2 tbsp tomato paste, stirring to coat the beef evenly. Let it cook for 1 minute until the raw tomato smell disappears and it begins to darken slightly. This step creates a rich foundation for your chili.
Next, add all the spices: 1 tsp smoked paprika, 0.5 tsp ground cumin, 0.5 tsp garlic powder, 0.5 tsp onion powder, 0.5 tsp salt, and 0.25 tsp black pepper. Stir vigorously for 30 seconds to toast the spices and release their aromas. You’ll smell that wonderful smoky, earthy depth developing—this is where the magic happens.
Combine with Chili Kit and Simmer
Pour in the contents of the 1 box 5 Alarm Chili Kit and stir to combine with the beef and spices. Add the 1 cup chicken broth and scrape up any browned bits from the bottom of the pot—these contain concentrated flavor. Bring the mixture to a gentle boil over medium-high heat, then immediately reduce heat to low.
Let the chili simmer uncovered for 25-30 minutes, stirring occasionally. You’re looking for the flavors to meld together and the chili to thicken slightly. The perfect consistency should be thick enough to coat the back of a spoon but still have a spoonful slide off easily. Taste and adjust seasoning if needed—you might want to add a pinch more salt or a dash of the 1 tbsp dark brown sugar to balance any heat.
Finish and Serve with Toppings
Once the chili reaches your desired consistency and flavor, remove it from heat. Stir in the 1 tbsp dark brown sugar to help balance any heat and add depth. Let it sit covered for 5 minutes to thicken further.
Ladle the chili into bowls and top with 0.5 cup shredded sharp cheddar cheese and 0.25 cup sour cream. Garnish with 0.25 cup fresh cilantro just before serving. The cheese will melt slightly from the heat, adding a creamy contrast to the smoky chili, while the sour cream cools the palate. The fresh cilantro adds a bright, herby finish that cuts through the richness.
Pro Tips For Making 5 Alarm Chili Kit
- CRISP THE BEAN MIX: Brown the ground beef first, then stir in the chili kit’s bean mix before adding any liquid. This lets the spices cling to the meat, so you’re not just boiling dry seasoning—it actually sticks. (Yes, the instructions might not say this, but trust me.)
- SALT THE BROTH: The chicken broth is where flavor hides. Taste it before pouring—if it’s bland, add ½ teaspoon salt per cup. The chili kit’s spices can’t fix watery broth, and you’ll end up chasing flavor later.
- STIR THE PASTE: When you add the tomato paste, don’t just dump it in and walk away. Scrape the bottom of the pot every 30 seconds for the first 5 minutes—this prevents burning and ensures the paste melts smoothly. Burnt paste = bitter chili.
- SMOKE IT LATER: Save the smoked paprika for the last 10 minutes of simmering. Sprinkle it in, stir, then let it bloom while the chili reduces. Adding it early just makes it disappear into the mix. (I learned this after tasting a chili that smelled like a campfire but tasted like nothing.)
Regional styles of these flavors
Texas-Style Bold
In Texas, chili is all about beef-forward boldness—this means doubling the ground beef to 1 lb total and adding 1 diced onion and 2 minced garlic cloves to the browned beef.
Use 1 tbsp chili powder instead of smoked paprika for that signature Texas heat. Serve with white rice and a side of cornbread for the full experience. 🌶️
Carolina Smoky Heat
South Carolina takes chili with a vinegar kick—add 1 tbsp apple cider vinegar and ½ tsp cayenne pepper to the simmering chili. Top with pickled jalapeños and crumbled feta cheese for a tangy, spicy twist. The vinegar brightens the smoky flavors while keeping the heat manageable. 🔥
Midwest Hearty Classic
The Midwest version leans into comfort food—swap the smoked paprika for 1 tsp regular paprika and add 1 diced bell pepper to the beef. Stir in ½ cup tomato sauce at the end for extra richness.
Serve with crusty bread or buttered crackers for dipping. This chili is all about warmth and heartiness. 🥖
Southwest Spiced Fusion
For a Southwest flair, add ½ tsp ground coriander and ½ tsp oregano to the spices. Stir in ½ cup diced tomatoes with the broth, and finish with chopped avocado and lime wedges. The acidity from the lime cuts through the smokiness beautifully. 🌵
New England Creamy Twist
New England chili is creamier and milder—reduce the smoked paprika to ½ tsp and add ½ cup heavy cream at the end of simmering. Top with crumbled bacon and green onions for a smoky, savory finish. This version is perfect for cooler weather. ❄️
Nutrition facts
Frequently asked questions
Can I use a different type of meat in this chili?
For a lighter version, swap the beef for ground turkey or lentils—just add an extra 0.5 tsp cumin to boost flavor. If you prefer pork, use Italian sausage instead of beef for a smoky twist. Always brown the meat thoroughly to develop deep flavors.
How do I make this chili less spicy?
Start by reducing the smoked paprika to ½ tsp and omit cayenne if your kit includes it. Add 1 extra tbsp brown sugar or 1 tsp honey to balance heat. For a milder finish, stir in ¼ cup sour cream at the end. Taste as you go!
Can I prepare this chili in a slow cooker?
Yes! Brown the beef first, then transfer everything to the slow cooker. Cook on low for 6-8 hours or high for 3-4 hours. The slow cooker enhances flavors but may need extra broth if it gets too thick. Stir occasionally for even cooking.
What’s the best way to reheat leftovers?
Reheat gently on the stove over low heat for 5-10 minutes, stirring often. Avoid microwaving—it can make the chili rubbery. For best texture, add 1-2 tbsp broth or water while reheating. Never add toppings until serving.
Why does my chili taste metallic?
Metal taste usually means the pot reacted with acidic ingredients. Use stainless steel or enamel-coated pots. If using aluminum, avoid cooking acidic foods (like tomatoes) for long periods. For immediate fixes, stir in a pinch of sugar or a splash of lemon juice to neutralize the flavor.

- 3lb Prime Rib Roast Recipe: Juicy Pink Center Guaranteed in 3 Hours - October 31, 2026
- 5 Spice Cake Recipe: Warmly Spiced Layers With Crunchy Top - October 31, 2026
- 1950’s Macaroni and Cheese Recipe: Nostalgic Creamy Cheese Sauce with Buttery Noodles - October 31, 2026