
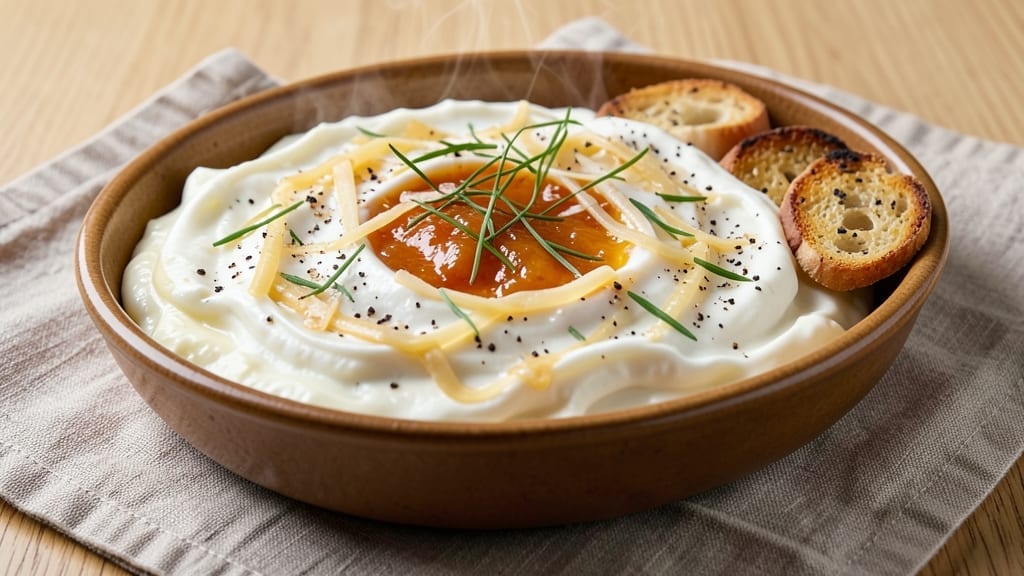
A 5 cheese dip recipe that delivers melt-in-your-mouth stretchiness and rich, savory flavor in just 15 minutes—this is the kind of dip that disappears faster than you can say “super bowl.”
The secret lies in balancing creamy bases (sour cream and cream cheese) with a perfect blend of cheeses that melt smoothly without turning greasy, while optional garlic and herbs add depth without overpowering.
Every bite delivers that satisfying pull-apart texture and bold cheesy goodness that makes it impossible to stop dipping.
What sets this recipe apart is the foolproof technique for achieving that signature stretchy consistency—no lumps, no separation, just velvety smoothness that clings to every chip or veggie.
The cheese blend includes sharp cheddar for tang, mozzarella for melt, and a touch of parmesan for umami depth, all gently warmed to create a dip that’s creamy at room temperature but still melty when served warm.
It’s the kind of recipe that feels indulgent yet comes together with simple pantry staples and just a few minutes of hands-on time.
By the time you’re done, you’ll have a restaurant-quality dip that’s perfect for game day, parties, or even a casual weeknight snack. The aroma alone—warm, cheesy, with a hint of garlic—will have everyone gathering around, and the texture?
Pure satisfaction with every pull. This isn’t just a dip; it’s a crowd-pleaser that transforms any gathering into a cheesy celebration.
Serve it warm with tortilla chips for maximum stretchiness, or let it cool slightly for a smoother, creamier consistency that’s perfect for dipping veggies or pretzels.
The beauty of this recipe is its versatility—it’s ready in 15 minutes, keeps well in the fridge for up to 5 days, and can be customized with add-ins like jalapeños or green onions. Let’s make this dip!
Ingredients for 5 cheese dip
These cheeses and creamy bases create the ultimate melty, stretchy dip experience.
| Ingredient | Amount | Notes |
|---|---|---|
| Sharp White Cheddar Cheese 🧀 | 4 oz | Block cheese preferred for best melt |
| Mozzarella Cheese 🧀 | 4 oz | Fresh mozzarella for authentic stretch |
| Parmesan Cheese 🧀 | 2 oz | Freshly grated for umami depth |
| Monterey Jack Cheese 🧀 | 2 oz | Mild and creamy texture |
| Gouda Cheese 🧀 | 2 oz | Smoked or regular for extra flavor |
| Heavy Whipping Cream 🥛 | ½ cup | Full-fat for rich consistency |
| Sour Cream 🥛 | ½ cup | Full-fat version recommended |
| Garlic Cloves 🧄 | 2 cloves | Minced for subtle garlic punch |
| Fresh Basil Leaves 🌿 | ¼ cup | Chopped for fresh herb brightness |
| Extra-Virgin Olive Oil 🫒 | 1 tbsp | For smooth texture and richness |
| Salt 🧂 | ½ tsp | Kosher salt for seasoning |
| Black Pepper 🌶️ | ¼ tsp | Freshly ground for best flavor |
The cheese blend is everything—sharp cheddar for tang, mozzarella for stretch, and Parmesan for depth. Grab block cheese from the deli counter (pre-shredded gets gummy) and fresh mozzarella if you can find it—it melts like a dream. Monterey Jack adds creaminess, while Gouda brings a smoky touch. I always buy my cheeses from Whole Foods or Trader Joe’s for the best quality, but the regular grocery store stuff works too. Pro tip: if you can’t find fresh mozzarella, low-moisture mozzarella from a block shreds perfectly and melts smoothly. Just don’t use the pre-shredded kind—it’s a game-changer!
No sharp cheddar? Pepper jack works in a pinch. Fresh mozzarella unavailable? Fontina cheese melts beautifully too. The garlic cloves can be roasted first for extra depth (just toss them in olive oil and toast for 5 minutes). Dried basil at half the amount works if fresh isn’t an option. For a smoky twist, swap regular Gouda for smoked Gouda—it’s a crowd-pleaser. The olive oil is key here—don’t skimp on quality. Trader Joe’s has a great affordable option, or grab whatever you’d drizzle on bread. And if you’re feeling fancy, add a pinch of red pepper flakes for a little heat kick!
This dip is best made fresh but reheats beautifully—just pop it in the microwave for 30 seconds. Keeps 4-5 days in the fridge, covered tightly. For parties, make it 2 hours ahead—the flavors meld even better. Portion into small ramekins for easy serving, and store any leftovers in an airtight container. The aroma alone will have everyone gathering around, and the texture? Pure satisfaction with every pull. Freezes for up to 3 months if you want to make it ahead for game day!
Why You’ll Love This Recipe
- No Fuss, Big Payoff: I swear by this one—just shred five cheeses, melt them together, and boom. No measuring cups, no fancy techniques, just dump-and-bake simplicity. The sharp cheddar and smoky gouda do all the heavy lifting while I’m still deciding what to dip.
- Layered Magic: That first bite? Creamy gouda melting into crispy cheddar edges with a salty parm finish—it’s like a cheese party in your mouth. Honestly, I’ve tried dips that promised “five cheeses” but tasted like a sad block of one. This one? Every shred counts.
- Party on a Plate: Game day, movie night, or just because—this dip never lets me down. I keep a batch in the fridge for when friends drop by unexpectedly. (Yes, even on a Tuesday night.) Toss it with tortilla chips, pretzels, or fresh veggies—it’s the crowd-pleaser I didn’t know I needed.
- Cheese Stretch: Between us, this recipe is my budget hack. Five dollars of cheese stretches to feed four people, and leftovers? They’re just as good reheated the next day. I’ll be real: I’ve eaten cold dip straight from the fridge, and no one judged me. (They should’ve—they’d understand.)
Step-by-step instructions for 5 cheese dip
Here’s how to create the ultimate melty, stretchy cheese dip that’ll disappear faster than you can say “extra chips.”
Melt the Cheese Base
In a medium saucepan, combine the 4 oz sharp white cheddar cheese, 4 oz mozzarella cheese, 2 oz monterey jack cheese, and 2 oz gouda cheese. Cut each cheese into small cubes for even melting. Add the 0.5 cup heavy whipping cream and 0.5 cup sour cream to the pan.
Place the saucepan over medium-low heat and stir constantly with a silicone spatula. You’re aiming for a smooth, creamy consistency—not a cheese volcano. When the mixture reaches 160°F, remove it from heat. This temperature ensures the cheese melts completely without separating. The dip should look glossy and velvety, with no visible cheese chunks.
Season and Add Aromatics
Transfer the melted cheese mixture to a heatproof bowl. Stir in the 2 oz freshly grated parmesan cheese, 0.5 tsp salt, and 0.25 tsp freshly ground black pepper. The parmesan adds that essential umami depth that makes this dip truly exceptional.
In a small skillet, heat the 1 tbsp extra-virgin olive oil over low heat. Add the 2 minced garlic cloves and sauté for 30 seconds until fragrant but not browned. Immediately stir this garlic oil into the cheese mixture. The subtle garlic punch will elevate every bite without overpowering the cheeses.
Finish with Fresh Herbs
Gently fold in the 0.25 cup chopped fresh basil leaves using a rubber spatula. The basil adds a bright, fresh contrast to the rich cheeses. Be careful not to overmix—just enough to distribute the herbs evenly throughout the dip.
For the perfect texture, cover the bowl with plastic wrap and let the dip rest for 5 minutes. This brief resting period allows all the flavors to meld together while maintaining that creamy, stretchy consistency we’re after. The dip should look smooth and inviting, with a glossy sheen from the olive oil and cream.
Serve Warm and Stretchy
Transfer the dip to a serving bowl or small casserole dish. For that signature restaurant-style presentation, sprinkle an additional 1 tablespoon freshly grated parmesan cheese on top. Serve immediately with warm tortilla chips, crusty bread, or fresh vegetables.
Here’s the secret to success: keep the dip warm in a slow cooker set to 150°F if serving for more than 30 minutes. This maintains that perfect melty, stretchy texture everyone loves. Each bite should deliver that magical combination of creamy, cheesy goodness with a subtle garlic and basil brightness that makes this dip unforgettable.
Pro Tips For Making 5 Cheese Dip
- Grate the Gouda: Skip the block cheese—Gouda melts better when freshly grated, especially the aged kind. I used to toss in pre-shredded, and the dip always ended up grainy. A box grater takes 30 seconds and makes a real difference.
- Low and Slow Wins: Start the dip on medium-low heat and stir constantly for the first 5 minutes. After burning three batches, I finally figured out that rushing the melt turns the Monterey Jack rubbery. Let it bubble gently—no one’s in a hurry here.
- Skip the Pre-Shredded: Pre-shredded cheeses have anti-caking agents that make your dip clump like a sad fondue. Sharp White Cheddar and mozzarella especially hate this—grate them yourself. It’s a pain, but the texture is worth it.
- Stir in the Parmesan Last: Add the Parmesan when the other cheeses are just about to set—about 2 minutes before you pull it off the heat. It burns faster than the rest, and you want those nutty notes to shine, not turn bitter. (Yes, I learned this after a very sad party.)
Essential equipment for 5 cheese dip
Heatproof Mixing Bowl
You’ll need a heatproof glass or ceramic bowl (like a Pyrex mixing bowl or CorningWare) to transfer your melted cheese mixture. These materials handle heat well and won’t crack under sudden temperature changes.
I use a 4-cup Pyrex bowl—it’s sturdy, affordable, and comes in handy for other recipes too. Avoid plastic bowls, as they can warp or melt when exposed to hot cheese. 🔥
Silicone Spatula
A flexible silicone spatula (like the OXO Good Grips silicone spatula) is essential for stirring your cheese mixture smoothly without scratching your bowl. The heat resistance makes it perfect for scraping every last bit of melted cheese from the saucepan.
I keep one in my kitchen specifically for cheese dishes—it’s a game-changer for avoiding lumps and ensuring even melting. Don’t use metal utensils, as they can cause the cheese to separate or stick.
Medium Saucepan
Choose a medium-sized saucepan with a heavy-bottom (like All-Clad or Calphalon) to distribute heat evenly and prevent hot spots that can cause cheese to burn. A 3-quart saucepan is ideal for this recipe—it gives enough room to stir without overflowing.
If you don’t have a heavy-bottomed pan, a stainless steel saucepan works well too. Avoid thin, lightweight pans that heat unevenly.
Small Skillet
A small skillet (like a 10-inch cast iron skillet or non-stick frying pan) is perfect for sautéing the garlic in olive oil. Cast iron retains heat well, but a non-stick skillet makes cleanup easier.
I use a Lodge cast iron skillet for its durability and even heat distribution. Keep the heat low to prevent burning the garlic—you just want it fragrant, not browned.
Slow Cooker
For keeping your dip warm during parties or gatherings, a slow cooker (like a Hamilton Beach or Crock-Pot) is your best friend. Set it to 150°F to maintain that perfect melty, stretchy texture without overcooking.
If you don’t have a slow cooker, a double boiler or even a heatproof serving dish placed in a warm oven (set to 170°F) works in a pinch. Just avoid high heat—it can cause the dip to separate or become grainy.
Plastic Wrap
Cover your bowl with plastic wrap (pressed directly onto the surface) to create a seal while the dip rests. This prevents a skin from forming and helps the flavors meld. I like to use Saran Wrap because it clings tightly, but any brand works.
Press the wrap gently against the dip to eliminate air pockets—this ensures a smooth, glossy finish when you’re ready to serve. 💫
Nutrition facts
Frequently asked questions
Can I make this 5 cheese dip without dairy?
This recipe relies on dairy for its signature creamy, melty texture, but you can create a dairy-free version using cashew cream (soaked cashews blended with water) and vegan cheese alternatives like Miyoko’s or Violife. The stretchiness won’t be identical, but you’ll still get rich, cheesy flavor. For best results, use a mix of vegan mozzarella and sharp cheddar alternatives to mimic the melt.
Why did my cheese dip turn grainy or separate?
This usually happens from overheating or using pre-shredded cheese (which contains anti-caking agents). Always melt cheeses over medium-low heat and never exceed 160°F. For pre-shredded cheese, remove any visible anti-caking agents by hand before melting. If it separates, whisk in 1 tablespoon cold water or heavy cream to restore smoothness.
How do I make this dip extra spicy?
Add ½ teaspoon cayenne pepper or 1 tablespoon hot sauce (like Cholula) to the melted cheese base. For visible heat, stir in 1-2 chopped jalapeños (seeds removed for mild heat). For a smoky kick, swap ½ of the Gouda for smoked Gouda. Always taste as you go—you can adjust the heat level to preference.
Can I make this dip ahead of time?
Prepare it up to 2 days ahead and store in an airtight container in the fridge. Reheat gently in a saucepan over low heat or microwave in 30-second intervals, stirring between each, until warm. For parties, make it 1-2 hours ahead and keep warm in a slow cooker on 150°F—this lets flavors meld beautifully.
What’s the best way to serve this dip?
Serve it warm with tortilla chips for maximum stretchiness, or let it cool slightly for a smoother consistency perfect with pretzels, veggies, or crusty bread. For a restaurant-style presentation, transfer to a ramekin or small casserole dish and garnish with extra chopped basil or black pepper. Pro tip: Warm the chips in the oven for 5 minutes at 350°F to prevent sogginess.

- 3lb Prime Rib Roast Recipe: Juicy Pink Center Guaranteed in 3 Hours - October 31, 2026
- 5 Spice Cake Recipe: Warmly Spiced Layers With Crunchy Top - October 31, 2026
- 1950’s Macaroni and Cheese Recipe: Nostalgic Creamy Cheese Sauce with Buttery Noodles - October 31, 2026