
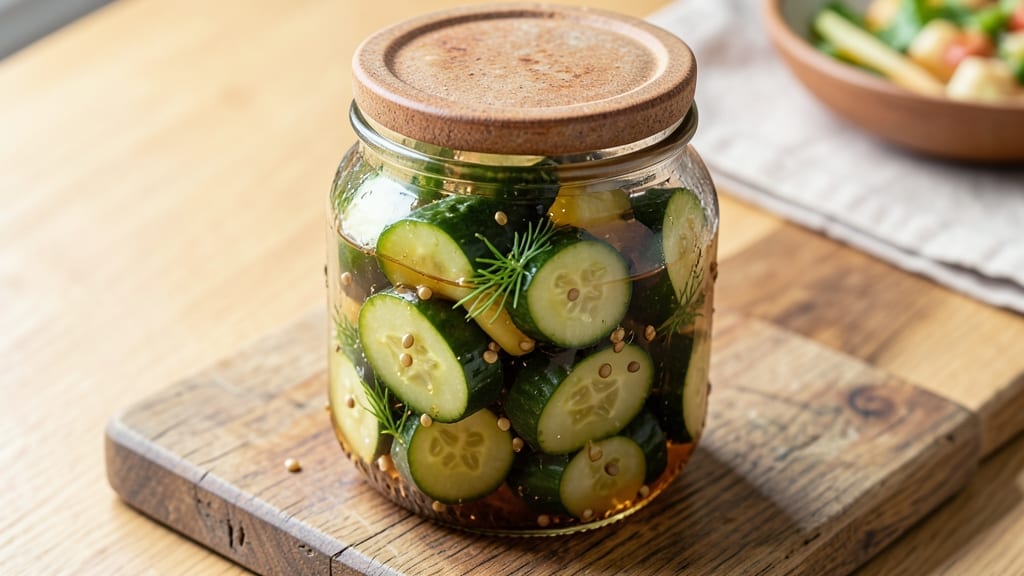
A 5-day sweet pickle recipe transforms simple cucumbers into addictively crunchy, fermented treats that balance tangy brightness with subtle sweetness. The magic happens through precise fermentation—where natural sugars develop while beneficial bacteria create that signature tang.
This isn’t just pickling; it’s a science of patience and balance, where every variable matters from brine ratio to temperature control.
What sets this method apart is the 5-day timeline, carefully calibrated to develop flavor without over-fermenting. You’ll need just 5 ingredients—cucumbers, water, salt, sugar, and a pinch of spice—to create pickles with restaurant-quality crunch and depth.
The process is beginner-friendly but demands attention to detail, particularly when monitoring acidity levels for safety.
By day 5, your cucumbers will have transformed into crisp, golden-edged pickles with a complex flavor profile—bright from fermentation, sweet from the sugar, and just slightly tangy. These aren’t your grandmother’s dill pickles; they’re a sophisticated ferment that elevates sandwiches, charcuterie boards, or even cocktails.
The best part? They keep improving in flavor over weeks of refrigerated storage.
This recipe includes critical safety notes about proper fermentation containers and acidity testing, ensuring your pickles are both delicious and safe. Whether you’re a fermentation newbie or seasoned pro, the step-by-step instructions will guide you through each phase—from initial brine preparation to the final flavor test.
Let’s get started on your first batch of crunchy, fermented sweet pickles.
Ingredients for 5 day sweet pickle
Five simple ingredients transform cucumbers into restaurant-worthy fermented sweet pickles in just five days.
| Ingredient | Amount | Notes |
|---|---|---|
| Fresh Kirby Cucumbers 🥒 | 2 lb | Thin-skinned for crisp texture |
| Non-Iodized Sea Salt 🧂 | ½ cup | Diamond Crystal preferred |
| Granulated White Sugar 🍚 | ¼ cup | Fine grain for even dissolving |
| Filtered Water 💧 | 4 cups | Chlorine-free for fermentation |
| Mustard Seeds 🌶️ | 1 tsp | Whole, for subtle peppery bite |
| Fresh Dill Sprigs 🌿 | ¼ cup | Optional, for aromatic depth |
| White Vinegar 🍶 | 1 tbsp | For final acidity boost |
| Food-Grade Fermentation Weight 🥫 | 1 piece | Or clean glass jar lid |
The cucumbers are the foundation—Kirby or Persian varieties work best with their thin skins and crisp texture. Grab them from the produce section at Whole Foods or your local farmers’ market for the freshest pick. Look for cucumbers that are firm but not rock-hard, with vibrant green skin—avoid any with soft spots or yellowing. The non-iodized sea salt is critical; iodized salt can inhibit fermentation. Diamond Crystal kosher salt is my go-to because it dissolves perfectly and won’t leave grit. If you’re using store-bought cucumbers, give them a quick rinse to remove any wax coating before slicing. For the sugar, granulated white sugar works perfectly, but you could also use turbinado or raw cane sugar for a slightly deeper flavor profile.
No mustard seeds? A pinch of black peppercorns or a few crushed red pepper flakes will add a similar kick. Skip the dill if you prefer a cleaner flavor profile—it’s completely optional but adds a lovely aromatic touch. The white vinegar is only added at the very end to ensure proper acidity levels for safety, so don’t worry about it affecting the fermentation process. For the water, filtered or spring water is ideal, but tap water will work in a pinch as long as it’s not heavily chlorinated. If you’re concerned about chlorine, let it sit out overnight before using. The fermentation weight keeps the cucumbers submerged—if you don’t have one, a clean glass jar lid or even a small plate works perfectly.
These pickles keep improving in flavor for weeks when stored properly. Once opened, transfer them to an airtight container and keep them refrigerated—they’ll stay crisp and delicious for up to 3 months. The brine actually gets better over time, so don’t hesitate to make extra. For long-term storage beyond a month, you can freeze the pickles in brine for up to 6 months. Just remember to thaw them in the refrigerator before eating. The golden edges develop best when you let them sit at room temperature for 10-15 minutes before serving—this enhances their natural sweetness and crunch.
Why You’ll Love This Recipe
- No-Fuss Setup: I swear by this method—just cucumbers, salt, and sugar. No fancy tools, no peeling, no stressing over measurements. Toss them in a jar, weigh them down, and let time do the work. That’s it.
- Sweet-Tangy Magic: The mustard seeds add this pop of heat that balances the sugar’s sweetness. After five days, you get that perfect crunch with a syrup so rich it coats every bite. Honestly, I reach for these before even opening the fridge.
- Meal Prep MVP: Batch these for sandwiches, charcuterie boards, or just snacking straight from the jar. They keep for weeks, so I make a big batch and forget about it—until I remember how good they taste. (Yes, even on a Tuesday night.)
- Penny-Smart Pantry: Five ingredients, all cheap and shelf-stable. No specialty items, no waste—just pure, reliable flavor. I’ve made this for years, and it’s never let me down. Budget-friendly? Absolutely. Worth it? Always.
Step-by-step instructions for 5 day sweet pickles
Here’s how to craft perfectly crunchy, sweet fermented pickles with just a week of patience.
Prepare and Pack the Cucumbers
Start by rinsing the 2 lb Fresh Kirby Cucumbers thoroughly under cold water to remove any dirt or wax. I like to trim off the very top and bottom of each cucumber—this prevents them from turning mushy during fermentation. Using a sharp knife, slice the cucumbers into ½-inch thick rounds or leave them whole if you prefer longer spears.
Pack the cucumbers tightly into a clean, wide-mouth quart-sized mason jar, leaving about 1 inch of headspace at the top. The cucumbers should be submerged in brine as you work, so don’t overfill. If you’re using the 0.25 cup Fresh Dill Sprigs, gently weave them between the cucumbers for even distribution. This step ensures maximum flavor infusion and prevents mold growth.
Create the Brine Solution
In a separate bowl, dissolve the 0.5 cup Non-Iodized Sea Salt and 0.25 cup Granulated White Sugar completely into the 4 cups Filtered Water. I use a wooden spoon to stir until no crystals remain—this ensures even distribution in the jar. The sugar will dissolve more slowly than the salt, so give it a good 2 minutes of stirring.
Once fully dissolved, pour the brine over the cucumbers in the jar until they’re completely covered. The liquid should reach at least 1 inch above the top cucumber. If needed, add a bit more filtered water to reach this level. The 1 tsp Mustard Seeds can be sprinkled on top now—they’ll add a subtle peppery bite as they ferment. Seal the jar loosely with the lid (don’t tighten completely) to allow gases to escape.
Add the Weight and Ferment
Place the food-grade fermentation weight on top of the cucumbers to keep them submerged. This prevents mold growth and ensures even fermentation. If you don’t have a fermentation weight, use a clean glass jar lid or even a small plate that fits inside the jar. The weight should press down gently but not crush the cucumbers.
Store the jar at room temperature, away from direct sunlight. Let it ferment for 5 days, checking daily to ensure the cucumbers remain fully submerged. You’ll see bubbles forming in the brine—this is normal and indicates active fermentation. After 3 days, you can taste a cucumber to check for sweetness. If it’s to your liking, you can remove it from the brine and store it in the refrigerator.
Finish with Vinegar and Store
After 5 days, remove the jar from fermentation and pour in the 1 tbsp White Vinegar. This step adds a final tangy brightness and helps preserve the pickles. Stir gently to mix the vinegar into the brine, then seal the jar tightly. The pickles are now ready to enjoy immediately or store in the refrigerator for up to 3 months.
The vinegar also helps balance the flavors, giving you that perfect sweet-and-tangy profile. For best results, let the pickles sit in the fridge for at least 24 hours before eating—this allows the flavors to meld completely. Serve them chilled alongside sandwiches, charcuterie boards, or enjoy them straight from the jar as a refreshing snack.
Pro Tips For Making 5 Day Sweet Pickle
- CHOP CUCUMBERS CLEANLY: Use a sharp chef’s knife and cut the Kirby cucumbers into even 1/4-inch slices—no thicker, no thinner. Thick slices stay crunchy but take forever to pickle; thin ones get mushy. I learned this the hard way after a batch turned into sad, limp cucumber soup.
- WEIGH THE SALT: Measure the non-iodized sea salt by weight (about 1.5 oz per quart of water) instead of volume. Spooning it straight from the jar means you’ll either undersalt (and get bland pickles) or oversalt (and ruin the whole batch). A kitchen scale makes this foolproof—trust me, your taste buds will notice.
- DON’T RUSH THE BRINE: Let the salt and sugar fully dissolve in the filtered water for at least 10 minutes before adding the cucumbers. Stirring in the mustard seeds right away just muddies the brine. Wait, then add everything at once—this guarantees even flavor and no floating seeds.
- COVER THE JAR TIGHT: Press the cucumbers down into the jar until they’re submerged, then seal the lid firmly—no loose lids, no half-hearted twists. Air exposure speeds up fermentation and dulls the crunch. I’ve seen jars pop open after 48 hours; don’t be that person. Use a rubber band to secure the lid if needed.
Regional styles of these flavors
Southern Sweet Style
In the American South, these pickles take on a sweeter profile with a touch of heat. I like adding ½ tsp cayenne pepper to the brine along with 2 tbsp blackstrap molasses for a deeper caramel note.
The molasses adds complexity that pairs beautifully with smoked meats—perfect for sandwiches or BBQ platters. Southern cooks often use whole cloves instead of mustard seeds for a floral warmth, and I’ve found 2-3 cloves work beautifully. 🌶️
German Sauerkraut-Inspired
German-style fermented cucumbers focus on crisp texture and subtle tang without sweetness. Skip the sugar entirely and use only ¼ cup salt in 4 cups water for a sharper brine. Add 1 tbsp caraway seeds and ½ tsp coriander seeds for an aromatic depth.
These pickles develop a lighter golden hue and pair wonderfully with sausages or pretzels. The fermentation time stays at 5 days, but the flavor profile shifts dramatically toward tartness.
Japanese Sunomono Twist
For a Japanese-inspired variation, use ½-inch thick cucumber rounds with 1 tbsp rice vinegar added to the initial brine instead of white vinegar. Add 1 tsp grated fresh ginger and 1 tsp toasted sesame seeds for umami depth.
After fermentation, toss the pickles with 1 tbsp soy sauce and 1 tsp honey before serving. These pickles have a refreshing, slightly sweet crunch perfect for sushi rolls or as a palate cleanser. 🥒
Mexican Escabeche Style
Mexican escabeche pickles blend fermentation with a vinegar bath for instant tang. After the 5-day fermentation, drain the cucumbers and combine ½ cup white vinegar, 1 tsp oregano, 1 tsp garlic powder, and ½ tsp chili powder in a saucepan.
Simmer for 2 minutes, then pour over the pickles. Let them marinate for 1 hour before serving. These pickles have a bright, spicy kick that’s ideal for tacos or ceviche.
Scandinavian Light Brine
Scandinavian fermented pickles use a lighter brine with only ¼ cup salt and 1 tbsp sugar in 4 cups water. Add 1 sprig fresh dill and 2-3 juniper berries for a piney aroma.
These pickles develop a delicate, herbal flavor with minimal sweetness, perfect for pairing with smoked fish or open-faced sandwiches. The fermentation time can extend to 7 days for deeper flavor development.
Italian Agresto Style
Italian agresto pickles combine fermentation with a citrusy finish. After 5 days, remove the cucumbers and mix ½ cup white wine vinegar, 1 tbsp honey, and zest of 1 lemon in a saucepan. Simmer for 1 minute, then pour over the pickles.
Add 2 tbsp chopped fresh basil and let them marinate for 4 hours. These pickles have a bright, citrusy tang that’s fantastic with antipasto platters or grilled meats.
Nutrition facts
Frequently asked questions
Why do I need to use non-iodized salt for fermented pickles?
Iodized salt contains iodine, which can inhibit the fermentation process and create an unbalanced flavor. Non-iodized sea salt dissolves evenly and allows the beneficial bacteria to thrive, ensuring proper fermentation and a clean, crisp texture in your pickles.
Can I use regular table salt instead of sea salt?
Technically yes, but it’s not ideal. Table salt contains anti-caking agents that can interfere with fermentation. If you must use it, opt for fine sea salt or kosher salt with no additives. Measure carefully—table salt is denser, so you may need slightly more volume to match the 0.5 cup requirement.
What happens if my cucumbers float during fermentation?
Floating cucumbers expose them to air, which can lead to mold or uneven fermentation. Use a fermentation weight or a clean plate to keep them submerged at all times. If you notice any gray fuzz (mold), remove the affected cucumbers immediately and discard them—they won’t be safe to eat.
How do I know when the pickles are ready at 5 days?
Your pickles should be crisp with slight golden edges and a tangy-sweet flavor. Taste one after 3 days—if it’s too bland, let it ferment another 2 days. The brine should smell pleasantly tangy (like yogurt or sauerkraut), not sour or putrid. If it smells off, discard the batch immediately.
Can I make these pickles without vinegar?
While not traditional, you can omit the vinegar if you prefer. However, adding 1 tbsp white vinegar after 5 days helps preserve the pickles longer and enhances their tang. Without it, they’ll still ferment but may soften faster. For safety, always ensure your pickles reach a pH below 4.6 (test with pH strips).

- 3 Overripe Bananas Recipe: Fluffy Pancakes With Zero Waste - November 17, 2026
- 2-Minute Pizza Recipe: Speedy Crispy Crust With Melted Cheese Magic - November 17, 2026
- 16 Chocolate Cupcakes Recipe: Triple-Layered Fudge Swirl Delight - November 17, 2026