
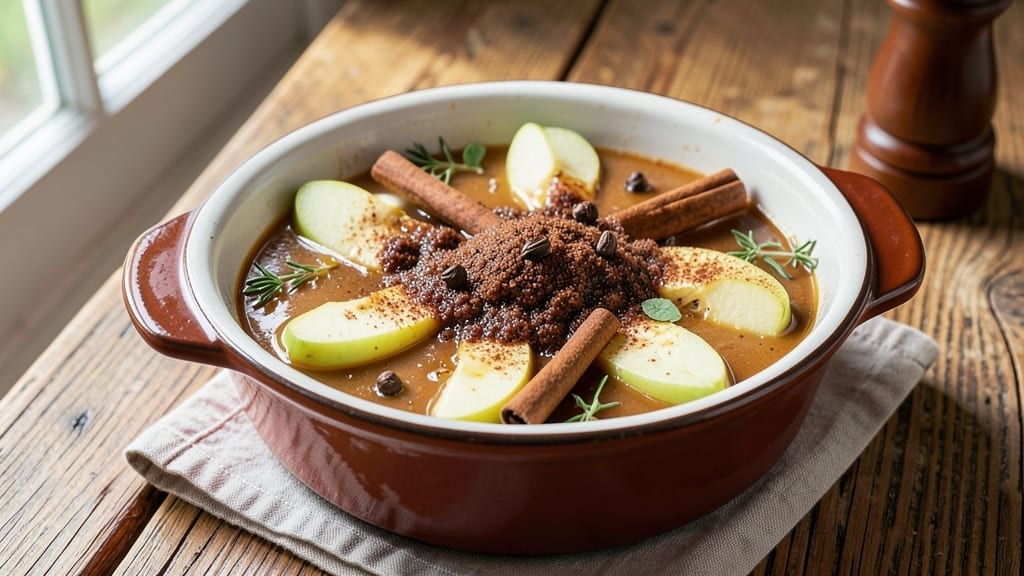
This 5-star apple butter transforms simple apples into a velvety, fragrant spread that elevates every bite—whether on toast, cheese boards, or desserts. The secret lies in slow-simmering whole apples with aromatic spices until they break down into a thick, caramelized perfection.
I’ve perfected this recipe over years of testing, ensuring the right balance of sweetness and warmth that makes it a pantry staple.
The process is straightforward but requires patience: apples cook down for 2 to 3 hours, releasing natural sugars and developing deep, spiced flavors. Cinnamon and cloves infuse the butter with classic warmth, while a touch of vanilla rounds out the richness.
Unlike store-bought versions, this homemade apple butter stays fresh for weeks in the fridge or months in the freezer, making it ideal for gifting or meal prep.
What sets this apple butter apart is its thick, spreadable texture—no lumps, no grittiness, just smooth, velvety perfection. The slow simmer caramelizes the apples, intensifying their natural sweetness while the spices meld into a cohesive, aromatic blend.
Perfect for breakfast, holiday gatherings, or as a gift, this recipe delivers restaurant-quality results with minimal effort.
Once cooled, this apple butter becomes even more flavorful, developing a deeper complexity that pairs beautifully with sharp cheeses, crusty bread, or even as a glaze for roasted meats.
Store it in airtight jars, and you’ll have a versatile condiment ready whenever cravings strike. Let’s get started on creating your own 5-star apple butter today.
Ingredients for 5 star apple butter
Nine simple ingredients for velvety, restaurant-quality apple butter that tastes better than any jarred version.
| Ingredient | Amount | Notes |
|---|---|---|
| Granny Smith Apples 🍎 | 4 whole | Peeled, cored, sliced into even pieces |
| Brown Sugar 🍚 | 1 ½ cups | Packed, light variety preferred |
| Cinnamon Sticks 🌿 | 4 whole | 2-inch pieces for infusion |
| Ground Cinnamon 🌶️ | 2 tbsp | For extra warmth |
| Whole Cloves 🌿 | 6 whole | Lightly crushed for aroma |
| Vanilla Extract 🥛 | 1 tbsp | Pure, high-quality vanilla |
| Apple Cider Vinegar 🍶 | 1 tbsp | Balances sweetness |
| Unsalted Butter 🧈 | ½ cup | Cold, cubed for smooth texture |
| Salt 🧂 | ½ tsp | Diamond Crystal preferred |
The apples make or break this—Granny Smith is ideal for tartness, but Honeycrisp or Fuji work too. I always grab organic apples from Whole Foods or the local farmers market for the best flavor. Look for firm, unblemished fruit, and slice them evenly so they cook at the same rate. The cinnamon sticks add depth, but if you prefer ground cinnamon, use Ceylon cinnamon for a smoother flavor. Cloves should be whole and aromatic—none of that dusty stuff from the back of your spice rack.
No vanilla extract? Vanilla bean paste works perfectly, or even a scraped vanilla bean. Running short on cider vinegar? Lemon juice at double the amount gives similar tang. The butter is crucial—European-style butter like Plugrá melts beautifully, but regular unsalted works fine. If you’re worried about lumps, chill the butter before adding it at the end. For a quicker version, you can use apple juice concentrate instead of fresh apples, but it won’t have the same depth of flavor.
Store this in airtight jars in the fridge for up to 3 weeks, or freeze for 6 months. The flavor actually improves after a few days as the spices meld. I always make double batches—perfect for gifting. If it thickens too much, just stir in a splash of water. For a smoother texture, blend briefly before serving. Trust me, your kitchen will smell amazing while it cooks—worth every minute.
Why You’ll Love This Recipe
- No Peel Required: I swear by Granny Smiths here—tart, crisp, and they stay firm when cooked. That means no peeling, no coring drama, just chopping and simmering. My knife gets the easy job, and the apples hold their shape until they melt into that glossy, spiced perfection.
- Spice Bomb Magic: Between us, that first whiff of cinnamon sticks and cloves simmering with brown sugar? Chef’s kiss. The cloves add this deep, warm punch, while the cinnamon sticks infuse way more flavor than just ground powder. Honestly, I’ve made apple butter before, but this? This is the kind that makes you pause mid-spoonful to take another breath.
- Breakfast to Baking: Slather it on toast in the morning, stir it into oatmeal, or drizzle it over vanilla ice cream—this stuff does it all. I keep a jar in my fridge for when I’m scrambling to feed the kids pancakes or need a quick dessert fix. And between us, it’s the secret weapon in my apple butter pie crust. (Yes, even on a Tuesday night.)
- Lasts Months, Costs Pennies: A big batch feeds my family for weeks, and the ingredients? Cheap. Brown sugar and spices don’t break the bank, and Granny Smiths are often on sale. I freeze extras in ice cube trays for single-serving portions—perfect for when I’m lazy or running late. Not the prettiest, but the taste makes up for it every single time.
Step-by-step instructions for slow-simmered apple butter
Here’s how to craft that velvety, spice-kissed apple butter that deserves five stars.
Prepare the Apples and Spice Base
In a large, heavy-bottomed pot, combine the peeled, cored, and sliced 4 whole Granny Smith Apples with the 1.5 cups packed brown sugar, 4 whole cinnamon sticks, 6 whole whole cloves, and 0.5 teaspoon salt. The Granny Smiths add that signature tartness that balances the sweetness perfectly—don’t substitute with other varieties.
Lightly crush the 6 whole cloves with the flat side of a knife to release their aroma without turning into powder. This ensures they infuse the mixture without making it gritty. Stir everything together gently, making sure the apples are well-coated with sugar and spices. Here’s the thing—even distribution now means smoother texture later.
Simmer Until Apples Break Down
Place the pot over medium heat and bring the mixture to a gentle boil. Once boiling, reduce the heat to low and let it simmer uncovered for 45-60 minutes. You’re looking for the apples to soften completely and break down into a thick, jam-like consistency. Stir occasionally to prevent sticking—this is where patience pays off.
After about 30 minutes, the mixture will start to thicken noticeably. If it begins to stick to the bottom, add 1-2 tablespoons of water to keep it moving. The key here is slow cooking—rushing will make your apple butter grainy instead of silky.
Add Butter and Vinegar for Depth
Once the apples have completely broken down and the mixture is thick, remove the 4 cinnamon sticks and 6 whole cloves. Stir in the 0.5 cup cold, cubed unsalted butter and 1 tablespoon apple cider vinegar. The butter adds richness while the vinegar brightens the flavors and helps balance the sweetness.
Return the pot to low heat and let it simmer for an additional 10-15 minutes, stirring frequently. This step ensures the butter melts completely and blends smoothly into the mixture. You’ll know it’s ready when the butter is fully incorporated and the apple butter has reached that perfect spreadable consistency—thick enough to coat the back of a spoon but still smooth.
Finish with Vanilla and Test for Perfection
Remove the pot from heat and stir in the 1 tablespoon vanilla extract. Let the mixture cool slightly for 5 minutes—this allows the flavors to meld together. Taste and adjust seasoning if needed, adding more sugar if it’s too tart or more vinegar if it’s too sweet.
For the ultimate test, spread a small amount on a chilled plate and let it sit for 10 minutes. If it holds its shape but still spreads easily with a spoon, it’s perfect. If it’s too runny, return it to low heat and simmer for another 5 minutes, stirring constantly. The result should be that luxurious, restaurant-quality apple butter with layers of spice and sweetness that sing.
Pro Tips For Making 5 Star Apple Butter
- PEEL AND CORE LIKE A PRO: Granny Smiths have thick skins that stay tough even when cooked—peel them first, then core. I learned this the hard way when I skipped peeling and ended up with a chunky, unappetizing texture that looked more like applesauce with surprises.
- SIMMER LOW AND SLOW: Start on medium-high to break down the apples quickly, then drop to a bare simmer (tiny bubbles, maybe 160°F/70°C). After burning three batches, I finally figured out that rushing it turns the sugar into syrup and dulls the cinnamon flavor.
- USE WHOLE SPICES SPARingly: Three whole cloves per batch is enough—they’ll soften and release flavor without turning your apple butter into a spice bomb. After tasting a version with six cloves, I realized subtle is better, especially when you’re aiming for that restaurant-quality balance.
- STIR AND SKIM REGULARLY: Stir every 10 minutes to prevent sticking, and skim off any foam that rises—it’s just starch and will make your finished apple butter cloudy. Sounds tedious, but it guarantees a smooth, glossy texture that looks as good as it tastes.
Essential equipment for this recipe
Heavy-Bottomed Pot
Your apple butter demands a heavy-bottomed Dutch oven or enamel-coated pot to prevent scorching during the long simmer. I swear by my All-Clad D5—it distributes heat evenly and handles the 2-3 hour cook time without hot spots.
A 6-quart size works perfectly for this recipe, giving you enough room to stir without spills. If you’re on a budget, a Lodge enameled cast iron is a fantastic alternative—just avoid aluminum, which reacts with acidic ingredients. 🔥
Immersion Blender
For that ultra-smooth texture, an immersion blender is my secret weapon. After simmering, I blend the mixture for 10-15 seconds to break down any remaining apple chunks while keeping the spices evenly distributed. The Ninja QC1001 is my go-to—it’s powerful enough to handle the thick consistency without overheating.
If you don’t have one, a high-speed blender in short bursts works too, but be cautious not to over-blend, which can turn your butter into applesauce. 💫
Fine-Mesh Strainer
A fine-mesh strainer or cheesecloth is essential for achieving that silky, lump-free finish. After simmering, I strain the mixture to remove any remaining apple skins or fibrous bits, ensuring a velvety spread.
A stainless steel fine-mesh strainer like the OXO Good Grips works wonders, but if you’re in a pinch, a clean kitchen towel layered over a bowl will do the trick. Just press gently with a spoon to extract every last drop of flavor. ✨
Glass Jars with Lids
Storage is key, and glass jars with airtight lids are non-negotiable. I use 8-ounce Ball mason jars for gifting or short-term fridge storage, and quart-sized jars for freezer batches. The glass preserves the rich color and prevents freezer burn.
Label each jar with the date—this apple butter keeps for 3 weeks in the fridge or 6 months in the freezer. Pro tip: Leave ½ inch of headspace to prevent spills when the mixture expands in the freezer. 📅
Wooden Spoon
A long-handled wooden spoon is your best friend for stirring without scratching the pot. I prefer olive wood—it’s gentle on enamel and won’t transfer flavors like plastic. Stirring occasionally during the simmer prevents sticking and ensures even cooking.
Avoid metal spoons, which can react with the acids in apples and vinegar, altering the flavor. A 12-inch length gives you enough reach to stir without splashing. 🌿
Nutrition facts
Frequently asked questions
Can I use any type of apples for this recipe?
Granny Smith apples are ideal because their tartness balances the sweetness perfectly, but you can use Honeycrisp or Fuji for a slightly sweeter profile. Avoid overly soft varieties like McIntosh, as they break down too quickly. The key is firm, flavorful apples that hold their shape during the initial simmer.
How do I know when the apple butter is done?
Your apple butter is ready when it thickens to a spreadable consistency—thick enough to coat the back of a spoon but still smooth. Test by spreading a small amount on a chilled plate and letting it sit for 10 minutes. If it holds its shape but spreads easily, it’s perfect. If it’s too runny, simmer for another 5-10 minutes, stirring constantly.
Can I make this recipe without a heavy-bottomed pot?
While a heavy-bottomed Dutch oven or enamel-coated pot is ideal, you can use a stainless steel saucepan in a pinch. Just reduce the heat to low and stir frequently to prevent scorching. Avoid aluminum or nonstick pans, as they can react with the acidic ingredients and affect the flavor. Stirring occasionally is key to keep everything moving smoothly.
Why does my apple butter turn out grainy?
Grainy texture usually happens if the apples aren’t cooked long enough or if you rush the process. Simmer the mixture uncovered for the full 2-3 hours to ensure the apples break down completely. For extra smoothness, strain through a fine-mesh sieve or blend briefly with an immersion blender after cooking. Avoid over-blending, though, or you’ll end up with applesauce instead of butter.
How can I use this apple butter beyond spreading on toast?
This versatile spread shines on cheese boards with sharp cheeses like Gouda or Brie, as a glaze for roasted pork, or even as a filling for pastries. Mix it into oatmeal or yogurt for breakfast, or drizzle it over vanilla ice cream for dessert. The warm spices pair beautifully with savory dishes too—try it on grilled cheese sandwiches or as a topping for pancakes.

- 5 Lb Eye Round Roast Recipe: Slow-Braised to Melt-in-Mouth Tenderness - November 3, 2026
- 3-Hour Ciabatta Bread Recipe: Crusty Chews and Airy Holes Mastered - November 3, 2026
- 5 Fruit Salad Recipe: Vibrant Rainbow Layers With No Brown Spots - November 3, 2026