
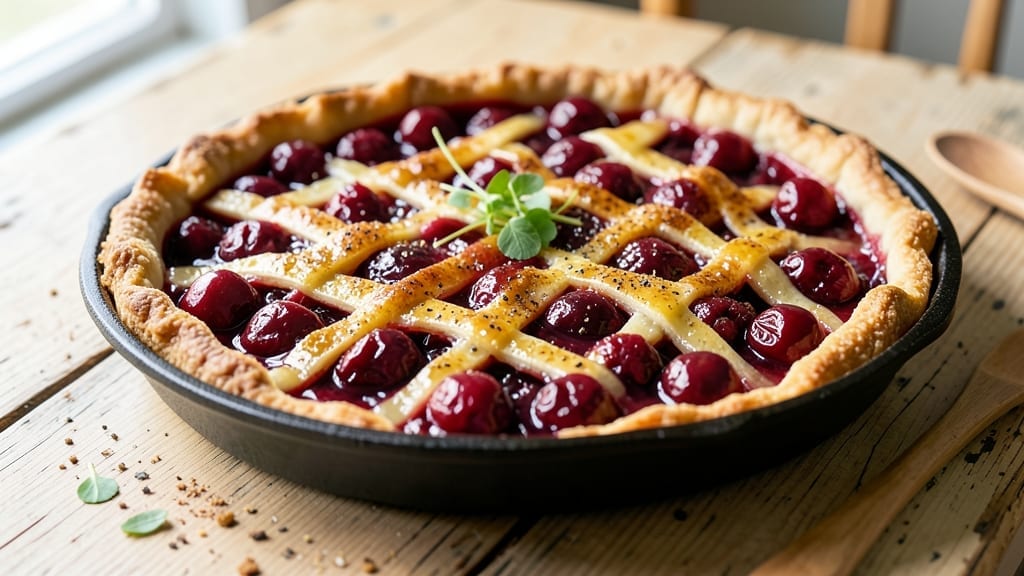
This 5-star cherry pie recipe delivers the kind of dessert that makes every slice feel like a restaurant masterpiece—deep tart filling, buttery lattice crust, and that perfect balance of sweet and tangy. 💛 The secret lies in a 30-minute simmer for the filling to develop rich flavors while the lattice crust adds visual elegance and crispy texture.
I’ve perfected this over years of baking, and it’s the recipe I bring out for special occasions when I want to impress.
The filling starts with pitted tart cherries (fresh or high-quality frozen) simmered with sugar, cornstarch, and a blend of cinnamon, nutmeg, and lemon juice for brightness. This foolproof technique ensures a thick, glossy filling that clings to the crust without being overly sweet.
Meanwhile, the lattice crust—made with layers of pie dough cut into strips—creates a stunning pattern that bakes up golden and flaky, holding its shape even after slicing.
By the time it emerges from the oven, you’ll have a pie with a deep cherry aroma, a lattice crust that’s crisp yet tender, and filling so flavorful it earns every 5-star rating.
The lattice not only looks impressive but also allows for easy serving—each slice reveals that perfect balance of juicy fruit and buttery pastry. This is the kind of pie that disappears faster than you can say “second helping.”
Serve it warm with a scoop of vanilla ice cream or whipped cream for the full experience. The lattice design makes it perfect for gatherings, and the recipe scales easily for crowds. Let’s get baking—this pie is worth every minute of effort.
Ingredients for 5 star cherry pie
These ingredients create a showstopping pie with restaurant-quality filling and golden lattice crust.
| Ingredient | Amount | Notes |
|---|---|---|
| Pitted Tart Cherries 🍒 | 4 cups | Fresh or high-quality frozen |
| Granulated Sugar 🍚 | 1 ½ cups | White or light brown |
| Cornstarch 🌾 | ¼ cup | For perfect thickening |
| Ground Cinnamon 🌿 | 1 ½ tsp | Freshly ground preferred |
| Ground Nutmeg 🌿 | ¼ tsp | Freshly grated nutmeg |
| Lemon Juice 🍋 | 2 tbsp | Freshly squeezed |
| Unsalted Butter 🧈 | 1 cup | Cold, cubed for lattice |
| All-Purpose Flour 🌾 | 3 cups | Plus 1 tbsp for dusting |
| Ice Water 💧 | ½ cup | For pie dough |
| Salt 🧂 | ½ tsp | Fine sea salt |
| Vanilla Extract 🌸 | 1 tsp | Pure vanilla preferred |
| Heavy Cream 🥛 | ½ cup | For brushing crust |
The cherries are everything—fresh or high-quality frozen makes all the difference. Trader Joe’s and CostcoEuropean-style if you can—it stays firm longer for the lattice.
No fresh cherries? Canned tart cherries (no sugar added) work in a pinch, but drain them well. Running short on cornstarch? Arrowroot powder at the same amount does the trick. The lattice crust can be made ahead—just roll it out and wrap tightly in plastic. For extra shine, brush the baked lattice with simple syrup (equal parts sugar and water, heated until dissolved). The vanilla extract can be swapped for vanilla bean paste if you’re feeling fancy—it adds little flecks of flavor magic.
The filling keeps 3 days in the fridge once cooked, but the crust is best made fresh. Store any leftover dough between parchment paper in the fridge for up to 3 days. This pie reheats beautifully—just warm slices in a 350°F oven for 5-10 minutes. For serving, I always dust with powdered sugar and add a scoop of homemade vanilla ice cream. The leftovers? They disappear just as fast as the first slices.
Why You’ll Love This Recipe
- No Pitting Stress: I grab a jar of pre-pitted cherries—no sink full of seeds, no sticky fingers. Just dump, simmer, and let that cornstarch-thickened filling do the magic while I sip coffee.
- Spice That Stays: That whisper of nutmeg and cinnamon? It lingers—warm, cozy, like a hug in every bite. The sugar caramelizes just enough to balance the tart cherries without turning sickly sweet.
- Pie for Any Moment: Weekday breakfast? Slice it cold with yogurt. Holiday dessert? Serve it warm with vanilla ice cream. Even my picky teen devours it—no questions asked.
- Leftovers That Last: One pie feeds a crowd, and the slices stay fresh for days. Freeze extras for lazy mornings, or reheat them with a sprinkle of powdered sugar. Zero waste, all flavor.
Step-by-step instructions for 5 star cherry pie
Here’s how to make a showstopping cherry pie with a perfect balance of tart filling and buttery lattice crust.
🍳 Step 1: Make the Cherry Filling
In a large saucepan, combine the 4 cups pitted tart cherries, 1.5 cups granulated sugar, 0.25 cup cornstarch, 1.5 tsp ground cinnamon, 0.25 tsp ground nutmeg, and 2 tbsp lemon juice. Stir until the sugar dissolves completely—this prevents grainy filling later.
Cook over medium-high heat for 8-10 minutes, stirring constantly, until the mixture thickens to a jam-like consistency. You’ll know it’s ready when it coats the back of a spoon and bubbles steadily. Here’s the thing—don’t walk away. Cherry filling burns faster than you think, and once it scorch marks, it’s game over. Remove from heat and stir in the 1 tsp vanilla extract. Let it cool for 10 minutes while you prepare the crust.
👨🍳 Step 2: Prepare the Buttery Lattice Crust
Cut the 1 cup unsalted butter into small cubes and chill in the freezer for 10 minutes while you mix the dough. In a large bowl, whisk together the 3 cups all-purpose flour, 0.5 tsp salt, and 1 tbsp extra flour (for dusting). Cut in the cold butter using a pastry cutter or your fingers until the mixture resembles coarse crumbs with pea-sized butter pieces.
Add the 0.5 cup ice water gradually, mixing just until the dough comes together. Don’t overwork it—this makes tough crust. Divide the dough into two equal portions, flatten into discs, wrap in plastic, and chill for 30 minutes. This resting time is crucial for a flaky crust. While it chills, preheat your oven to 375°F—this is the perfect temperature for even baking without burning the lattice.
🥘 Step 3: Assemble the Pie
Roll out one dough disc on a floured surface into a 12-inch circle (about ⅛-inch thick). Transfer carefully to a 9-inch pie dish, trim the edges, and crimp the crust. Pour the cooled cherry filling into the crust, mounding it slightly in the center—this ensures even distribution when it shrinks during baking.
Roll out the second dough disc into another 12-inch circle. Using a sharp knife or pizza cutter, make 1-inch wide strips by cutting parallel lines ½-inch apart, then rotate the dough 90 degrees and cut perpendicular strips. Here’s where it gets fun—arrange the strips in a lattice pattern over the filling, alternating directions for that classic pie look. Brush the lattice with 0.5 cup heavy cream for a golden finish.
🔥 Step 4: Bake to Golden Perfection
Place the pie on a baking sheet (to catch any drips) and bake for 45-50 minutes until the crust is deep golden brown and the filling bubbles vigorously at the edges. The lattice should look crisp and the filling should be set but still slightly jiggly in the center—this indicates perfect doneness.
I know it’s tempting to open the oven early, but resist! The first 20 minutes are critical for building that beautiful crust. If the edges brown too quickly, cover them with aluminum foil. Let the pie cool for at least 2 hours before slicing—this gives the filling time to set properly and prevents a runny mess. Serve warm with vanilla ice cream for the ultimate experience!
Pro Tips For Making 5 Star Cherry Pie
- Prep Cherries Like a Pro: Dump those pitted cherries straight into the pan and you’re asking for a watery mess. Instead, toss them with 1-2 tablespoons of sugar first—this kickstarts the juices releasing before they hit the heat, so they thicken properly. (Yes, even if the recipe says to add sugar later.)
- Simmer Until It’s Almost Dry: I used to pull the pie filling off the heat the second it looked thick, only to watch it turn into glue later. Let it bubble until it coats the back of a spoon like thin syrup—then simmer 1-2 more minutes. That extra time guarantees a set filling, not a soggy one.
- Skip the Overmixing Spice: Stirring cinnamon and nutmeg into the hot filling? You’re wasting flavor. Whisk them into the cold cornstarch-sugar mix first—this distributes them evenly and keeps them from clumping into bitter pockets. (Trust me, you’ll taste the difference.)
- Chill Before Baking: Pour that filling into your crust and straight into the oven? That’s how you end up with a runny center. Let it sit at room temp for 30 minutes first—this lets the cornstarch fully activate and prevents a gummy middle. (Your future pie slices will be firm, not jiggly.)
Make-ahead tips for this recipe
Filling Prep Ahead
Make the cherry filling up to 3 days in advance—it actually tastes better as the flavors meld. Store it in an airtight container in the fridge. When ready to bake, reheat gently over low heat with 1 tbsp water to restore its glossy texture.
I often prep the filling the night before so I can focus on rolling out the lattice crust fresh in the morning. 💫
Crust Make-Ahead
Roll out both pie dough discs, wrap tightly in plastic, and refrigerate for up to 3 days. For even better results, freeze the dough discs for 1 month—thaw in the fridge overnight before using.
This saves time on baking day, and the cold dough creates extra flaky layers. Just let the dough sit at room temperature for 15 minutes before rolling to make it more pliable. ✨
Assembled Pie Storage
Assemble the pie (without baking) up to 24 hours ahead. Cover tightly with plastic wrap and refrigerate. When ready to bake, let it sit at room temperature for 30 minutes before putting it in the oven.
This prevents condensation from making the crust soggy. I love this trick for holiday baking—it means one less thing to do on the big day. 🔥
Baked Pie Refresh
Bake the pie, then let it cool completely. Wrap tightly in plastic wrap and store at room temperature for 2 days or refrigerate for up to 5 days. To revive, warm slices in a 350°F oven for 5-10 minutes until heated through.
For extra shine, brush the cooled lattice with simple syrup (equal parts sugar and water) before serving. 💛
Freezer-Friendly
For long-term storage, bake the pie completely, then cool it. Wrap in plastic followed by aluminum foil, and freeze for up to 3 months. Thaw overnight in the fridge before serving.
The texture holds up beautifully, though the lattice may lose some crispness. I find this ideal for gifts—just wrap slices individually in parchment paper for easy transport. ❄️
Nutrition facts
Frequently asked questions
Can I use canned cherries instead of fresh or frozen?
Yes, but choose no-sugar-added canned tart cherries to maintain the perfect balance of sweet and tart. Drain them well and pat dry with paper towels to prevent a watery filling. You may need to reduce the sugar slightly (1.25 cups instead of 1.5 cups) since canned cherries often contain some natural sweetness.
How do I fix a soggy bottom crust?
Prevent soggy bottoms by pre-baking the crust for 10 minutes at 375°F before adding filling. Sprinkle 1 tbsp cornstarch or crushed cornflakes on the crust before filling to absorb moisture. For extra insurance, chill the pie on a baking sheet for 15 minutes before baking to help the filling set faster.
Can I make this pie without a lattice crust?
For a simpler version, roll out the second dough disc to cover the filling completely. Cut decorative slits or leave it solid, then brush with heavy cream for shine. A crustless option works too—just bake the filling in a deep dish until set. The lattice is purely decorative and adds visual appeal, but the pie will still taste amazing.
Why did my filling turn out too sweet?
This usually happens when using overly ripe or sweet cherries. Balance the flavor by adding 1 extra tbsp lemon juice or ½ tsp ground cinnamon to the filling. For future pies, taste the filling before baking—it should be pleasantly tart, not cloyingly sweet. Adjust sugar to taste (usually 1-2 tbsp less works).
How do I transport a baked pie?
Let the pie cool completely, then wrap it tightly in plastic wrap followed by aluminum foil. Place it in a sturdy box with crumpled paper towels around the edges to prevent shifting. For short trips, a pie carrier works best—just ensure it’s fully cooled to avoid melting the filling. If transporting warm, use an insulated cooler with ice packs.

- 3lb Prime Rib Roast Recipe: Juicy Pink Center Guaranteed in 3 Hours - October 31, 2026
- 5 Spice Cake Recipe: Warmly Spiced Layers With Crunchy Top - October 31, 2026
- 1950’s Macaroni and Cheese Recipe: Nostalgic Creamy Cheese Sauce with Buttery Noodles - October 31, 2026