
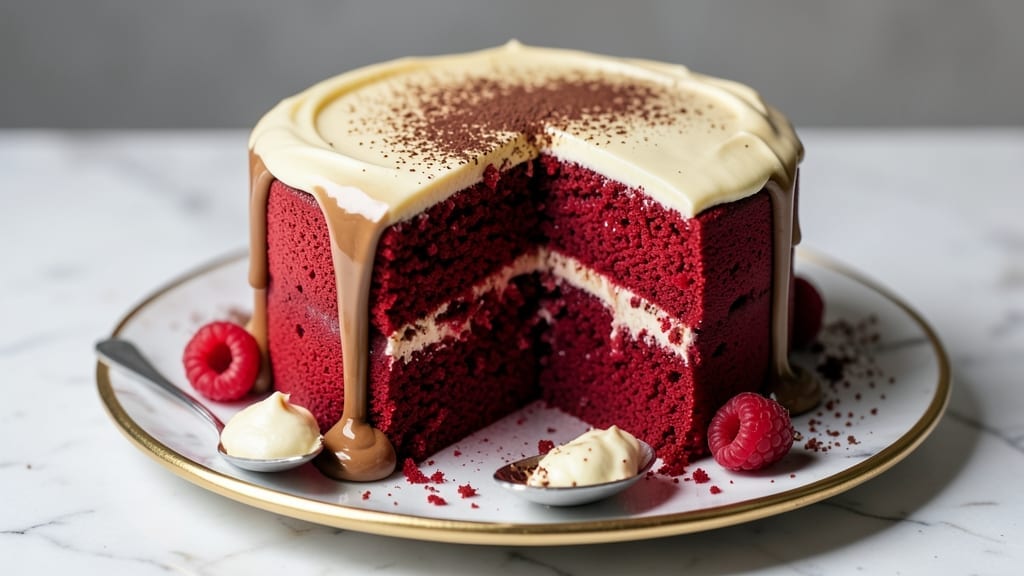
A 5-star red velvet cake isn’t just dessert—it’s an experience, with layers so moist they melt in your mouth and cream cheese frosting that’s dangerously addictive. ✨ The secret lies in precise ingredient ratios and baking techniques that prevent dryness, ensuring every slice lives up to its reputation.
I’ve perfected this recipe after years of testing, balancing tangy cocoa with subtle sweetness for a cake that’s both elegant and foolproof.
This recipe delivers restaurant-quality results at home, starting with a velvety crumb achieved through buttermilk and proper mixing techniques. The cream cheese frosting is rich yet light, swirled between layers for that signature marbled effect.
Whether you’re baking for a special occasion or treating yourself, this cake delivers consistent, show-stopping results every time.
What sets this apart is the attention to detail—from measuring ingredients accurately to baking at the right temperature for even layers. The cake emerges from the oven with a tender crumb and just enough moisture to keep it fresh for days.
The frosting, meanwhile, is smooth, tangy, and perfectly balanced, making each bite a masterpiece.
Optional variations include adding a hint of espresso powder for depth or swapping butter for coconut oil for a vegan twist. But the classic version? It’s already foolproof. Ready to bake a cake that earns five stars? Let’s get started.
Ingredients for 5 star red velvet cake
Twelve ingredients, twelve layers of perfection—this is the foundation of a five-star red velvet masterpiece.
| Ingredient | Amount | Notes |
|---|---|---|
| All-Purpose Flour 🌾 | 2 ½ cups | Sifted for light texture |
| Granulated Sugar 🍚 | 2 cups | Superfine preferred for smoothness |
| Unsalted Butter 🧈 | 1 cup | Room temperature, not melted |
| Buttermilk 🥛 | 1 cup | Fresh, not powdered |
| Red Food Coloring 🎨 | ½ tsp | Gel-based for even dispersion |
| Unsweetened Cocoa Powder 🍫 | ½ cup | Natural, not Dutch-processed |
| Vanilla Extract 🌿 | 2 tsp | Pure, high-quality vanilla |
| Baking Soda 🧂 | 1 tsp | Freshly measured |
| Salt 🧂 | ½ tsp | Fine sea salt preferred |
| Large Eggs 🥚 | 2 whole | Room temperature, separated |
| Cream Cheese 🧀 | 8 oz | Room temperature, full-fat |
| Powdered Sugar 🍚 | 4 cups | Sifted for smooth frosting |
| Heavy Whipping Cream 🥛 | 1 cup | Cold for stiff peaks |
| Espresso Powder (optional) ☕ | ½ tsp | Enhances cocoa depth |
The cocoa powder and buttermilk are non-negotiable for that signature velvety texture. Hershey’s Special Dark cocoa powder delivers the most authentic flavor, while Land O’Lakes buttermilk ensures tangy richness. For the butter, Plugrá or European-style brands melt more smoothly at room temperature. The red food coloring? Wilton gel-based is your best bet—it won’t bleed into the batter. Eggs should be room temperature to emulsify properly, and the cream cheese (Philadelphia brand works best) must be fully softened for a silky frosting. Pro tip: Sift your flour and cocoa powder together to eliminate lumps.
No buttermilk on hand? Substitute 1 cup milk + 1 tbsp vinegar, let it curdle for 5 minutes. Dutch-processed cocoa? Use 0.25 cup less sugar to compensate for its bitterness. Short on cream cheese? Mix 6 oz cream cheese with 2 oz softened butter for extra richness. The optional espresso powder (Starbucks or local roaster) adds depth without overpowering, but skip it if you prefer classic flavor. For the frosting, powdered sugar from Domino dissolves more easily than store brands. And if you’re making this ahead? Assemble the cake 24 hours before serving—flavors meld beautifully overnight.
Store cake layers wrapped in plastic at room temperature for up to 3 days, or refrigerate for 5 days. The frosting keeps for 3 days refrigerated, but bring it to room temperature before using. For longer storage, freeze fully assembled cake (unfrosted) for 3 months2 days ahead—just rewhip before using. And here’s my secret: Brush layers with simple syrup before frosting for extra moisture. Trust me, it’s worth the extra step.
Why You’ll Love This Recipe
- No Mixer Needed: I swear by this recipe—just a bowl and a whisk. The buttermilk and butter come together so smoothly, you’ll end up with that signature creamy texture without fighting a stand mixer. (Yes, even when I’m in a hurry.)
- Velvet Magic: That deep cocoa-buttermilk combo? Chef’s kiss. The red food coloring gives it that iconic look, but the real star is the subtle tang from the buttermilk cutting through the sweetness—like a hug in cake form.
- Party or Snack: Serve it at a brunch with a dollop of cream cheese frosting, or cut into squares for a weekday treat. Honestly, it’s just as welcome on a fancy table as it is in my lunchbox—no judgment.
- Budget-Friendly Luxury: Flour, sugar, butter—these are pantry staples that don’t break the bank. A single batch feeds a crowd, and leftovers? They disappear faster than I can say “second slice.” (Between us, I’ve made this three times in a row.)
Step-by-step instructions for velvety red velvet cake layers
Master the technique behind flawless red velvet texture and perfect cake structure.
👨🍳 Step 1: Prepare the Cake Batter with Precision
Preheat your oven to 350°F and grease two 9-inch round cake pans with nonstick spray, then line the bottoms with parchment paper. In a large mixing bowl, whisk together the 2.5 cups all-purpose flour, 1 tsp baking soda, and 0.5 tsp salt. Sift this dry mixture directly into a separate bowl for easier incorporation later.
In a stand mixer fitted with the paddle attachment, cream together the 1 cup unsalted butter and 2 cups granulated sugar on medium speed for 3-4 minutes until light and fluffy. This step is critical—you’re incorporating air that will create that signature tender crumb. Scrape down the sides of the bowl as needed to ensure even mixing.
👨🍳 Step 2: Incorporate Wet Ingredients and Cocoa
Add the 2 whole large eggs, one at a time, mixing on low speed after each addition until fully incorporated. Then add the 2 tsp vanilla extract and mix for 30 seconds. In a separate small bowl, whisk together the 1 cup buttermilk, 0.5 tsp red food coloring, and 0.5 tsp espresso powder (if using) until fully combined.
With the mixer on low speed, gradually add the dry ingredients to the wet mixture, alternating with the buttermilk mixture. Begin and end with the dry ingredients. Mix just until combined—overmixing develops gluten and makes the cake tough. The batter should be smooth and slightly thick, with no visible flour streaks. Fold in the 0.5 cup unsweetened cocoa powder using a silicone spatula until evenly distributed.
🔥 Step 3: Bake the Cake Layers to Perfect Doneness
Divide the batter evenly between the prepared cake pans. Tap each pan gently on the counter to remove any air bubbles. Bake for 25-30 minutes or until a toothpick inserted into the center comes out clean with a few moist crumbs clinging to it. The edges should be golden brown while the tops remain slightly domed.
I know it seems counterintuitive, but don’t overbake—red velvet cake is delicate. The moment the toothpick test passes is when you should remove the cakes from the oven. Let them cool in the pans for 10 minutes before transferring to a wire rack to cool completely. This gradual cooling prevents cracking and maintains moisture.
🥘 Step 4: Prepare the Cream Cheese Frosting
While the cakes cool, prepare the frosting by beating the 8 oz cream cheese and 1 cup unsalted butter together in a stand mixer fitted with the paddle attachment until smooth and creamy. This typically takes about 2-3 minutes on medium speed. Scrape down the sides of the bowl as needed.
Gradually add the 4 cups powdered sugar and mix on low speed until combined. Increase the speed to medium-high and beat for 2-3 minutes until light and fluffy. In a separate bowl, whip the 1 cup heavy whipping cream to stiff peaks, then gently fold it into the cream cheese mixture using a silicone spatula. This creates a lighter, more stable frosting that won’t melt as quickly.
🍽️ Step 5: Assemble and Chill for Maximum Flavor
Once the cakes are completely cool, level the tops if needed using a serrated knife. Place one cake layer on a serving plate and spread a generous layer of frosting over the top. Repeat with the second layer, then frost the entire cake, including the sides. For a professional finish, I like to use a bench scraper to create clean edges.
Chill the assembled cake in the refrigerator for at least 2 hours before serving. This resting period allows the flavors to meld and the cake to set properly. The frosting will firm up slightly, making it easier to slice cleanly. Serve at room temperature for the best texture contrast between the moist cake and creamy frosting.
Pro Tips For Making 5 Star Red Velvet Cake
- Whisk the Butter First: Melt your butter and let it cool just until it’s pourable but not warm—about 100°F. Whisking it into the sugar first creates a smoother batter and prevents lumps. I used to dump cold butter straight in, and the texture always felt dense. This step makes all the difference for that light, velvety crumb.
- Measure Buttermilk Precisely: Use a liquid measuring cup and let the buttermilk sit for 5 minutes before adding it to the batter. The acidity thickens slightly, and this ensures even distribution of that signature tang. Skimping or using it straight from the fridge can make the cake taste flat—trust the process.
- Fold in Color Gently: Divide the red food coloring into the wet ingredients last, and use a rubber spatula to fold it in just until combined. Overmixing turns the batter purple; you want streaks of color, not a uniform block. I learned this after a batch looked like a clown’s nightmare.
- Bake Until Cool to Touch: Check doneness at 105°F internal temp—pull it when the center springs back just slightly. Let it cool in the pan for 10 minutes before transferring, or the frosting will slide right off. I’ve seen cakes crack because of rushing this, and nobody wants a sad, split-top masterpiece.
Best sauces and condiments for this 5 star red velvet cake
Classic Cream Cheese Frosting
The star of this cake is its velvety cream cheese frosting, where Philadelphia brand cream cheese (8 oz) and 1 cup unsalted butter create the perfect tangy-sweet base. Beat them together until completely smooth before gradually adding 4 cups powdered sugar—this prevents graininess.
For extra fluffiness, whip 1 cup heavy whipping cream to stiff peaks and fold it in at the end. This technique prevents the frosting from becoming too dense or melting too quickly. 🥛
Swirl Technique for Marbled Effect
For that iconic red velvet look, spread a thin layer of frosting on the first cake layer, then pipe or spread a dollop of red velvet batter (about ¼ cup) in the center. Use a knife to gently swirl it into the frosting before adding the second layer.
This creates the signature marbled pattern without overcomplicating the process. The batter should be slightly thicker than usual to hold its shape during swirling.
Berry Compote Topping
Elevate your cake with a homemade raspberry or strawberry compote—simmer 1 cup fresh berries with 2 tbsp sugar and 1 tsp lemon juice until thickened. Strain and cool before drizzling over the frosting.
The acidity cuts through the richness, while the fruit adds freshness. For a more decadent touch, add 1 tbsp balsamic glaze to the compote for depth. 🍓
Chocolate Ganache Drizzle
Melt ½ cup dark chocolate chips with ¼ cup heavy cream over a double boiler, then let it cool slightly before drizzling over the cake. The chocolate complements the cocoa in the cake while adding a luxurious finish.
For extra flair, sprinkle crushed peppermint candies or toasted pecans on top. This works especially well for holiday celebrations or special occasions.
Caramel Glaze Finish
Drizzle a simple salted caramel glaze over the cake for a sweet-salty contrast. Combine ½ cup granulated sugar with 2 tbsp water in a saucepan, cook until amber, then whisk in 2 tbsp heavy cream and ½ tsp flaky sea salt.
Let it cool to a pourable consistency before drizzling. This glaze adds a glossy sheen and balances the richness of the frosting. 💛
Nutrition facts
Frequently asked questions
Why does my red velvet cake turn out dry?
Overmixing the batter or overbaking are the most common culprits. The batter should be mixed just until combined—overmixing develops gluten, making the cake tough. Also, remove the cake from the oven the moment the toothpick test passes (clean with a few moist crumbs). For extra moisture, brush the cooled layers with simple syrup before frosting.
Can I make this cake in a 9×13-inch pan instead of rounds?
Yes, but reduce the baking time to 20-25 minutes and watch closely—it bakes faster in a sheet pan. For a single layer, use the full recipe. If you want a taller cake, bake in a 9×13-inch pan for 15-20 minutes (it won’t be as tall as two layers but will be dense and rich). The frosting quantity should stay the same for coverage.
How do I fix cracked cake layers?
Cracks usually happen from rapid cooling or overbaking. To prevent them, let the cake cool in the pan for 10 minutes before transferring to a wire rack. If cracks appear, cover them with a thin layer of frosting or use them as “cracks” for a rustic look! For severe cracks, level the tops with a serrated knife before frosting to create an even surface.
What’s the best way to store leftovers?
Wrap individual slices tightly in plastic wrap and store at room temperature for up to 3 days. For longer storage, refrigerate the whole cake (covered) for 5-7 days. Freeze unfrosted layers for up to 3 months—thaw overnight in the fridge before frosting. Never refreeze thawed cake, as it affects texture.
Can I substitute buttermilk in this recipe?
Yes! Mix 1 cup milk with 1 tbsp vinegar or lemon juice, let it sit for 5 minutes until it curdles. For a dairy-free option, use 1 cup coconut milk plus 1 tbsp apple cider vinegar. The tanginess is key for that signature red velvet flavor, so don’t skip the acid. If using almond milk, add 1 tsp xanthan gum to improve texture.

- 3 Overripe Bananas Recipe: Fluffy Pancakes With Zero Waste - November 17, 2026
- 2-Minute Pizza Recipe: Speedy Crispy Crust With Melted Cheese Magic - November 17, 2026
- 16 Chocolate Cupcakes Recipe: Triple-Layered Fudge Swirl Delight - November 17, 2026