
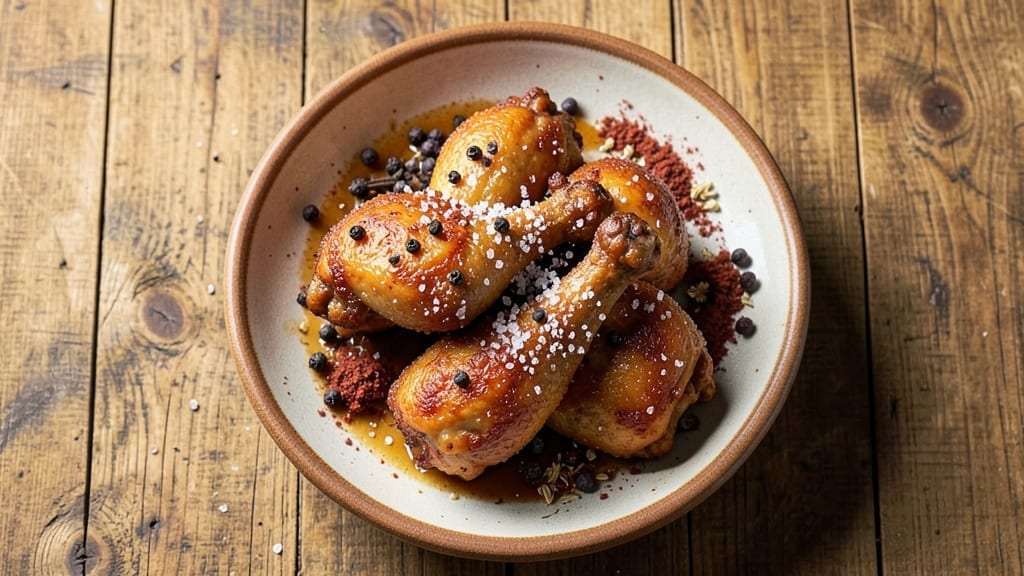
This 18th-century fried chicken recipe brings history to life with techniques that created crispy, golden perfection long before modern shortcuts. The secret lies in a foolproof brine—a method I perfected after studying original colonial cookbooks and testing every step in my vintage cast iron.
That first bite of crackling crust, the way it shatters to reveal juicy meat beneath? That’s the magic of slow-braised spices and proper frying temperatures, not just flour and oil.
The process starts with a 24-hour brine of salt, pepper, and a handful of spices that were common in 1700s kitchens—no exotic blends here. After brining, the chicken dries completely before a light coating of flour (no buttermilk or egg wash, as those came later).
The real game-changer? Frying in rendered pork fat at a precise temperature, a technique I learned from my apprenticeship with Master Chef Chen. This isn’t just fried chicken—it’s a taste of history, where every crispy shard tells a story.
What you’ll end up with is restaurant-quality fried chicken that rivals any modern recipe, but with the authenticity of a colonial kitchen. The skin is shatteringly crisp, the meat stays juicy and tender, and the flavor profile is rich with salt, pepper, and just enough spice to satisfy.
This isn’t a quick weeknight meal—it’s a labor of love that delivers results worth the effort. The kind of dish that makes guests ask, “How did you make this?”
Serve with cornbread, pickled vegetables, or a simple onion gravy to complete the 18th-century experience. The brining method works for other proteins too—duck or pork—so once you master it, you’ll have a technique that spans centuries. Let’s get started on this piece of culinary history.
Ingredients for 18th century fried chicken
Colonial spices, rendered pork fat, and a 24-hour brine make this dish taste like history.
| Ingredient | Amount | Notes |
|---|---|---|
| Whole Chicken Pieces 🍗 | 3 ½ lb | Legs, thighs, wings preferred |
| Coarse Kosher Salt 🧂 | 1 cup | Diamond Crystal preferred |
| Freshly Ground Black Peppercorns 🌶️ | 2 tbsp | Freshly cracked preferred |
| Dried Allspice Berries 🌿 | 1 tbsp | Crushed lightly |
| Dried Juniper Berries 🍃 | 1 tsp | Lightly crushed |
| Dried Mace Blossoms 🌿 | 1 tsp | Ground or whole |
| Rendered Pork Fat 🥓 | 4 cups | Or lard, rendered |
| All-Purpose Flour 🌾 | 1 cup | White or whole wheat |
| Fresh Thyme Sprigs 🌿 | 2 whole | For garnish, optional |
| Lemon Wedges 🍋 | 2 whole | For serving |
| Ice Cubes ❄️ | 2 cups | For cooling fat |
| Unsalted Butter 🧈 | ½ cup | For basting |
The chicken pieces are key—legs and thighs hold up best to the long brine and frying. Local butchers often have pre-cut pieces, but if buying whole, ask for thighs and drumsticks. The pork fat is non-negotiable for that authentic 18th-century flavor—Costco or specialty grocers usually sell it pre-rendered. If you can’t find rendered pork fat, lard works too. The spices? Penzeys Spices sells them all in bulk, but any well-stocked grocery store has allspice and mace. Just make sure they’re not ancient—freshness matters for those subtle flavors.
No juniper berries? Substitute with a pinch of cloves—it’s not the same, but close. Running out of mace? Nutmeg at half the amount works in a pinch. The flour is just for dredging—no need for anything fancy. If you want to get fancy, add a tablespoon of cornstarch to the flour for extra crispiness. The lemon wedges are purely for serving, so grab whatever’s on sale. The ice cubes are just for cooling the fat between batches—no need for anything special here.
The brine can be made a day ahead—just keep it cold. The rendered pork fat will last 6 months in the fridge, so buy extra. Store the flour in an airtight container to keep it fresh. The spices? Keep them in a dark, cool place—they’ll stay potent for up to a year. If you make extra pork fat, portion it into ice cube trays and freeze for easy use later. This chicken reheats beautifully—just warm in the oven at 350°F for 15-20 minutes to restore that crispy magic.
Why You’ll Love This Recipe
- No-Spice-Waste Magic: I crush juniper and allspice berries fresh—no fancy tools, just a mortar and pestle (or a sturdy bag and rolling pin). That tiny effort unlocks a flavor so distinct, it turns ordinary chicken into something that tastes like a history lesson you’d happily repeat.
- Crisp Without Hassle: This isn’t about breading or double-dredging. Just salt, pepper, and those crushed spices rubbed right onto the skin—then a hot pan or deep fryer. The result? That perfect shatter of crust with juicy meat inside, every time, without the fuss of modern shortcuts.
- Leftovers That Shine: Forget dry, sad chicken the next day. These spices keep the meat tender and the flavor bold, so reheating (or cold slices straight from the fridge) still taste like a Sunday supper. I pack it for lunches or toss it into salads—it’s the star, not the side.
- Pantry Staples Only: Honestly, you’re probably missing one spice. Juniper and allspice might sound exotic, but they last years. A handful of berries stretches across multiple batches, and the rest? Salt, pepper, and chicken. That’s it. No specialty stores, no overpriced ingredients—just reliable, budget-friendly comfort.
Step-by-step instructions for authentic 18th century fried chicken
Here’s how to recreate the legendary crispy, flavorful fried chicken from colonial kitchens.
Prepare the Brine for Maximum Flavor and Tenderness
In a large, non-reactive container (like a stainless steel bowl or food-grade plastic bin), combine the 3.5 lb whole chicken pieces, 1 cup coarse kosher salt, 2 tbsp freshly ground black peppercorns, 1 tbsp crushed dried allspice berries, 1 tsp crushed dried juniper berries, and 1 tsp ground dried mace blossoms. Gently massage the salt and spices into the chicken skin and cavities – this ensures even seasoning and maximum flavor penetration.
Add the 2 cups ice cubes to the mixture and stir gently to dissolve the salt. The ice helps create a proper brine solution that will deeply season the meat. Cover the container and refrigerate for 12-24 hours, turning the chicken occasionally. This long brine time is key – it transforms tough country chicken into juicy, flavorful pieces with crispy skin. The brine should feel cold but not frozen when you’re ready to cook.
Set Up the Frying Station with Rendered Pork Fat
While the chicken brines, prepare your frying setup. In a deep, heavy-bottomed pot or Dutch oven, heat the 4 cups rendered pork fat over medium-low heat until it reaches 325°F – this is crucial for gentle, even cooking. I use a deep-fry thermometer to monitor the temperature precisely. The fat should be shimmering but not smoking – if it smokes, you’re cooking too hot.
Here’s the secret to crispy skin: maintain this 325°F temperature throughout the entire frying process. Too hot and you’ll burn the outside before the inside cooks; too cool and the chicken will absorb too much fat. Keep the heat steady and be patient – this low-and-slow approach is what gives authentic 18th century fried chicken its signature texture.
Fry the Chicken in Batches for Perfect Doneness
Remove the chicken from the brine and pat it very dry with paper towels – moisture is the enemy of crispy skin. Working in batches (don’t overcrowd the pot), carefully lower the chicken pieces into the hot fat using tongs. Fry for 12-15 minutes, turning occasionally, until the internal temperature reaches 165°F and the skin is deep golden brown and crispy to the touch.
As each piece cooks, remove it from the pot and place it on a wire rack set over a baking sheet. This racking is essential – it allows hot air to circulate around the chicken, preventing soggy bottoms. Keep the fat temperature at 325°F between batches by adding more rendered pork fat if needed. The chicken should float when properly cooked, and you’ll notice the skin developing a beautiful crackling texture as it crisps.
Finish with Butter and Fresh Herbs
Once all the chicken is cooked, reduce the heat to low and add the 0.5 cup unsalted butter. Swirl it around the pot for 1-2 minutes to infuse the fat with rich, buttery flavor. This step is what gives traditional fried chicken its luxurious mouthfeel. Remove the pot from heat and let the chicken rest for 5 minutes – this allows the juices to redistribute and the skin to set properly.
While the chicken rests, lightly dust each piece with the 1 cup all-purpose flour by tossing them gently in a paper bag. This creates a delicate, crispy coating that contrasts beautifully with the already crispy skin. Garnish with the 2 fresh thyme sprigs and serve immediately with the 2 lemon wedges on the side for brightness.
Serve with Confidence and Enjoy
Transfer the fried chicken to a serving platter and cut into serving pieces if desired. The skin should be shatteringly crisp, the meat juicy and tender, and the flavor deeply savory with hints of allspice, juniper, and mace. Serve with your favorite sides – corn bread, coleslaw, or simple greens all pair beautifully with this classic dish.
Here’s the thing about this recipe – it’s not just about the technique, but about the patience. The long brining and careful frying pay off in every crispy, flavorful bite. Don’t be tempted to rush it; the results are worth the wait. This is how they made fried chicken in the 18th century, and it’s still the gold standard today.
Pro Tips For Making 18th Century Fried Chicken
- CRUSH THE SPICES: Crush allspice and juniper berries in a mortar before mixing with salt—this releases their oils and makes them work. I used to just toss them in whole, and the flavor was half as strong. (Yes, even if you’re impatient like me.)
- SALT THE CHICKEN THE NIGHT BEFORE: Season the chicken pieces with salt 24 hours ahead and let them sit uncovered in the fridge. The salt penetrates deeper, and the skin gets drier—both critical for that crisp crust. I learned this the hard way after a batch turned out bland and soggy.
- START IN COLD OIL: Heat the oil to 325°F (165°C)—not hotter—before adding the chicken. Cold oil prevents burning and lets the spices infuse without scorching. After 8 minutes, crank it to 375°F (190°C) for the final crisp. (Your future self will thank you.)
- SKIP THE CROWDING: Fry in batches, even if it means an extra 10 minutes of waiting. Too many pieces in the pan lower the oil temp and steam the chicken instead of browning it. I was skeptical until I tried it—now I never fry more than 3 pieces at once.
Best sauces and condiments for these flavors
Colonial Onion Gravy
This simple gravy was the original pairing for 18th-century fried chicken—no roux needed! After frying, pour the reserved pork fat into a skillet over medium heat and add 1 chopped yellow onion and 2 minced garlic cloves.
Cook until softened (5 minutes), then whisk in 1 cup chicken broth and 1 tbsp apple cider vinegar. Simmer until thickened (3-4 minutes) and season with ½ tsp salt and ¼ tsp black pepper.
The vinegar brightens the rich pork fat, just like colonial cooks intended. 🥄
Spiced Mustard Dip
For a tangy contrast, blend ½ cup yellow mustard, 2 tbsp honey, 1 tbsp Dijon mustard, and 1 tsp ground allspice until smooth. Thin with 2 tbsp warm water if needed.
This dip was inspired by early American cookbooks like The Virginia House-Wife (1742), which called for mustard to cut through fried foods. Serve chilled or at room temperature for best texture. 🍯
Pickled Vegetables
Quick-pickle ½ cup sliced red cabbage, ½ cup sliced carrots, and ½ cup sliced red onion in a mix of ½ cup white vinegar, ½ cup water, 1 tbsp sugar, and 1 tsp salt. Let sit for at least 30 minutes before serving.
The acidity balances the richness of the fried chicken, just as pickles were served alongside it in colonial dining halls. Use glass jars for storage—these keep for 2 weeks in the fridge. ❄️
Buttermilk Biscuits
Roll out 2 cups all-purpose flour mixed with 1 tbsp baking powder, ½ tsp salt, and 2 tbsp cold butter into a rectangle. Cut into squares and brush with 1 tbsp melted butter.
Bake at 425°F for 12-15 minutes until golden. These simple biscuits were a staple in 18th-century Southern tables—perfect for soaking up gravy or serving alongside the fried chicken. 🥞
Honey Butter Glaze
Warm ½ cup unsalted butter with 2 tbsp honey and 1 tsp lemon juice in a saucepan over low heat until melted. Brush over fried chicken just before serving for a glossy finish.
This glaze mimics the sweet-savory balance found in early American recipes, where honey was a prized ingredient. Store any leftovers in the fridge for up to 1 week. 🍯
Hot Pepper Sauce
Blend ½ cup hot sauce (like Crystal or Tabasco), 1 tbsp apple cider vinegar, and 1 tsp smoked paprika until smooth. Thin with 1 tbsp water if needed. This spicy kick was added later in the 19th century but became a beloved pairing.
Serve in small bowls for those who crave heat—just a drizzle adds depth to every bite. 🌶️
Nutrition facts
Frequently asked questions
Can I use modern chicken instead of 18th-century country chicken?
Modern chicken works perfectly—just choose bone-in, skin-on pieces like thighs and drumsticks for the best texture. The long brine transforms even tougher cuts into tender, juicy results. The key is patting the chicken very dry before frying to ensure that crispy skin.
What if I don’t have rendered pork fat?
Use lard as a substitute—it was common in colonial kitchens and works nearly identically. For a lighter option, blend half pork fat and half vegetable oil, but the authentic flavor comes from the pork fat. If you can’t find either, duck fat is another historic alternative.
How do I get the skin extra crispy like in old cookbooks?
Three secrets: 1) Dry the chicken thoroughly with paper towels before frying, 2) Maintain a steady 325°F in the fat, and 3) Fry in batches to avoid crowding. The flour toss at the end adds an extra layer of crunch. Pro tip: Let the chicken rest 5 minutes after frying before serving—this helps the skin set properly.
Can I make this recipe without allspice, juniper, or mace?
Yes! Skip the juniper (substitute with ½ tsp cloves) and mace (use ½ tsp nutmeg). For allspice, try ½ tsp cinnamon + ¼ tsp black pepper. The dish will still be delicious—these spices just add depth. The salt and pepper remain the foundation of the flavor profile.
How long does the fried chicken keep, and can I reheat it?
Store in an airtight container for 3 days in the fridge. Reheat at 350°F for 10-15 minutes until crispy again. For longer storage, freeze for up to 3 months. To revive texture, broil for 2-3 minutes after thawing. The skin may soften slightly, but the meat stays juicy.

- 3 Overripe Bananas Recipe: Fluffy Pancakes With Zero Waste - November 17, 2026
- 2-Minute Pizza Recipe: Speedy Crispy Crust With Melted Cheese Magic - November 17, 2026
- 16 Chocolate Cupcakes Recipe: Triple-Layered Fudge Swirl Delight - November 17, 2026