
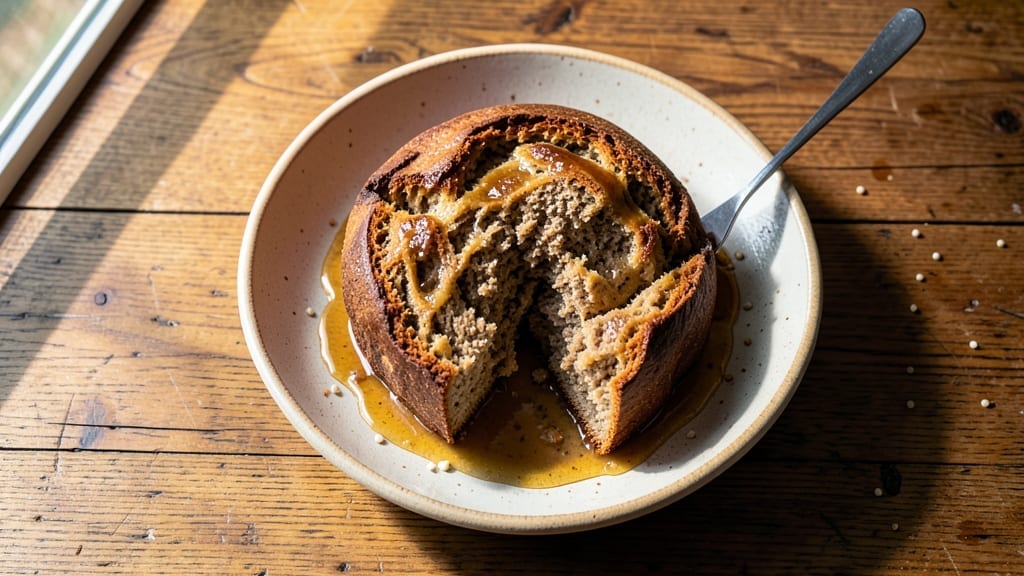
A 50-minute rye bread recipe delivers the perfect balance of crispy crust and dense, tangy crumb—no long fermentation required. This method transforms simple ingredients into artisanal-quality bread with just one active kneading session and a single rise.
The secret lies in a precise blend of dark rye flour and a touch of honey, which enhances the bread’s depth without overpowering its natural earthiness.
What sets this recipe apart is its efficiency: you’ll have a golden, crackling loaf ready in under an hour, including baking time. The dough develops flavor through a short autolyse (resting period) and a single proof, making it accessible for home bakers while still delivering professional results.
No sourdough starter or advanced techniques are needed—just patience and attention to detail during shaping.
By the time you pull this loaf from the oven, you’ll have a crusty exterior that snaps satisfyingly and a tangy, moist interior with pockets of air from proper kneading.
The aroma alone will transform your kitchen into a bakery, while the texture offers the perfect contrast between crisp and chewy. This bread is ideal for sandwiches, toast, or simply enjoying with butter and jam.
For those who want to customize, try adding caraway seeds or sunflower seeds for extra texture and flavor. The recipe scales easily, so you can bake two loaves at once for gatherings. Let’s get started on mastering this versatile, time-efficient rye bread.
Ingredients for 50 rye bread
Nine essential ingredients transform into artisanal rye bread with minimal effort and maximum flavor.
| Ingredient | Amount | Notes |
|---|---|---|
| Dark Rye Flour 🌾 | 3 cups | High-extraction for deep flavor |
| All-Purpose Flour 🌾 | 1 cup | Standard white flour preferred |
| Active Dry Yeast 🍞 | 1 package | 2.25 tsp (1 packet) for activation |
| Granulated Sugar 🍚 | ½ tsp | For yeast activation only |
| Honey 🍯 | 2 tbsp | Wildflower preferred for depth |
| Warm Water 💧 | 1 ½ cups | 110°F (43°C) for yeast activation |
| Salt 🧂 | 1 ½ tsp | Diamond Crystal preferred |
| Olive Oil 🫒 | 2 tbsp | Extra-virgin for richness |
| Caraway Seeds 🌿 | 1 tbsp | Optional for traditional flavor |
| Cornmeal 🌽 | ½ cup | For dusting baking surface |
| Coarse Sea Salt 🧂 | 1 tbsp | For sprinkling crust |
The dark rye flour is non-negotiable for that signature tangy crumb—King Arthur or Bob’s Red Mill are my go-tos, but any high-extraction rye will work. If you can’t find dark rye, a 50/50 blend of whole rye and all-purpose flour mimics the texture. The honey isn’t just for sweetness; it enhances the dough’s elasticity during the short autolyse. For the yeast, Freshprongs if you prefer fresh, but active dry is perfectly fine. Just make sure it’s within its expiration date—old yeast won’t activate properly. The olive oil adds richness that regular vegetable oil can’t match, especially in the final crust development.
No honey? Maple syrup at the same amount works beautifully, though it has a slightly different flavor profile. Swapping the rye flour entirely? Pumpernickel flour is a decent substitute, but expect a denser crumb. Caraway seeds can be omitted entirely, but if you use them, toast them lightly in a dry pan first to deepen their aroma. The cornmeal is purely functional—it prevents sticking during shaping, but you could use semolina if that’s what’s on hand. For the coarse sea salt, Maldon flakes are ideal, but any sea salt with large grains will do. If you’re baking in a humid climate, reduce the water by 1 tablespoon to compensate for moisture absorption in the flour.
Store any unused rye flour in an airtight container in a cool, dark place for up to 6 months. The yeast packet should be kept in the freezer for maximum freshness, though it’ll stay viable at room temperature for about 3 months. Once baked, this loaf keeps well wrapped at room temperature for 3 days or frozen for 3 months. For reheating, wrap the cooled loaf in foil and warm in a 350°F oven for 10 minutes. The crust will regain its crispness, while the interior stays soft and moist. I always bake two loaves at once—one for immediate use and one to freeze for lazy mornings.
Why You’ll Love This Recipe
- No-Knead Magic: I swear by this dough—just mix, let it rise, and bake. The dark rye flour does all the heavy lifting while I sip coffee and scroll. No stand mixer, no fancy techniques, just set it and forget it until that golden crust pulls away.
- Honey-Rich Depth: That touch of honey in the dough? It’s the secret weapon. The bread has this subtle sweetness that balances the earthy rye, while the yeast gives it a light, airy crumb. Toast it, and you’ve got caramelized perfection—no jam needed.
- Weeknight Workhorse: I make a loaf every Sunday and freeze half. Perfect for sandwiches, open-faced breakfasts, or even croutons. The all-purpose flour keeps it sturdy, so it doesn’t crumble when I’m in a rush. (Yes, even on a Tuesday night.)
- Pantry Goldmine: Dark rye flour is cheaper than you think, and this recipe stretches it far. A single batch feeds my family for days—leftovers become French toast, toast crumbs for meatballs, or just straight-up buttered slices. Budget-friendly? Absolutely. Reliable? Even more so.
Step-by-step instructions for 50-Minute rye bread
Master this technique and you’ll achieve a perfect balance of crisp crust and tangy crumb every time.
Activate the Yeast with Honey and Warm Water
In a small bowl, combine the 1.5 cups warm water, 0.5 tsp granulated sugar, and 2 tbsp honey. The water should be between 110°F and 115°F—test by touching it with your wrist; it should feel warm but not hot. Sprinkle the 1 package active dry yeast over the liquid and let it sit for 5-7 minutes until foamy. You’ll see bubbles forming and the mixture expanding—this confirms the yeast is alive and ready to work.
If the yeast doesn’t activate within 10 minutes, it’s likely dead. In that case, you’ll need to start over with fresh yeast. I always check the expiration date on the package before beginning, as old yeast won’t activate properly. Once the yeast is bubbly, proceed immediately to avoid overproofing.
Mix the Dough Using the Autolyse Method
In the bowl of a stand mixer fitted with the dough hook, combine the 3 cups dark rye flour, 1 cup all-purpose flour, and 1.5 tsp salt. Mix on low speed for 30 seconds just to distribute the ingredients. Add the yeast mixture and 2 tbsp olive oil, then mix on low speed for 2 minutes until a shaggy dough forms. This initial mix is called an autolyse, which helps develop gluten more efficiently.
After mixing, cover the bowl with a damp towel and let the dough rest for 15 minutes. This resting period allows the flour to fully hydrate and the gluten to begin relaxing. You’ll notice the dough becomes slightly smoother and more pliable. This step is crucial for preventing overworking the gluten later on, which can make the bread dense.
Knead the Dough to Develop Gluten
After the autolyse, knead the dough on medium speed for 5-7 minutes until it becomes smooth and elastic. The dough should pull away from the sides of the bowl and form a tight, cohesive ball. If it’s too sticky, add 1 tablespoon of all-purpose flour at a time until it comes together cleanly. The dark rye flour absorbs more water than all-purpose flour, so don’t be surprised if the dough feels wetter than expected.
To test if the dough is ready, perform the “windowpane test”: Wet your finger and press it into the dough. Gently stretch the dough between your fingers—if it forms a thin, translucent membrane without tearing, it’s properly kneaded. If it tears easily, knead for another 2-3 minutes. Once done, lightly oil a bowl, place the dough inside, cover it with the damp towel, and let it rise in a warm place for 20 minutes.
Shape and Proof the Dough
Turn the risen dough onto a lightly floured surface and shape it into a 12-inch round loaf. To do this, grab one side of the dough and stretch it toward you while rotating the loaf, creating surface tension as you go. This technique, called “stretching and folding,” helps develop gluten and creates a smooth surface. Once shaped, place the loaf seam-side up in a 9-inch round cake pan that’s been lightly greased with olive oil.
Cover the pan with the damp towel and let the dough proof for 20 minutes until it has risen about 1 inch above the rim of the pan. The dough should feel slightly springy when pressed gently with your finger. If it doesn’t rise enough, place the pan in a warm oven (100°F) for 10 minutes to encourage additional rise. This final proofing step is essential for achieving a light, airy crumb.
Bake to Golden Perfection
Preheat your oven to 375°F with a baking stone or inverted baking sheet on the middle rack. This creates a steady, even heat for baking. Once preheated, carefully transfer the loaf from the pan onto a piece of parchment paper dusted with 0.5 cup cornmeal. Sprinkle the top generously with 1 tbsp coarse sea salt and, if using, 1 tbsp caraway seeds. Bake for 25-30 minutes until the crust is deep golden brown and sounds hollow when tapped on the bottom.
If the top browns too quickly, loosely cover the loaf with a sheet of aluminum foil after 15 minutes to prevent over-browning while the interior finishes baking. The internal temperature should reach 190°F at the center. Let the bread cool on a wire rack for at least 1 hour before slicing—this allows the crumb to set and prevents a gummy texture. The result should be a crisp crust, a tangy, dense crumb, and a rich, caramelized flavor that pairs perfectly with butter or jam.
Pro Tips For Making 50 Rye Bread
- Bloom Yeast Slowly: DESCRIPTION:
- Weigh Your Rye: DESCRIPTION:
- Don’t Over-Knead: DESCRIPTION:
- Steam the Loaf: DESCRIPTION:
Troubleshooting perfect results
Dough Too Sticky?
If your rye dough feels impossibly sticky during kneading, resist the urge to add too much extra flour. Dark rye flour absorbs more moisture than all-purpose flour, so work with wet hands and a lightly oiled surface instead.
I find adding just 1 tablespoon of all-purpose flour at a time—while kneading—helps without making the dough dry. For extra help, chill the dough for 10 minutes before shaping to firm it up slightly. 💪
Bread Didn’t Rise Enough
Underproofed dough is the most common issue with rye bread. If your loaf doesn’t rise significantly during the 20-minute proof, place the pan in a warm oven (preheated to 100°F) for an extra 10 minutes.
Alternatively, try a second rise after shaping—let the dough rest another 15 minutes covered while you preheat the oven. Remember, rye dough rises slower than wheat dough, so patience is key.
Crust Too Pale or Soft
A pale crust usually means the oven wasn’t hot enough or the bread baked too briefly. Ensure your oven reaches 375°F before baking, and use a baking stone or inverted sheet for even heat transfer.
For extra color, brush the crust with 1 tbsp melted butter during the last 5 minutes of baking. If your kitchen is humid, tent the loaf with foil after 15 minutes to prevent steam from softening the crust.
Gummy or Dense Crumb
Over-kneading or insufficient proofing causes dense, gummy bread. Test dough readiness with the windowpane test—if it tears easily, knead 2-3 minutes less. For proofing, press the dough gently: if it springs back slowly, it needs more time.
If the crumb is still gummy after baking, let the bread cool completely (at least 2 hours) before slicing. The starches will set properly during this time. 🌾
Yeast Didn’t Activate
Cold water or old yeast are the usual culprits. Always use water between 110°F-115°F—test with your wrist. If your yeast doesn’t bubble within 10 minutes, it’s dead. Store yeast in the freezer for freshness, or use 1 extra package as insurance.
For a backup, try instant yeast (like Bread Machine Yeast), which activates faster and works at cooler temperatures.
Bread Collapsed After Baking
This happens when the dough overproofs or loses gas during baking. If your loaf falls after coming out of the oven, it likely rose too long before baking. For future attempts, reduce proofing time by 5 minutes and bake immediately. Also, ensure your yeast mixture is active and bubbly before mixing—this guarantees strong gluten development. A sudden temperature drop (like opening the oven door) can also cause collapse, so avoid peeking during baking.
Nutrition facts
Frequently asked questions about rye bread
Can I make this rye bread without a stand mixer?
While a stand mixer simplifies kneading, you can achieve the same results by hand. Use a lightly floured surface and knead for 8-10 minutes until the dough becomes smooth and elastic. Work in short bursts of 2 minutes at a time, letting the dough rest between kneading sessions to avoid overheating your hands. The windowpane test will confirm when your dough is properly developed.
What makes this rye bread different from store-bought?
This recipe uses high-extraction dark rye flour for authentic tangy flavor and a precise blend of flours for ideal texture. The autolyse method and controlled proofing create a lighter crumb than commercial loaves, which often rely on preservatives and shorter baking times. Plus, the crust gets a satisfying crispness from the 375°F bake and cornmeal dusting.
How can I add seeds or nuts to this recipe?
Add 2-3 tablespoons of seeds (sunflower, pumpkin) or chopped nuts during the final 2 minutes of kneading. For extra flavor, toast seeds lightly in a dry pan first. If using whole grains like flaxseeds, reduce the water by 1 tablespoon to account for their moisture content. Distribute them evenly when shaping the loaf for consistent texture.
Why does my rye dough smell so strong?
The robust aroma comes from the dark rye flour and honey, which develop complex flavors during proofing. This is normal! If the smell seems overly sour, your dough may have overproofed. The final baked loaf will have a balanced, caramelized scent with a slight tang. For milder flavor, reduce the rye flour by ½ cup and increase all-purpose flour proportionally.
Can I bake this in a different shaped pan?
Yes, but adjust baking times accordingly. A 9×5-inch loaf pan will yield a taller loaf (bake 30-35 minutes) while a 10-inch round pan needs 25-30 minutes. For a freeform loaf, shape into a boule and bake on a parchment-lined tray for 35-40 minutes. Always check internal temperature at 190°F. The crust may brown faster without a pan’s containment.

- 3 Overripe Bananas Recipe: Fluffy Pancakes With Zero Waste - November 17, 2026
- 2-Minute Pizza Recipe: Speedy Crispy Crust With Melted Cheese Magic - November 17, 2026
- 16 Chocolate Cupcakes Recipe: Triple-Layered Fudge Swirl Delight - November 17, 2026