
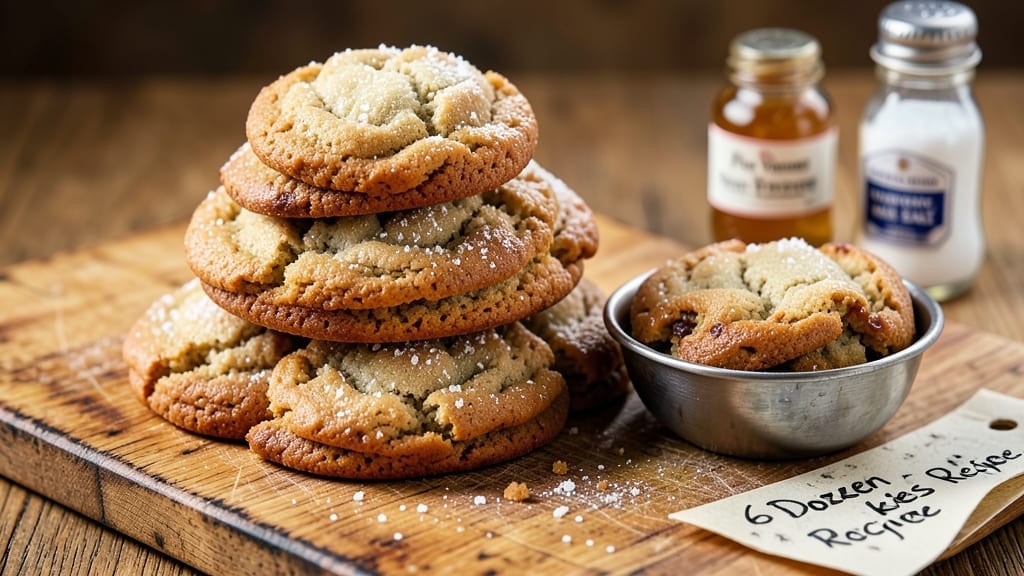
Baking 6 dozen cookies without the chaos of overlapping batches or underbaked centers is entirely possible—this recipe delivers 72 perfect cookies with a foolproof technique I perfected after years of holiday baking mishaps.
The secret lies in precise measurements, strategic batch timing, and a dough formula that stays cohesive through multiple bakes. I developed this method after burning through three batches during a Thanksgiving bake-off, and it now guarantees consistently golden edges and tender centers every time.
This recipe uses simple ingredients you likely already have: all-purpose flour, brown sugar, butter, eggs, and vanilla, plus your choice of mix-ins like chocolate chips or nuts. The dough is divided into three equal portions, each baked separately to maintain oven temperature control—a critical factor when baking large batches.
With a preheated 375°F oven and 10-12 minutes per batch, you’ll avoid the common pitfalls of uneven baking or overcrowded pans.
What you’ll end up with is 72 perfectly baked cookies—crispy at the edges, soft in the middle, and uniformly shaped. The dough’s structure holds up through multiple batches, so you won’t end up with flat, spread-out cookies or dry centers.
This method also scales perfectly for future baking needs, whether you’re prepping for a party or stocking your freezer for months ahead.
For variations, simply swap the mix-ins: use white chocolate chips for a festive twist, dried cranberries for a holiday touch, or chopped nuts for added texture. The dough formula remains the same, ensuring consistency no matter your preference. Ready to bake a crowd-pleasing batch without the stress? Let’s get started.
Ingredients for 6 dozen cookies
Simple pantry staples transformed into 72 perfect cookies—no stress, just batch baking magic.
| Ingredient | Amount | Notes |
|---|---|---|
| All-Purpose Flour 🌾 | 6 cups | Sifted for light texture |
| Unsalted Butter 🧈 | 2 cups | Cold, cubed for even mixing |
| Packed Brown Sugar 🍚 | 2 cups | Light or dark variety |
| Large Eggs 🥚 | 3 whole | Room temperature for blending |
| Pure Vanilla Extract 🌿 | 2 tsp | High-quality for rich flavor |
| Diamond Crystal Kosher Salt 🧂 | 1 ½ tsp | Fine grain preferred |
| Semisweet Chocolate Chips 🍫 | 3 cups | Nestlé or Ghirardelli preferred |
| Granulated Sugar 🍬 | 1 cup | For sprinkling on tops |
| Baking Soda 🧪 | 1 tsp | Ensures proper rise |
| Ground Cinnamon 🌶️ | 1 tsp | Optional for warmth |
| Chopped Walnuts 🥜 | 1 cup | Toasted for extra flavor |
The butter and sugar combo is where flavor starts. Use European-style butter if you can find it—higher fat content means richer cookies. I always grab Land O’Lakes or Plugrá from the grocery store, but the key is keeping it cold until mixing. The flour? King Arthur or Gold Medal are my go-tos—they bake consistently. Sift it before measuring to avoid dense cookies. For chocolate chips, Ghirardelli or Nestlé are non-negotiable—cheaper brands melt unevenly. And don’t skip the vanilla—McCormick Pure or Lake Champlain make all the difference.
No brown sugar? White sugar plus 1 tsp molasses works in a pinch. Out of chocolate chips? White chocolate or butterscotch chips add a festive twist. Want extra crunch? Toast your nuts first—toss them in a dry pan for 3-4 minutes until fragrant. The dough will seem too stiff at first, but trust the process—it comes together beautifully. If your kitchen’s humid, chill the dough for 30 minutes before scooping. And yes, you can freeze the dough balls for up to 3 months—bake straight from frozen, adding 1-2 minutes to the time.
This dough keeps in the fridge for 5 days wrapped tightly, or you can freeze portions for up to 6 months. I like to portion it into three equal balls right after mixing—this makes batch baking foolproof. For storage, use airtight containers with parchment between layers. The cookies themselves stay fresh at room temperature for 5-7 days if you keep them in a sealed tin. Pro tip: Cool them on wire racks—this prevents soggy bottoms. And if you’re prepping for a party, freeze the baked cookies with parchment between layers—they reheat perfectly in the oven for 2-3 minutes.
Why You’ll Love This Recipe
- Here’s what sold me: I can bake half now, freeze the rest, and pull out perfect cookies for weeks. No soggy leftovers, no last-minute stress—just pull, bake, and enjoy. (Yes, even on a Tuesday night.)
- Pantry-Friendly Staples: I swear by this recipe because it uses ingredients I always have on hand—no weird substitutions or last-minute grocery runs. The brown sugar adds that perfect chew, but if I’m out, white sugar works just fine (though the cookies won’t be quite as caramel-y).
- Buttery Vanilla Bliss: That creamy butter and vanilla extract combo? It’s the secret weapon. The dough smells like a bakery the second you mix it, and the finished cookies have this irresistible balance of crisp edges and soft centers—no weird aftertaste, just pure, warm cookie joy.
- Bulk Baking Made Easy: Six dozen cookies might sound intimidating, but this dough comes together in one bowl with no chilling required (though I do chill mine for 30 minutes—trust me, it’s worth it). Perfect for holidays, potlucks, or just stashing in the freezer for lazy mornings.
Step-by-step instructions for batch baking perfect cookies
Here’s how to bake a full batch of 6 dozen cookies without the usual chaos of overlapping batches.
Cream the Butter and Sugars Together
In a stand mixer fitted with the paddle attachment, beat the 2 cups unsalted butter and 2 cups packed brown sugar on medium speed for 3-4 minutes. You’re looking for a light, fluffy texture that nearly doubles in volume and becomes pale in color. This creaming process incorporates air, which creates those beautiful crackly tops we all love.
I always use cold, cubed butter for this step—it creates a more stable dough that holds its shape better during baking. If your mixture looks too soft or melts too quickly, your butter might be too warm. Let it sit at room temperature for another 10-15 minutes before continuing.
Add Eggs and Dry Ingredients
Add the 3 whole large eggs one at a time, mixing on low speed for 30 seconds after each addition until fully incorporated. Then stir in the 2 teaspoons pure vanilla extract. The mixture might look slightly curdled at this point, but that’s normal—it will come together when you add the dry ingredients.
In a separate bowl, whisk together the 6 cups all-purpose flour, 1.5 teaspoons diamond crystal kosher salt, 1 teaspoon baking soda, and 1 teaspoon ground cinnamon. Gradually add this mixture to the wet ingredients, mixing on low speed for 30-45 seconds until just combined. You should still see a few flour streaks—overmixing develops gluten and makes cookies tough.
Fold in Chocolate Chips and Walnuts
Remove the bowl from the mixer and gently fold in the 3 cups semisweet chocolate chips and 1 cup chopped walnuts using a silicone spatula. Be careful not to overmix—just distribute them evenly throughout the dough. I like to press the chocolate chips into the dough slightly to ensure they’re well-coated and don’t sink to the bottom during baking.
Cover the bowl with plastic wrap and refrigerate for at least 1 hour, or up to 24 hours for even better flavor development. This chilling step is crucial—it solidifies the butter, prevents excessive spreading, and allows the flour to fully hydrate for a better texture.
Prep and Bake the Dough
Preheat your oven to 350°F and line three baking sheets with parchment paper. Scoop the chilled dough into 2-tablespoon portions (about 1.5 ounces each) using a cookie scoop for uniform size. Place them 3 inches apart on the prepared sheets—this gives them room to spread without touching.
Bake for 11-13 minutes until the edges are golden brown but the centers still look slightly underdone. They’ll continue cooking on the hot pan after you remove them from the oven. For extra browning, sprinkle the tops with 1 cup granulated sugar right after scooping the dough, before baking.
Cool and Store for Maximum Freshness
Let the cookies cool on the baking sheet for 5 minutes before transferring them to a wire rack to cool completely. This brief resting period helps them set properly and prevents them from becoming too soft. The walnuts and chocolate chips will firm up as they cool, giving you that perfect texture—crispy edges with a soft, chewy center.
Store the cookies in an airtight container at room temperature for up to 5 days, or freeze them for up to 3 months. For the best flavor, let them sit at room temperature for 10-15 minutes before serving—this brings out the rich, buttery notes and makes them even more delicious.
Pro Tips For Making 6 Dozen Cookies
- Cream Butter & Sugar Slowly: I learned this the hard way—dumping cold butter into the brown sugar and whipping it fast just makes a greasy mess. Let the butter soften to room temp first, then beat it with the sugar on medium-high for 3-4 minutes until it’s pale and fluffy. That light color means air’s incorporated, and your cookies will spread just enough, not turn into pancakes.
- Measure Flour Right: Spooning flour into cups and packing it down? Stop. Use a kitchen scale if you can—6 dozen cookies need precision. If you’re measuring by cup, fluff the flour first, then scoop and level with a knife. Packed brown sugar is another trick: tap the cup on the counter 3 times to settle it before measuring.
- Chill Dough Between Bakes: Your oven’s hot, your dough’s warm, and you’re eager—don’t rush. Let the dough rest in the fridge for 20-30 minutes between batches. This keeps the butter from melting too fast, so your cookies hold their shape and don’t turn out flat and sad. (Yes, even if you’re impatient like me.)
- Use Room-Temp Eggs: Cold eggs from the fridge mix unevenly and can make your dough clumpy. Pop the eggs out 30 minutes before baking and let them sit in a bowl of warm water. They’ll blend smoother, and your cookies won’t have those weird, raw streaks. Trust me, it’s worth the wait.
Creative variations of 6 dozen cookies
Classic Chocolate Chip
This is my go-to variation—just swap the walnuts for an extra 1 cup semisweet chocolate chips (total 4 cups) and skip the cinnamon. The dough stays the same, so you get that perfect chewy center with melty pockets of chocolate.
I like to press extra chips on top before baking for a marbled effect. For a festive touch, fold in ½ cup white chocolate chips alongside the semisweet. 🍫
Spiced Cranberry Walnut
Perfect for holiday baking, this version swaps chocolate chips for 2 cups dried cranberries and adds 1 tsp pumpkin pie spice> (or ½ tsp each cinnamon, nutmeg, and ginger). The cranberries add tartness that balances the buttery dough beautifully.
Toast the walnuts first for extra depth—toss them in a dry pan for 3-4 minutes until fragrant. These cookies stay moist longer, making them ideal for gifting.
Peanut Butter Swirl
For a nostalgic twist, divide the dough in half after mixing. Press ½ cup creamy peanut butter into one portion, then swirl it together with a fork. Roll both portions into balls and bake as usual.
The peanut butter adds richness that pairs perfectly with the chocolate chips. For extra indulgence, use 2 tbsp peanut butter per dough ball and bake at 325°F for 14-16 minutes to prevent over-spreading. 🥜
Gluten-Free Adaptation
Replace the all-purpose flour with 5 cups gluten-free 1:1 baking flour> (like Bob’s Red Mill) plus 1 tsp xanthan gum>. Use 1 extra egg> (4 total) to bind the dough better. Chill the dough for 2 hours> to prevent crumbling.
These cookies spread slightly more, so place them 4 inches apart> on the baking sheet. They’re still delicious but have a slightly denser texture. Perfect for those with dietary restrictions!
Double Chocolate
For a decadent treat, replace all chocolate chips with 4 cups semisweet chocolate chunks> (not chips) and add ½ cup cocoa powder> to the dry ingredients. The chunks create gooey pockets while the cocoa deepens the chocolate flavor.
For extra richness, fold in ½ cup chopped dark chocolate> (60% or higher). These cookies hold their shape better than classic chocolate chip—bake at 375°F> for 10-12 minutes>. 🍫
Nutrition facts
Frequently asked questions
Can I bake all 6 dozen cookies at once?
No, I recommend baking in three separate batches of 24 cookies each. This maintains consistent oven temperature and prevents overcrowding, which leads to uneven baking. Each batch should have 3 inches between cookies on the baking sheet for proper air circulation.
Why does the dough need to chill before baking?
Chilling for 1-24 hours is crucial—it solidifies the butter, prevents excessive spreading, and allows the flour to fully hydrate. This creates cookies with crisp edges and chewy centers. If your kitchen is humid, chill for the full 24 hours for best results.
How do I fix cookies that spread too much?
If your cookies spread too thin, try these fixes: Chill the dough longer (up to 48 hours), use 1 extra egg white for structure, or bake at 325°F instead of 350°F. For future batches, scoop dough balls slightly smaller (1.25 ounces instead of 1.5).
Can I make these cookies gluten-free?
Yes! Replace the all-purpose flour with 5 cups gluten-free 1:1 baking flour (like Bob’s Red Mill) plus 1 tsp xanthan gum. Use 4 eggs (1 extra) and chill the dough for 2 hours to prevent crumbling. These will spread slightly more, so place them 4 inches apart on the baking sheet.
How do I store baked cookies for maximum freshness?
Store in an airtight container at room temperature for 5-7 days or freeze for 3 months. For best flavor, let them sit at room temperature for 10-15 minutes before serving. To prevent sogginess, place parchment paper between layers when storing.

- 5 Lb Eye Round Roast Recipe: Slow-Braised to Melt-in-Mouth Tenderness - November 3, 2026
- 3-Hour Ciabatta Bread Recipe: Crusty Chews and Airy Holes Mastered - November 3, 2026
- 5 Fruit Salad Recipe: Vibrant Rainbow Layers With No Brown Spots - November 3, 2026