
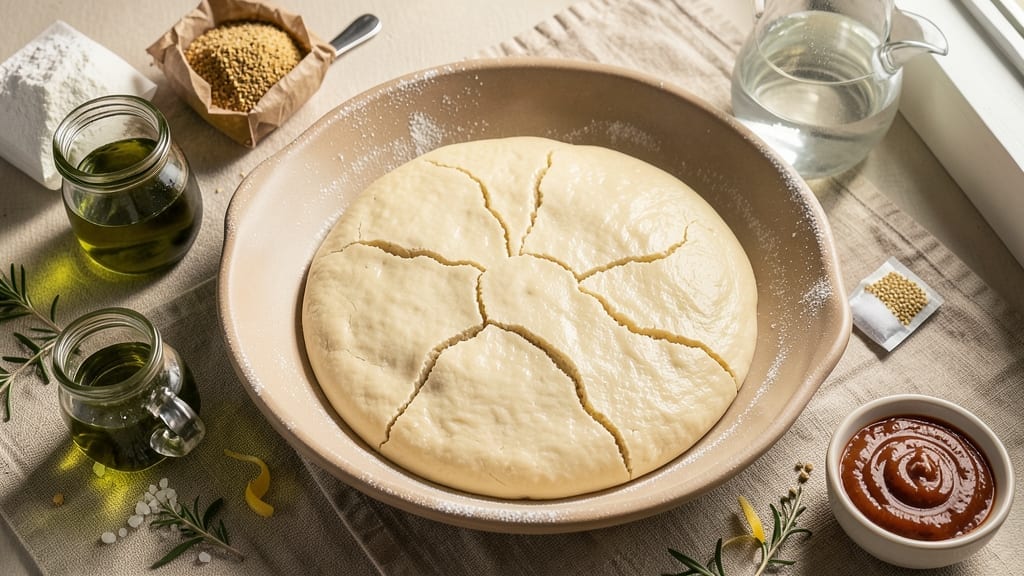
A 6-hour pizza dough recipe transforms ordinary pizza night into an artisanal experience with a crust that’s chewy, airy, and packed with flavor. This extended fermentation process develops gluten and flavor in ways instant dough never can.
I perfected it after years of experimenting with different rise times—each batch reveals how patience pays off in texture and taste.
The secret lies in the slow fermentation, which breaks down gluten for a tender yet chewy bite and allows flavors to meld naturally. You’ll work with simple ingredients—flour, water, yeast, salt, and olive oil—but the technique makes all the difference.
The dough rests at room temperature for 2 hours, then chills overnight, creating that signature open crumb structure that holds toppings perfectly.
What you’ll achieve is a pizza crust that’s crisp at the edges yet soft and pillowy inside, with a subtle depth of flavor from the extended fermentation. The high hydration level (70%) gives it that professional-quality airiness, while the cold proofing ensures it’s ready whenever you are.
This isn’t just dough—it’s the foundation for restaurant-quality pizzas you can make at home.
Once your dough is ready, you can shape it into classic Neapolitan-style pies, deep-dish, or even flatbreads. The possibilities are endless, and the results will impress even the most discerning pizza lovers. Let’s get started on creating your perfect crust.
Ingredients for 6 hour pizza dough
Five simple ingredients transform into restaurant-quality pizza dough with just time and patience.
| Ingredient | Amount | Notes |
|---|---|---|
| Bread Flour 🌾 | 3 ½ cups | High-protein for chewy texture |
| Active Dry Yeast 🍞 | ¼ tsp | Freshly opened for best results |
| Extra-Virgin Olive Oil 🫒 | ¼ cup | Fruity variety for authentic flavor |
| Granulated Sugar 🍚 | ½ tsp | Feeds yeast for activation |
| Diamond Crystal Kosher Salt 🧂 | 1 ½ tsp | Fine grain for even distribution |
| Warm Water 💧 | 1 ¾ cups | 105-110°F for optimal yeast activation |
| Semolina Flour 🌾 | ¼ cup | For dusting and crispy crust |
| Cornmeal 🌽 | ¼ cup | For pizza peel preparation |
The bread flour is non-negotiable here—King Arthur or Caputo are my go-tos for that perfect chew. If you’ve only got all-purpose, add an extra 0.5 cups for structure. Yeast is the workhorse: Saf-Instant or Red Star are reliable, but check the expiration date—old yeast dies before it can work. The olive oil should be fruity and extra-virgin; California brands like Corto or Colavita are my favorites. For the water, I use filtered, but tap works too if your local water isn’t heavily chlorinated. The sugar is just enough to wake up the yeast—don’t skip it, but don’t go overboard either.
No bread flour? All-purpose plus 0.25 cup vital wheat gluten gets you close, though texture won’t be identical. Running short on olive oil? Avocado oil works in a pinch, but it lacks the fruity depth. The salt is critical—Diamond Crystal is less salty than Morton, so if you use Morton, reduce to 1 tsp. For the water temperature, 105-110°F is perfect. Too hot and you’ll kill the yeast; too cold and it won’t activate. No thermometer? The water should feel warm to your wrist but not hot. The semolina and cornmeal are optional but worth it—they create that perfect crispy base and prevent sticking.
This dough is all about timing. After mixing, let it rest at room temperature for 2 hours, then refrigerate for 12-16 hours. The cold proofing is what gives it that professional airiness. Store mixed dough in an airtight container for up to 3 days in the fridge, or freeze for 3 months by wrapping tightly in plastic. When ready to use, let it come to room temperature for 1-2 hours before shaping. The longer it ferments, the more flavor develops—up to 24 hours in the fridge if you’re patient. Divide and freeze individual portions for quick pizza nights later.
Why You’ll Love This Recipe
- Set-and-Forget Magic: I mix the dough in 10 minutes—yeast, warm water, bread flour—and let it rise while I watch a movie. No hovering, no stress, just perfect development from that 6-hour rest.
- Crispy-Chewy Gold Standard: The bread flour gives it that signature snap, while the olive oil keeps it tender inside. Honestly, the flavor is so rich it makes store-bought crust taste like cardboard.
- Weeknight Superhero: Use half for tonight’s dinner, freeze the other half for lazy Mondays. Works for pizza, focaccia, even garlic knots—no extra effort, just endless possibilities.
- Budget-Friendly Luxury: A single batch costs pennies but feels like a trattoria. The yeast and sugar combo makes it rise like a dream, and that kosher salt? Game-changer for depth without breaking the bank.
Step-by-step instructions for fermented pizza dough
Here’s the method that transforms simple ingredients into a restaurant-quality crust.
Mix the Dough with Precision
In a large mixing bowl, combine the 3.5 cups bread flour, 1.5 tsp diamond crystal kosher salt, and 0.5 tsp granulated sugar. Use a whisk to break up any flour clumps and create small wells in the center. This ensures even distribution of ingredients when you add the wet components.
In a separate small bowl, dissolve the 0.25 tsp active dry yeast in 1.75 cups warm water (between 105-110°F). Let it sit for 5 minutes until frothy—this confirms your yeast is active. If it doesn’t bubble, your yeast may be dead and you’ll need to start over. Pour this yeast mixture into the flour wells along with the 0.25 cup extra-virgin olive oil. Use a wooden spoon to gently combine everything until a shaggy dough forms.
Knead Until Silky Smooth
Transfer the dough to a lightly floured surface and knead for 8-10 minutes by hand, or use a stand mixer with a dough hook attachment for 5-6 minutes on medium speed. You’re looking for a dough that’s smooth, elastic, and slightly tacky—not dry or stiff. The high-protein bread flour will give you that perfect chewy texture, but only if properly developed.
Here’s the thing—don’t rush this step. You’ll know it’s ready when the dough springs back slowly when poked and forms a clean windowpane when stretched thin. If it tears easily, knead another minute. Shape into a round ball, place in a lightly oiled bowl, cover with plastic wrap, and let rest at room temperature for 1 hour. This initial rest relaxes the gluten structure, making it easier to handle later.
Cold Ferment for Maximum Flavor
After the initial rest, transfer the dough to the refrigerator where it will undergo its 6-hour cold ferment. This slow fermentation develops complex flavors and creates that signature airy, open crumb structure. Place the covered bowl in the fridge and resist the urge to peek—every time you open it, you risk introducing condensation that can weaken the gluten.
I like to set a timer for the 6 hours and let the dough do its magic undisturbed. The cold temperature slows yeast activity just enough to prevent overproofing while allowing enough fermentation for that perfect texture. When you’re ready to use it, the dough should have roughly doubled in size and feel noticeably lighter when lifted.
Shape and Rest Before Baking
Remove the dough from the refrigerator and let it sit at room temperature for 15-20 minutes to soften slightly. This makes it easier to handle without sticking. On a lightly floured surface, gently press and stretch the dough into your desired shape—traditional round for classic pizza or rectangular for focaccia-style variations.
Here’s where it gets fun—dust your pizza peel generously with semolina flour (for that crispy crust) or cornmeal (for a slightly grainier texture). Transfer your shaped dough to the peel and let it rest for another 10-15 minutes before adding toppings. This final rest allows the gluten to relax again, preventing shrinking during baking. You’ll know it’s ready when the surface looks slightly domed and feels springy to the touch.
Pro Tips For Making 6 Hour Pizza Dough
- Use Warm Water: The yeast in this dough wakes up fastest with water around 105°F—lukewarm to the touch, not hot enough to melt butter. I learned this the hard way after killing yeast twice with boiling water. If your kitchen’s drafty, warm the water in a microwave for 20 seconds, then check with your finger.
- Salt the Flour First: Sprinkle all the kosher salt directly into the flour before mixing—this ensures even distribution, so no pocket of dough turns bland. I used to toss it in later and ended up with a slightly salty crust and a dull center. Diamond Crystal measures lighter than table salt, so don’t eyeball it.
- Oil the Bowl Properly: Coat the mixing bowl with at least 2 tablespoons of olive oil, then swirl it around until the entire surface glistens—this prevents the dough from sticking when it doubles in size. I skipped this once and spent 20 minutes prying a single, sad lump off the bowl. (Yes, even if you’re impatient like me.)
- Punch Down Gently: After the first rise, deflate the dough with light punches—just enough to release air bubbles without compacting it. Overworking it here makes the final crust dense. My grandmother swore by this, and she was right: the dough should spring back slowly when poked, not bounce like a basketball.
Perfect pairings for this recipe
Classic Topping Combinations
Start with the timeless Margherita—fresh San Marzano tomatoes, fior di latte mozzarella, fresh basil, and a drizzle of extra-virgin olive oil. I like to add a pinch of red pepper flakes for subtle heat.
For a meat lover’s option, go for pepperoni, sausage, and mushrooms with a sprinkle of Parmesan. The key is balance: don’t overload the dough with toppings or it’ll weigh it down. 🍕
Wine Pairings
A crisp Pinot Grigio from Italy complements the acidity of tomato-based pizzas beautifully. For white pizza variations with ricotta and spinach, try a Vermentino from Sardinia. Red wine lovers can opt for a light Chianti—its bright acidity cuts through the richness of cheese and cured meats.
I always keep a bottle of Franzia on hand for quick gatherings. 🍷
Beer Pairings
An Italian Peroni or Moretti lager works perfectly with classic tomato pizzas—the carbonation cleanses your palate between bites. For a craft beer twist, try a Belgian witbier like Hoegaarden with its citrusy notes.
If you’re serving spicy pizzas, a hazy IPA from local breweries adds a nice contrast. My go-to is always a local Denver lager when I’m hosting pizza nights. 🍺
Unexpected Topping Twists
Try a fig and prosciutto combo with a drizzle of balsamic glaze—sweet, salty, and tangy all in one bite. For a veggie lover’s dream, load up with roasted eggplant, caramelized onions, and goat cheese.
I also love adding sautéed garlic shrimp with a squeeze of lemon for a seafood pizza that’s always a hit. The possibilities are endless once you step outside the traditional toppings. 🌟
Dessert Pizza Variations
Skip the savory toppings and go sweet with a Nutella pizza topped with banana slices and a sprinkle of sea salt. For a more sophisticated option, try caramelized apples, pecans, and a dusting of cinnamon.
I’ve even made a lemon ricotta pizza with a honey drizzle—it’s a crowd-pleaser at summer gatherings. The same dough works perfectly for both sweet and savory creations. 🍯
Cheese Board Pairings
Serve your pizza with a charcuterie board featuring Parmigiano-Reggiano, pecorino, and aged cheddar. Add prosciutto, salami, and marinated olives for a complete Italian-inspired spread.
I like to include fresh fruit like grapes and figs to cut through the richness. The contrast of textures and flavors makes the pizza experience even better. 🧀
Nutrition facts
Frequently asked questions
Why does this dough need a 6-hour fermentation?
The extended fermentation develops complex flavors and creates that signature airy, open crumb structure. The cold proofing breaks down gluten proteins for a chewy yet tender texture while allowing natural flavor development that quick-rise doughs can’t match. Think of it as letting the dough “rest” and mature like fine wine.
Can I make this dough ahead of time?
This dough is perfect for meal prep. After mixing, let it rest at room temperature for 2 hours, then refrigerate for up to 3 days. For longer storage, freeze portions wrapped tightly in plastic for 3 months. Thaw overnight in the fridge before using.
What’s the best way to tell when the dough is ready?
Look for these signs: the dough should have roughly doubled in size and feel noticeably lighter when lifted. When you press your finger gently, it should spring back slowly (not immediately). For shaping, it should feel slightly tacky but not sticky—this indicates proper gluten development.
Can I use all-purpose flour instead of bread flour?
Yes, but you’ll need to add 0.25 cup vital wheat gluten to compensate for the lower protein content. This helps mimic the chewy texture bread flour provides. The dough might be slightly less elastic but will still work well for pizza. For best results, stick with bread flour when possible.
How do I prevent the dough from sticking?
Use plenty of semolina flour or cornmeal on your work surface and pizza peel—they create a crispy barrier that prevents sticking. Always keep your dough ball lightly oiled in the bowl during fermentation. When shaping, work quickly but gently to avoid over-handling, which can make the dough too sticky.

- 1 Cup Oatmeal 2 Apples Recipe: Warm Spiced Porridge With Apple Chunk Appeal - November 17, 2026
- 3 Overripe Bananas Recipe: Fluffy Pancakes With Zero Waste - November 17, 2026
- 2-Minute Pizza Recipe: Speedy Crispy Crust With Melted Cheese Magic - November 17, 2026