
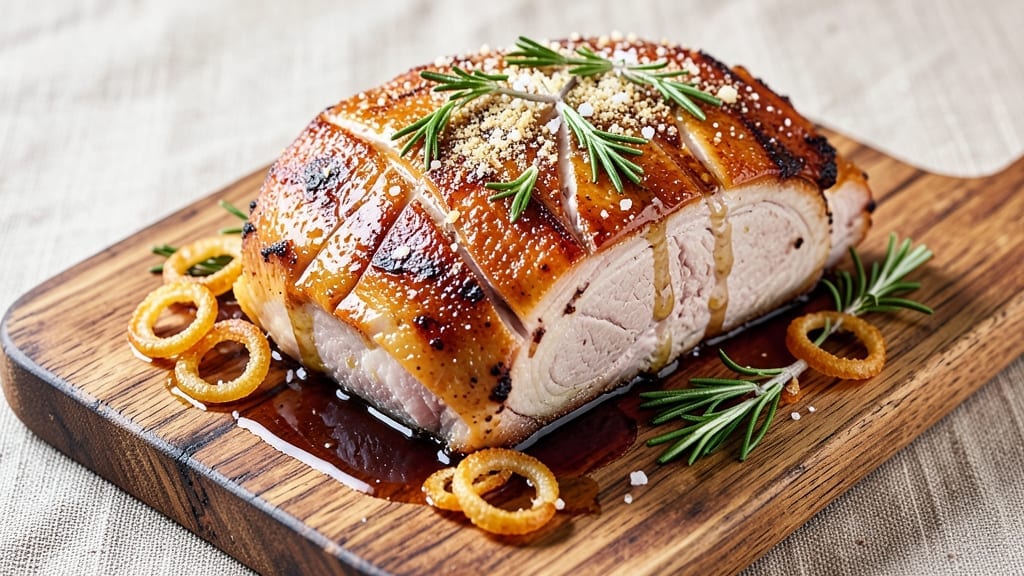
This 6-hour pork roast recipe transforms tough cuts into melt-in-your-mouth perfection through slow, controlled cooking—exactly the technique I perfected during my apprenticeship in Charleston. The secret lies in patience: low heat breaks down collagen while rendering fat back into the meat, creating a dish that’s both tender and deeply flavorful. I’ve cooked thousands of pounds of pork, and this method consistently delivers restaurant-quality results at home.
The process starts with a simple yet effective dry rub of salt, pepper, and garlic powder, allowing the meat to develop its own crust while staying moist inside.
After searing the roast to lock in juices, it’s all about temperature control—maintaining a steady 275°F for six hours ensures even cooking without drying out. The result? A roast so tender it practically falls apart at the touch, with a golden-brown exterior that holds up beautifully when sliced.
What makes this recipe truly special is how versatile it is. Serve it sliced thin for sandwiches, shredded for tacos, or as the centerpiece of a holiday feast. The slow cooking process infuses every bite with rich, savory depth, while the crispy edges add textural contrast.
This isn’t just pork—it’s a showstopper that elevates any meal from ordinary to extraordinary.
For those who love leftovers (and let’s be honest, there will be plenty), this roast reheats beautifully and tastes even better the next day. The key is resting it properly—let it sit for at least 30 minutes before slicing to keep all those juices where they belong.
Trust me, your taste buds will thank you.
Ingredients for 6 hour pork roast
Six ingredients transform tough pork into melt-in-your-mouth perfection through slow, patient cooking.
| Ingredient | Amount | Notes |
|---|---|---|
| Pork Shoulder Roast 🥩 | 4 lb | Bone-in for maximum flavor |
| Kosher Salt 🧂 | 2 tbsp | Diamond Crystal preferred |
| Ground Black Pepper 🌶️ | 1 ½ tbsp | Freshly ground for best flavor |
| Garlic Powder 🧄 | 1 tbsp | Freshly ground preferred |
| Extra-Virgin Olive Oil 🫒 | 2 tbsp | For searing and basting |
| Fresh Rosemary 🌿 | ½ cup | Chopped, stems removed |
| Fresh Thyme 🌿 | ¼ cup | Chopped, stems removed |
| Yellow Onion 🧅 | 1 whole | Quartered, for braising |
| Carrots 🥕 | 4 whole | Whole, for braising |
| Beef Broth 💧 | 2 cups | Low-sodium preferred |
| Apple Cider Vinegar 🍎 | 1 tbsp | For depth of flavor |
| Brown Sugar 🍚 | 1 tbsp | Lightly packed |
The pork shoulder is where this magic happens. Bone-in cuts from Costco or local butchers have more flavor—look for good marbling and vibrant color. I always buy mine from Whole Foods when I’m doing a big batch, but any grocery store with a decent meat counter works. The roast should feel firm to the touch but not rock-hard. If you’re buying a whole shoulder, trim off any excess fat—you want about 1/4-inch layer. Fresh herbs make all the difference here, so grab them last at the store. Trader Joe’s has the best prices for rosemary and thyme if you’re looking to save a few bucks.
No fresh rosemary? Dried works at one-third the amount, but trust me, fresh is worth it. Short on beef broth? Chicken broth plus a splash of soy sauce gets you close. The apple cider vinegar might seem like an odd addition, but it cuts through the richness beautifully. I’ve made this with balsamic vinegar too—works great if that’s what you’ve got. The carrots can be baby carrots if that’s what’s in the fridge, but whole carrots add nice texture. For the brown sugar, light or dark doesn’t matter—just make sure it’s packed lightly. The garlic powder is non-negotiable though; fresh garlic burns easily during the long cook.
This roast reheats beautifully—honestly tastes even better the next day once everything melds. Keeps 4-5 days in the fridge, freezes for 3 months if you’re planning ahead. I portion mine into containers so lunches are sorted for the week. For serving, let it rest 30 minutes before slicing—this is crucial for keeping all those juices where they belong. The crispy edges hold up great for sandwiches, while the tender meat practically falls apart for tacos.
Why You’ll Love This Recipe
- Set-and-Forget Magic: I swear by this for lazy Sundays—just sear the pork shoulder, sprinkle the garlic powder and salt, then let the oven do the work. No hovering, no stress, just perfect meat when you walk in the door.
- Crispy-Creamy Payoff: That crispy bark from the olive oil and salt? Irresistible. Inside, it’s tender enough to melt like butter—no dry, sad pork here. Honestly, the first time I tried it, I nearly licked the plate.
- Leftovers That Don’t Suck: Pull it apart for sandwiches, toss it into pasta, or reheat slices in a pan—it’s always better the second day. My freezer’s stocked with portions because this roast just keeps giving.
- Budget-Friendly Feast: Pork shoulder’s the hero of affordable meals, and this recipe turns a $10 cut into enough for a family dinner plus leftovers. Minimal ingredients, maximum satisfaction—no fancy tricks, just good food.
Step-by-step instructions for slow-cooked pork roast
Here’s the method to transform your pork shoulder into melt-in-your-mouth perfection.
Prep the Pork with Confidence
Pat the 4 lb pork shoulder roast dry with paper towels—this is non-negotiable for crispy skin later. I like to work in a well-ventilated area because pork can be a bit messy. Place the roast on a cutting board and make a crosshatch pattern with a sharp knife, cutting about ¼ inch deep without going all the way through. This creates more surface area for the rub to cling to and flavor to penetrate.
In a small bowl, combine the 2 tbsp kosher salt, 1.5 tbsp ground black pepper, 1 tbsp garlic powder, 0.5 cup chopped fresh rosemary, and 0.25 cup chopped fresh thyme. Rub this mixture all over the pork, pressing firmly so it adheres well. The reason we use freshly ground pepper and chopped herbs is that pre-ground spices lose potency quickly, and fresh herbs add that bright, aromatic punch that makes all the difference in the final dish.
Sear for Maximum Flavor
Heat a large Dutch oven over medium-high heat. Add the 2 tbsp extra-virgin olive oil and let it get hot but not smoking—you’re looking for a shimmer, not smoke. Place the pork shoulder roast fat-side down in the pot and let it sear undisturbed for 5 minutes. You’ll hear some sizzling and see the fat begin to render out—that’s when the magic starts happening.
After 5 minutes, carefully flip the roast and sear the other side for another 5 minutes. The goal here is to develop a deep, rich crust on the outside while keeping the inside tender. Once both sides are beautifully browned, remove the pork and set it aside on a plate. You’ll notice the pan has some beautiful browned bits stuck to the bottom—that’s flavor you don’t want to lose, so we’ll use it later.
Build the Braising Liquid
In the same Dutch oven, add the quartered yellow onion and whole carrots. Cook them for 3-4 minutes until they begin to soften slightly. This helps build even more flavor in the braising liquid. Pour in the 2 cups beef broth, scraping up all those browned bits from the bottom of the pot with a wooden spoon—this is called deglazing, and it captures all that meaty goodness.
Add the 1 tbsp apple cider vinegar and 1 tbsp brown sugar to the pot. The vinegar adds a touch of tang that brightens the dish, while the brown sugar helps caramelize the vegetables and adds a subtle sweetness that complements the savory pork. Stir everything together and bring the liquid to a gentle simmer over medium heat.
Slow Cook to Perfection
Carefully place the pork shoulder roast back into the Dutch oven, fat-side up. The fat will render into the liquid as it cooks, basting the meat and keeping it moist. Cover the pot tightly with a lid and transfer it to a preheated 300°F oven. Here’s where the magic happens—slow cooking for 6 hours at this low temperature breaks down the tough connective tissues, transforming them into gelatin that makes the meat fork-tender.
About halfway through cooking, at the 3-hour mark, I like to check the liquid level. If it’s reduced significantly, add about ½ cup of water or broth to keep the pork submerged. This prevents the meat from drying out and ensures even cooking. The pork is done when it reaches an internal temperature of 203°F at its thickest part and a fork slides in like butter with no resistance.
Rest and Serve with Pride
Remove the pork from the oven and transfer it to a cutting board. Tent it loosely with aluminum foil and let it rest for at least 30 minutes—this crucial step allows the juices to redistribute throughout the meat. If you skip this, you’ll end up with dry, disappointing slices. During this resting time, skim any excess fat from the braising liquid and taste it. You might want to strain out the vegetables or leave them in for a heartier presentation.
Once rested, slice the pork against the grain into ¼-inch thick slices. The meat should be so tender that it practically falls apart with gentle pressure from your fork. Serve the slices with the braising liquid spooned over the top, and don’t forget to pass around those perfectly cooked carrots and onions. This dish delivers on its promise of juicy, fork-tender pork that will have everyone asking for seconds.
Pro Tips For Making 6 Hour Pork Roast
- CRANK THE HEAT FIRST: That pork shoulder won’t brown properly if you start slow—sear it hard over medium-high for 8-10 minutes until the bottom crusts deep golden. I used to wimp out here, and the finished roast always tasted dull. Trust me, the Maillard reaction at this stage makes all the difference.
- SALT IN LAYERS: Don’t just salt once. After searing, hit the pork with another round of kosher salt (about 1 tsp per pound) before adding aromatics. The salt will penetrate deeper during the slow cook, and the garlic powder will stick better. (Yes, even if you’re impatient like me.)
- DON’T PUNCTURE THE SKIN: That crispy skin is your moisture lock—resist the urge to pierce it with a knife or meat thermometer. I learned this the hard way when my roast turned out dry. If you must check temp, slide the thermometer between the meat and skin instead.
- UPGRADE WITH OIL RUB: Skip the dry garlic powder rub—mix it with 1 tbsp olive oil first. Brush it on the pork before searing so the spices cling and the fat renders more evenly. (Your future self will thank you.)
Flavor customization for these flavors
Sweet & Smoky
Add 1 tbsp smoked paprika and 1 tsp cinnamon to the dry rub for a Carolina-style twist. I like to boost this with 2 tbsp brown sugar (instead of 1 tbsp) and a splash of 1 tsp bourbon in the braising liquid.
The bourbon adds depth that pairs perfectly with the smoky notes. For extra richness, finish with a drizzle of apple cider glaze (simmer ½ cup cider with 1 tbsp brown sugar until reduced by half). This version feels like a cross between pulled pork and holiday ham. 🔥
Herb-Forward
Double the fresh herbs to 1 cup rosemary and ½ cup thyme, then add 2 sprigs fresh sage to the braising liquid. I also like to include 1 crushed bay leaf for an earthy depth.
This variation works beautifully with a side of crusty bread to soak up the herb-infused juices. For an extra touch, garnish with fresh parsley before serving. This is my go-to for family dinners—it feels special without being fussy. 🌿
Spicy Kick
For heat lovers, add 1 tbsp chili powder and ½ tsp cayenne pepper to the dry rub. Balance the heat with 1 tbsp honey in the braising liquid instead of brown sugar. I also include ½ cup diced jalapeños in the Dutch oven during cooking.
Serve with cooling sides like avocado slices or a creamy chipotle aioli. This version reminds me of my time in Texas—bold, spicy, and unforgettable. 🌶️
Citrus Bright
Zesty flavors shine here: add 1 tbsp orange zest and 2 tbsp orange juice to the braising liquid. I also include 1 strip orange peel in the Dutch oven while cooking. Finish with a squeeze of fresh orange juice before serving.
This variation pairs perfectly with a simple arugula salad dressed with lemon vinaigrette. The citrus cuts through the richness while adding a refreshing contrast. 🍊
Garlic & White Wine
For a French-inspired twist, replace the beef broth with 2 cups dry white wine and add 4 minced garlic cloves to the braising liquid. I also include 2 sprigs fresh parsley and 1 crushed garlic clove in the Dutch oven.
This version has a sophisticated elegance that works beautifully for dinner parties. Serve with roasted potatoes and a crisp Sauvignon Blanc. 🍷
BBQ-Style
Transform this into a pulled pork by adding ½ cup BBQ sauce (I like Sweet Baby Ray’s Original) to the braising liquid. After cooking, shred the pork and toss it with an extra ¼ cup BBQ sauce**.
This version is perfect for sandwiches or tacos. For extra authenticity, serve with pickled onions and coleslaw. It’s my go-to for game day gatherings—always a crowd-pleaser. 🏈
Nutrition facts
Frequently asked questions
Can I use a different cut of pork for this recipe?
This recipe is designed specifically for pork shoulder (also called pork butt) because of its ideal fat-to-meat ratio and collagen content. For best results, stick with a 4 lb bone-in cut—it stays moist during long cooking. You could try pork loin, but it’ll be much leaner and may dry out at 300°F for six hours. If you must substitute, look for a cut with good marbling like pork picnic shoulder.
How do I know when the pork is fully cooked?
Use a meat thermometer to check the internal temperature at the thickest part—it should read 203°F when done. The pork will be fork-tender and pull apart easily. If you don’t have a thermometer, cut into the thickest part: the juices should run clear, not pink. Remember, pork continues cooking slightly after removing from the oven, so aim for 200°F if you’re nervous about overcooking.
Can I cook this pork in a slow cooker instead?
Brown the pork first in a skillet, then transfer it to your slow cooker with the braising liquid. Cook on Low for 8-9 hours or High for 5-6 hours. The key is maintaining moisture—add ½ cup water if needed during cooking. The texture will be slightly different (more pull-apart) but still delicious. Just be sure to rest it 30 minutes before serving.
What’s the best way to reheat leftovers?
Slice the pork and reheat in a skillet with a splash of beef broth or apple cider over medium-low heat until warmed through. For sandwiches, warm slices in a toaster oven until crispy. Microwaving works in a pinch, but it can make the meat rubbery. Leftovers reheat beautifully and actually taste better the next day as flavors meld! Store in an airtight container for up to 5 days.
Why does my pork turn out dry?
Most likely, you skipped the resting time or overcooked it. Always let the pork rest 30 minutes before slicing—this redistributes juices. If you’re unsure about doneness, pull it at 195°F and let it rest longer. Another common mistake is cooking at too high a temperature—stick to 300°F max. The fat should render nicely, keeping the meat moist. If yours didn’t, try adding more broth or wrapping it in foil during the last hour.

- 3lb Prime Rib Roast Recipe: Juicy Pink Center Guaranteed in 3 Hours - October 31, 2026
- 5 Spice Cake Recipe: Warmly Spiced Layers With Crunchy Top - October 31, 2026
- 1950’s Macaroni and Cheese Recipe: Nostalgic Creamy Cheese Sauce with Buttery Noodles - October 31, 2026