
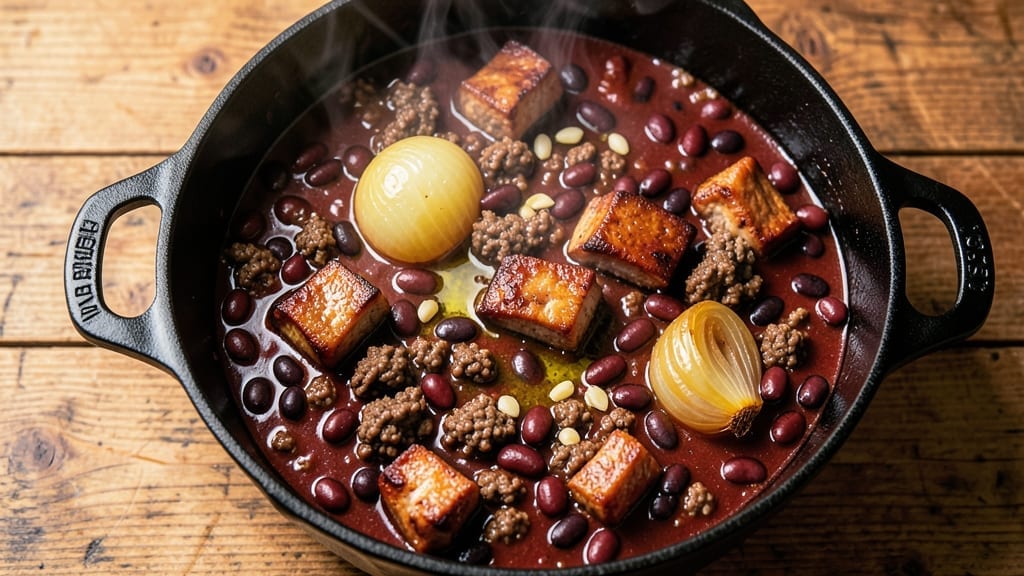
A 6-quart chili recipe that delivers restaurant-quality depth in one pot is the kind of meal that transforms a casual gathering into a memorable event. I perfected this version after years of testing—balancing meaty richness, smoky spices, and a slow simmer that develops layers of flavor.
The key lies in the right ratio of beans, broth, and spices, all coming together over 4-6 hours for that perfect texture and depth.
This recipe uses ground beef and pork shoulder for a deeper, more complex flavor than beef alone, while kidney beans and black beans add heartiness.
The slow simmer isn’t just about time—it’s about letting the spices bloom and the meat tenderize, creating a chili that tastes even better the next day. I also include a few shortcuts, like using a pressure cooker for 90-minute prep, so you get the same results without all-day commitment.
What you’ll end up with is a 6-quart pot of chili that’s thick, flavorful, and packed with texture—crispy edges on the beans, tender meat, and a broth that’s rich but not greasy.
Serve it with all the classic toppings: shredded cheese, sour cream, green onions, and a dollop of hot sauce. This isn’t just chili; it’s a weeknight centerpiece that feels like a celebration.
Whether you’re feeding a crowd for game day or prepping for meal prep, this recipe scales perfectly and tastes even better reheated. The instructions are straightforward, but the flavor is anything but—this is the kind of chili that gets rave reviews and second helpings. Let’s get cooking.
Ingredients for 6 quart chili
Sixteen ingredients. One pot. A chili so rich it’ll have everyone asking for seconds.
| Ingredient | Amount | Notes |
|---|---|---|
| Ground Beef (80/20) 🥩 | 3 lb | Lean-to-fat ratio for flavor |
| Pork Shoulder (Bone-In) 🐖 | 2 lb | Cut into 1-inch cubes |
| Kidney Beans (Dried) 🌾 | 1 ½ cups | Soaked overnight or canned drained |
| Black Beans (Dried) 🌾 | 1 cup | Soaked overnight or canned drained |
| Onion (Yellow) 🧅 | 2 whole | Diced, medium dice |
| Garlic Cloves 🧄 | 8 cloves | Minced, fresh preferred |
| Tomato Paste 🍅 | ½ cup | Squeeze tube or canned |
| Beef Broth (Low-Sodium) 💧 | 4 cups | Homemade or quality store-bought |
| Water 💧 | 2 cups | For simmering |
| Chili Powder 🌶️ | 2 tbsp | Smoked or mild variety |
| Ground Cumin 🌿 | 1 tbsp | Toasted for depth |
| Dried Oregano 🍃 | 1 tsp | Mexican oregano if available |
| Salt 🧂 | 1 ½ tsp | Adjust to taste |
| Black Pepper 🌶️ | 1 tsp | Freshly ground |
| Dark Brown Sugar 🍯 | 1 tbsp | Balances acidity |
| Cayenne Pepper 🔥 | ½ tsp | Adjust for heat |
| Bay Leaves 🌿 | 2 whole | Removed before serving |
| Olive Oil 🫒 | 2 tbsp | For browning meat |
The meat is where the magic starts. Ground beef and pork shoulder together give you that deep, complex flavor—way better than beef alone. I grab the pork shoulder from the butcher counter at Whole Foods or Kroger (look for good marbling), and the ground beef? 80/20 fat ratio is non-negotiable for juicy results. The beans are key too—dried takes more time but has better texture, but canned works in a pinch (just drain and rinse). For the onions, I always use yellow—red gets too pretty when cooked. The tomato paste? Squeeze tubes from Trader Joe’s are perfect here—they’re concentrated and don’t waste space in your pantry.
No chili powder? Mix 1 tbsp smoked paprika + 1 tsp cinnamon for a close substitute. Short on cumin? Corriander seeds toasted and ground work in a bind. The brown sugar might seem odd, but it balances the acidity from tomatoes and beans—trust me on this. For the broth, homemade is ideal, but Annie’s or Pacific Foods low-sodium versions are solid shortcuts. The cayenne is optional, but if you skip it, add an extra pinch of black pepper for warmth. And if you’re using dried beans, soak overnight or quick-soak with boiling water—never skip this step or they’ll stay hard.
This chili tastes even better the next day—honestly, the flavors meld into perfection after 24 hours. Keeps for 5 days in the fridge, freezes for 6 months (portion into containers before freezing). For game day, I double the batch and freeze half. The meat gets extra tender with time, so don’t rush it. And if you’re using a pressure cooker, 90 minutes on high pressure gives you the same depth without the wait. Just remember to release the pressure naturally for the best texture.
Why You’ll Love This Recipe
- One-Pot Magic: I swear by this—no chopping, no fuss. Just brown the beef and pork in the same pot, dump in the dried beans (soaked overnight, of course), and let it simmer. The onions caramelize right into the chili, so you’re not stuck with a separate pan to wash.
- Deep, Smoky Richness: That 80/20 ground beef and bone-in pork shoulder? It’s the secret weapon—juicy, fatty, and packed with flavor that infuses every spoonful. The beans soften just enough to soak it all up, but the meat stays tender. Honestly, it’s the kind of chili that makes you slow down and savor it.
- Weeknight Workhorse: This recipe doesn’t just feed a crowd—it feeds a crowd. Double it for game day, halve it for a cozy Tuesday, or freeze half for when you’re too tired to cook. The beans hold up for days, and the meat stays juicy even reheated. (Yes, even on a Tuesday night.)
- Budget-Friendly Feast: Dried beans and bulk pork shoulder stretch this into a meal that won’t break the bank. A single batch feeds six, and leftovers taste just as good the next day. I’ll be real: my grocery bill stays low, but my freezer stays full of this stuff. Not the prettiest, but the taste makes up for it.
Step-by-step instructions for 6 quart chili recipe
This chili delivers deep, layered flavor with minimal effort—just follow these simple steps.
Brown the Meats Thoroughly
Heat a large Dutch oven over medium-high heat and add the 2 tablespoons olive oil. Once shimmering, add the 3 pounds ground beef (80/20) and 2 pounds pork shoulder (bone-in, cut into 1-inch cubes). Cook in batches if needed to avoid crowding—this ensures proper browning.
Stir occasionally for 10-12 minutes until the beef is broken into small crumbles and the pork develops a deep brown crust. The pork cubes should release easily from the pan when ready. This step builds the rich, meaty foundation of your chili. Don’t rush it—well-browned meat equals deeper flavor.
Sauté Aromatics Until Fragrant
Push the browned meat to one side of the pot and add the 2 whole yellow onions (diced) and 8 cloves garlic (minced) to the empty space. Cook for 3-4 minutes until the onions soften and turn translucent, then stir to combine with the meat.
Next, add the 0.5 cup tomato paste and cook for another 2 minutes, stirring constantly. This creates a thick, flavorful base that prevents a watery chili. The tomato paste will deepen the color and add natural sweetness that balances the spices.
Build the Spice Base
Add the 2 tablespoons chili powder, 1 tablespoon ground cumin, 1 teaspoon dried oregano, 1.5 teaspoons salt, 1 teaspoon black pepper, 1 tablespoon dark brown sugar, and 0.5 teaspoon cayenne pepper. Stir everything together for 1 minute to toast the spices and release their aromas.
This is where the magic happens—the spices bloom and infuse the meat with their warm, earthy flavors. The brown sugar helps balance any acidity from the tomato paste, while the cayenne adds just enough heat. Don’t skip this step—it’s the difference between good chili and extraordinary chili.
Simmer with Beans and Broth
Pour in the 4 cups low-sodium beef broth and 2 cups water, then add the 1.5 cups dried kidney beans and 1 cup dried black beans. Bring the mixture to a boil, then reduce heat to low and add the 2 whole bay leaves. Cover and simmer for 1.5 hours, stirring occasionally.
If you used dried beans, they’ll soften significantly during this time. If you prefer canned beans, add them now and simmer for 30-45 minutes instead. The bay leaves add subtle herbal depth—don’t forget to remove them before serving. This slow simmer ensures the flavors meld together beautifully.
Adjust and Serve
After simmering, taste and adjust seasoning with additional salt or black pepper if needed. The chili should be rich, slightly sweet, and perfectly spiced. Let it rest for 10 minutes off the heat—this allows the flavors to settle and the beans to absorb all that delicious liquid.
Serve warm with your favorite toppings—shredded cheese, sour cream, chopped cilantro, or diced avocado. This chili keeps well in the refrigerator for 4-5 days or freezes beautifully for up to 3 months. The longer it sits, the better it tastes as the flavors continue to develop.
Pro Tips For Making 6 Quart Chili
- CRISP THE PORK FIRST: Bone-in pork shoulder needs a quick sear—cut it into 1-inch chunks, pat dry, and hit them in a screaming-hot Dutch oven for 3-4 minutes per side. I learned this the hard way: soggy pork = mushy chili. The crust locks in flavor and moisture when it braises later.
- SOAK BEANS SEPARATELY: Dump those dried beans straight into the pot with everything else? Bad idea. Soak kidney and black beans overnight in separate bowls (they absorb water at different rates). Drain well before adding—this prevents a watery, gluey chili. (Pro move: Add a pinch of baking soda to the soaking water for even softer beans.)
- BROWN THE MEAT IN BATCHES: Your Dutch oven’s not a trash can—don’t overload it with ground beef. Cook in two batches over medium-high heat, breaking it into crumbles with a wooden spoon. Crowding steams the meat instead of browning, and that’s where the depth of flavor lives. (Yes, even if you’re impatient like me.)
- SIMMER LOW AND LONG: After the initial sear and bean addition, drop the heat to a bare simmer—just tiny bubbles breaking the surface. Six hours is the magic number for this recipe, but don’t rush it. The pork needs time to fall apart, and the beans to soak up all that meaty goodness. (Your future self will thank you for not speeding this up.)
Essential equipment for great 6 quart chili
Dutch Oven Essentials
Your 6-quart Dutch oven is the heart of this recipe—it’s deep enough to handle the volume while allowing even heat distribution. I swear by Lodge’s pre-seasoned cast iron (10.5-inch diameter) because it develops a natural non-stick patina over time.
For non-stick convenience, All-Clad’s stainless steel Dutch oven works beautifully too—just avoid overheating to prevent warping. 🔥
Meat Thermometer
A meat thermometer ensures your pork shoulder reaches 195°F for fork-tender perfection. I use the ThermoWorks Smoke—it’s durable, has a long probe, and reads temps instantly. For budget-friendly options, the Ozeri Touchless works just as well. Check temps in the thickest part of the pork cubes before adding broth.
Instant-Read Thermometer
This instant-read thermometer (like the Thermapen One) is your best friend for testing the chili’s internal temperature—aim for 165°F before serving. It’s also perfect for checking meat doneness during browning.
I keep mine clipped to my apron so it’s always within reach while cooking. No more guessing if it’s ready!
Pressure Cooker
Short on time? A 6-quart pressure cooker (like the Instant Pot Duo) cuts cooking time to 90 minutes while delivering the same deep flavor. Just add all ingredients, seal, and cook on high pressure for 60 minutes, then natural release for 15 minutes.
The high heat breaks down collagen in the pork faster than stovetop simmering. 💫
Wooden Spoon
A wooden spoon (preferably maple or hickory) is non-reactive and won’t scratch your Dutch oven. Use it to stir the chili gently during simmering—it prevents scorching at the bottom while ensuring even heat distribution. I keep one dedicated to chili-making, as it absorbs flavors beautifully over time.
Slotted Spoon
For serving, a slotted spoon (like the OXO Good Grips) makes it easy to scoop chili without the beans falling through. I also use it to skim any excess fat that rises to the surface during simmering.
A ladle works too, but the slots help drain excess liquid for thicker servings.
Nutrition facts
Frequently asked questions
Can I make this chili in a smaller pot?
Yes, but you’ll need to adjust the cooking time and method. For a 4-quart pot, reduce the meat to 2 pounds ground beef + 1 pound pork shoulder and use 1 cup dried beans total. Simmer for 1 hour instead of 1.5 hours, stirring frequently to prevent sticking. The flavor will still develop, but expect slightly more evaporation.
How do I make this chili vegetarian?
Replace the meat with 2 pounds mushrooms (cremini or portobello, diced) and 1 block (14 oz) extra-firm tofu (pressed and crumbled). Use 2 tbsp soy sauce + 1 tbsp smoked paprika to mimic meaty depth. Add 1 cup cooked lentils for extra heartiness. The spices and tomato paste will still create rich flavor, but the texture will be more plant-based.
Why does my chili taste watery?
Watery chili usually means too much liquid or not enough simmering time. First, check if you added all 6 cups of broth/water—reduce to 4 cups total next time. Also, simmer uncovered for the last 15 minutes to thicken. If it’s still too thin, mash 1/2 cup beans with a fork to release starch, which naturally thickens the broth.
Can I use canned beans instead of dried?
Just reduce the amount by 1/3—use 1 cup canned kidney beans + 2/3 cup canned black beans (drained and rinsed). Canned beans cook faster, so add them in the last 30 minutes of simmering. For extra flavor, sauté them in the Dutch oven with the onions for 5 minutes before adding broth.
How do I reheat leftover chili?
Reheat gently on the stove over low-medium heat for 10-15 minutes, stirring occasionally. For even better results, transfer to a slow cooker on low for 2 hours or microwave in 1-minute intervals (stirring between each). Never microwave from cold—it creates uneven heating. The chili will taste even richer after reheating!

- 6 Egg Cake Recipe with Oil: Light as Air With Buttery Moisture - October 4, 2026
- 4 Bean Casserole Recipe: One-Pan Heartiness With Smoky Paprika Depth - October 4, 2026
- 3-Ingredient Keto Mug Cake Recipe: Microwave Magic in 2 Minutes - October 4, 2026