
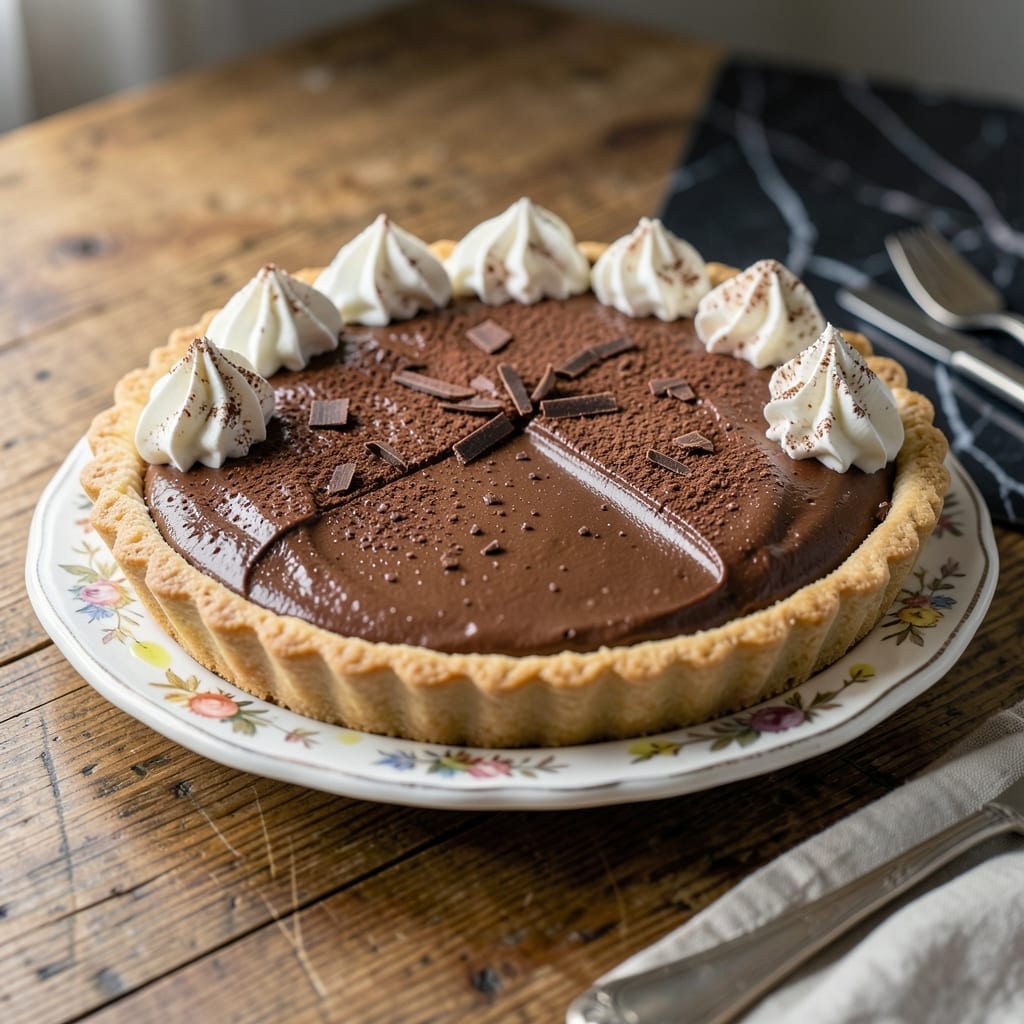
There’s nothing quite like the satisfaction of slicing into a silky smooth chocolate cream pie with a perfectly flaky crust.
This recipe delivers that classic diner-style filling—rich, velvety, and deeply chocolatey—without requiring advanced pastry skills. The secret lies in a simple custard base that sets up beautifully every time.
I’ve refined this method to ensure the filling is never grainy or lumpy, just creamy perfection. The cocoa powder provides intense chocolate flavor while keeping the texture light and airy rather than dense.
Whether you’re making it for a special occasion or just because, this pie always impresses. The contrast between the crisp crust and decadent chocolate center makes every bite memorable.
Ingredients for Betty Crocker Chocolate Cream Pie
These classic ingredients create that diner-style chocolate cream pie with signature silky texture and rich cocoa depth.
| Ingredient | Amount | Notes |
|---|---|---|
| All-Purpose Flour 🌾 | 2 cups | Plus extra for dusting surface |
| Granulated Sugar 🍚 | 1 ½ cups | Divided between crust and filling |
| Unsalted Butter 🧈 | ¾ cup | Cold and cubed for crust |
| Ice Water 💧 | ¼ cup | For pie crust dough |
| Salt 🧂 | ½ tsp | Divided between crust and filling |
| Unsweetened Cocoa Powder 🍫 | ¾ cup | Dutch-processed preferred for richness |
| Cornstarch 🌾 | ¼ cup | For thickening custard base |
| Large Eggs 🥚 | 4 whole | For custard filling structure |
| Whole Milk 🥛 | 2 cups | Full-fat for creamiest texture |
| Vanilla Extract 🌿 | 2 tsp | Pure extract for best flavor |
| Semi-Sweet Chocolate 🍫 | 4 oz | Chopped for melting into filling |
The cocoa powder is non-negotiable for that deep chocolate flavor. Hershey’s Special Dark or Ghirardelli Dutch-processed produce the smoothest results. For the crust, use European-style butter (like Plugrá) for superior flakiness. Cold ingredients are essential—don’t let the butter soften before incorporating. The flour should be all-purpose; cake flour lacks the structure needed for a crisp base that holds up to the creamy filling.
No Dutch-processed cocoa? Natural cocoa works but may require an extra teaspoon of cornstarch to compensate for acidity. Out of whole milk? Half-and-half mixed with water (50/50) maintains richness. The semi-sweet chocolate can be replaced with bittersweet for a more intense flavor, or milk chocolate for sweeter results. For a dairy-free version, coconut milk and vegan butter work surprisingly well (though texture varies slightly).
The pie keeps beautifully. Store covered in the refrigerator for up to 5 days. For longer storage, freeze the unbaked crust for 1 month or the fully assembled pie for 3 months. Always bring to room temperature before serving for the best texture and flavor.
Why You’ll Love This Recipe
- No-Fuss Crust: I love that the crust comes together with just flour, butter, and ice water—no fancy techniques, just mix and chill.
- Rich Chocolate Dream: The filling is so velvety, that first bite of creamy chocolate is worth every minute.
- Feeds a Crowd: Between us, this pie disappears fast at potlucks, and I’ve never brought home leftovers.
- Budget Friendly: Honestly, the ingredients are pantry staples I already have, so it’s a treat that won’t break the bank.
Step-by-Step Instructions for Chocolate Cream Pie
Master the technique for a flawless chocolate custard filling in a buttery, flaky crust.
Step 1: Prepare the Chocolate Pie Crust
In a food processor, pulse the 2 cups All-Purpose Flour with ½ tsp Salt to combine. Add the 0.75 cup Unsalted Butter (cold and cubed) and pulse until the mixture resembles coarse crumbs with pea-sized butter pieces visible. This texture ensures a flaky crust.
With the processor running, drizzle in the 0.25 cup Ice Water 1 tablespoon at a time until the dough just begins to come together. Stop before it forms a solid ball—overworking the dough develops gluten and makes the crust tough. Turn the dough onto a lightly floured surface and shape it into a disk.
Roll the dough to a 12-inch circle and transfer it to a 9-inch pie dish. Trim the excess dough, leaving a ½-inch overhang, then crimp the edges. Chill the crust for 30 minutes before blind baking to prevent shrinking.
Step 2: Blind Bake the Crust
Preheat the oven to 375°F. Line the chilled crust with parchment paper and fill it with pie weights or dried beans. Bake for 15 minutes until the edges are lightly golden. Remove the weights and parchment, then bake for an additional 8-10 minutes until the bottom is light golden brown.
Let the crust cool completely on a wire rack while you prepare the filling. A fully cooled crust prevents the custard from becoming soggy. This step is non-negotiable for achieving that perfect crisp texture that contrasts beautifully with the silky filling.
Step 3: Create the Chocolate Custard Filling
In a medium saucepan, whisk together 1.5 cups Granulated Sugar, 0.75 cup Unsweetened Cocoa Powder, 0.25 cup Cornstarch, and the remaining ¼ tsp Salt. Gradually whisk in the 2 cups Whole Milk until smooth. This gradual incorporation prevents lumps from forming.
Place the saucepan over medium heat and cook, stirring constantly with a wooden spoon, until the mixture thickens and comes to a gentle boil. This should take 8-10 minutes. Once boiling, cook for an additional 1 minute to fully activate the cornstarch.
Step 4: Temper and Thicken the Custard
In a separate bowl, whisk the 4 whole Large Eggs until uniform in color. Slowly pour about 1 cup of the hot milk mixture into the eggs while whisking constantly to temper them. This prevents the eggs from scrambling when added to the hot liquid.
Pour the tempered egg mixture back into the saucepan and return it to medium heat. Add the 4 oz Semi-Sweet Chocolate (chopped) and 2 tsp Vanilla Extract. Cook for an additional 2-3 minutes, stirring constantly, until the custard thickens to the consistency of pudding and the chocolate is fully melted.
Step 5: Assemble and Chill the Pie
Pour the hot custard into the cooled pie crust. Smooth the top with a spatula and press plastic wrap directly onto the surface to prevent a skin from forming. Refrigerate the pie for at least 4 hours, or preferably overnight, until fully set.
The custard will firm up significantly as it chills, creating that signature creamy yet sliceable texture. Once set, remove the plastic wrap and serve with whipped cream or fresh berries if desired. The contrast between the rich chocolate filling and the crisp crust is what makes this pie exceptional.
Pro Tips For Making Betty Crocker Chocolate Cream Pie
- Chill the Dough: After mixing the flour, butter, and ice water, wrap the dough and refrigerate for at least 30 minutes—I learned this the hard way after my first few crusts shrank in the pan.
- Use Ice-Cold Butter: Cut the unsalted butter into small cubes and freeze for 10 minutes before mixing; this guarantees flaky layers in your pie crust instead of a dense, tough texture.
- Avoid Overworking: Mix the dough just until it comes together—resist the urge to knead it, or you’ll end up with a chewy crust instead of a tender one.
- Dock the Crust: Before blind-baking, prick the rolled-out dough all over with a fork to prevent air pockets from puffing up—sounds tedious, but it actually changes the outcome.
Dietary Considerations for This Recipe
Gluten-Free Option
For a gluten-free crust, replace the 2 cups All-Purpose Flour with a 1:1 gluten-free baking blend. I recommend King Arthur Measure for Measure for the best texture. The dough may be slightly stickier, so add 1-2 tbsp extra ice water as needed.
Dairy-Free Adaptation
Use coconut milk (full-fat, canned) instead of Whole Milk and swap Unsalted Butter for vegan butter like Miyoko’s. For the chocolate, ensure it’s dairy-free—Enjoy Life brand works perfectly. The coconut milk adds a subtle richness that pairs beautifully with the chocolate. 🌱
Lower Sugar Version
Reduce the Granulated Sugar by ½ cup and replace it with ¼ cup monk fruit sweetener or erythritol. The filling will be less sweet but still deeply chocolatey. Add 1 extra tbsp Cornstarch to compensate for the reduced sugar’s thickening power.
Egg-Free Alternative
Replace the 4 Large Eggs with ½ cup silken tofu blended smooth. The tofu provides structure without altering the flavor. Cook the custard an extra 2-3 minutes to ensure it reaches the proper thickness.
This works surprisingly well and maintains the pie’s creamy texture.
Nut-Free Assurance
This recipe is naturally nut-free as written. Just verify your cocoa powder and chocolate brands for cross-contamination warnings. Hershey’s and Ghirardelli both offer nut-free facilities for their standard products.
Vegan Complete
Combine all the above substitutions: gluten-free crust, coconut milk, vegan butter, dairy-free chocolate, and silken tofu. The result is a creamy, dreamy pie that everyone can enjoy. I’ve tested this version and it’s a crowd-pleaser! 💪
Nutrition Facts
Frequently Asked Questions
Can I use a store-bought crust?
Yes, a pre-made 9-inch crust works fine. Just blind bake it as directed to prevent sogginess. The filling is rich enough that no one will notice the difference.
Why did my filling turn lumpy?
This usually happens if the custard boiled too vigorously or the eggs weren’t tempered properly. Whisk constantly over medium heat and add the eggs slowly. Strain through a fine mesh sieve if needed.
How far ahead can I make this pie?
The pie keeps well for up to 5 days refrigerated. For best results, make it 1 day ahead so the flavors meld. Add toppings just before serving.
Can I substitute dark chocolate?
Use 4 oz dark chocolate for a more intense flavor. Reduce the sugar by 2 tbsp to balance the bitterness. The texture remains the same.

- 6 Egg Cake Recipe with Oil: Light as Air With Buttery Moisture - October 4, 2026
- 4 Bean Casserole Recipe: One-Pan Heartiness With Smoky Paprika Depth - October 4, 2026
- 3-Ingredient Keto Mug Cake Recipe: Microwave Magic in 2 Minutes - October 4, 2026